DNS Configuration for Azure in Avi Vantage
This article discusses the following options available for configuring DNS in an Azure cloud integrated with Avi Vantage Platform.
Azure DNS
Avi Vantage integrates with Azure cloud to provide DNS services to applications running on instances in Azure cloud.
Note:
Azure DNS is supported only for public IP addresses.
To configure an Azure DNS profile, follow the steps given below:
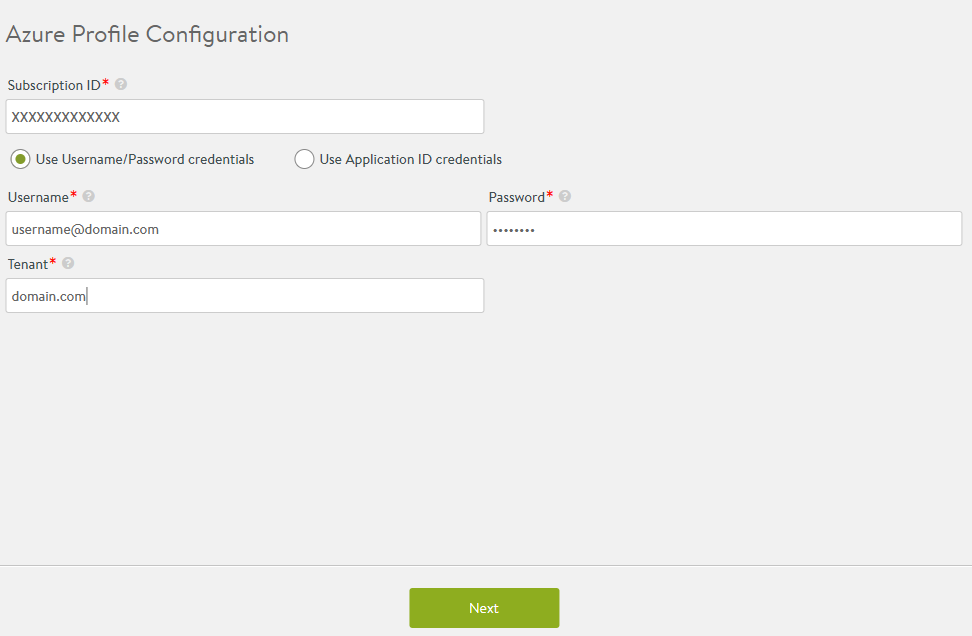
Step 1. Navigate to Templates > Profiles > IPAM/DNS Profiles and click on Create. Provide a relevant name to the profile and choose Azure DNS from the drop-down list for Type.

Step 2. Provide the Azure subscription ID under the Subscription ID field.
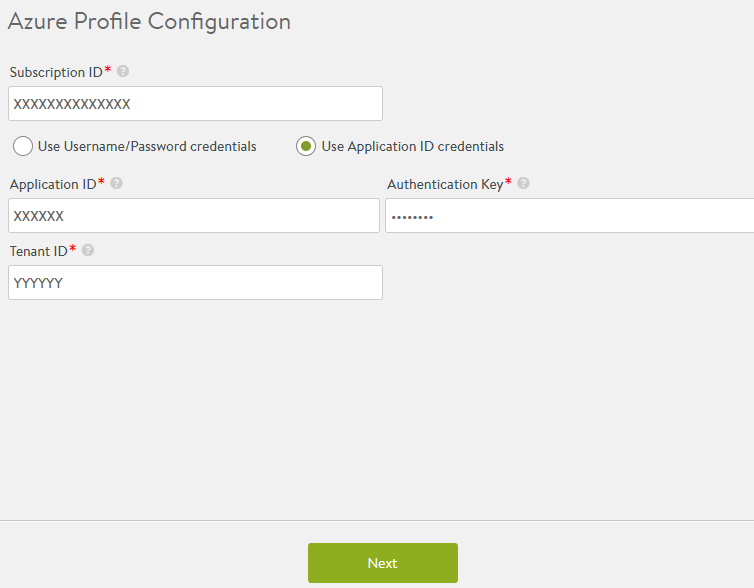
Step 3. To configure Azure as the DNS provider, one of the following types of credentials is required:
- Username and Password
- Application ID
Step 3a. Using Username/Password credential:
- Username— Enter the username for Azure subscription.
- Password— Enter the password associated with the entered username.
- Tenant— Enter the tenant or active directory associated with the Azure subscription.
Step 3b. Using Application ID credential:
- Application ID— Enter the application ID created for Avi Controller.
- Authentication Key— Enter the authentication token created for Avi Controller application.
- Tenant ID— Enter the tenant ID associated with the Azure subscription.
Step 4. Click on Next to configure rest of the profile settings.
- Azure Virtual Network (VNET)— Click on the dropdown list to choose the Azure virtual network that hosts the virtual IPs.
- Resource Group— Click on the dropdown list to choose the Azure resource group dedicated for the Avi Controller. The controller will create all its resources in this resource group.
- (Optional) Add Usable Domain— Enter the specific domain, if required.
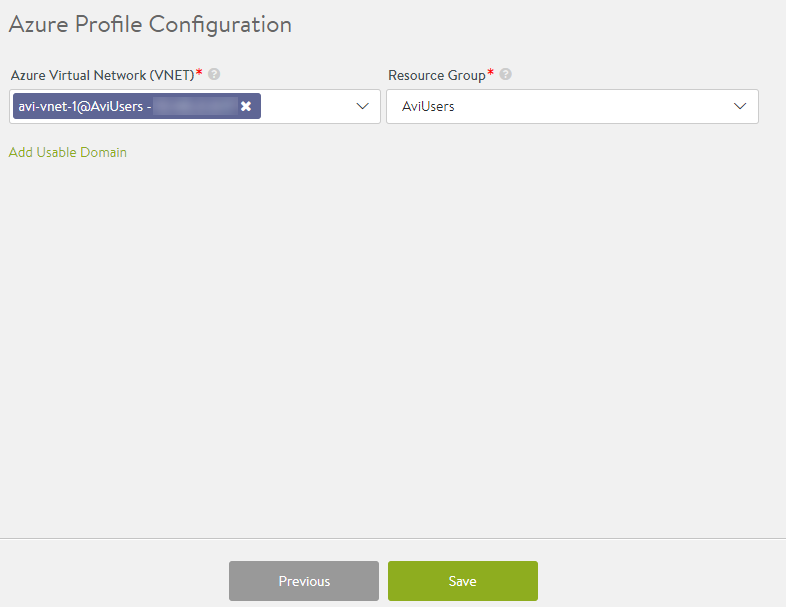
Step 5. Click on Save to complete the configuration.
Integrating with Amazon Route 53
To integrate Azure cloud with Amazon Route 53, follow the instructions provided in this section. For complete information on setting up Amazon Route 53 in Avi Vantage, refer to DNS Provider (AWS).
Step 1. Navigate to Infrastructure > Clouds and click on edit icon for the selected Azure cloud.
Step 2. Click on Location/Network tab. Under DNS click on Other. Choose Amazon Route 53 profile from the dropdown list under DNS Provider.
Step 3: Select Template Service Engine Group from the drop-down list from Service Engine section.
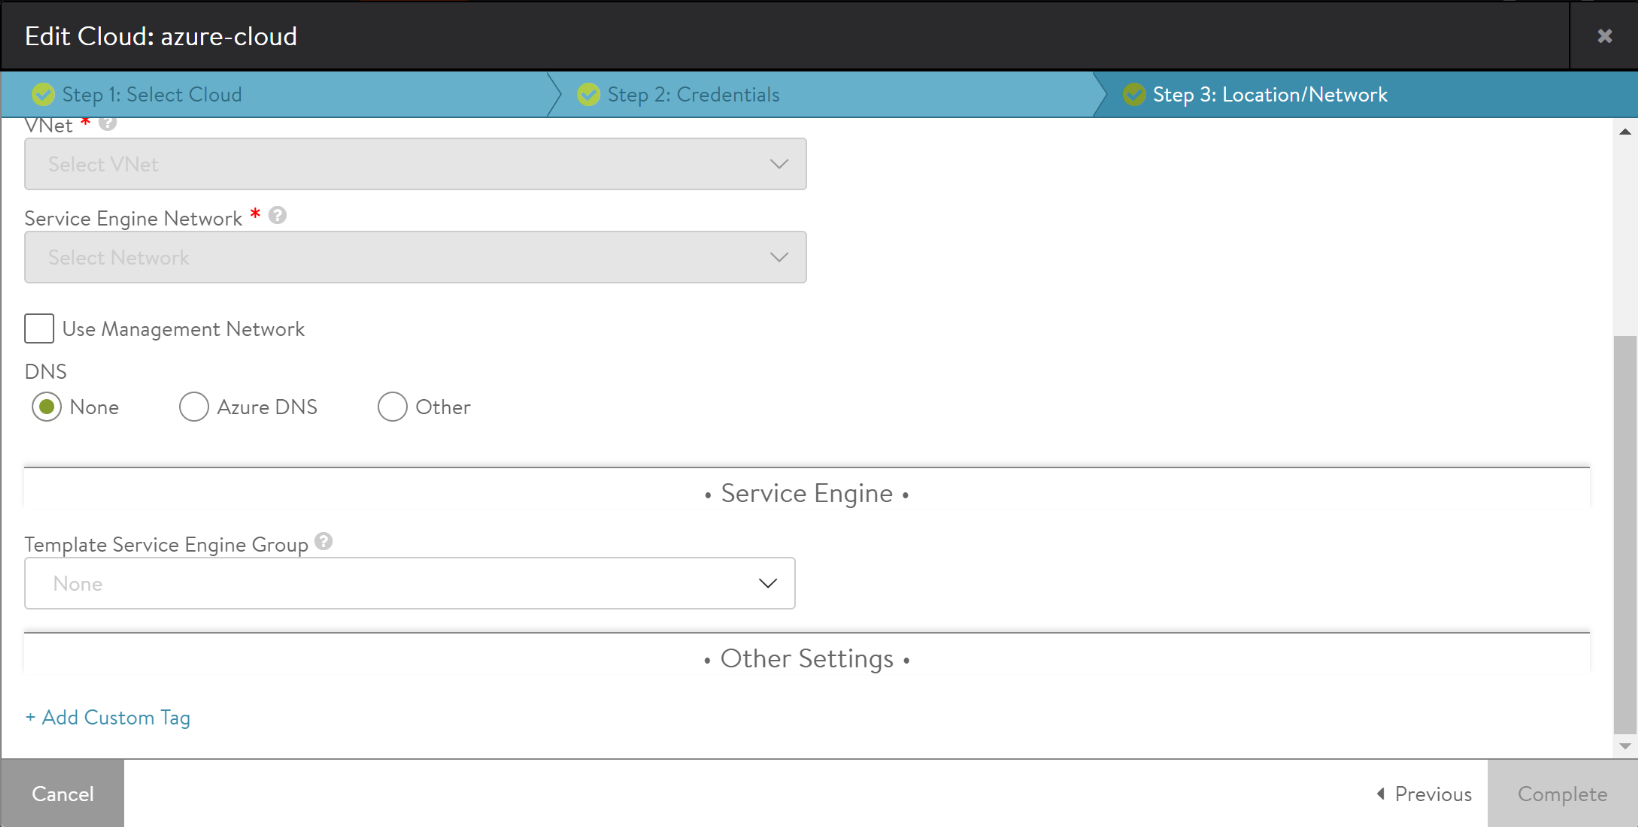
Step 3. Click on Save to complete the configuration.