VMware User Role for Avi Vantage
Overview
Avi Vantage manages the lifecycle of the load balancer within each cloud. In VMware write access cloud, the Controller requires vCenter URL, username, and password to establish a connection with the vCenter portal. With this the Controller discovers the vCenter managed objects to build an internal relation graph. As a part of the load balancer lifecycle management, Avi Service Engine is created and port groups are added and (or) removed from the virtual machines.
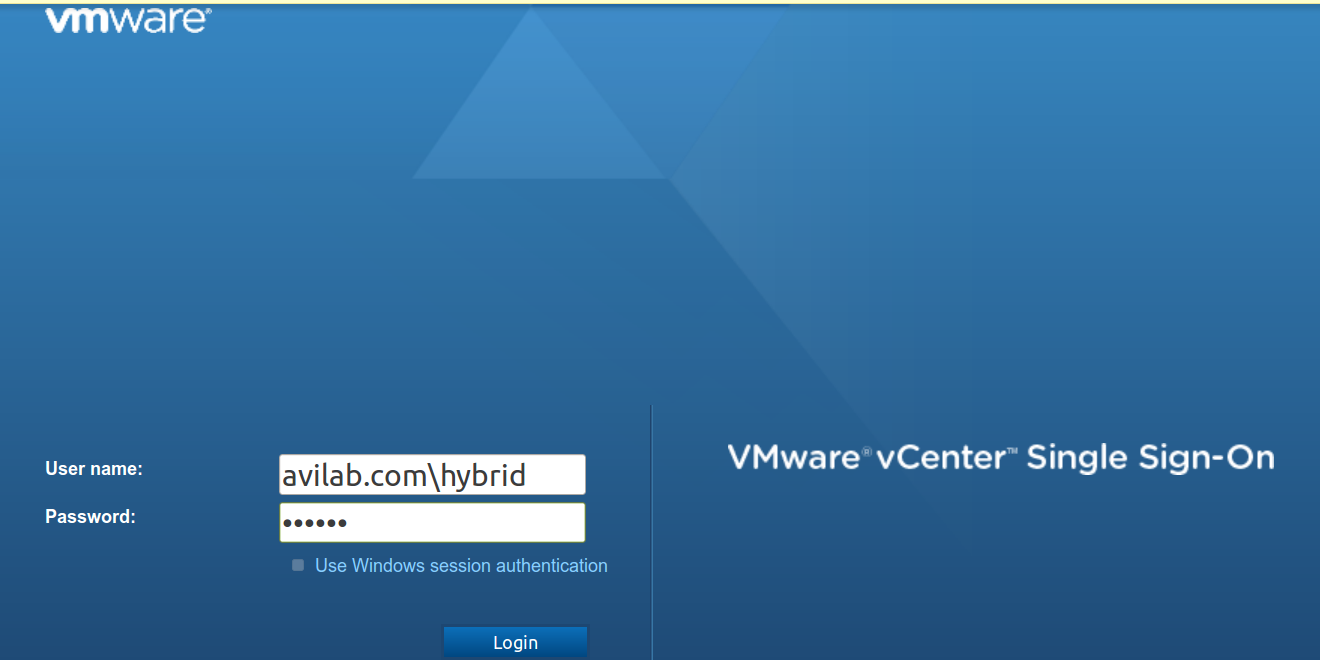
On deploying vCenter cloud, Avi Vantage is not provided the root credentials for security reasons. On creating the cloud in Avi Vantage, the vCenter user is assigned certain roles that allow the Controller to manage the load balancer lifecycle. The user is mapped to two roles during the role configuration on vCenter. One of the roles is applied at the vCenter root level and another at the folder level where the Service Engines are created by the Avi Controller.
The following section discusses defining role privileges for two roles AviRole1 and AviRole2 that are assigned to the vCenter user.
Configuring Role Settings
For 6 - 6.5 versions
For 6.7 and 7 versions

For more details on Roles and Permissions for vCenter, refer to Roles and Permissions for vCenter guide.
Root Folder Level Role
AviRole1 is the role applied at the root folder level, which allows the assigned user to:
- Deploy Service Engine in a data center.
- Create virtual NIC for the Service Engine.
- Discover all available networks with Read Only access.
- Discover the best possible host to deploy the Service Engine in Read Only mode.
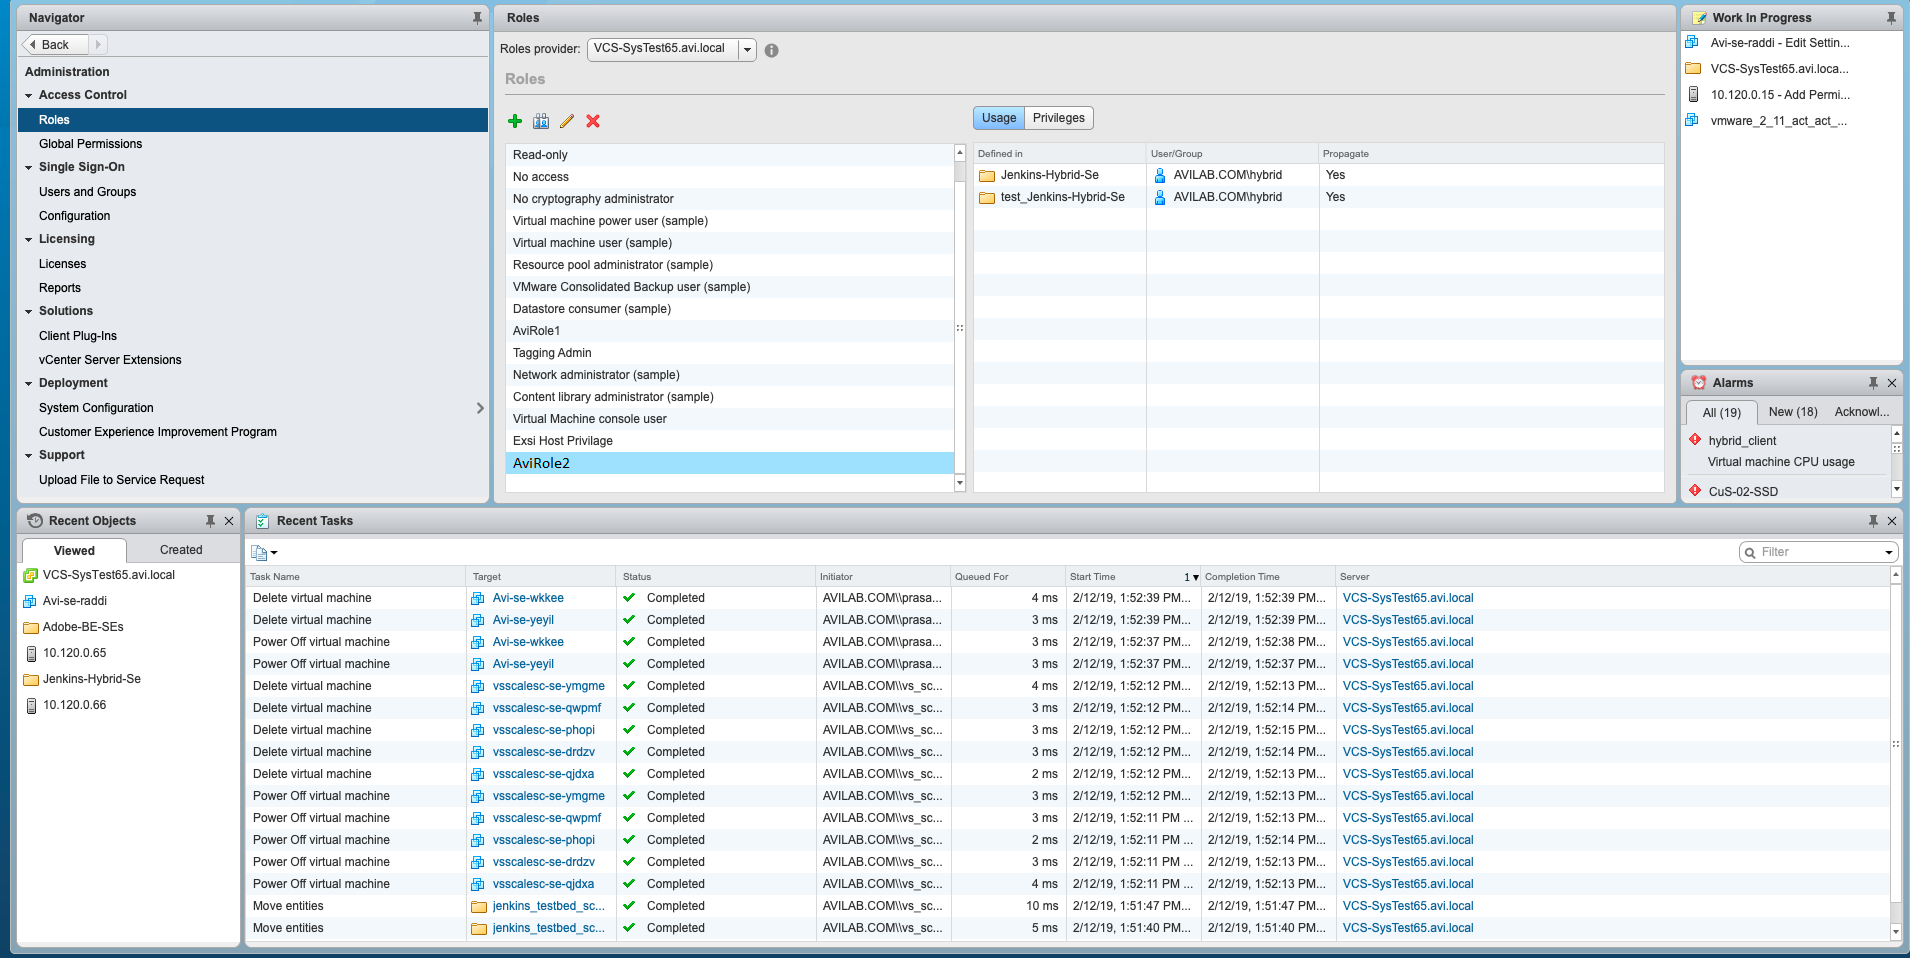
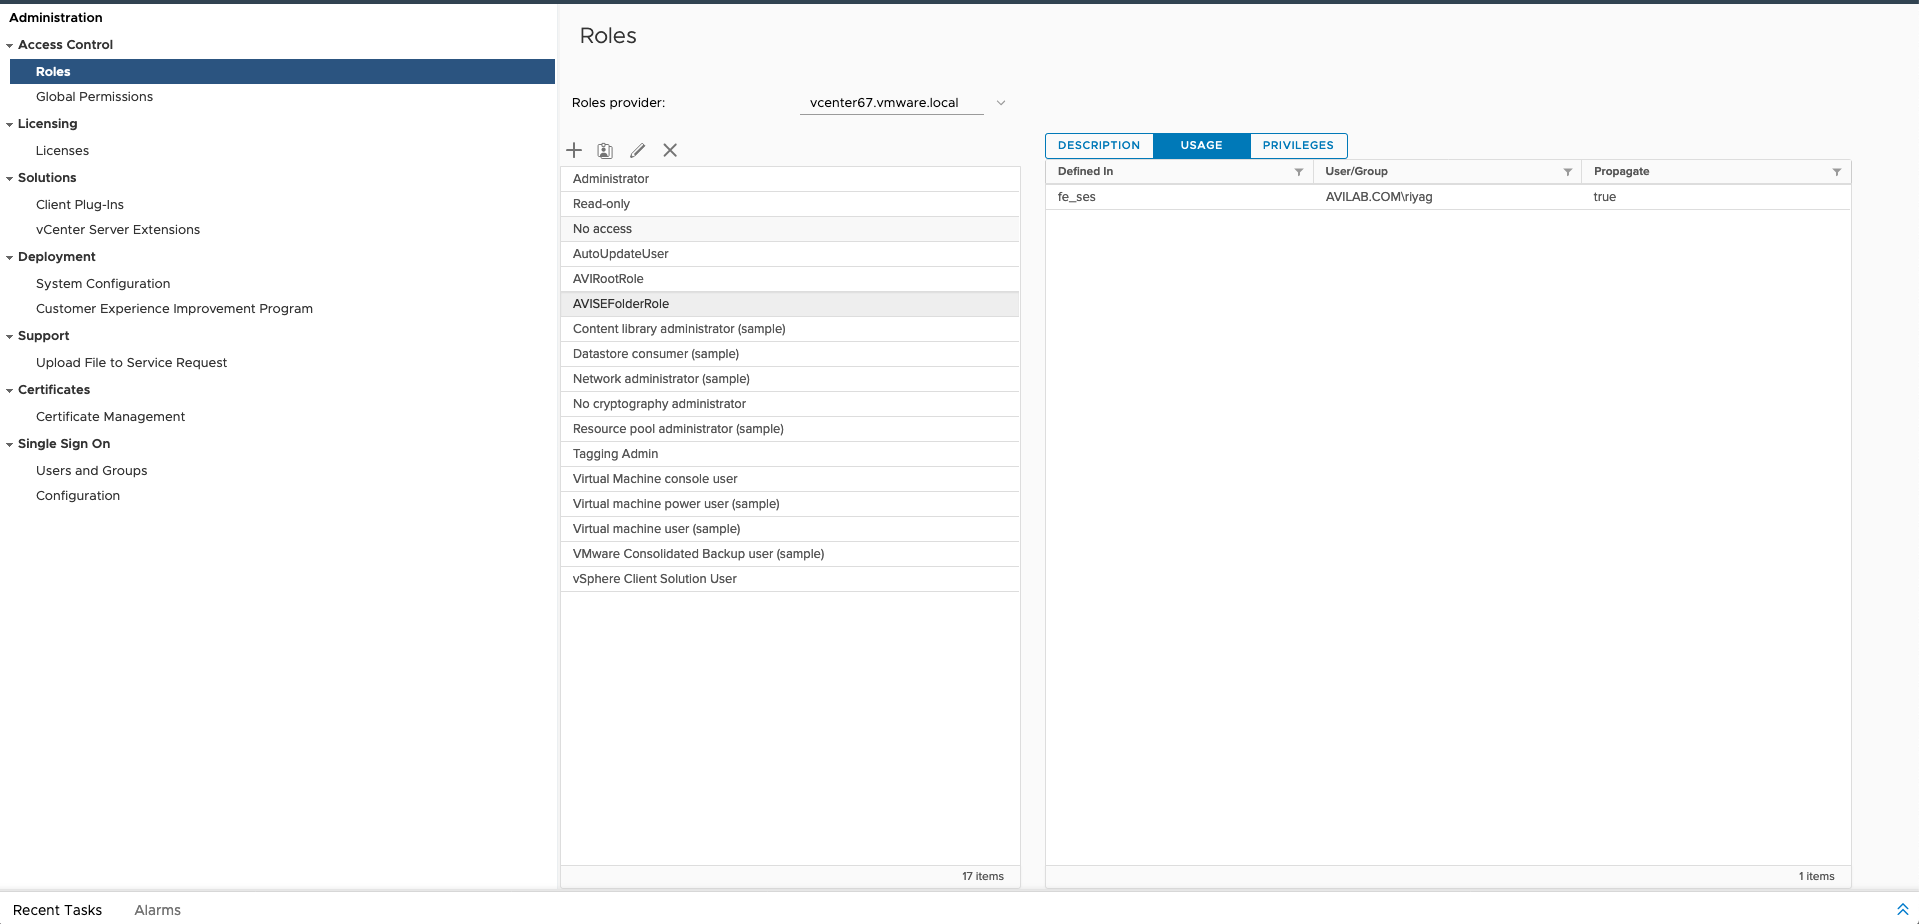
To configure the role settings, navigate to Administration > Roles and locate the Avi role name - AviRole1.
Apply the AviRole1 role to the root level of the vCenter object hierarchy for giving the Avi Controller access to discover vCenter resources.
Note: While creating the folder at vCenter, you should select New VM and Template Folder option.
For 6 - 6.5 versions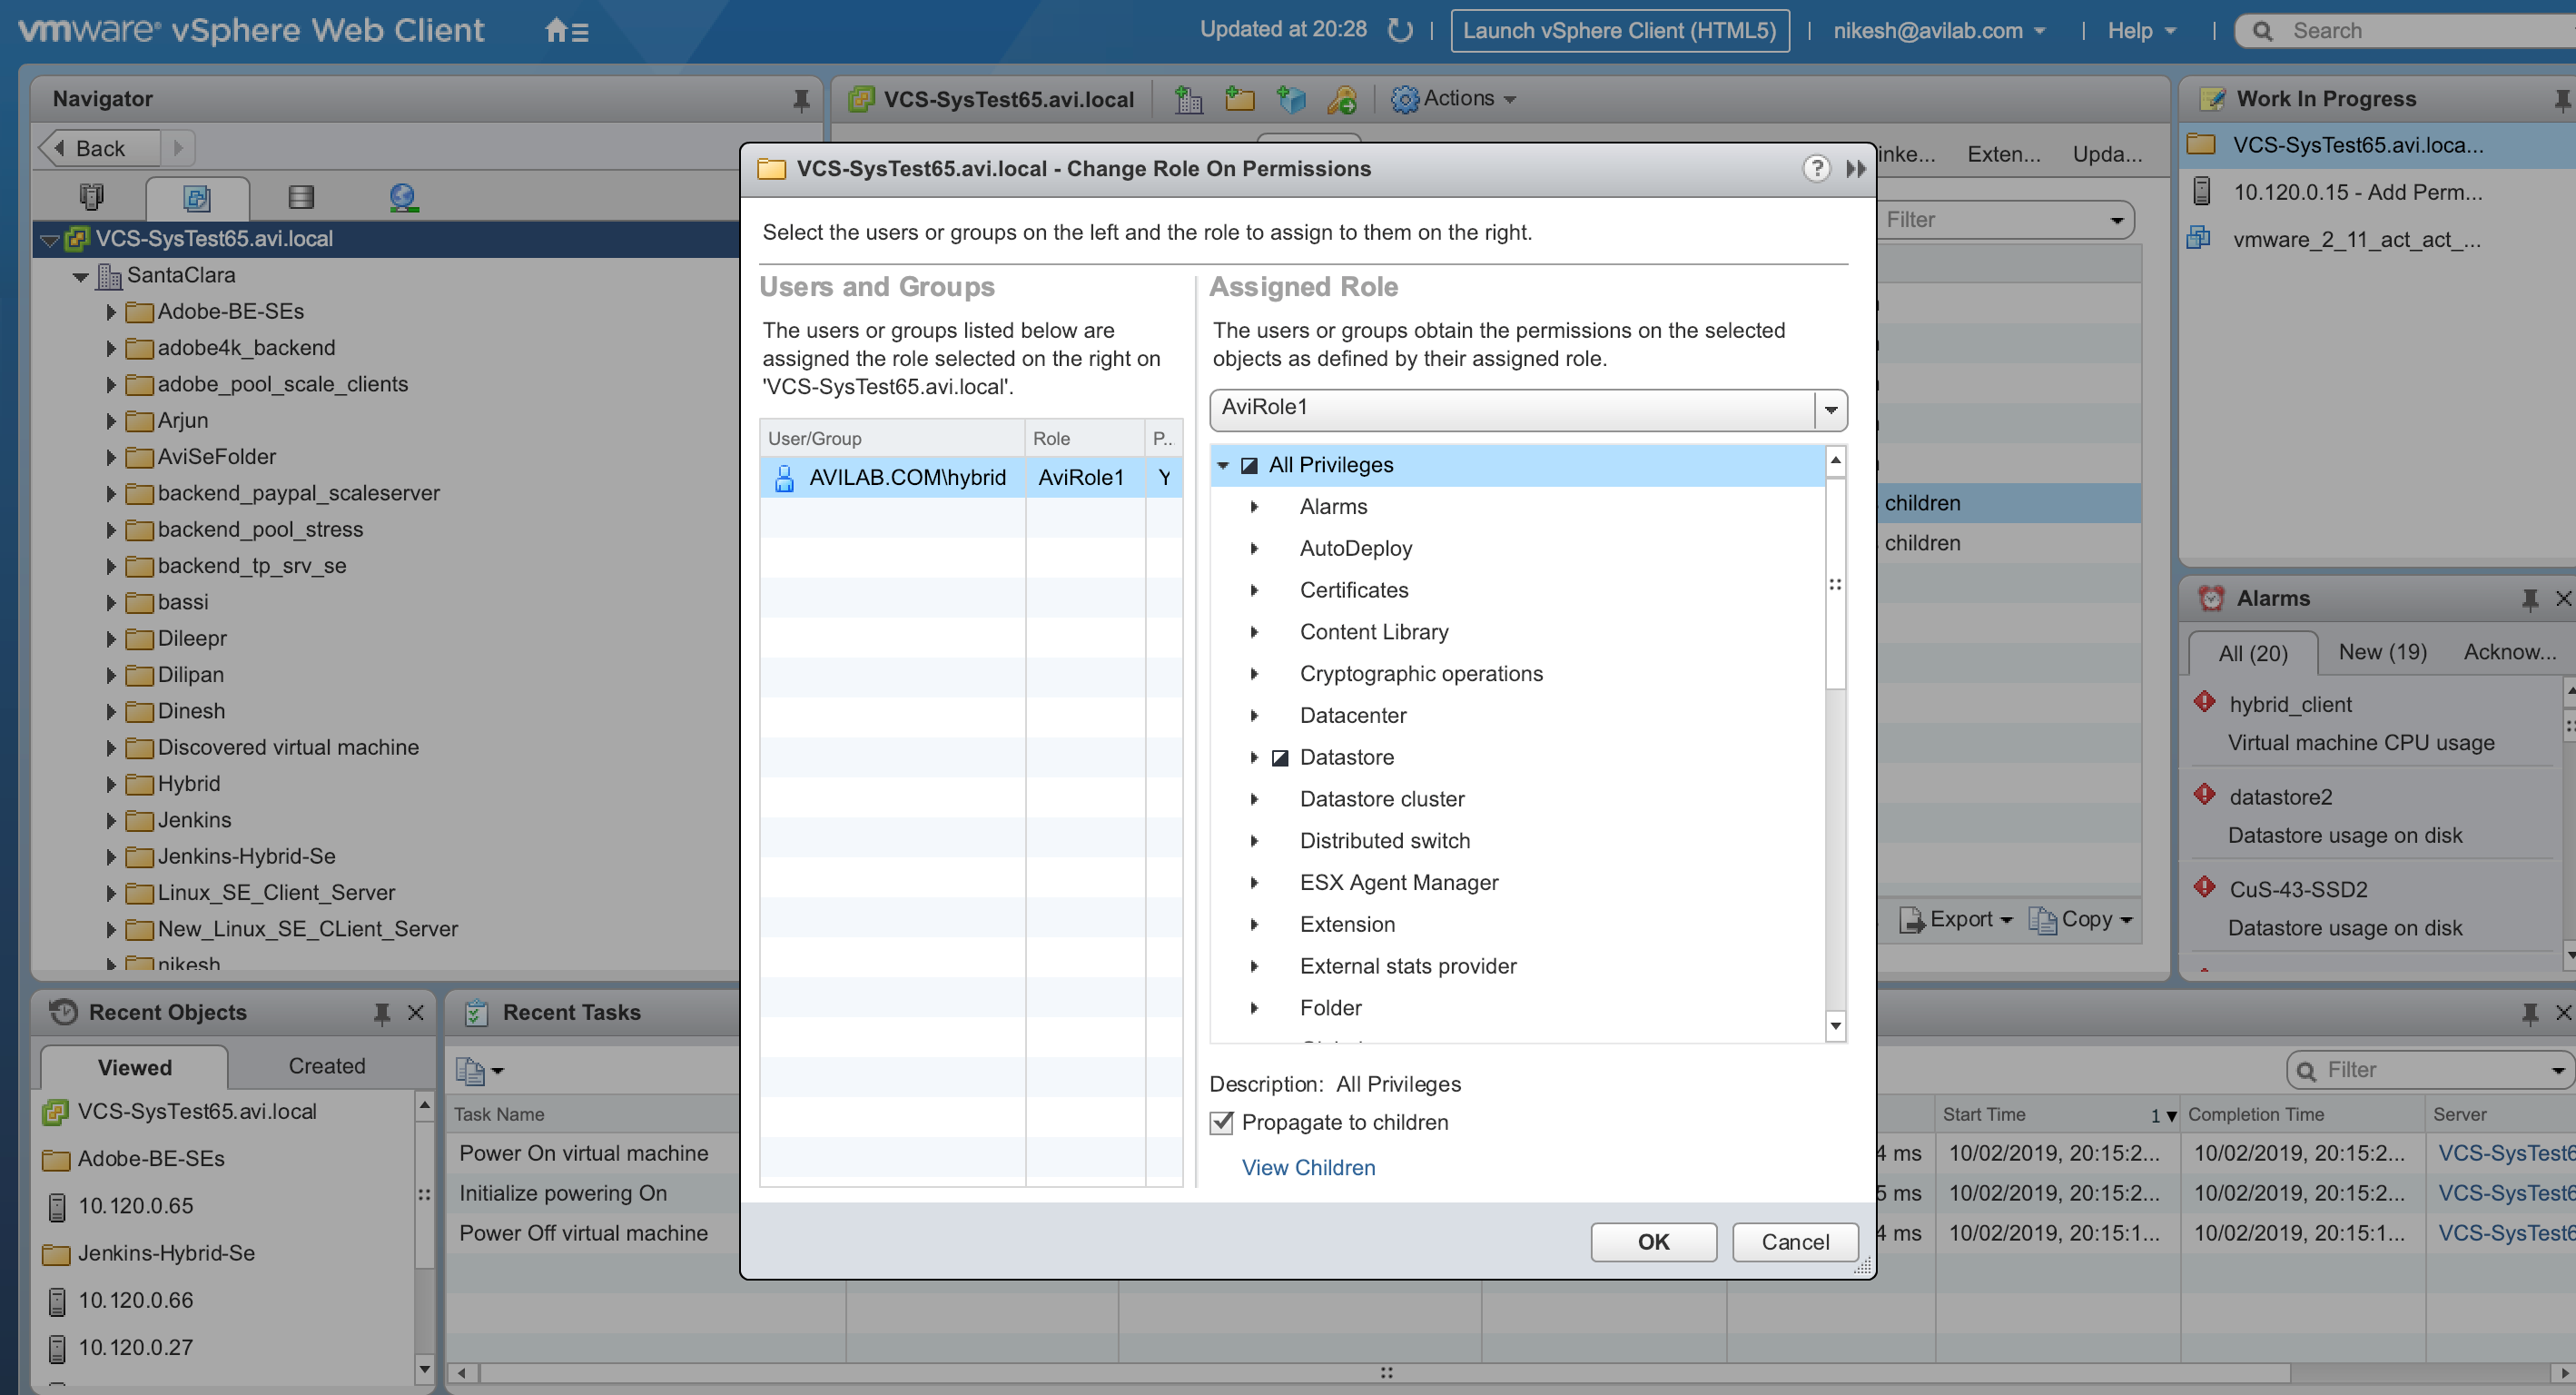
For 6.7 and 7 versions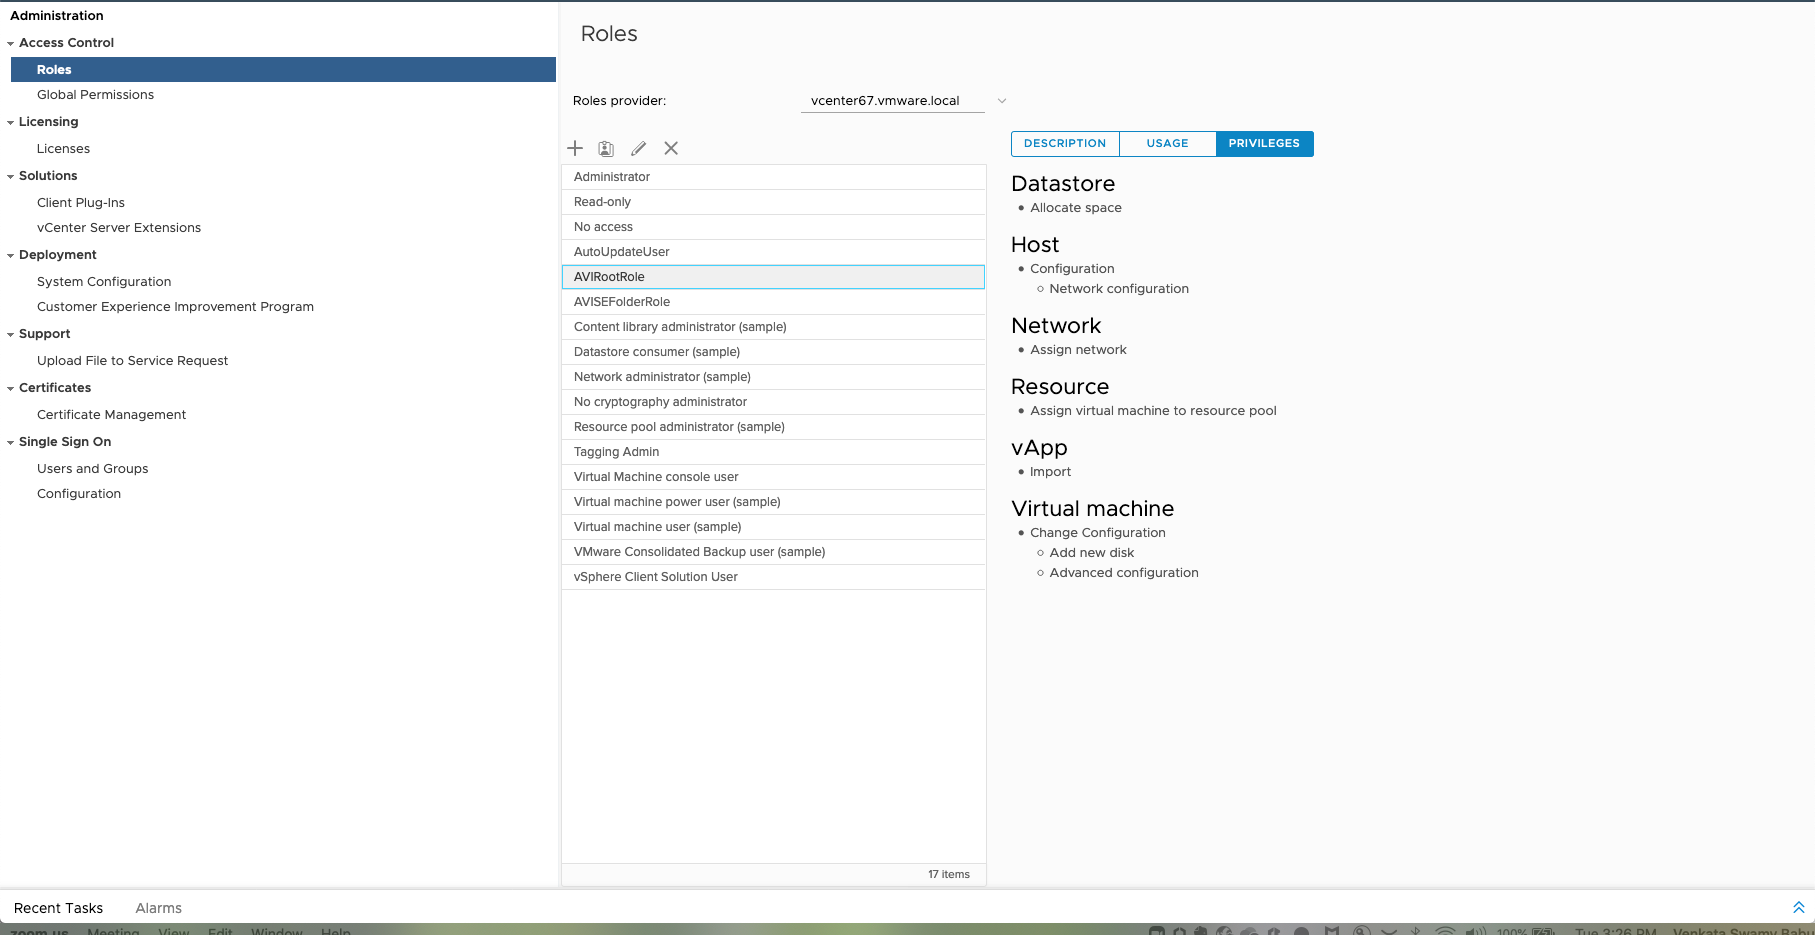
Under Privilege > All Privileges, define the following parameters for this role:
- Datastore settings
- Network configuration
- Resource
- Virtual machine configuration
- vApp import
-
Navigate to Datastore. Expand the list and click on the checkbox for Allocate space.
For 6 - 6.5 versions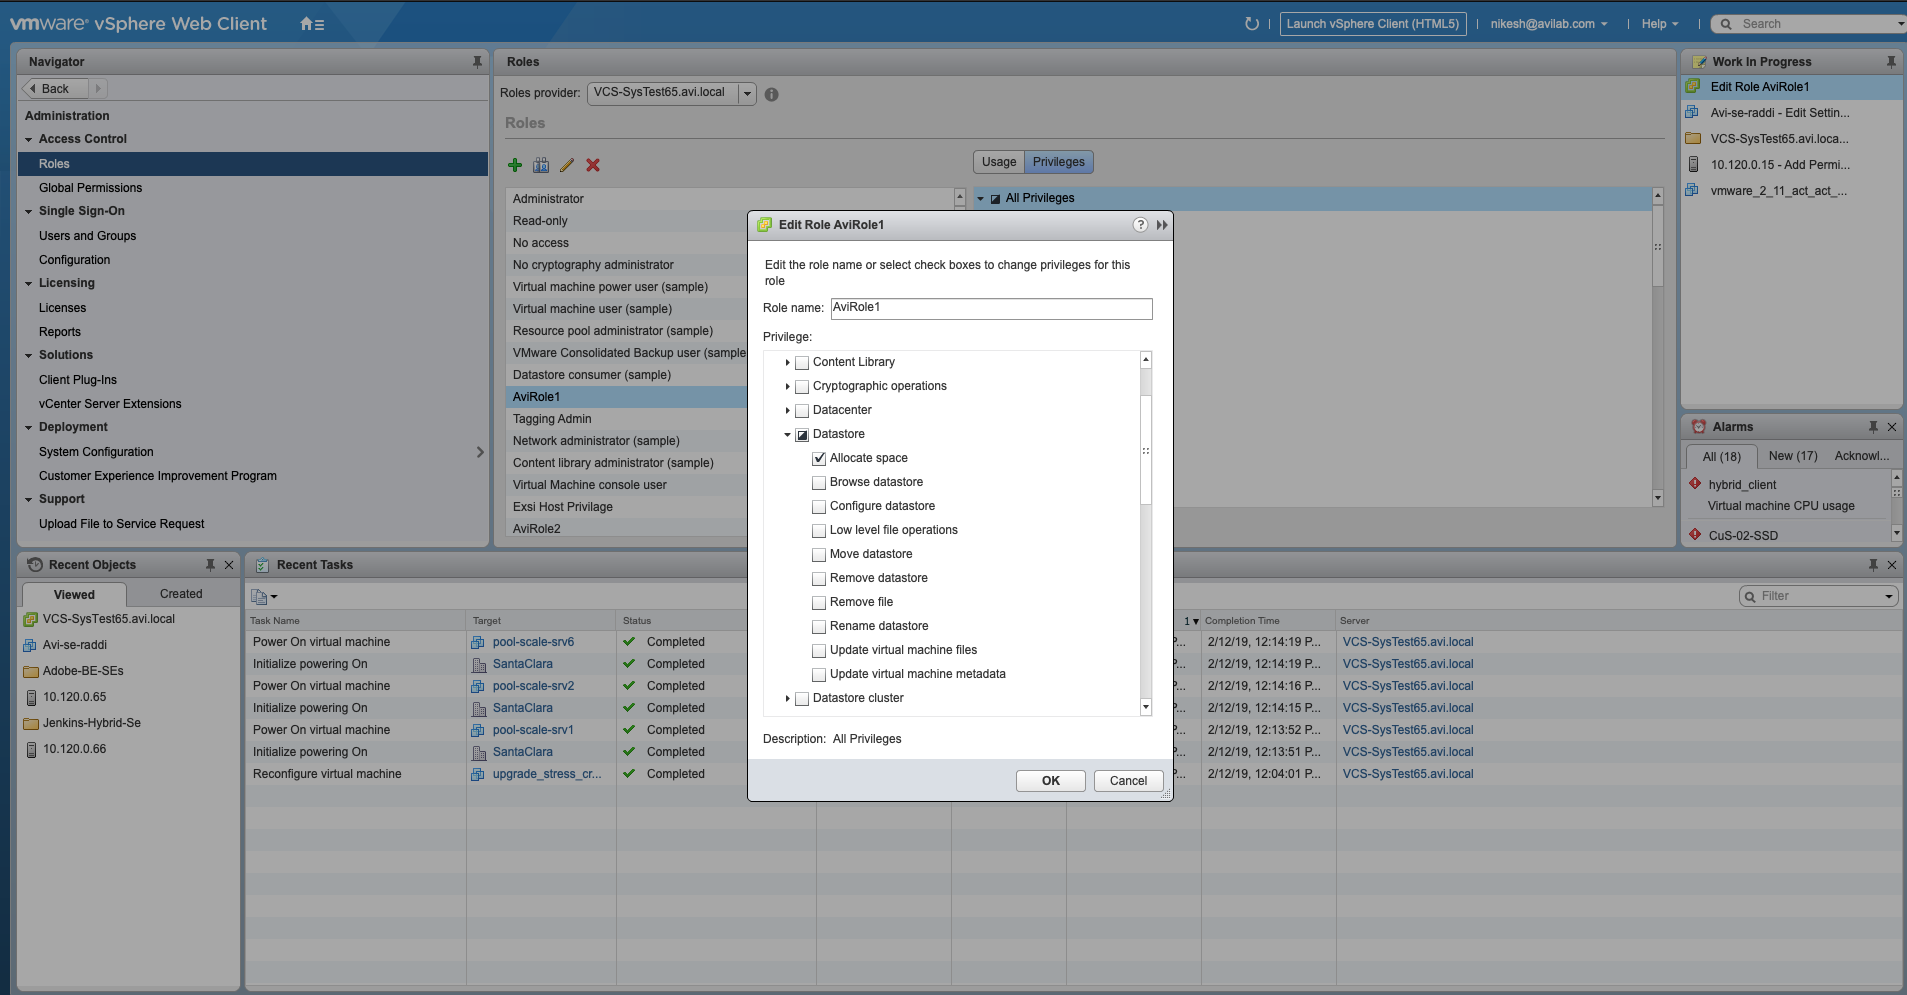
For 6.7 and 7 versions

-
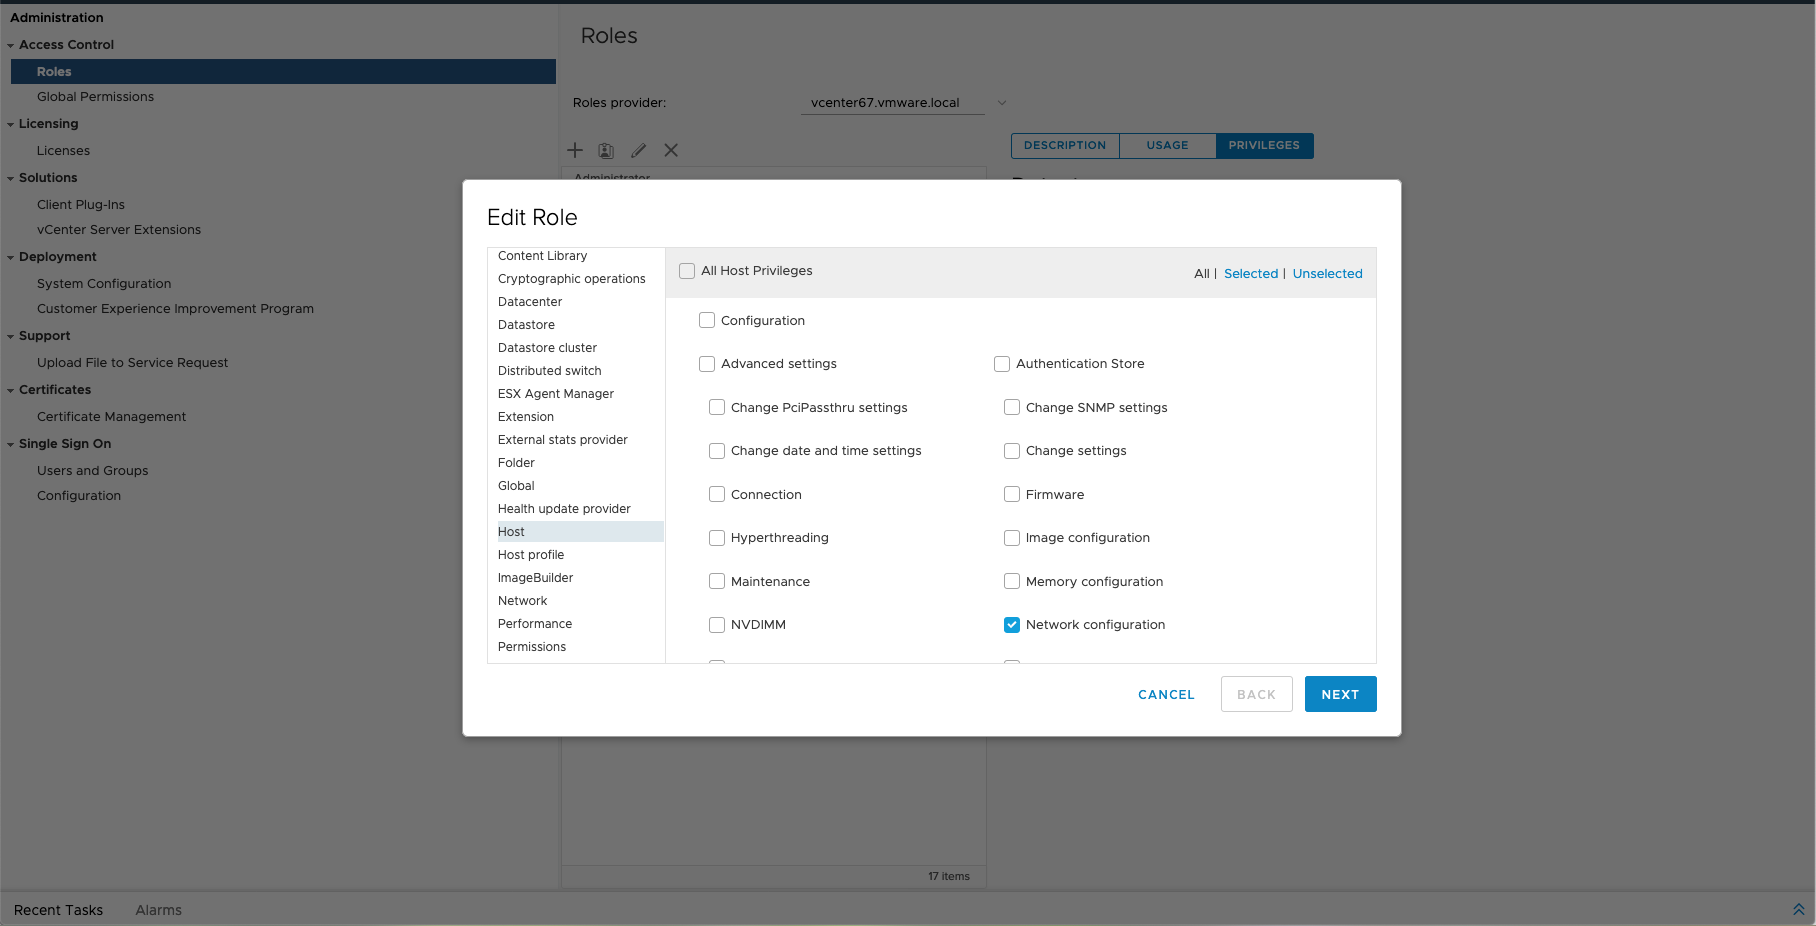
Navigate to Host and select Configuration. Expand the list and click on the checkbox for Network configuration.
For 6 - 6.5 versions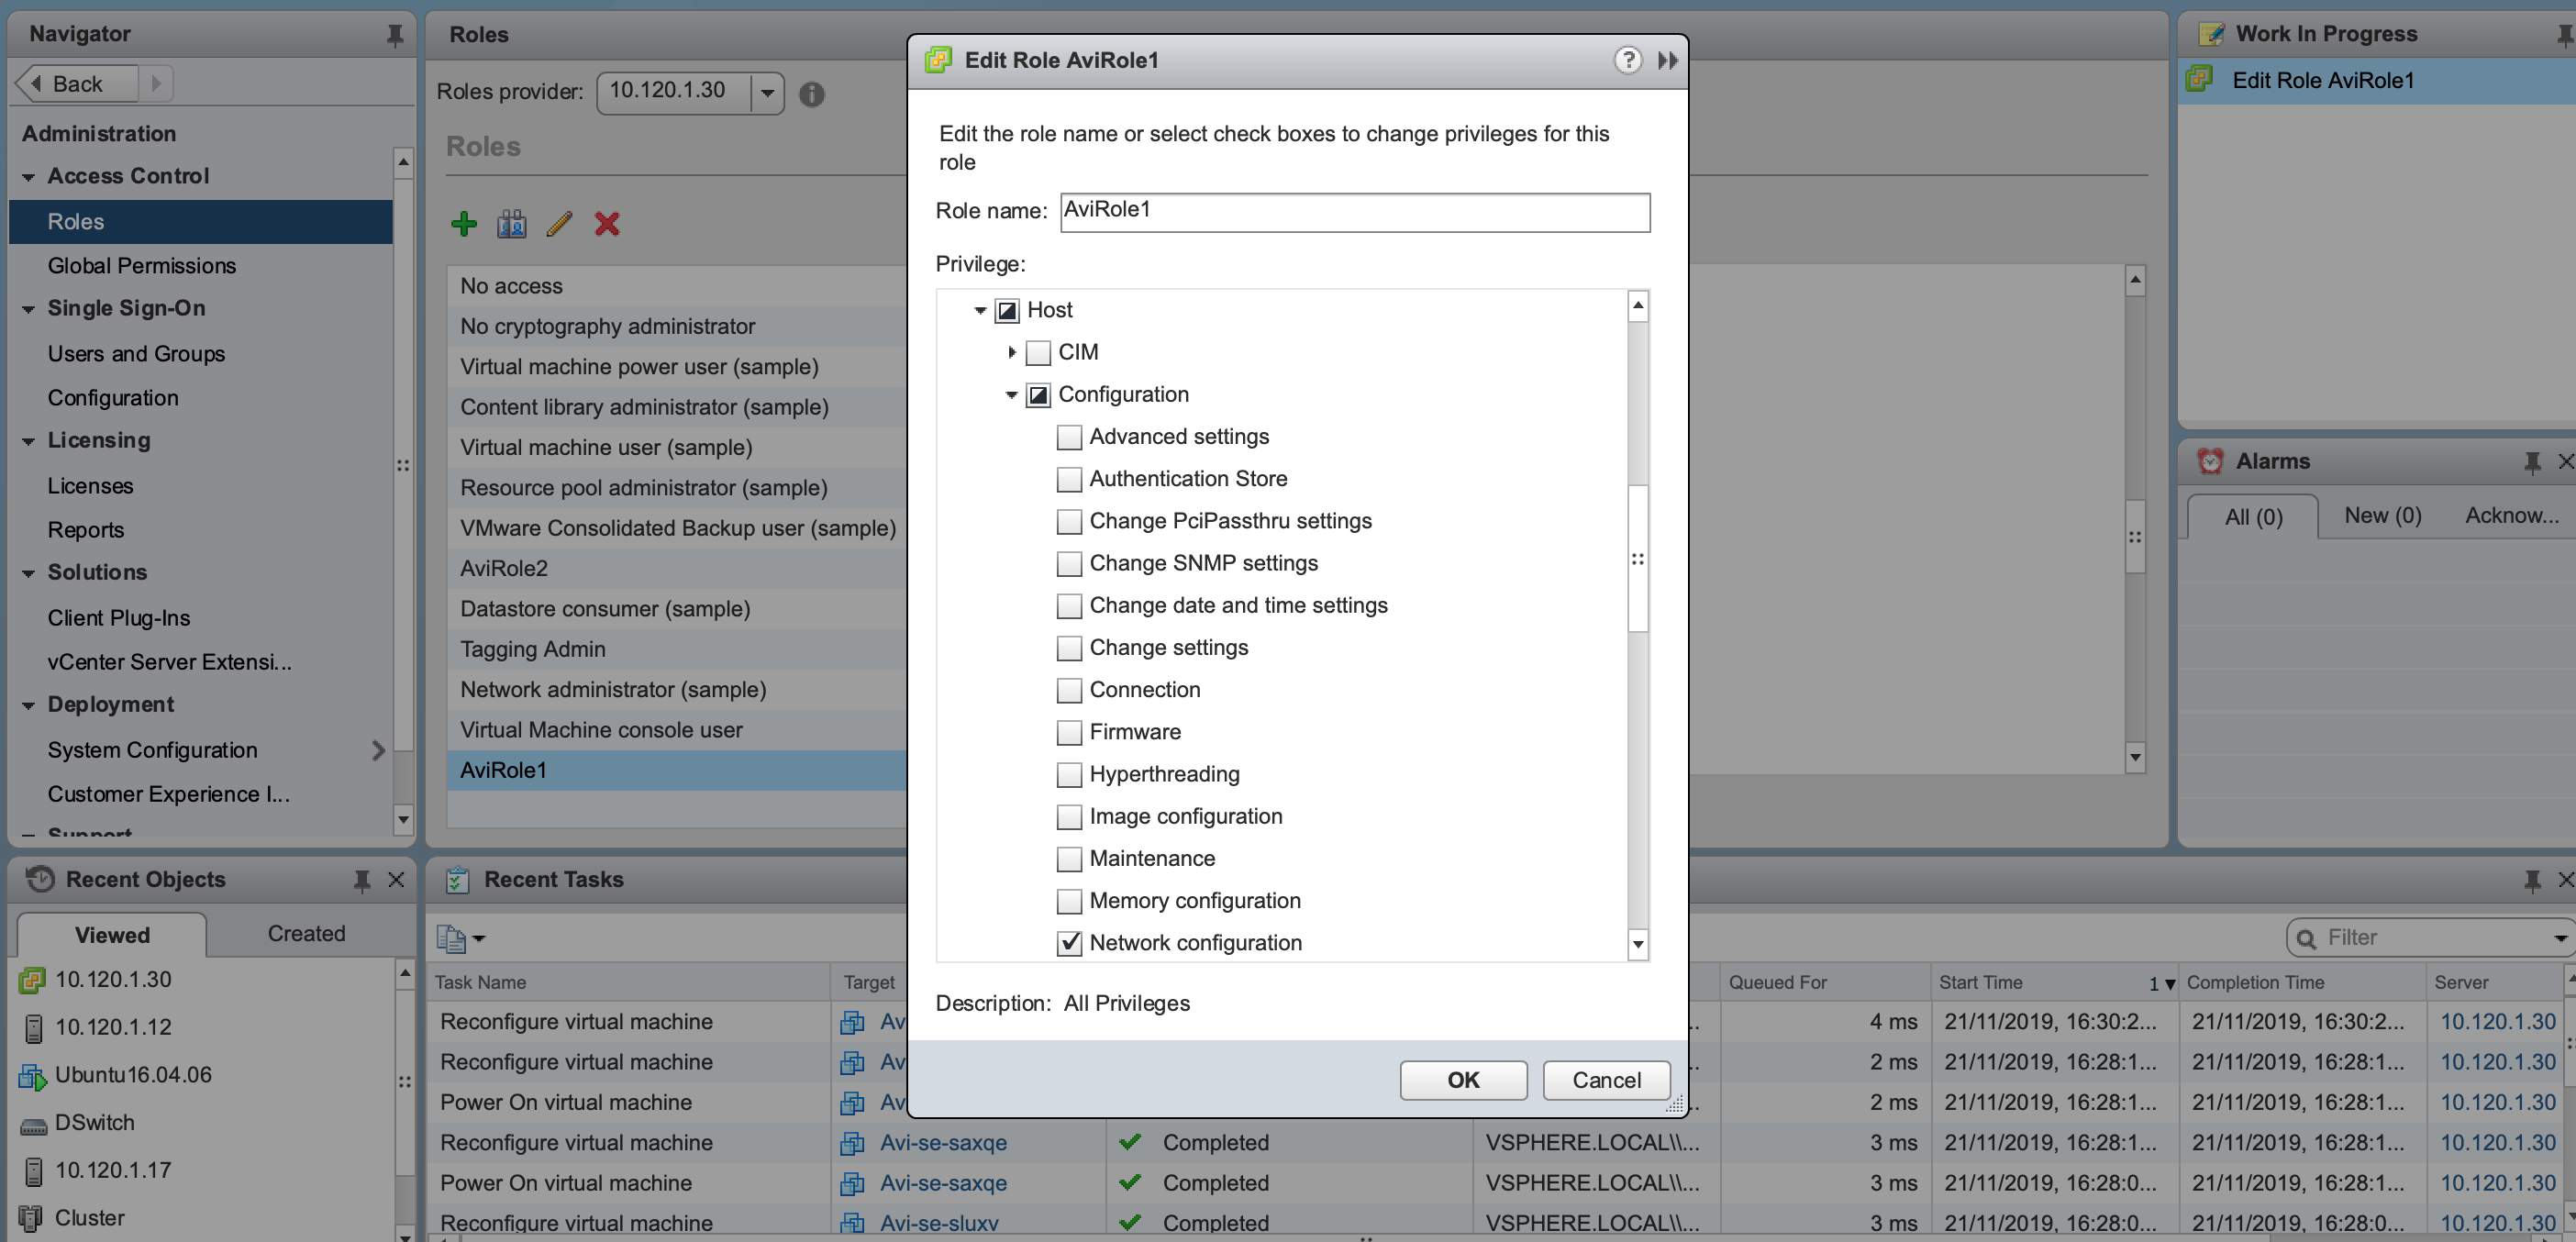
For 6.7 and 7 versions
-
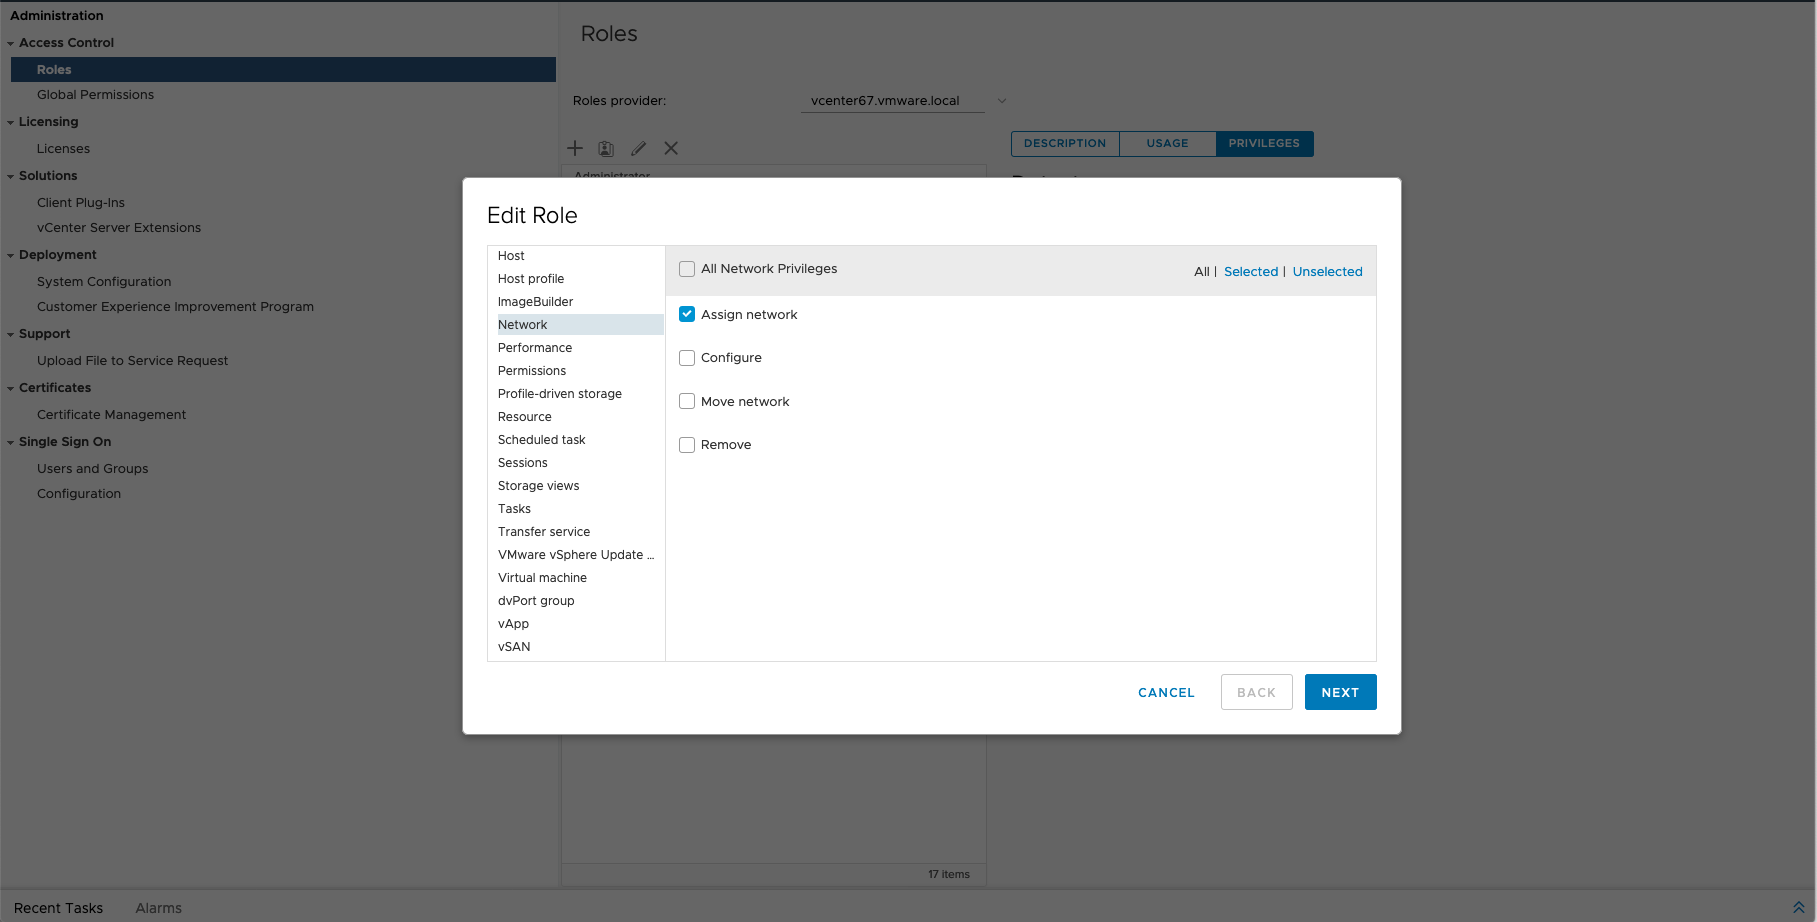
Navigate to Network and select Assign network.
For 6 - 6.5 versions
For 6.7 and 7 versions
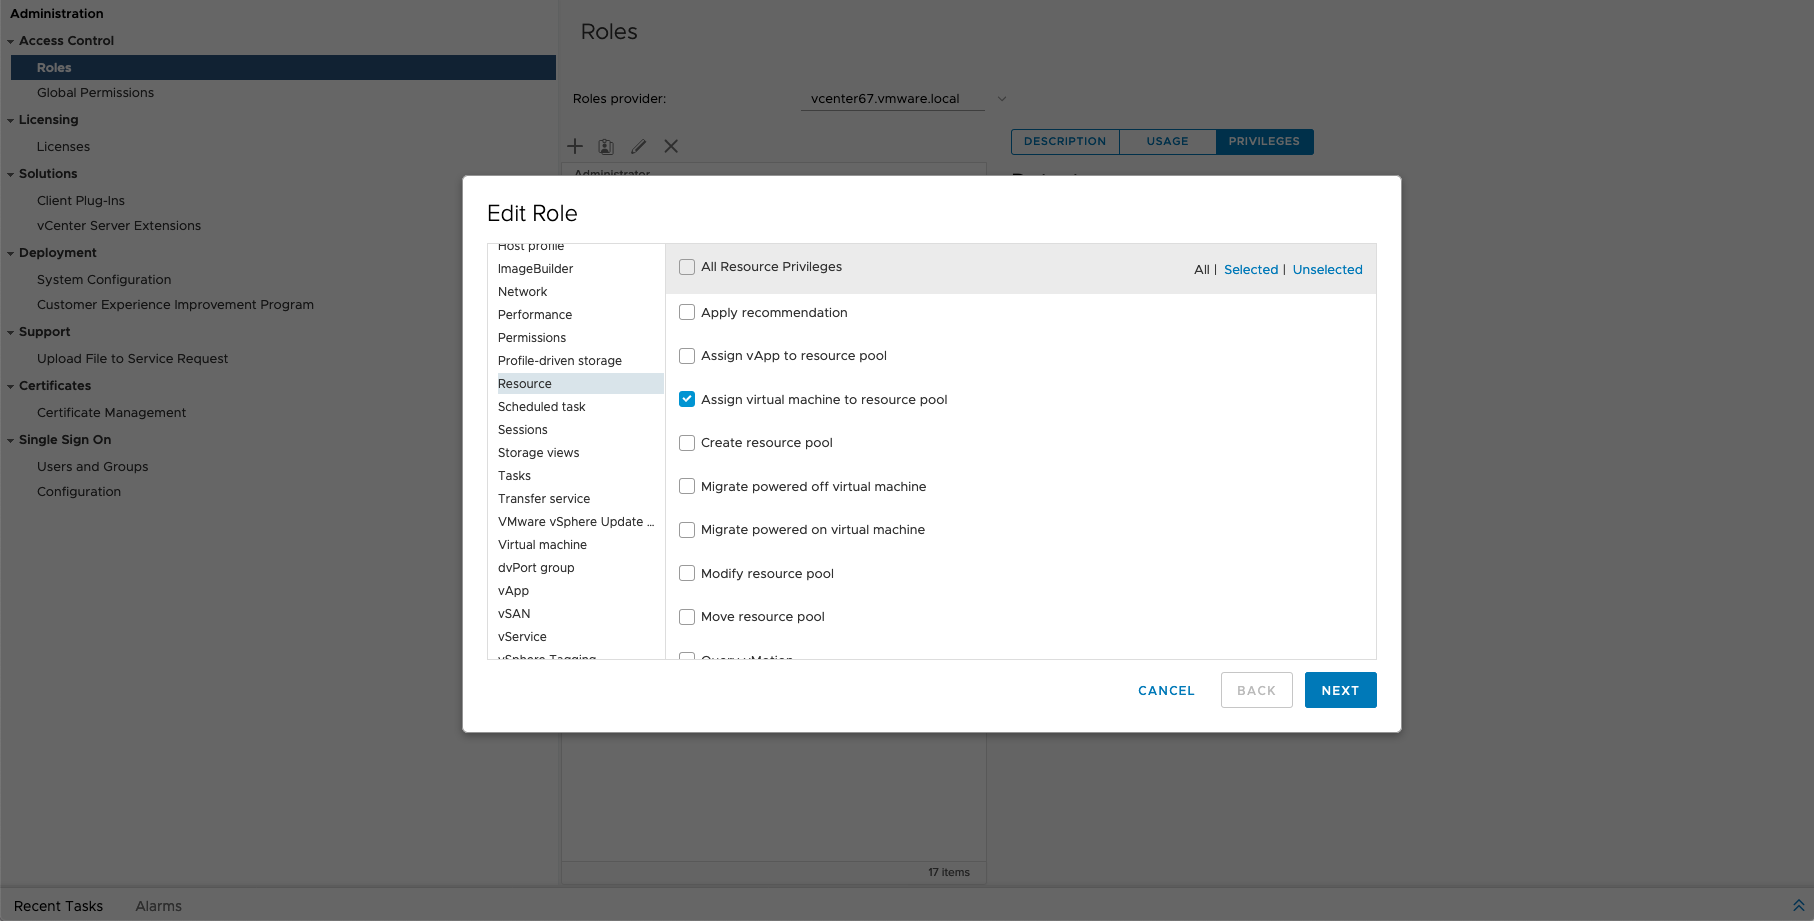
-
Navigate to Resource and select Assign virtual machine to resource pool.
For 6 - 6.5 versions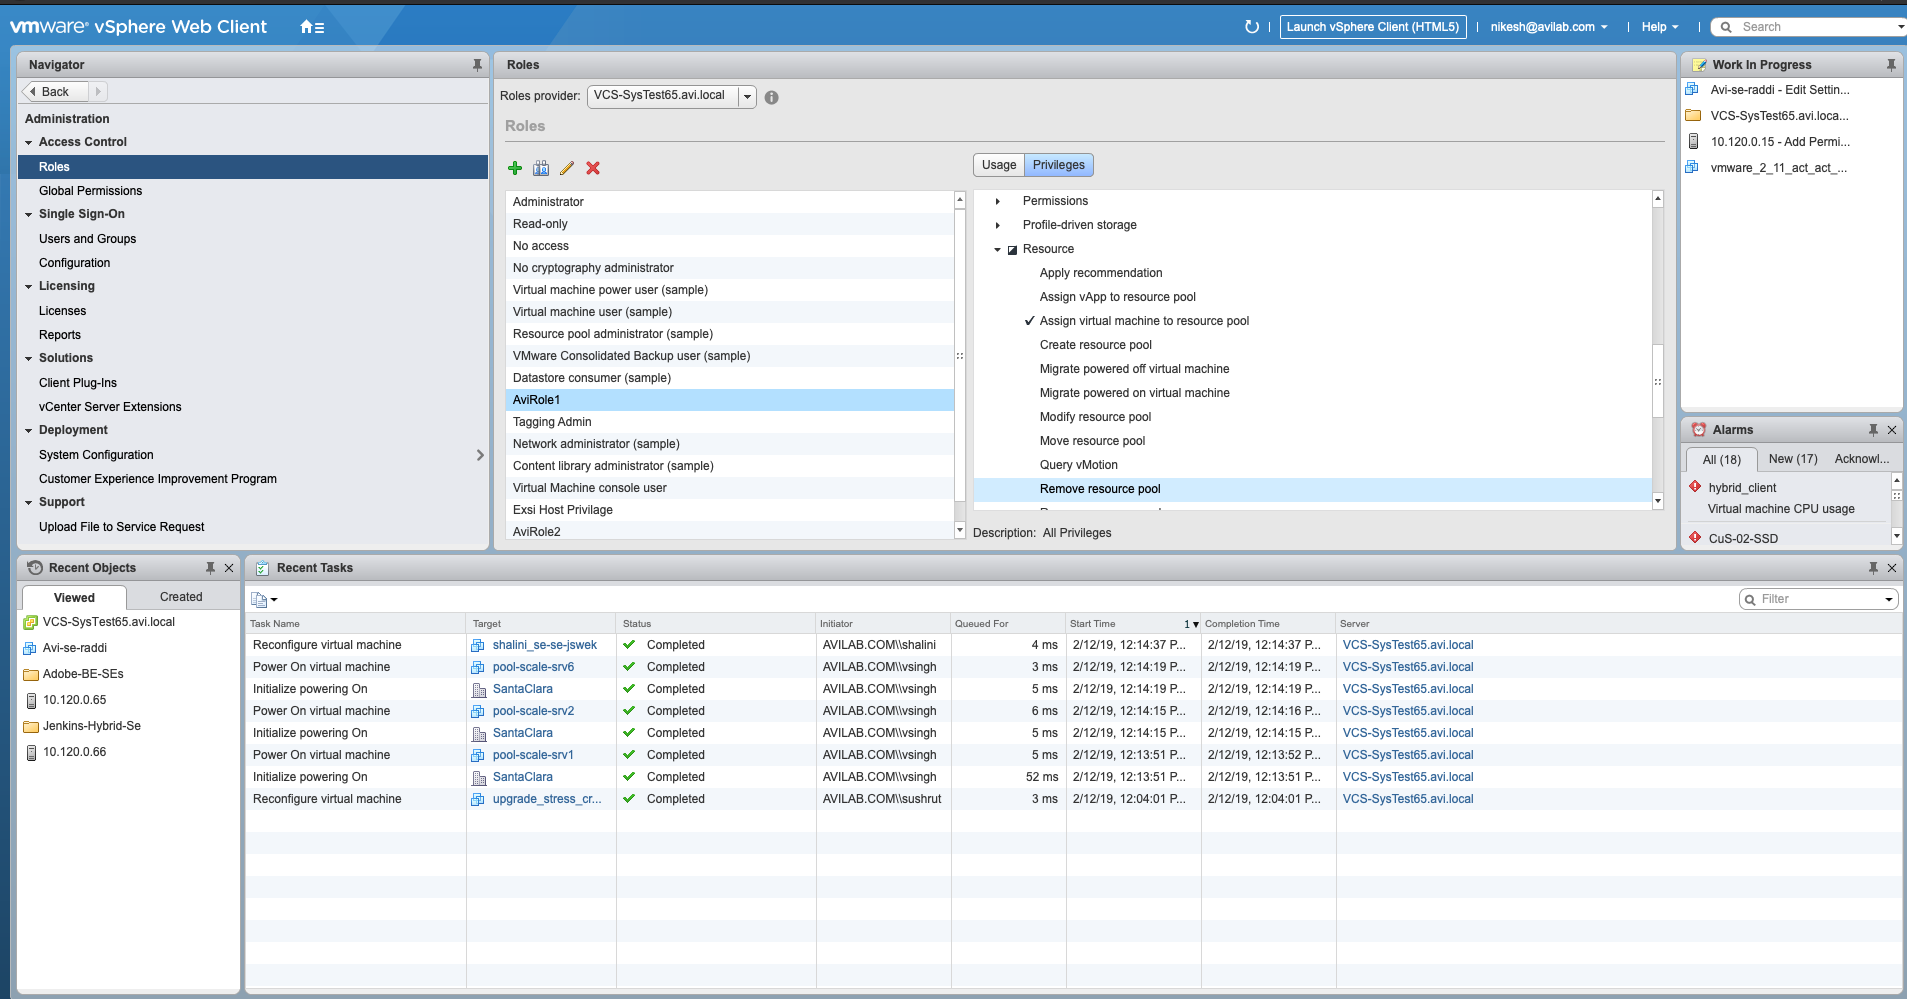
For 6.7 and 7 versions
- Navigate to Virtual machine > Configuration and select the following options:
- Add new disk
- Advanced
For 6 - 6.5 versions

For 6.7 and 7 versions

-
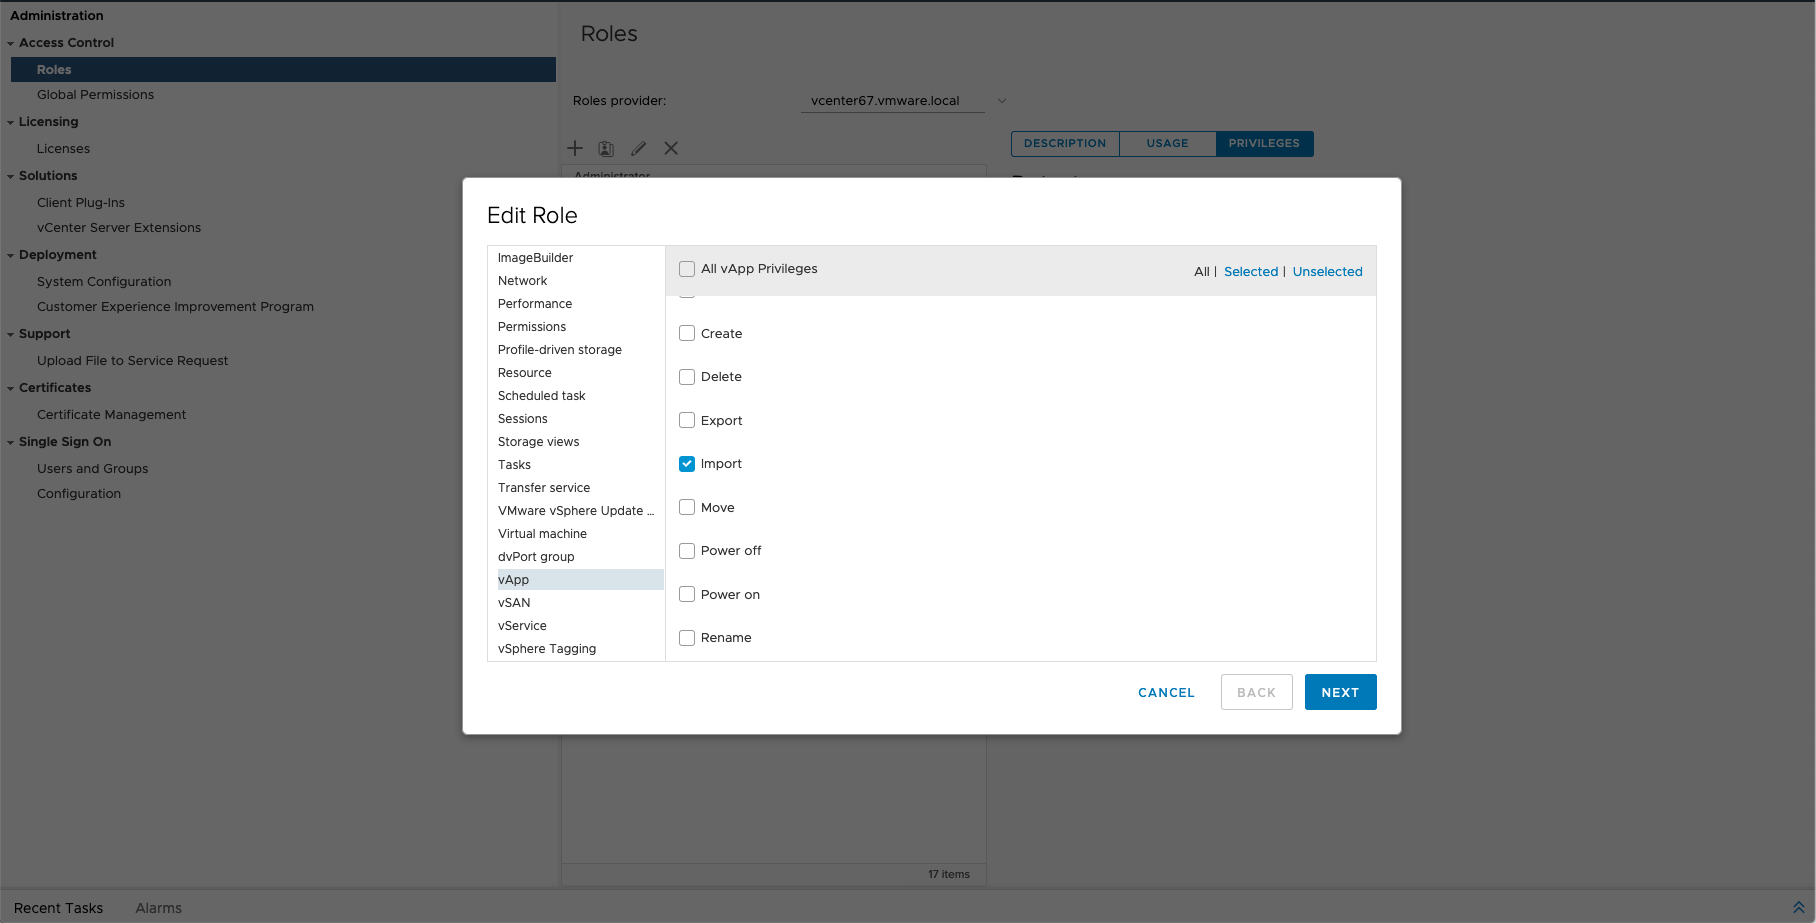
Navigate to vApp and select Import.
For 6 - 6.5 versions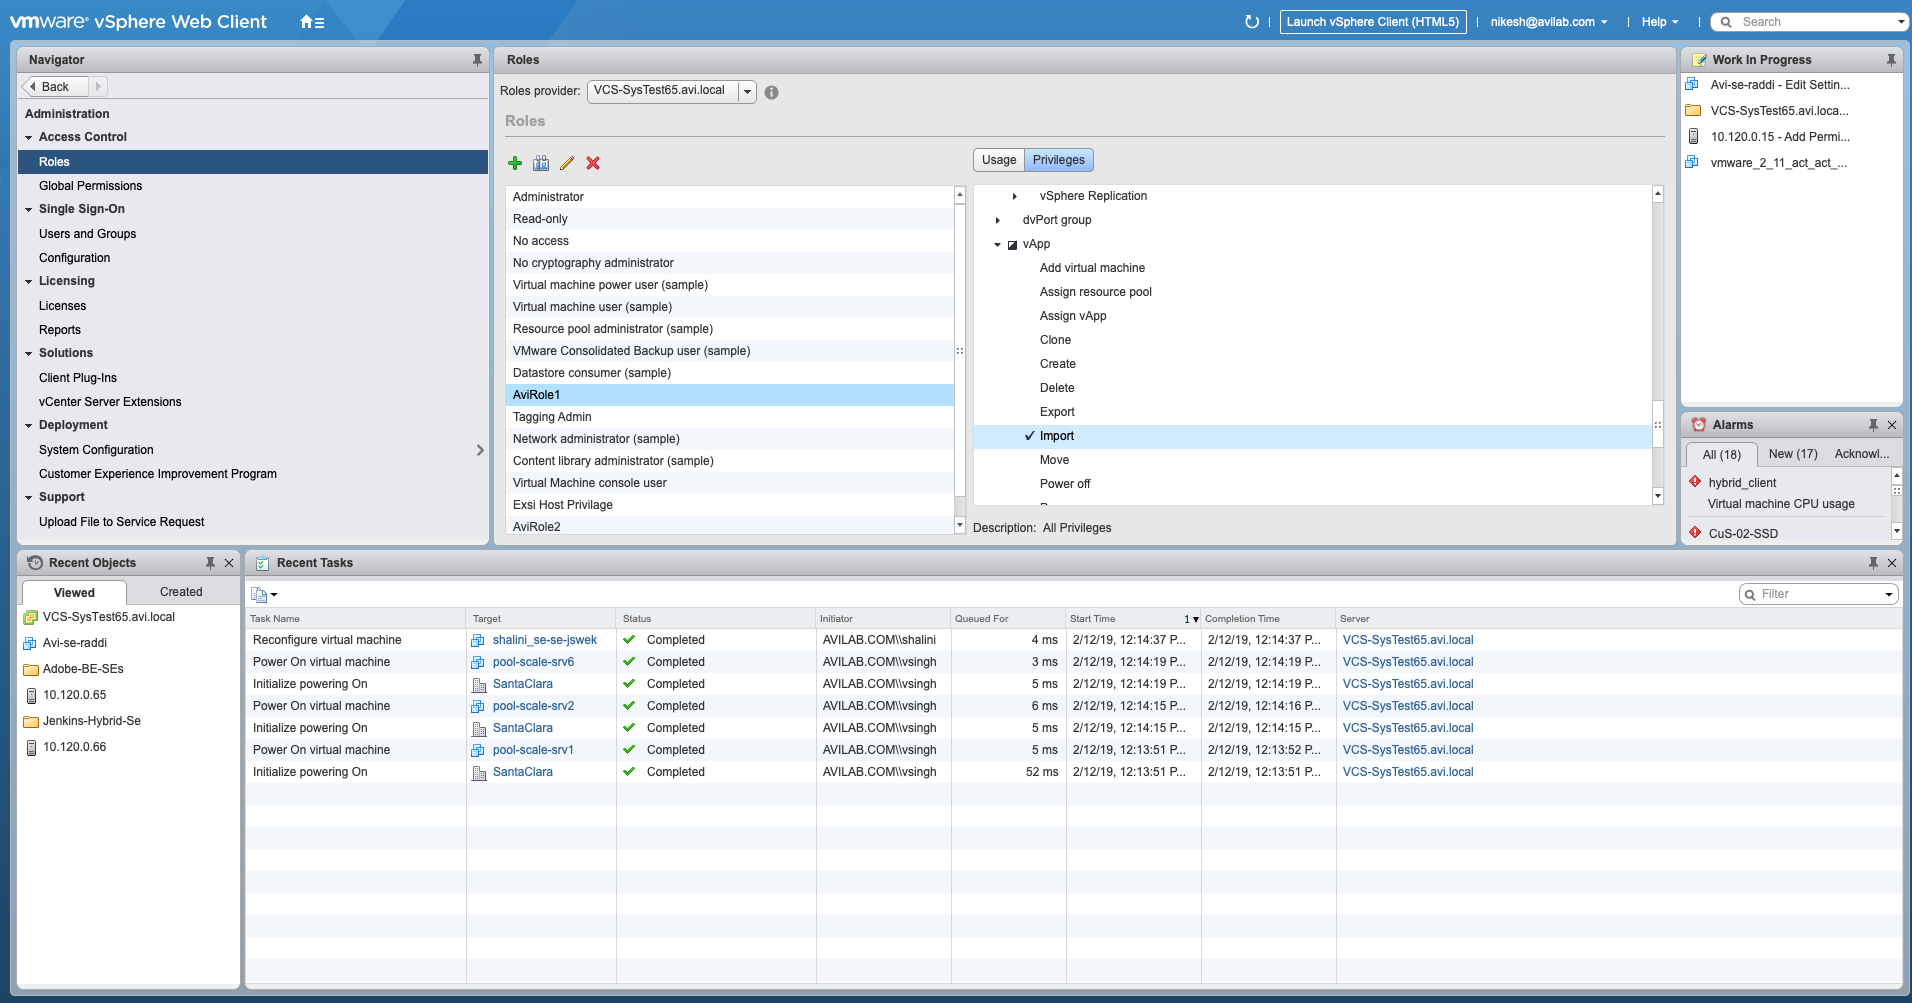
For For 6.7 and 7 versions

SE Creation Folder Level Role
AviRole2 role is applied at the folder level where the Service Engines are created by the Avi Controller. With this role, the user is restricted to perform all operations on a Service Engine within a particular folder and is not allowed to edit any resources outside the specific folder.
This role is required for the user to access the datastore, host, and networking settings that allow creating the Service Engine.
Under Privilege > All Privileges, define the following parameters for this role:
1. Datacenter settings
2. Datastore settings
3. Distributed switch configuration
4. Host configuration
5. Network, performance, virtual machine, and vApp import settings
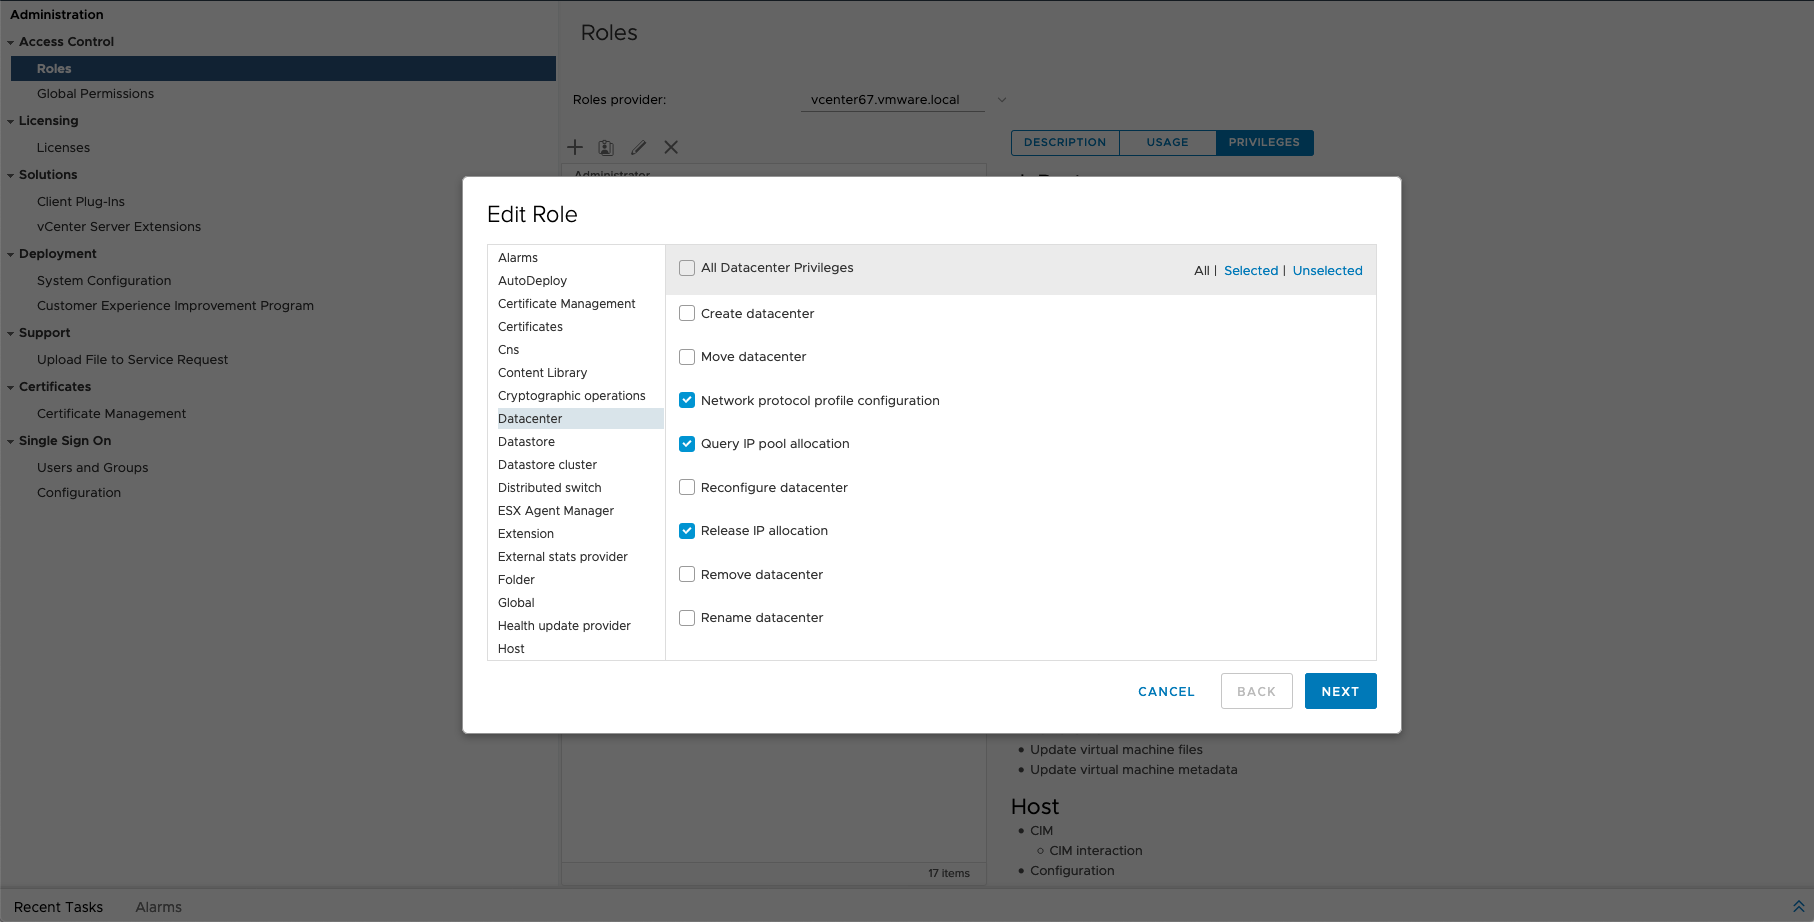
- Navigate to Datacenter by expanding the list and click on the checkbox for:
- Network protocol profile configuration
- Query IP pool allocation
- Release IP allocation
For 6 - 6.5 versions
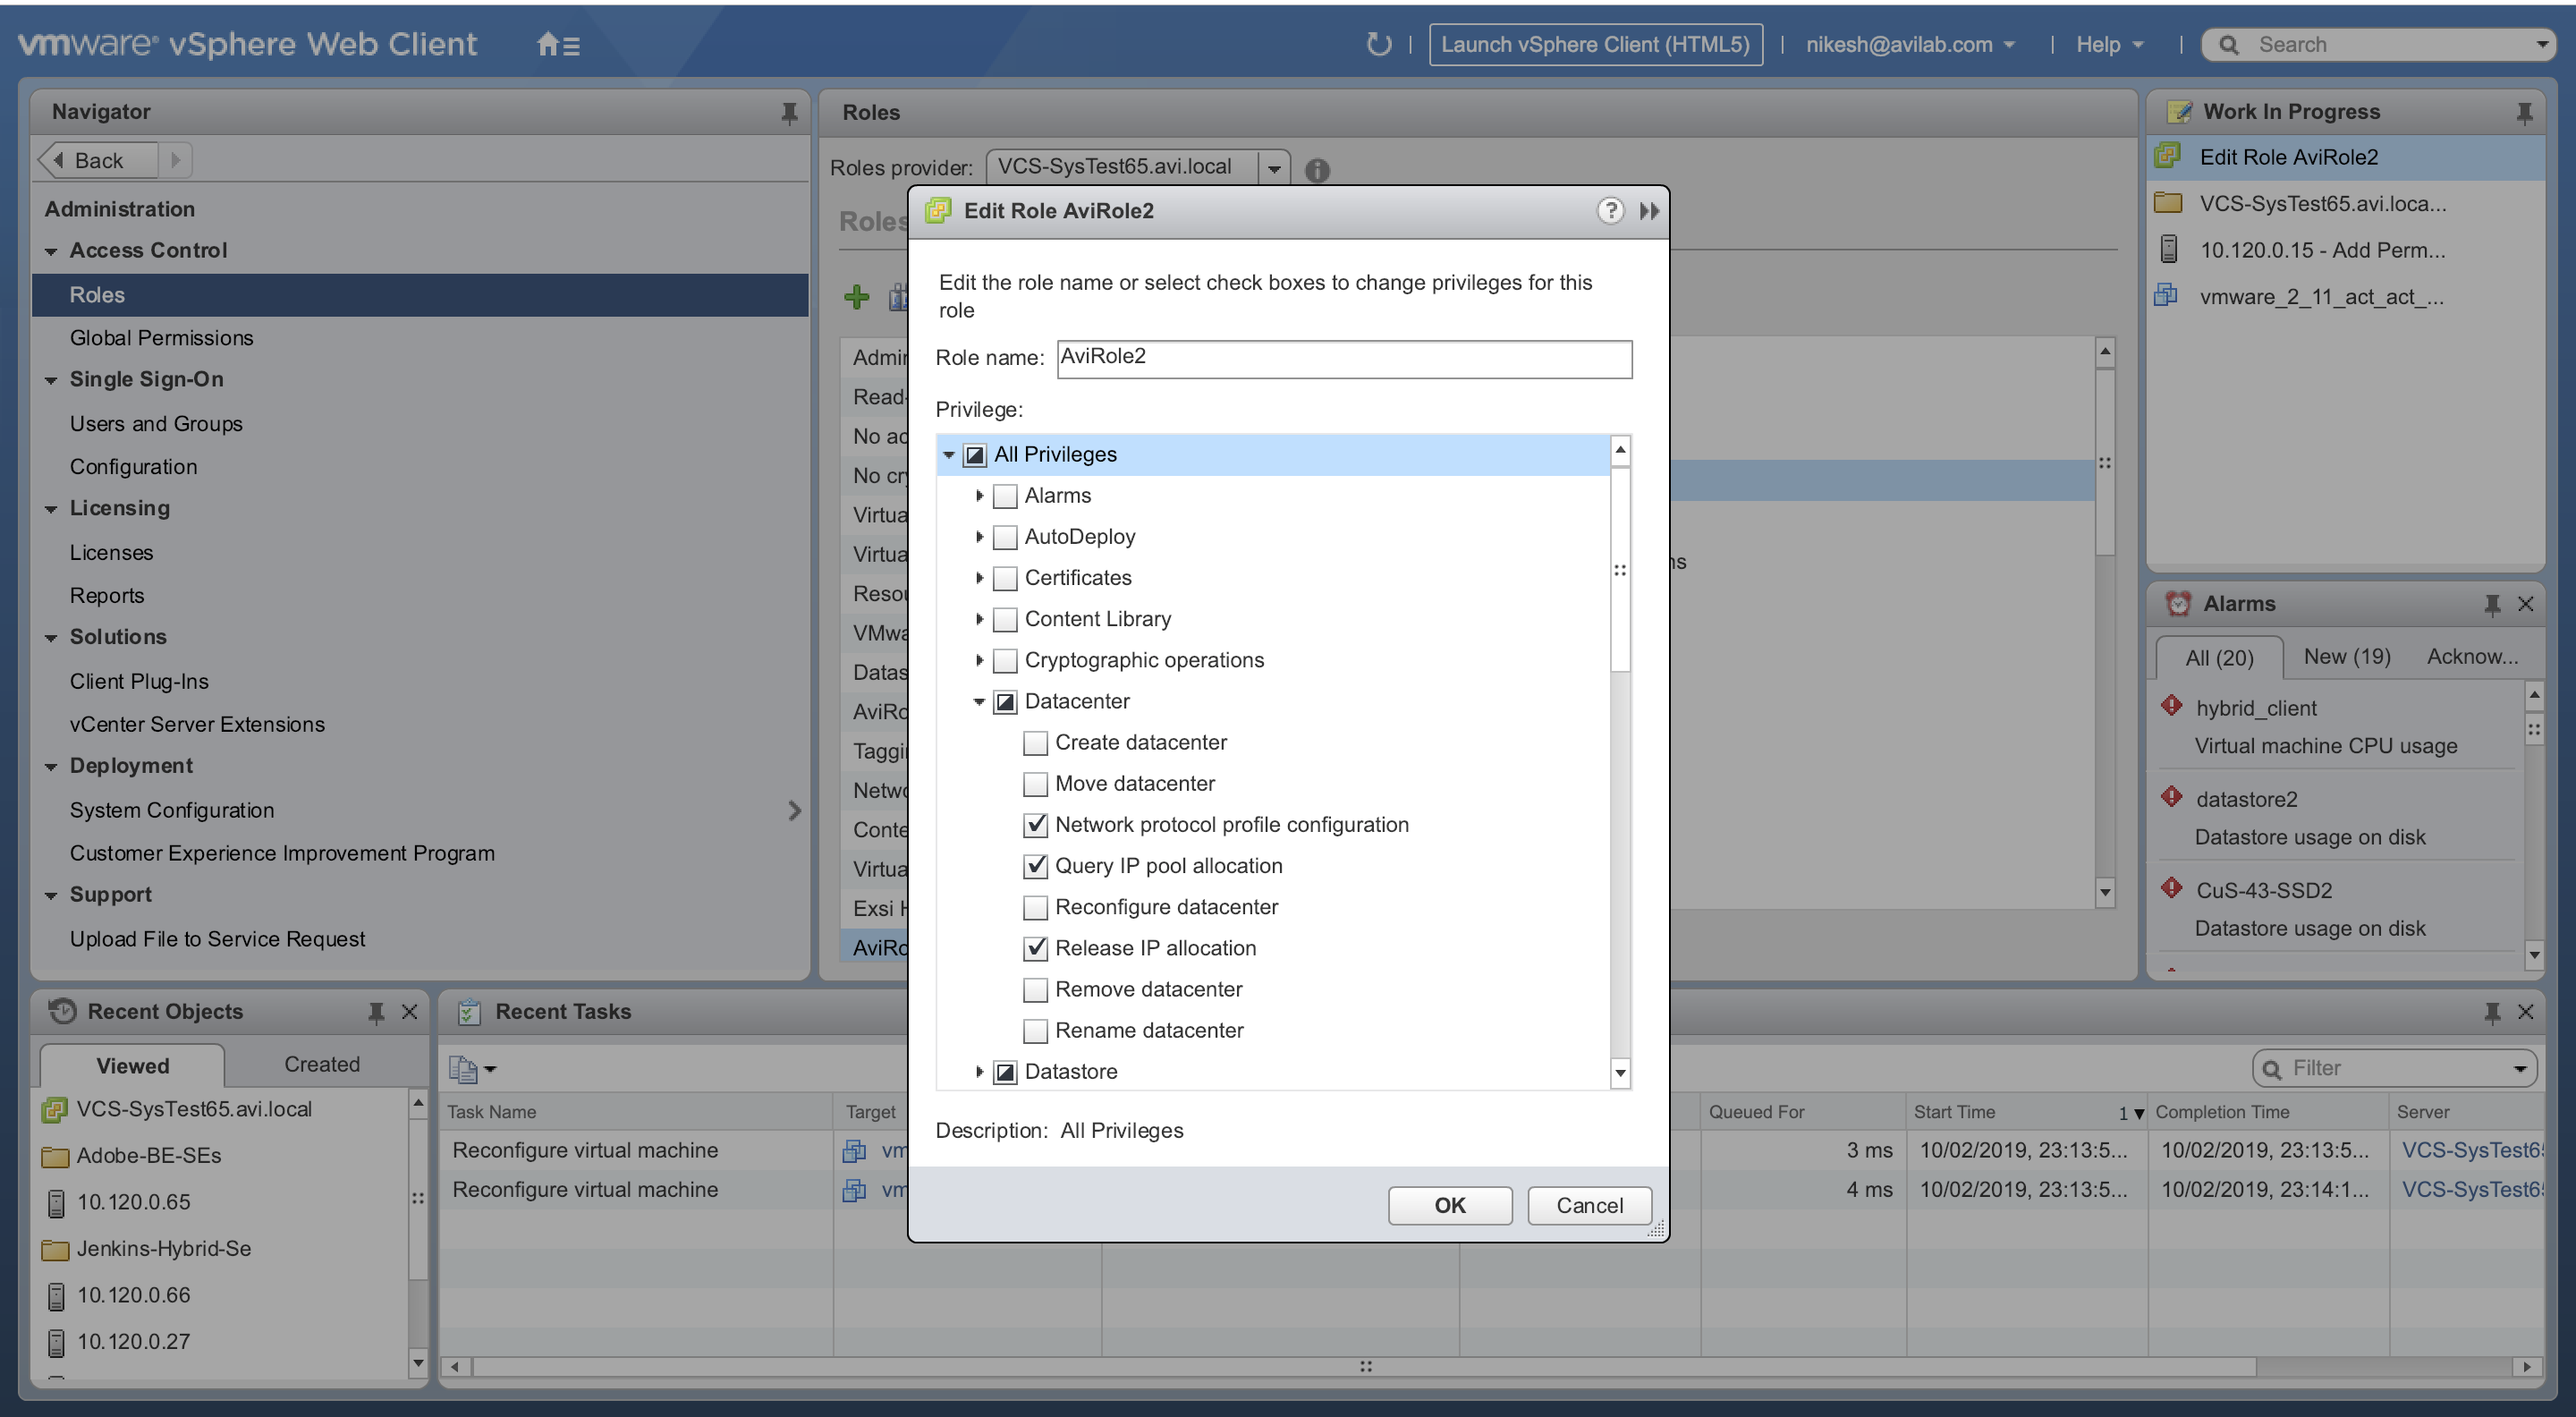
For For 6.7 and 7 versions
 </br>
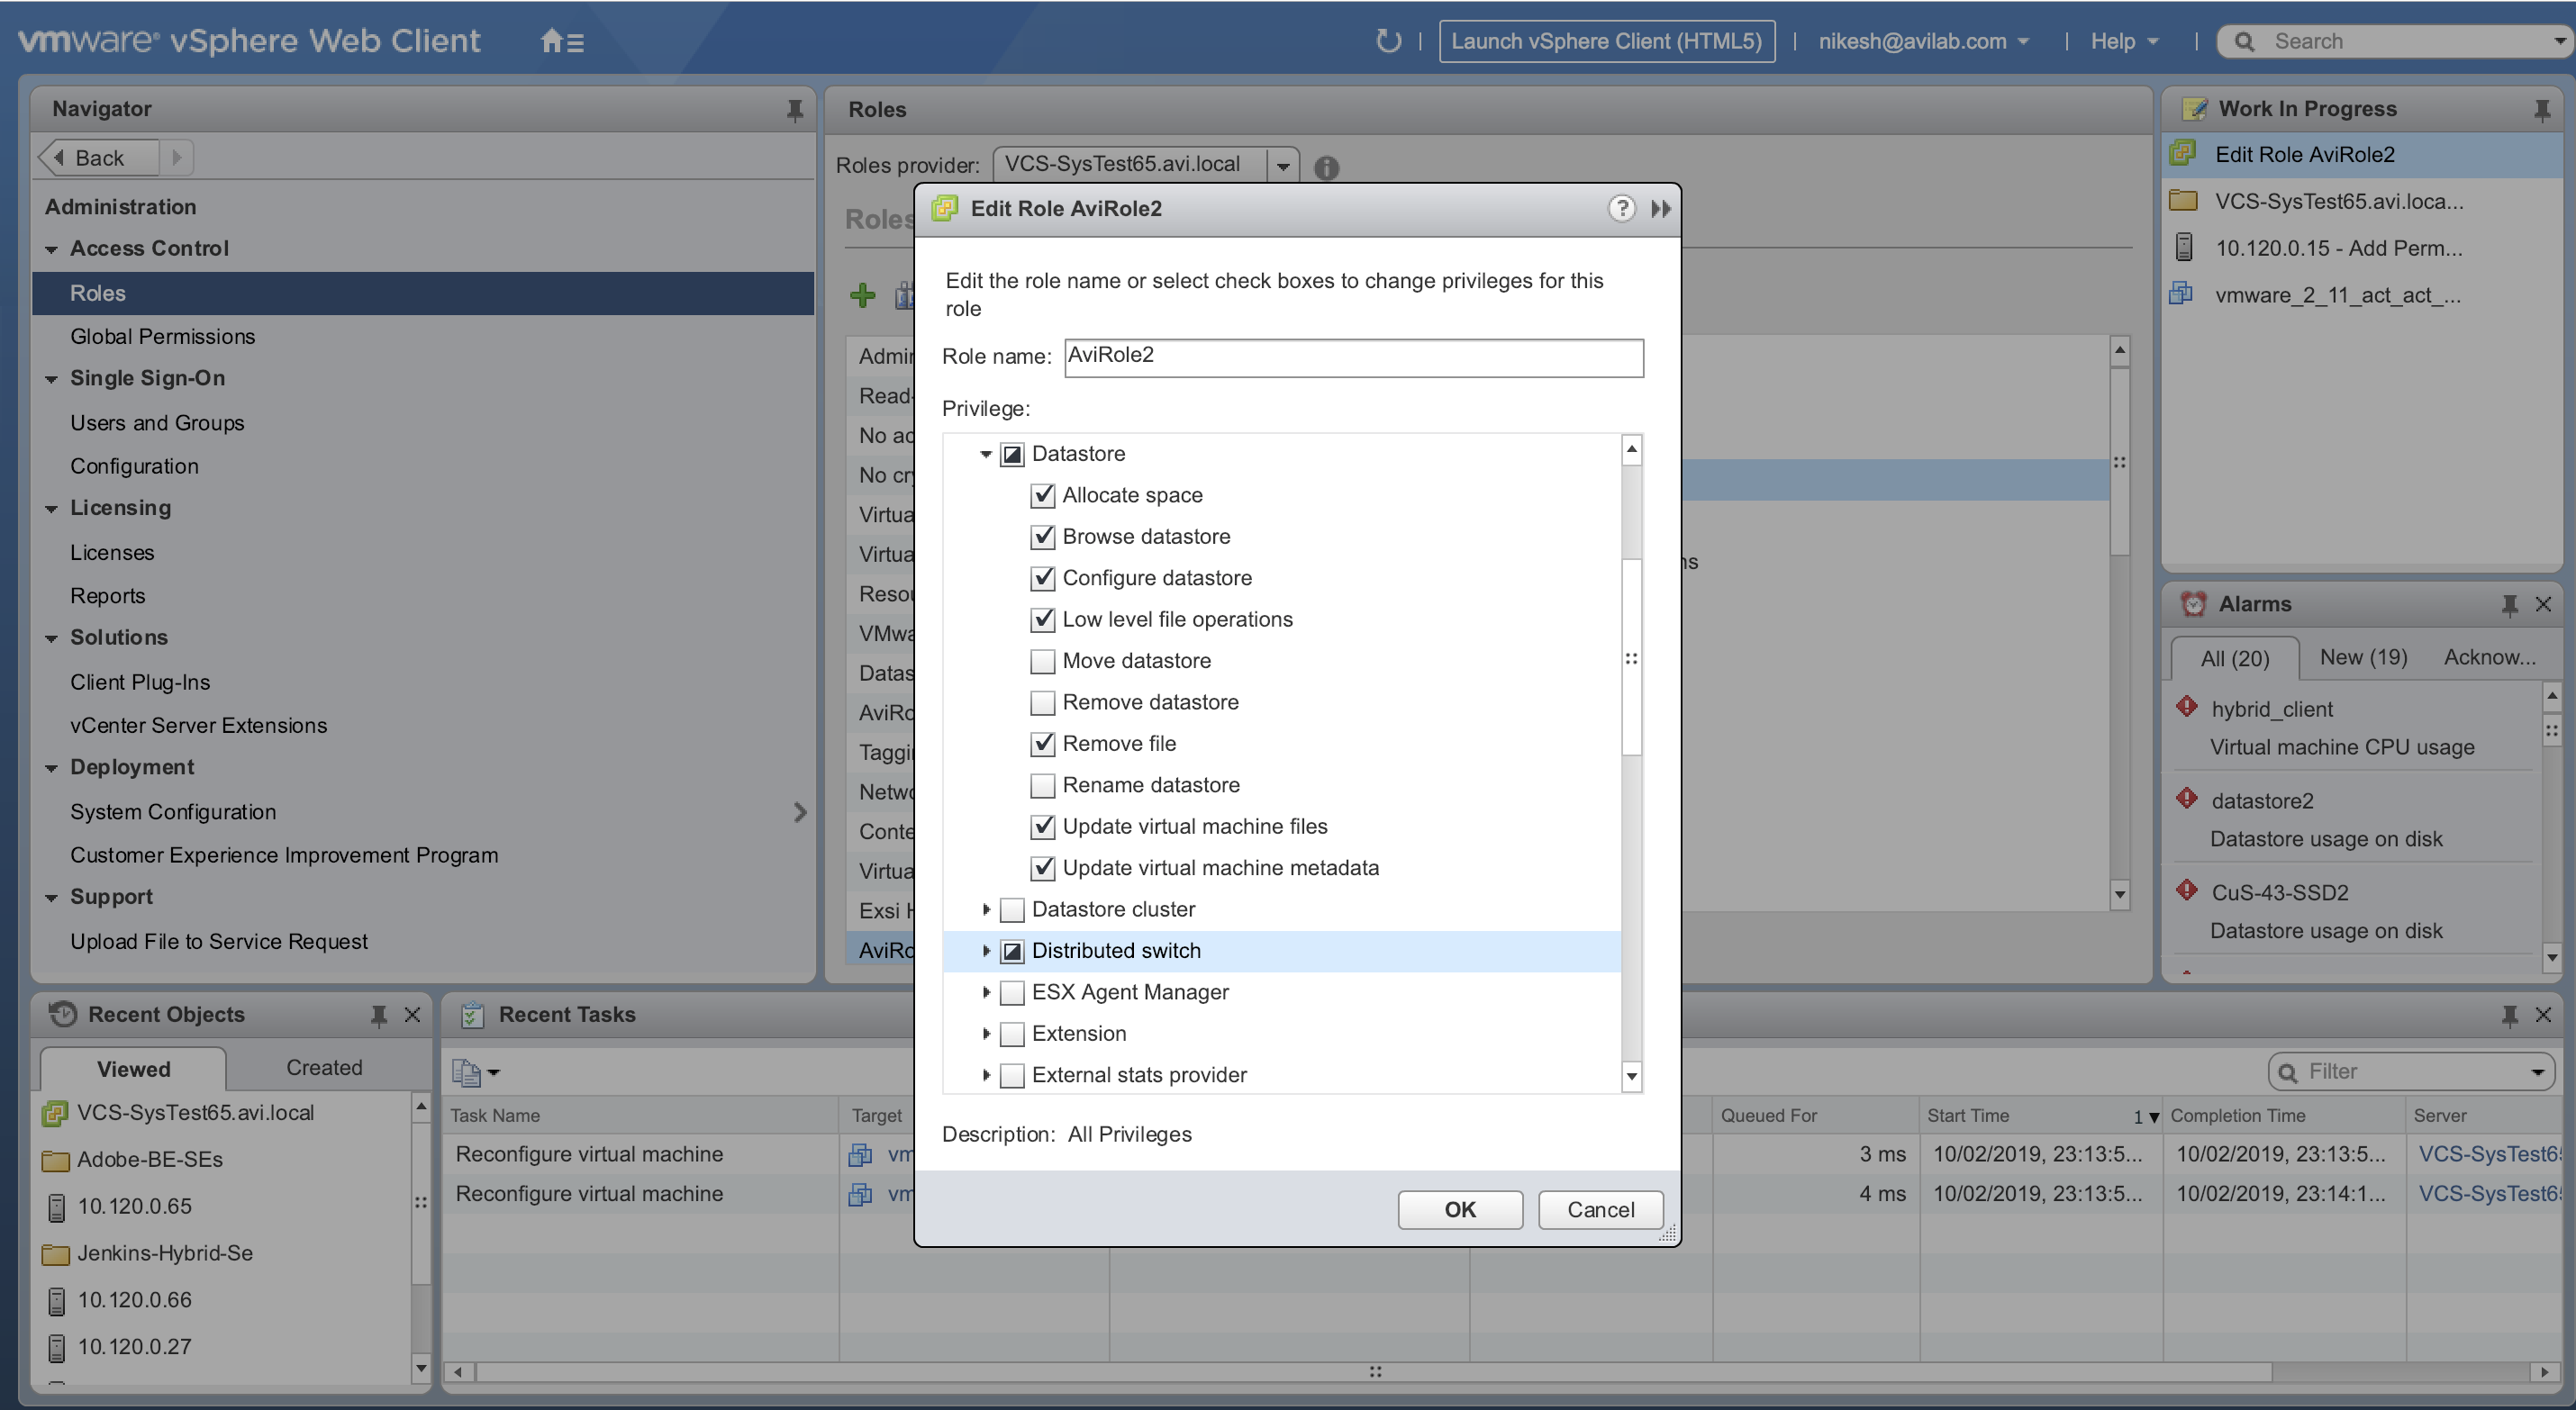
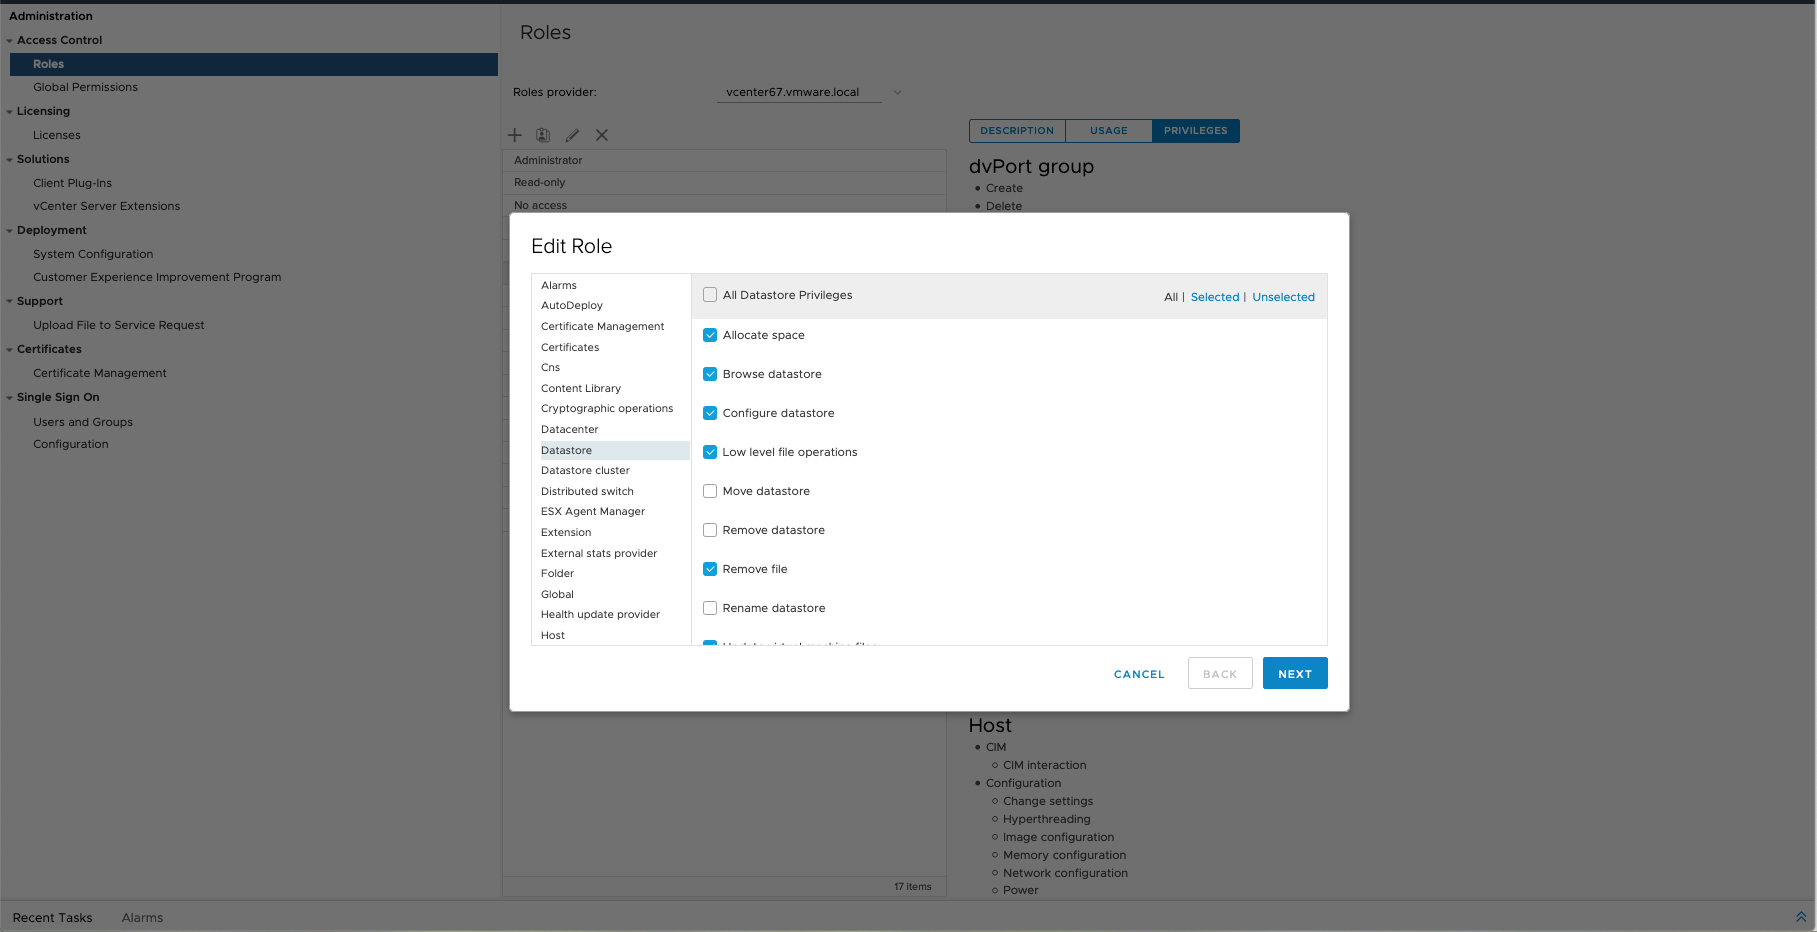
</br> - Navigate to Datastore by expanding the list and click on the following checkboxes:
- Allocate space
- Browse datastore
- Configure datastore
- Low level file operations
- Remove file
- Update virtual machine files
- Update virtual machine metadata
For 6 - 6.5 versions
For For 6.7 and 7 versions
 </br>
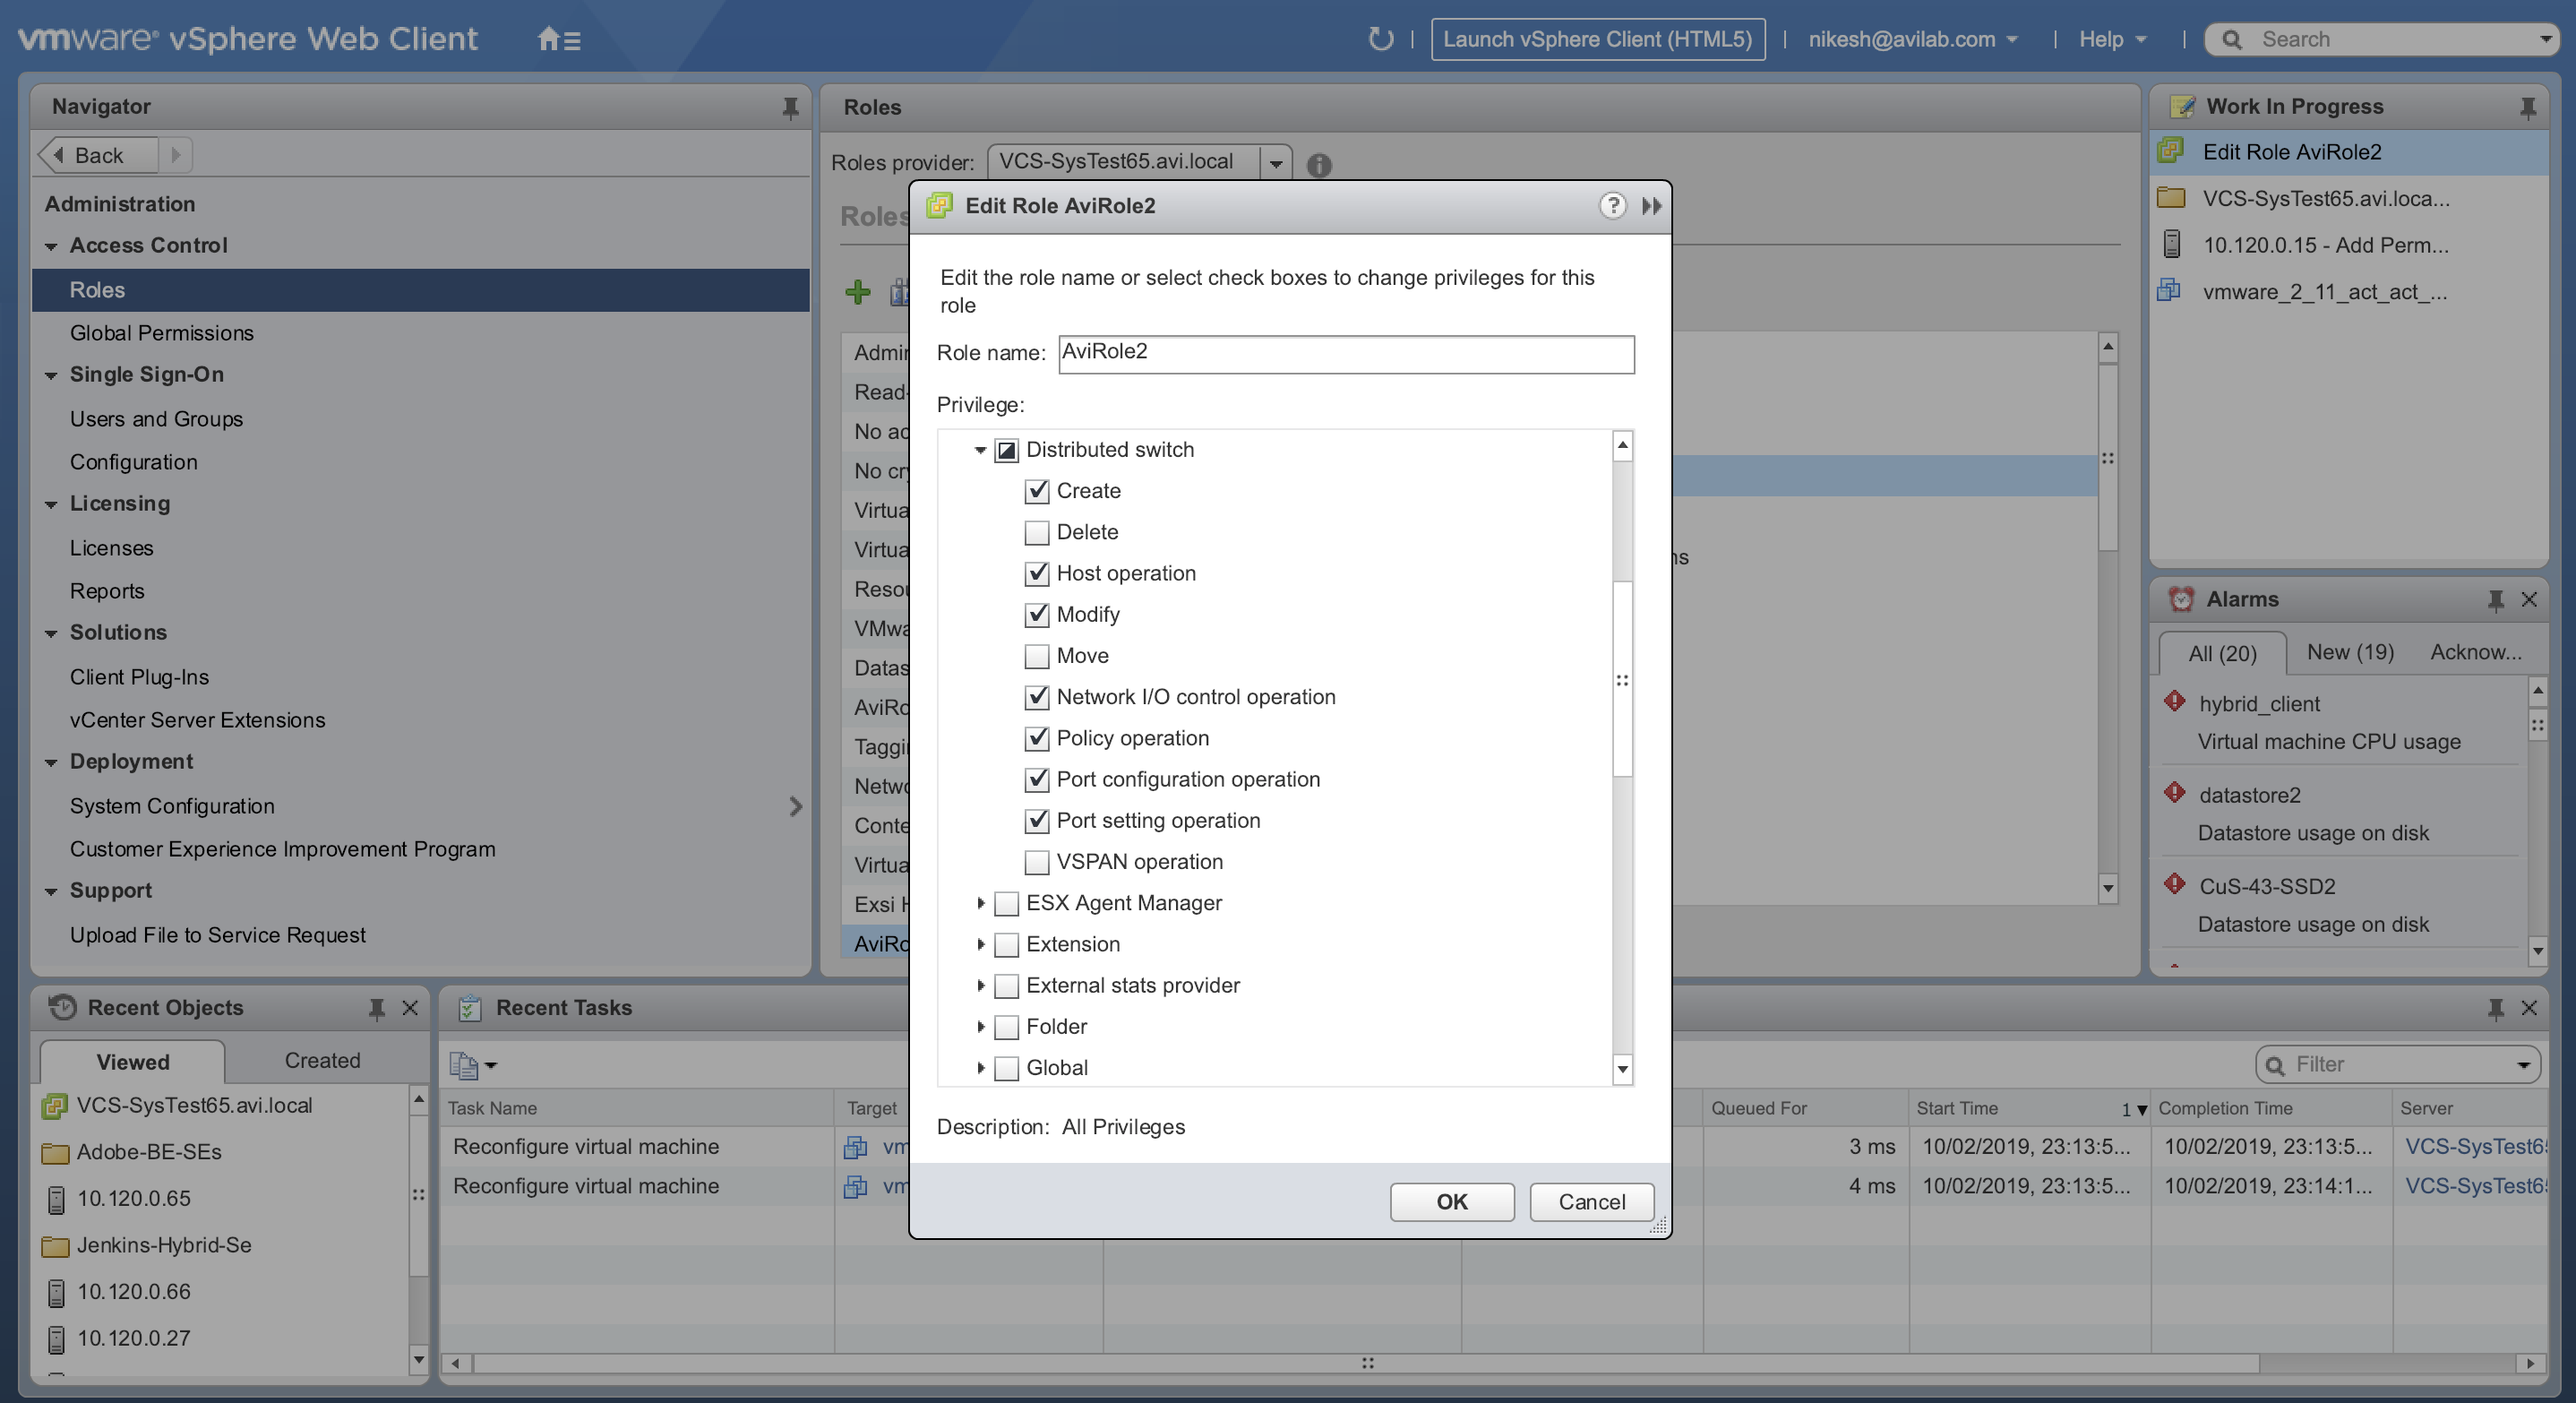
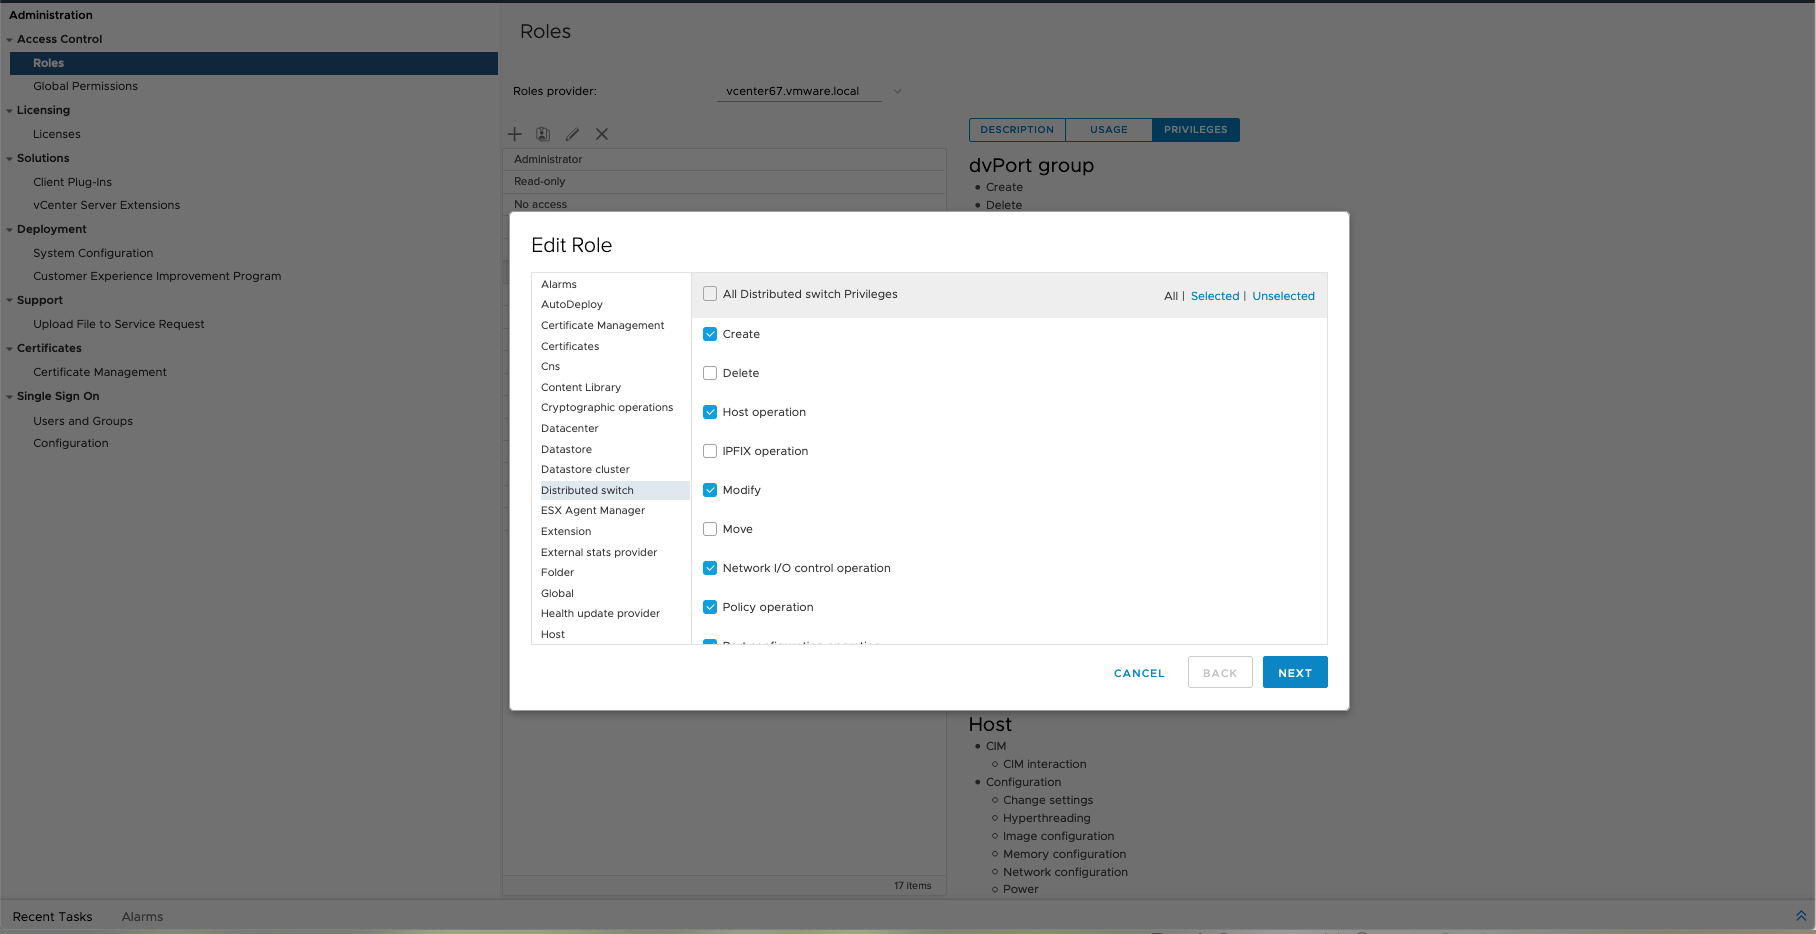
</br> - Navigate to Distributed switch by expanding the list and click on the checkbox for:
- Create
- Host operation
- Modify
- Network I/O control operation
- Policy operation
- Post configuration operation
- Port setting operation
For 6 - 6.5 versions
For For 6.7 and 7 versions
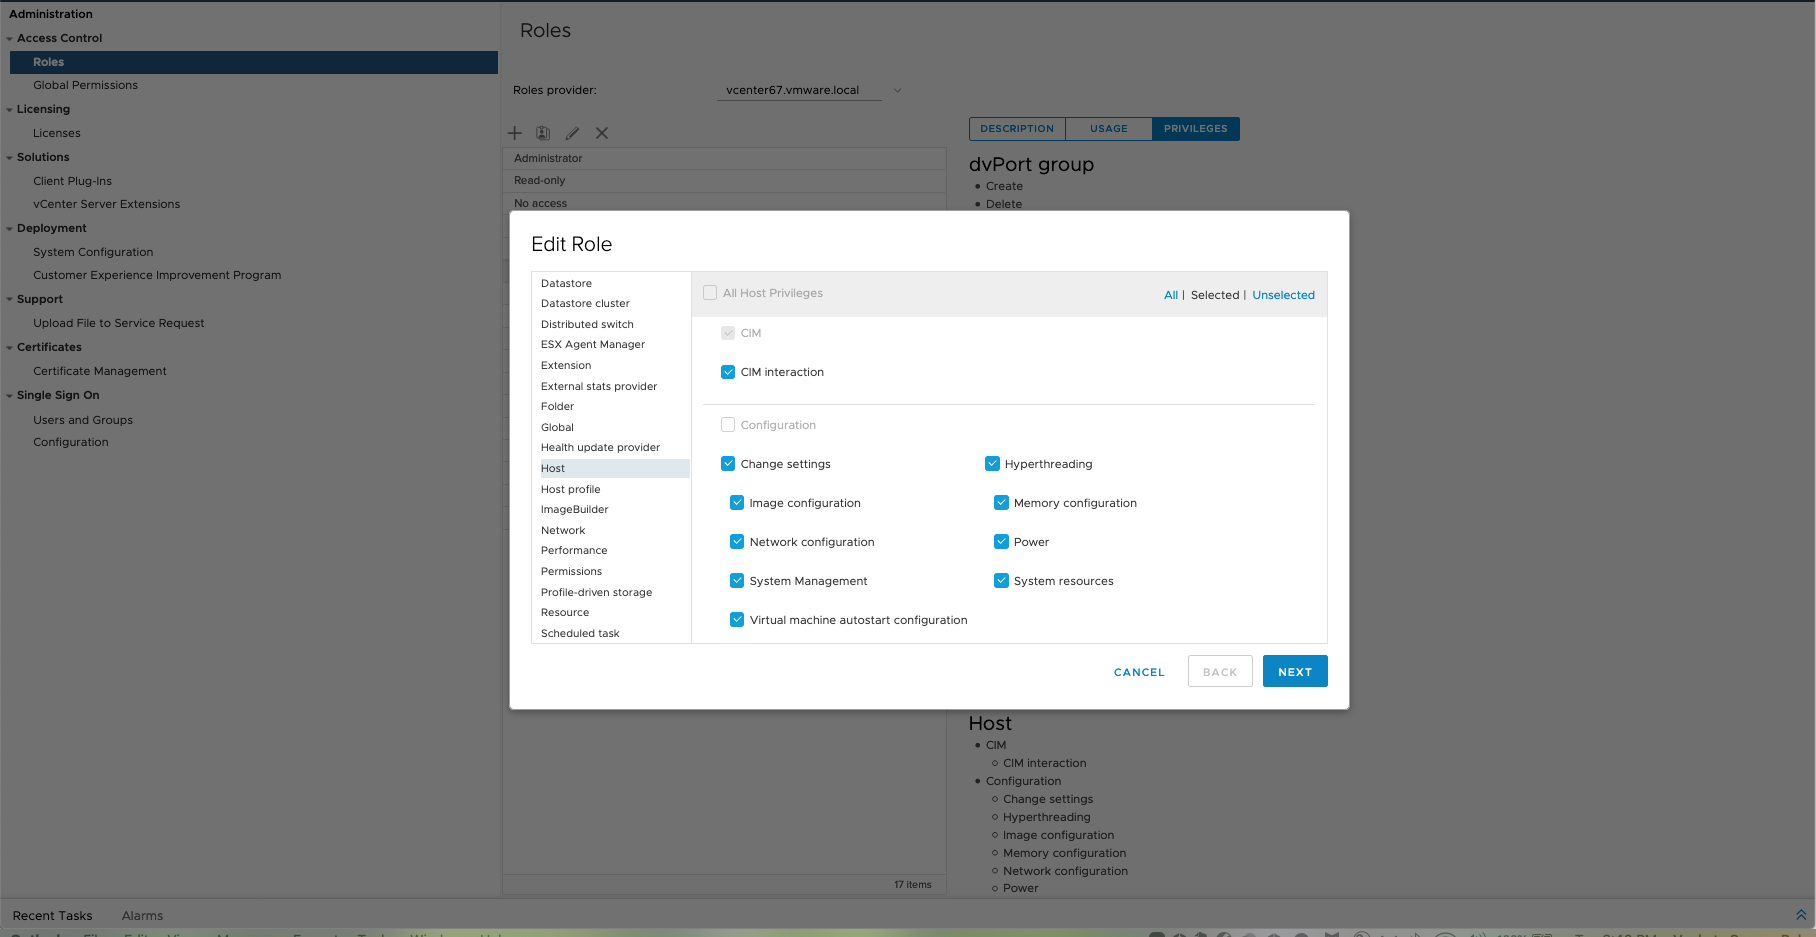
- Navigate to Host by expanding the list and click on the checkbox for:</p>
- CIM
- Local operations
- Inventory
- Under Configuration, select the following options:
- Change settings
- Hyperthreading
- Image configuration
- Memory configuration
- Network configuration
- Power
- System Management
- System resources
- Virtual machine autostart configuration
For 6 - 6.5 versions
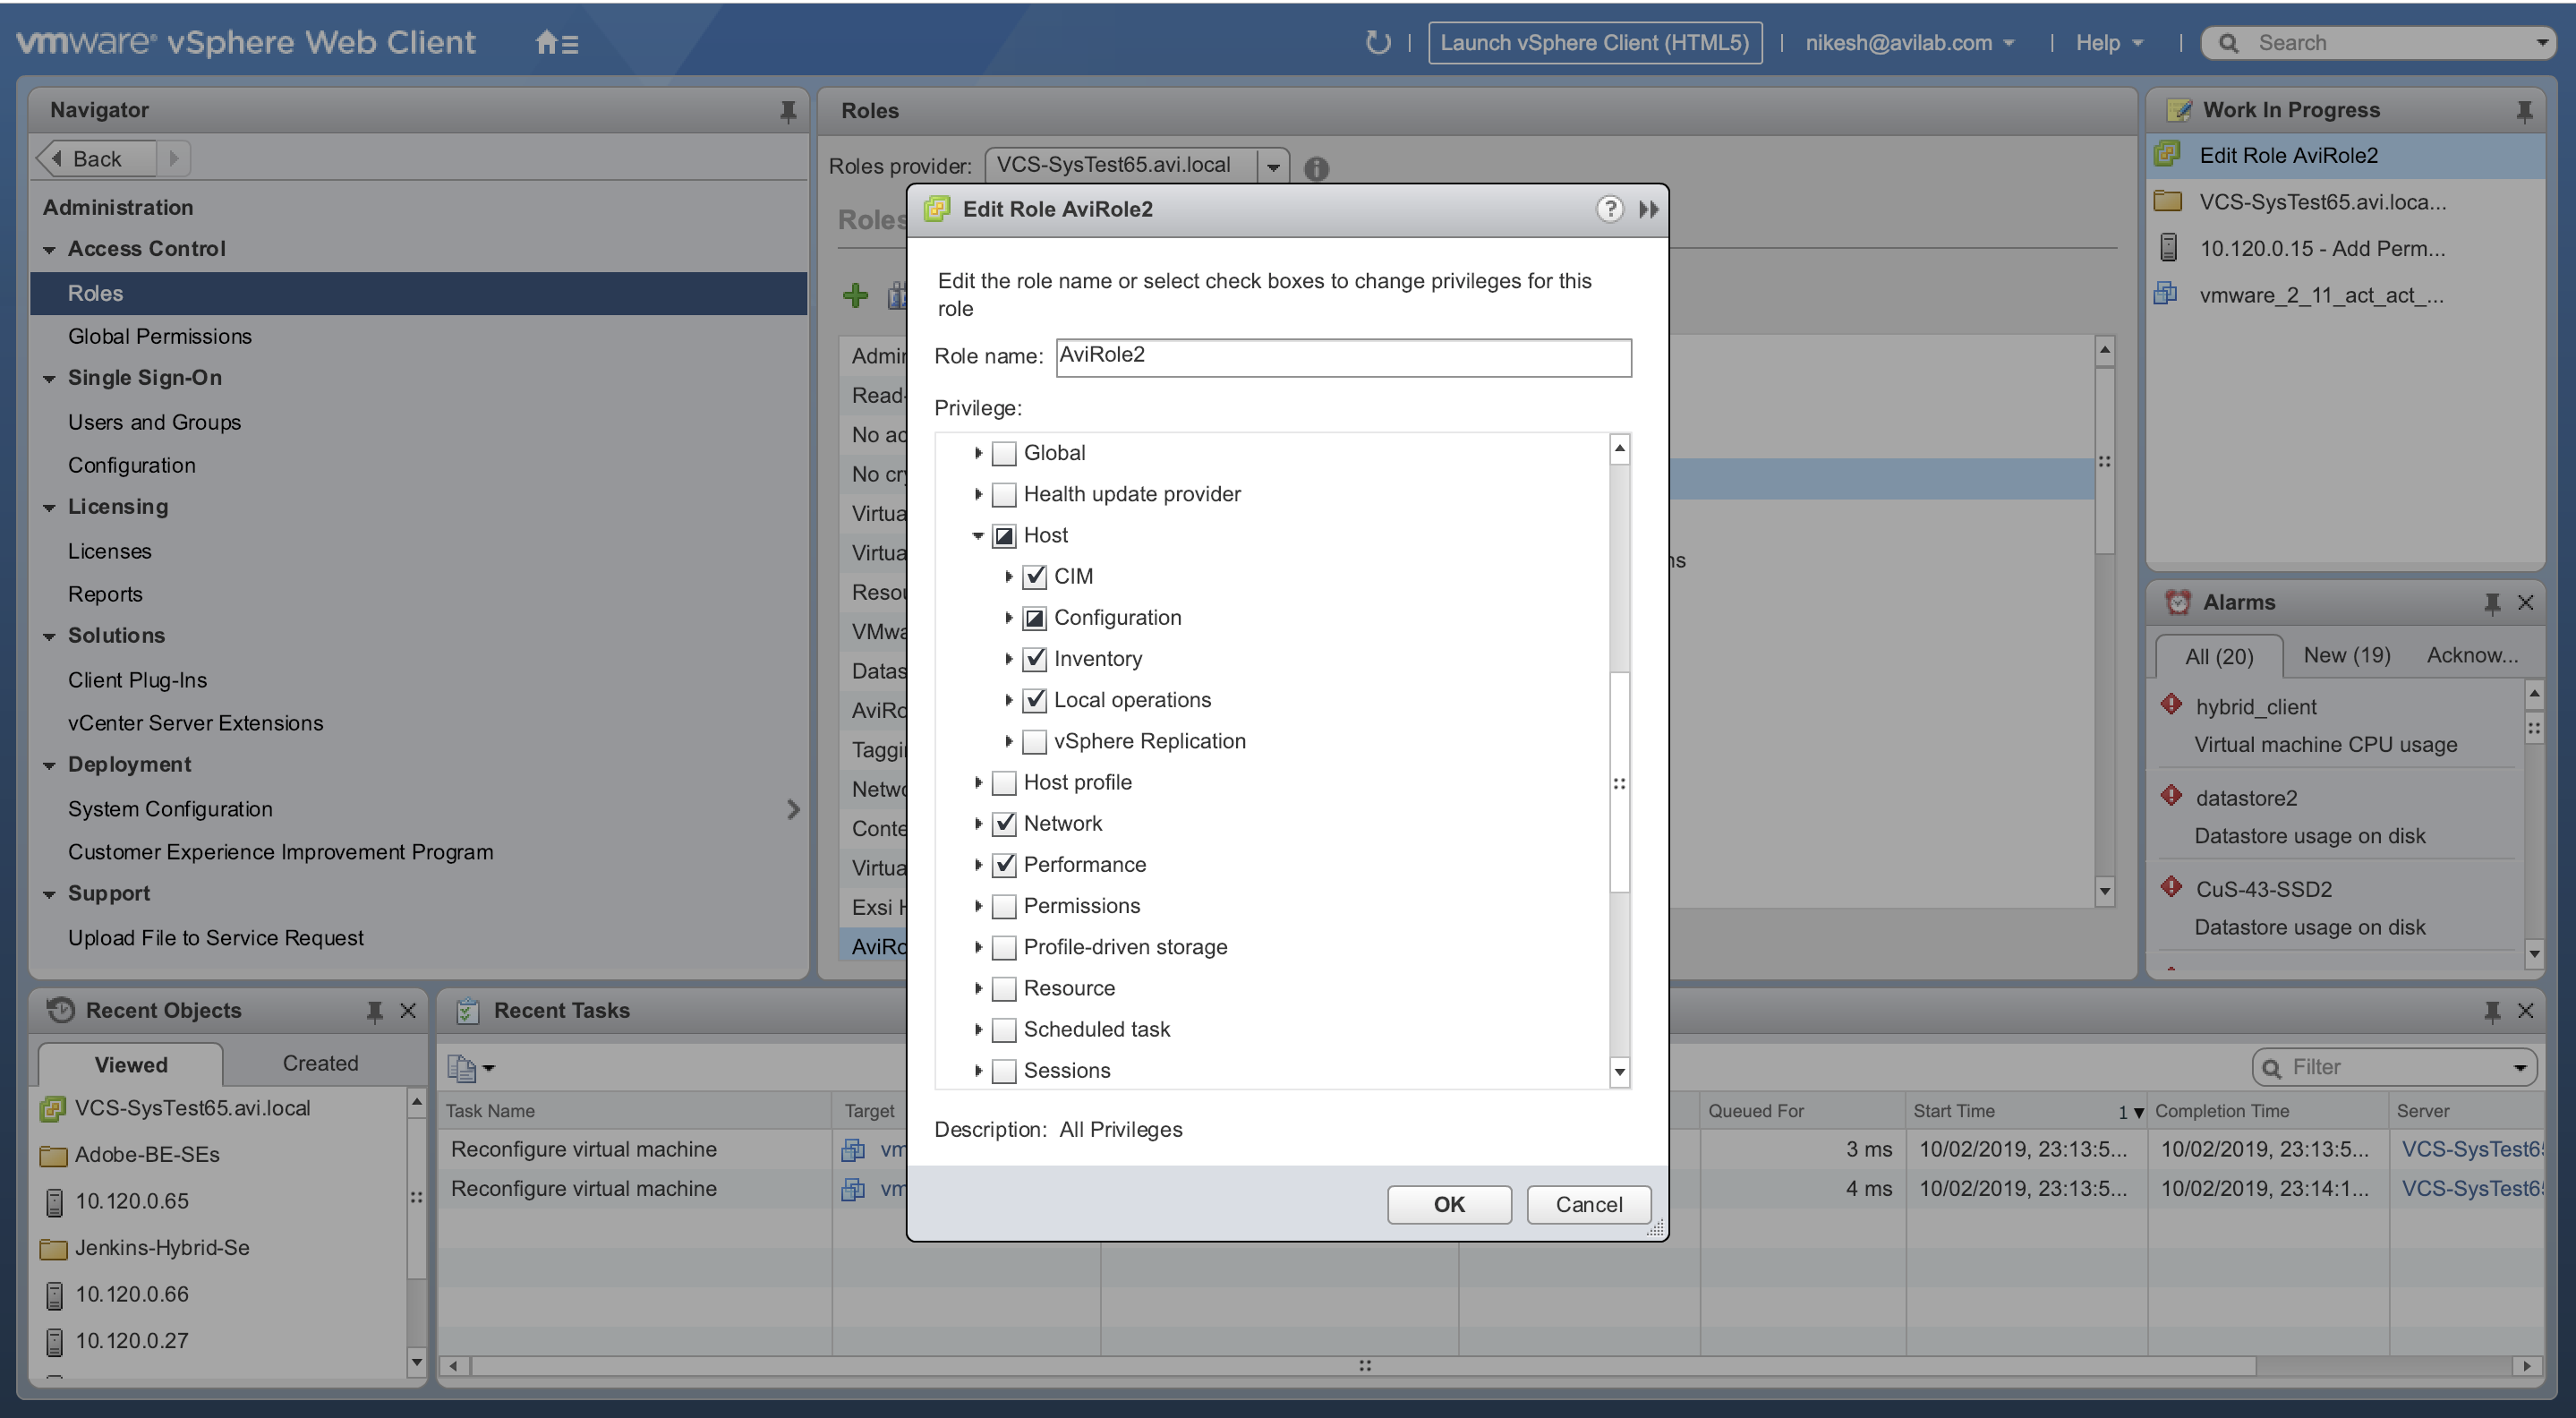
For For 6.7 and 7 versions
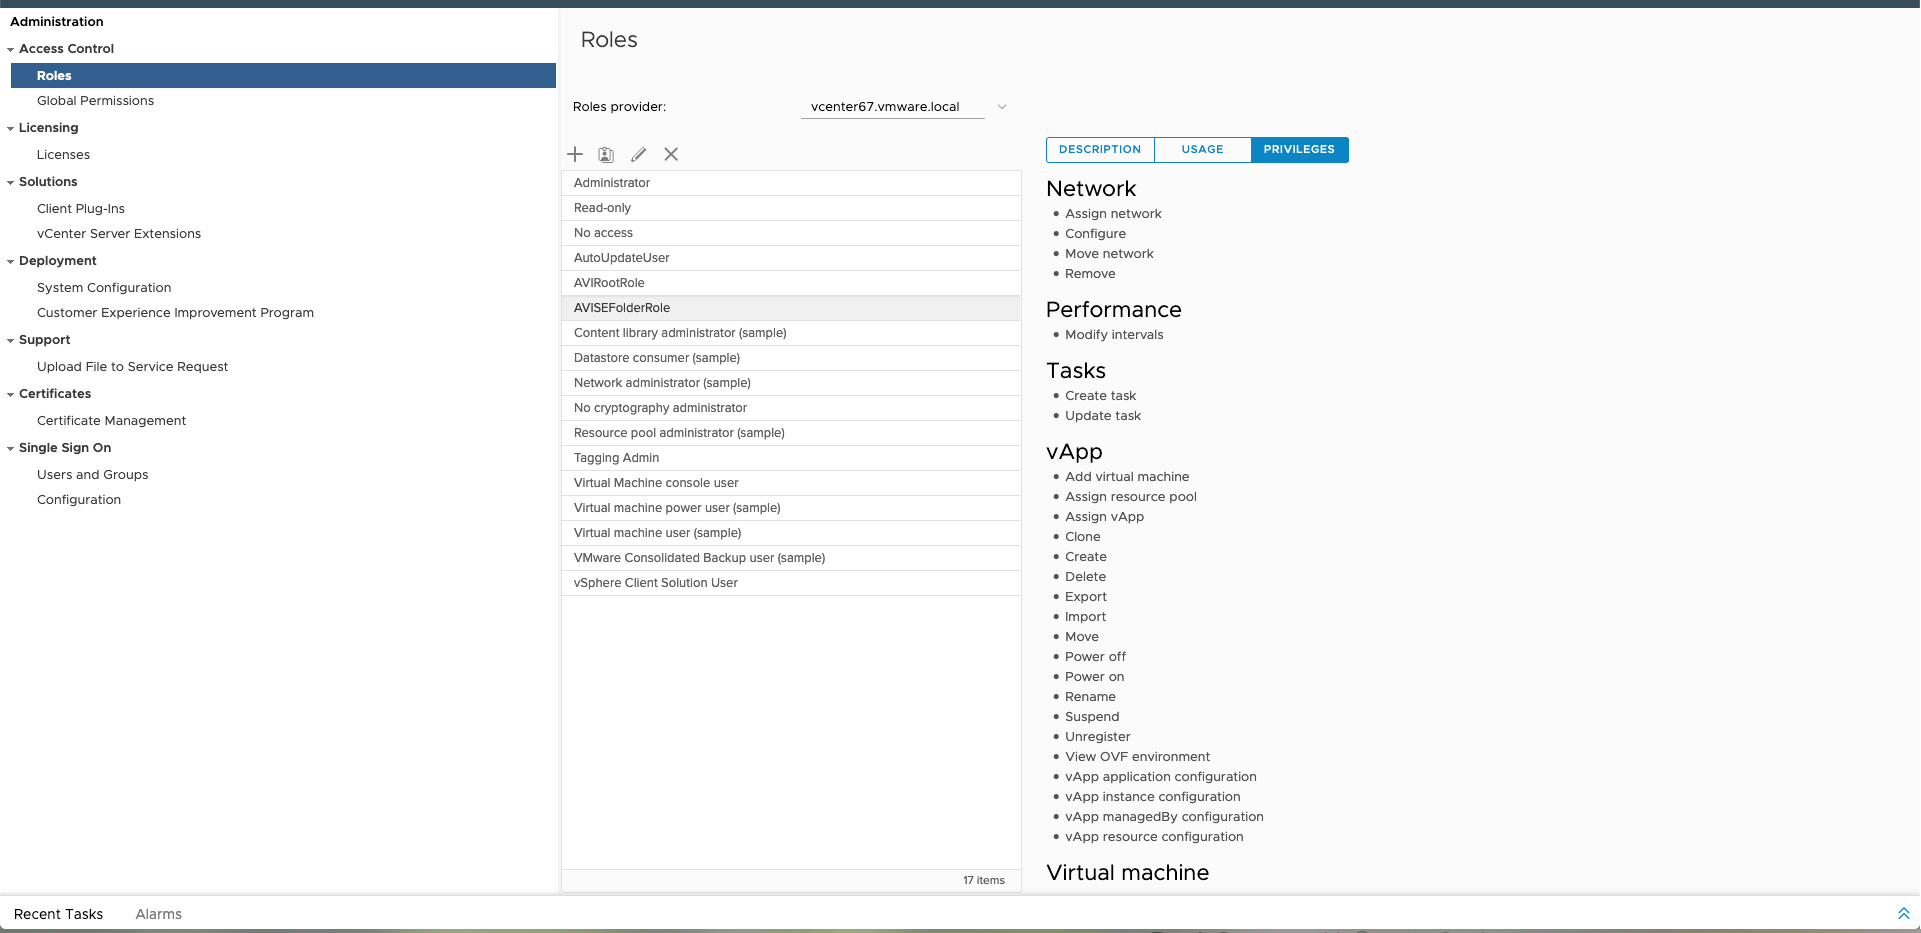
- Select the checkbox. Enable all parameters under the following categories:
- Network
- Performance
- Tasks
- Virtual machine
- dvPort group
- vApp
For 6 - 6.5 versions

For For 6.7 and 7 versions
Assign AviRole2 to a folder that is defined for the Service Engine creation as shown in the example below:
For 6 - 6.5 versions
For 6.7 and 7 versions
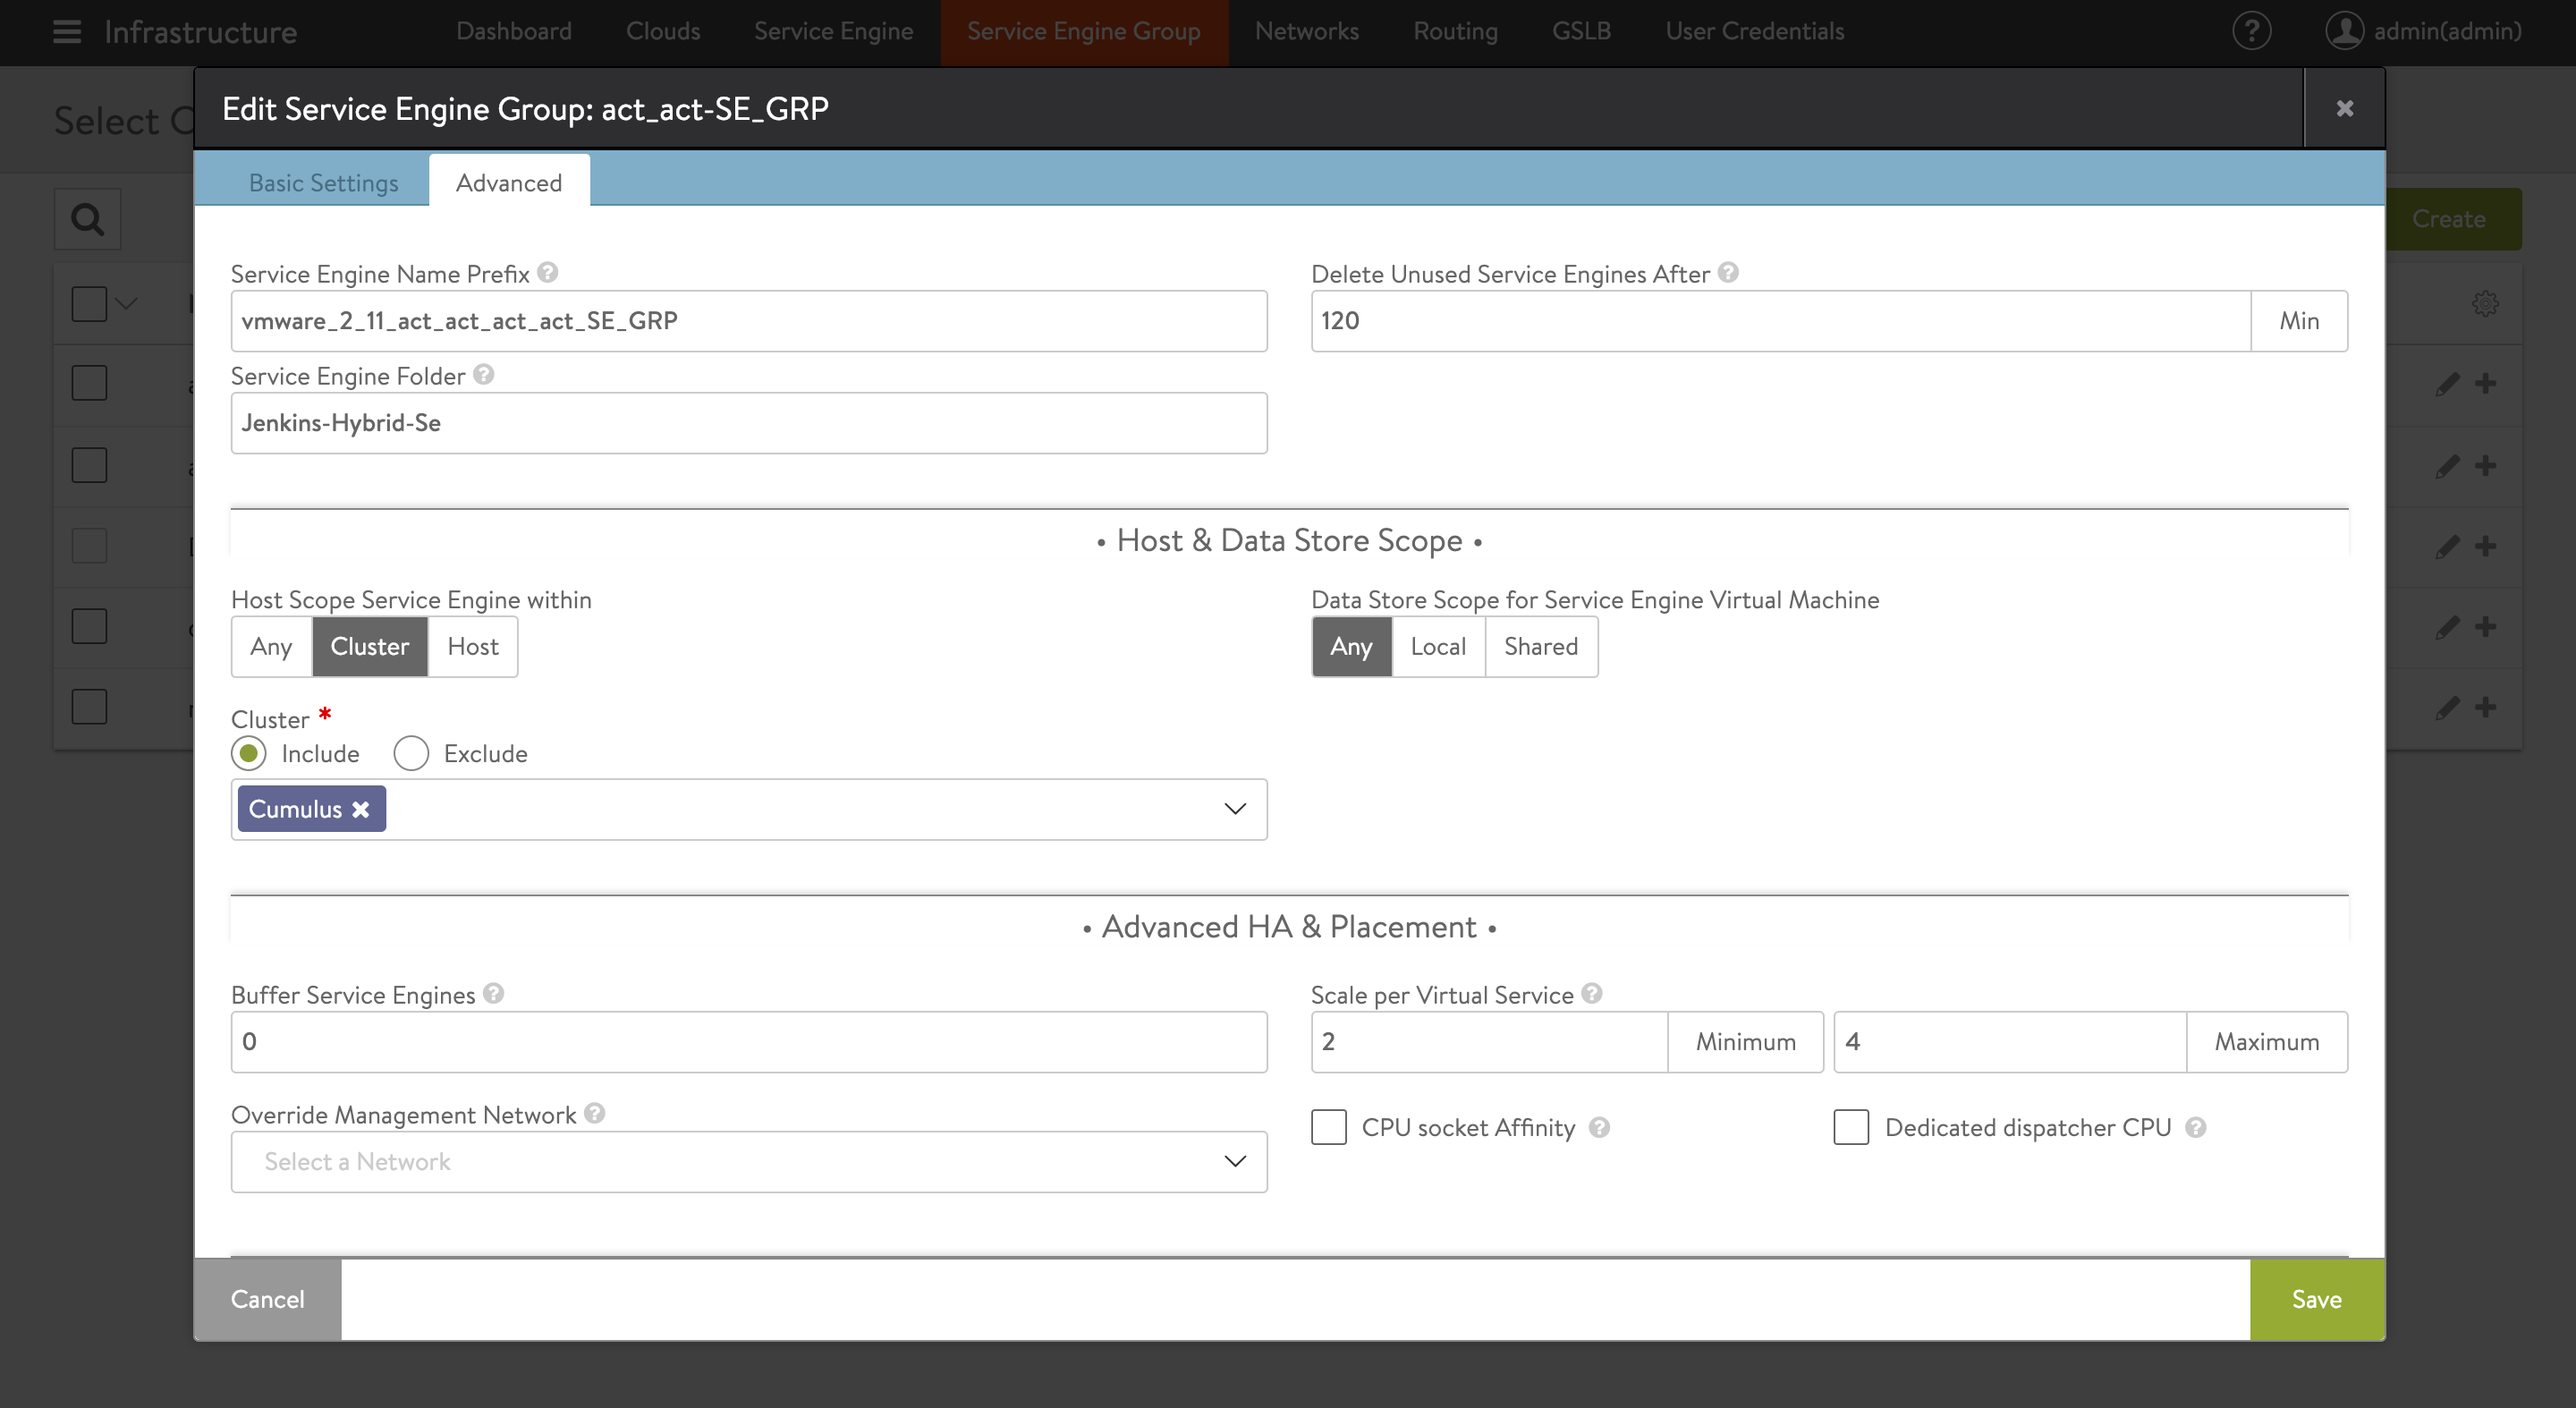
In Avi UI, navigate to Infrastructure > Service Engine Group and enter the folder name from the previous step under the Service Engine Folder field.
Content Library Support for vCenter Cloud
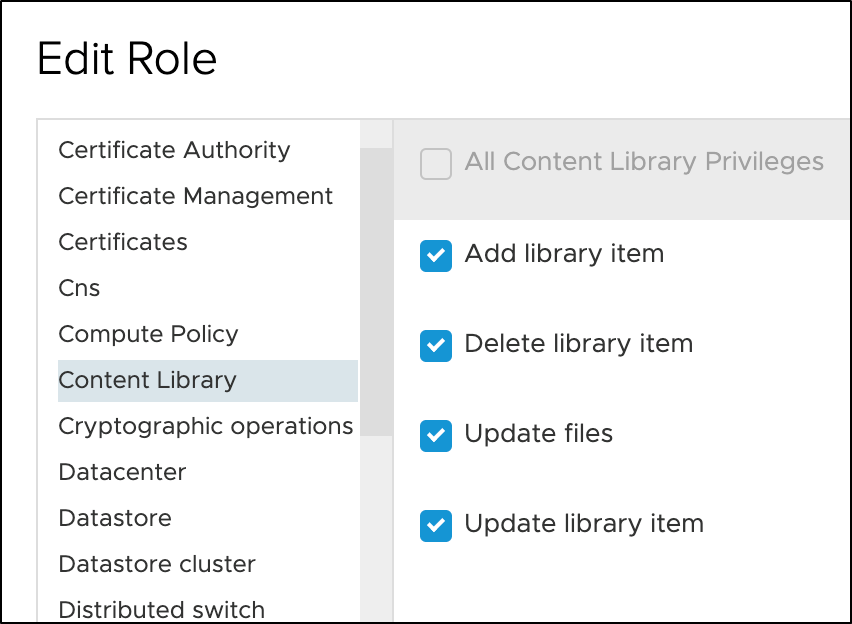
The following is the set of additional permissions to use the content library:
- Content Library
- Add library items
- Delete library items
- Update files
- Update library items
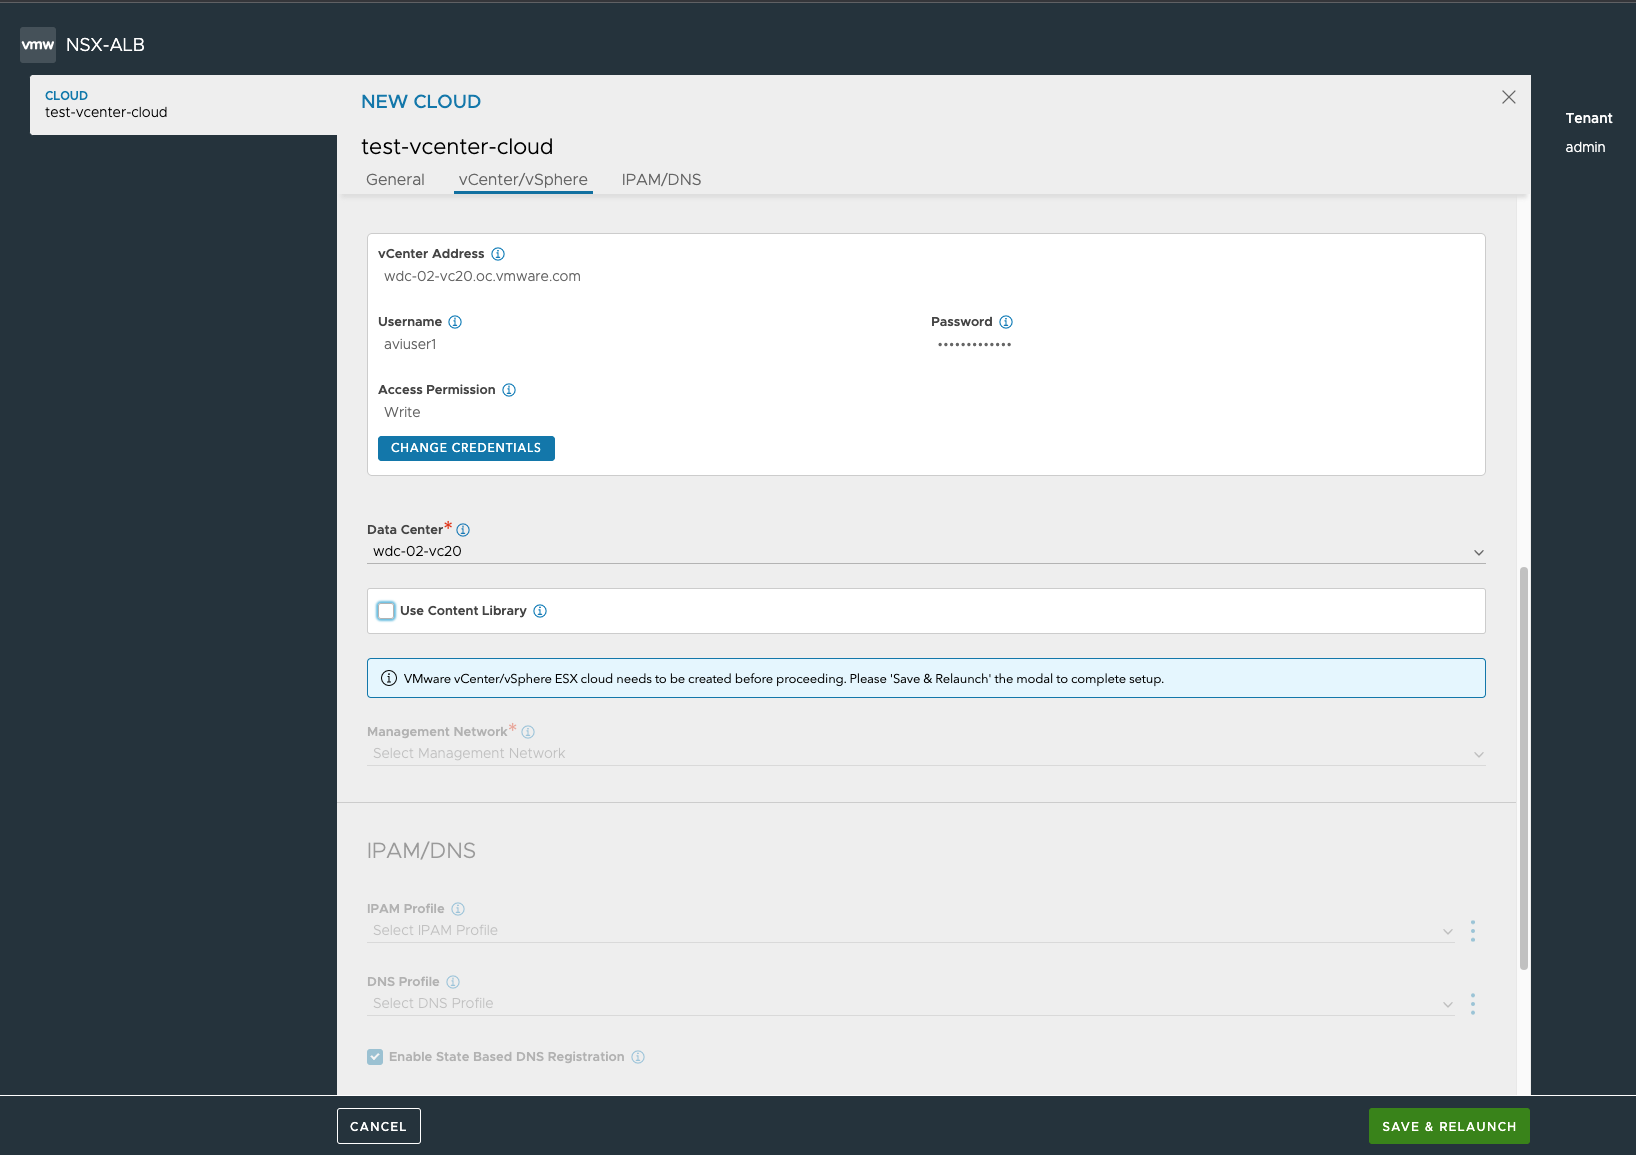
Creating vCenter cloud with Content Library
Content Library is enabled by default. If the credentials are supplied then the list of content libraries will be displayed in the UI drop-down as shown below.

If the content library option is not chosen when creating the cloud, the SE images will be uploaded to the host and the Controller should have the reachability to the hosts.
Post upgrade, existing clouds with image upload to host the content library will be in the disabled state. Customers can anytime choose to enable the content library and the subsequent SE creations will happen with the content library.
Note: If a cloud is created with content library enabled then it cannot be edited to change to host upload.
Displaying vCenter Information
The following examples show the Avi Controller CLI commands used for displaying vCenter outputs:
[admin:jenkins-hybrid-controller]: > show vinfra vcenter 10.1.1.1-SantaClara datastores
+---------------+------------------------------------------------+
| Field         | Value                                          |
+---------------+------------------------------------------------+
| datacenter    | datacenter-2-cloud-81cxxxxx-5bxx-46xx-89xx-5fexxxxx |
+---------------+------------------------------------------------+
[admin:jenkins-hybrid-controller]: > show vinfra vcenter 10.1.1.1-SantaClara redis
+-----------------------+----------------------------+----------+
| Name                  | Inventory State            | Progress |
+-----------------------+----------------------------+----------+
| 10.10.2.11-SantaClara | VCENTER_DISCOVERY_COMPLETE | 100      |
| 10.10.2.5-SantaClara  | VCENTER_DISCOVERY_COMPLETE | 100      |
+-----------------------+----------------------------+----------+
[admin:jenkins-hybrid-controller]: > show vinfra vcenter 10.1.1.1-SantaClara hostresources
+---------------------+-------------------+------------+--------+---------+------------+
| Name                | Managed Object Id | Host Scale | Num Se | Se Fail | Se Success |
+---------------------+-------------------+------------+--------+---------+------------+
| 10.160.5.23         | host-603          | 2558       | -      | -       | -          |
| 10.160.5.24         | host-588          | 1217       | -      | -       | -          |
| cum-esx-9.avi.local | host-5526         | 431        | -      | -       | -          |
| cum-esx-8.avi.local | host-5513         | 543        | -      | -       | -          |
Document Revision History
| Date | Change Summary |
|---|---|
| July 15, 2022 | Added Content Library Support for vCenter Cloud section for 22.1.1 |