Using the Avi Customer Portal
Overview
The Avi Customer Portal gives secure access to your Avi support cases, software images, and licenses. It is the preferred means by which you can initiate, modify, and track your support cases. This article explains how to use the Portal. You can register as an user by following the instructions at Avi Networks Customer Portal.
Top Banner Navigation
To login into the portal you will require approved credentials. You can obtain the credentials by either of the following:
- Placing a request with your Avi Networks point of contact.
- Registering at Avi Networks Customer Portal.
Log into the portal by navigating to the link at Avi Networks Customer Portal.

- Dashboard – Default page providing at-a-glance information about support cases and licenses.
- Software – Installation images of current and recent Avi Vantage releases.
- License – YAML files to enable the installed product.
- SaaS – Deployment and user details about your SaaS deployment.
- Cases – Repository of existing cases and access to the portal to create new cases.
- Resources – Links to Avi Resource Center, Webinars, Knowledge Base, and Community pages.
- Users – (For admin users) User details associated with the account.
- Controllers – (For admin users) Controller details associated with the account.
Dashboard
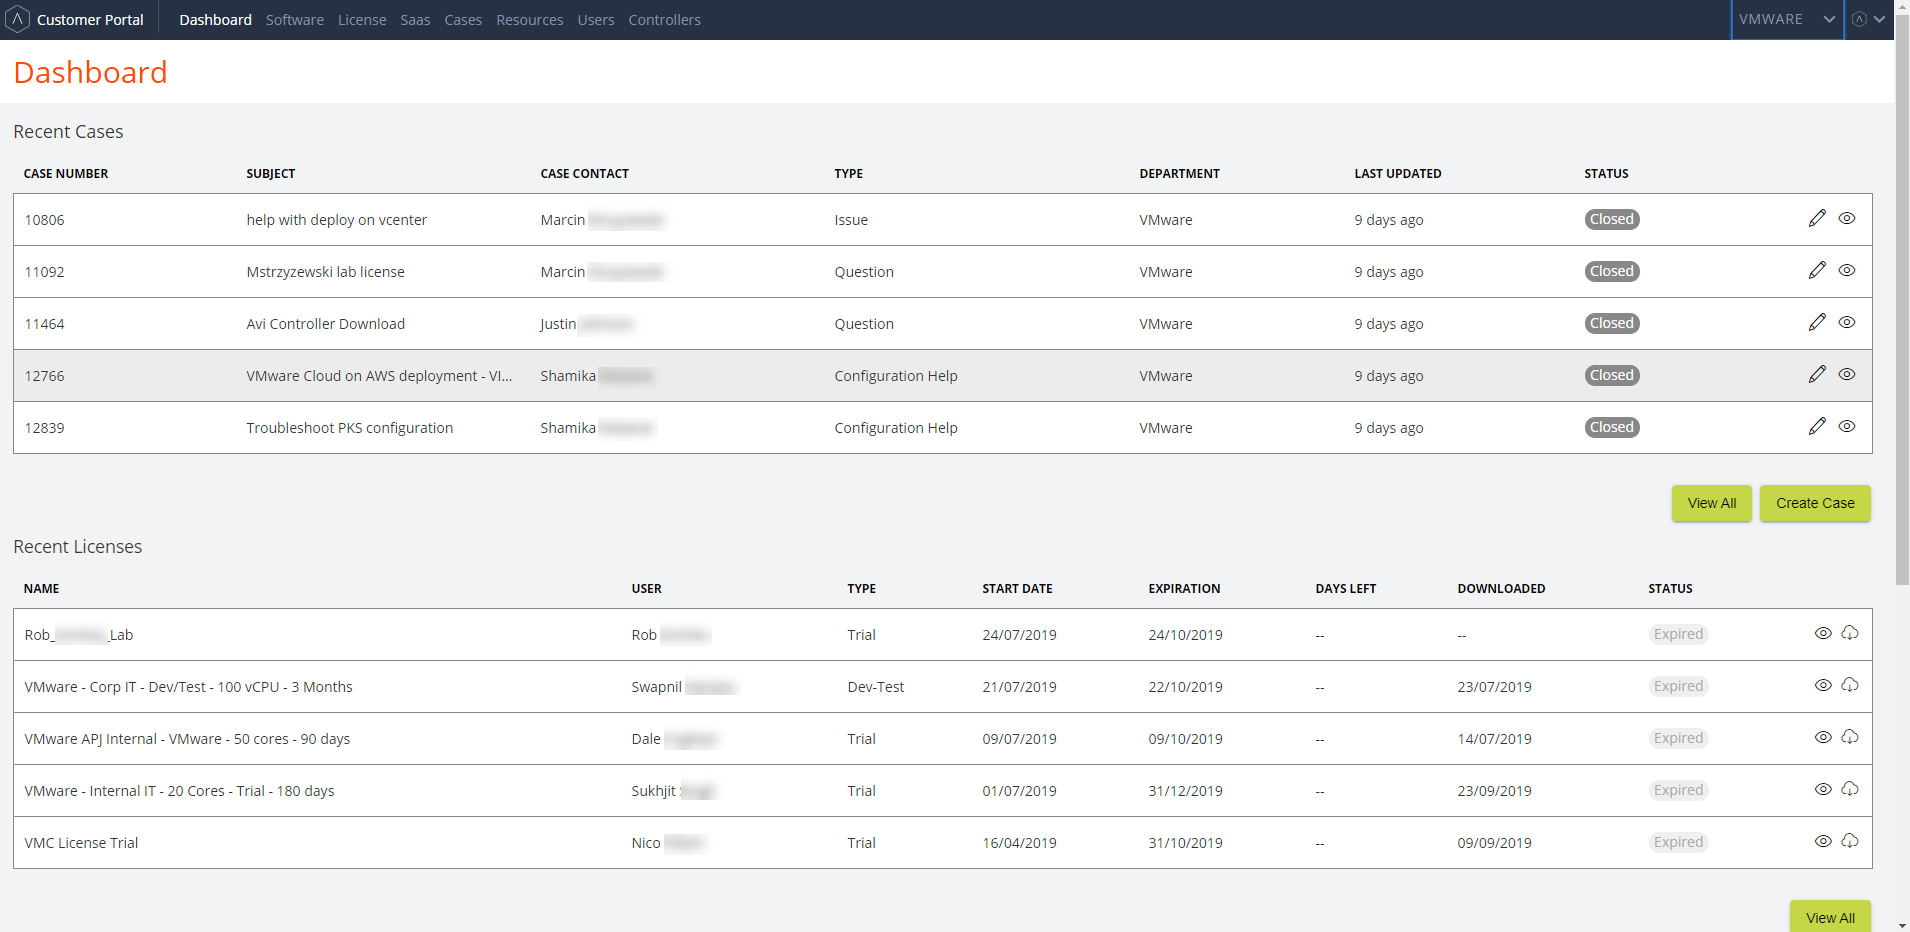
The Dashboard tab gives you a glance of the support cases and licenses associated with the account.
-
Recent Cases – This section lists the most recent cases submitted by the logged-in user, in the order of most-recent first. The list is empty if the user is yet to submit a case. This section displays the auto-assigned case number, user-specified subject, case contact, case type (Issue, Bug, Feature request, or Question), related department, the last updated details, and the status of the case. You can click on icons available for each case to either edit the case or view complete details. For complete information on the support case workflow, refer to Avi Support Case Workflow.
- Create Case – To the bottom-right corner of this section is the Create Case icon. Click on this to create a support case. This displays a template for you to enter details to create your support case.
-
Recent Licenses – This section displays links to download YAML license files. The license files are displayed here along with the user and the status details. Click on the download icon available for each listed license to download the file.
The License tab in the banner additionally lists the expired licenses.
Software

The Software tab provides you access to all available Avi Vantage system, patch images, and related resources.
-
Vantage – Lists all Avi Vantage System and Patch images available for download. Click on the reply icon
 of the required version to access all available images and resources.
Click on the download icon for any listed image to download the tar.gz folder containing the image. On the right pane you have links to the following resources:
- Release notes
- API guide
- Installation guides
- Upgrade guides
- Default password (if required for accessing the file)
-
Additional Tools – Lists the CLI packages and web server images available.
-
Beta – Lists the Beta version of images available for download.
-
CRS – Lists the Avi Core Rule Set available for download. Click on the download icon to download the associated CRS file.
License
The License tab lists all Active and Expired licenses associated with the account.
SaaS
The SaaS tab displays the Deployment, Tenant, and Admin details related to your Avi SaaS deployment. You can create a SaaS administrator by clicking on Create SaaS Admin icon under the Admin tab.

Cases
The Cases tab provides complete information about your active and resolved support cases and along with an option to create a new case.
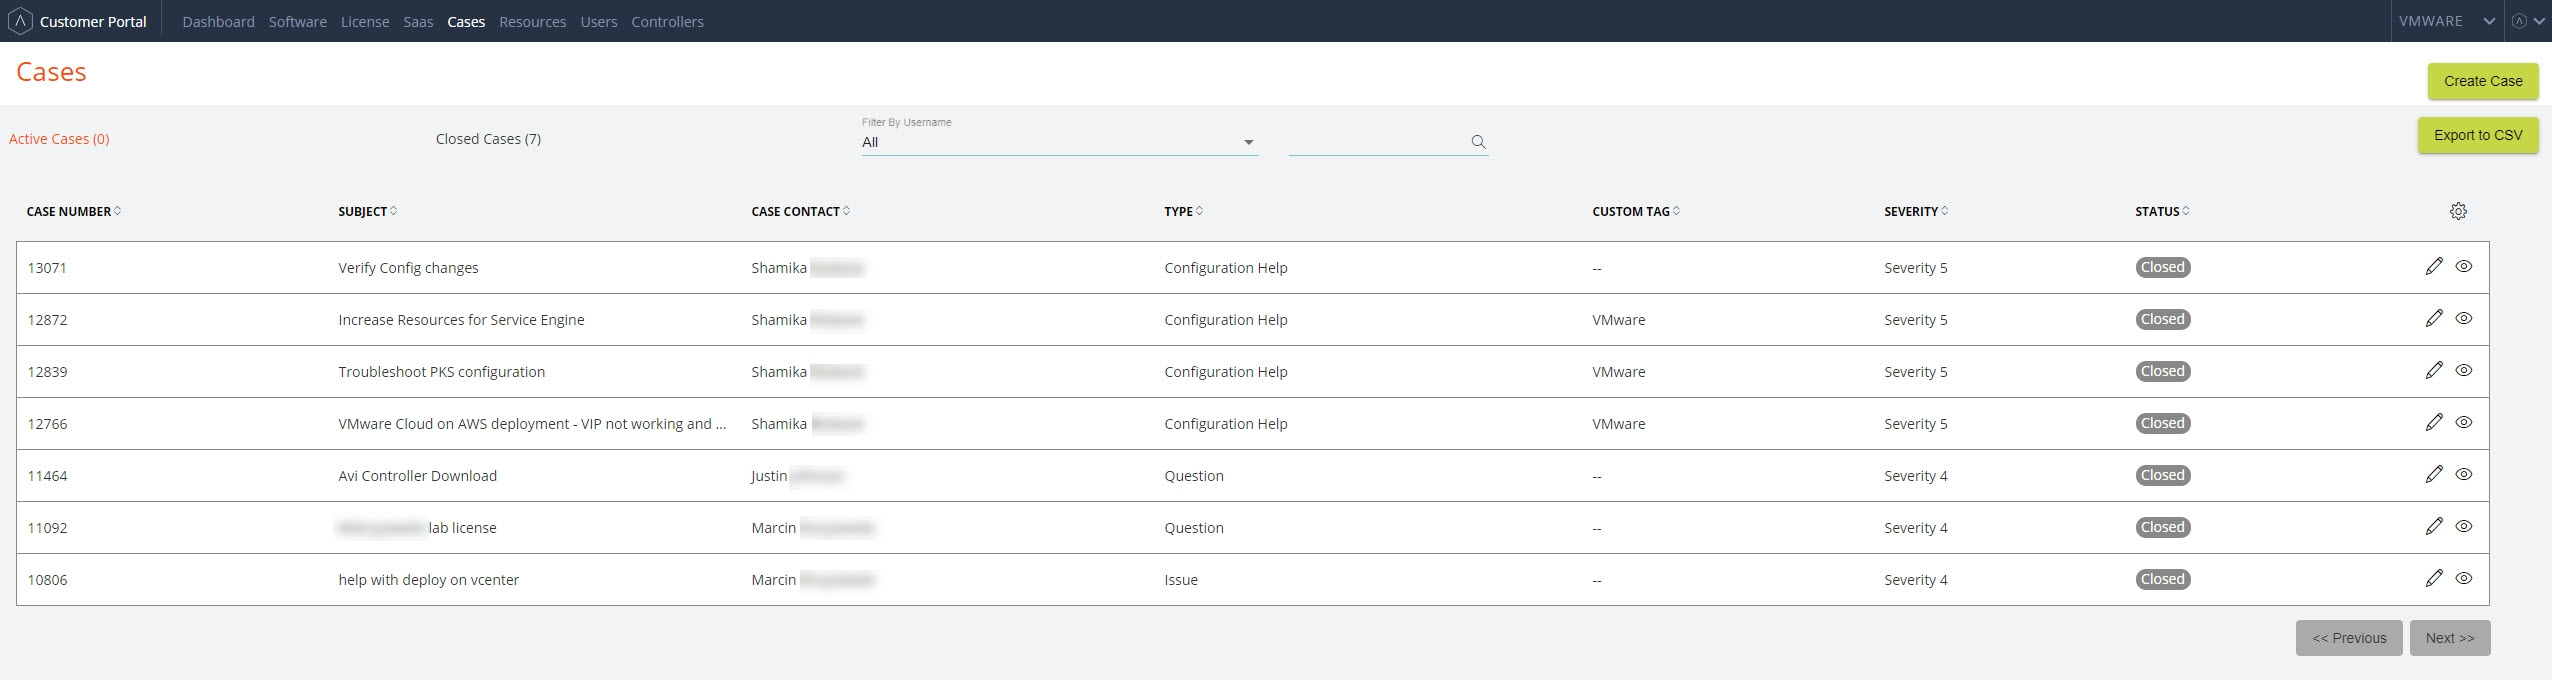
Click on the Active Cases (#) tab to view all the open and in-progress cases. Click on the Closed Cases (#) tab to view all the closed cases. You can choose an username from the drop-down list at the Filer By Username field or enter any keyword in the search bar provided to filter the results.
-
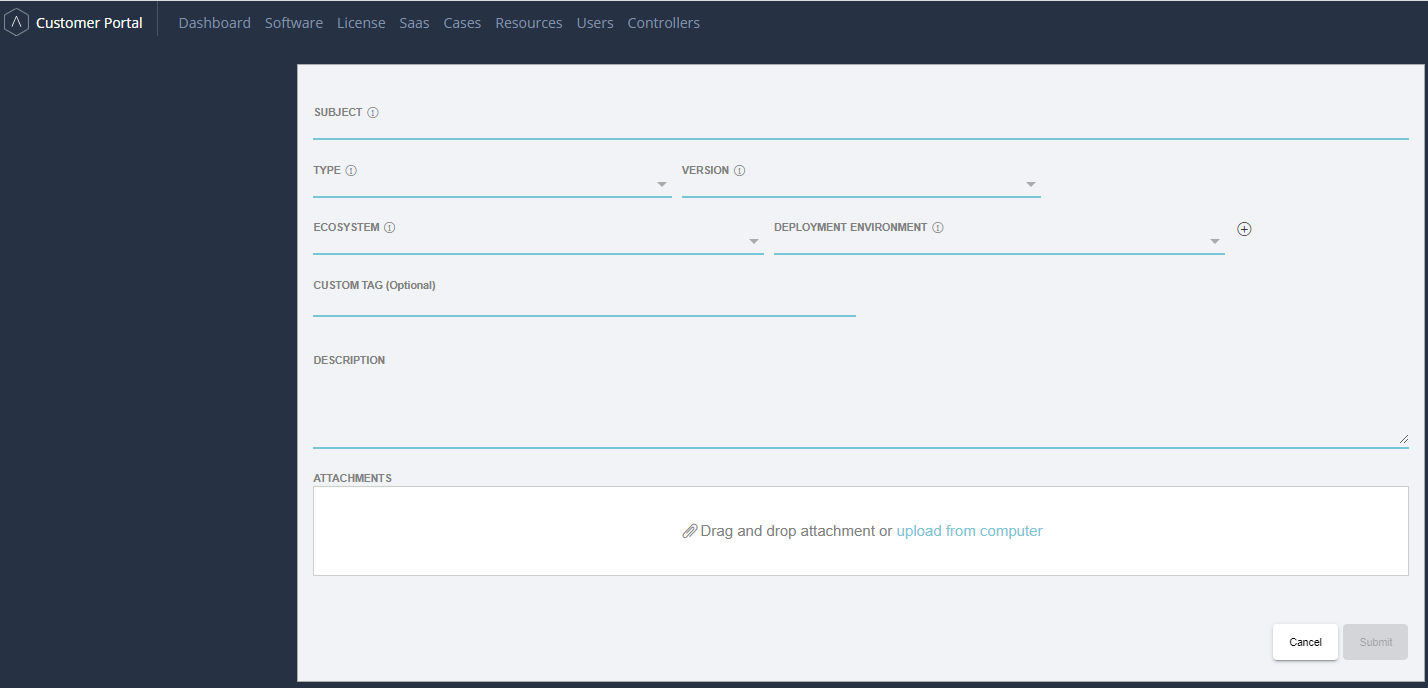
Create Case – Clicking on this icon will display a new window for you to create a new case.
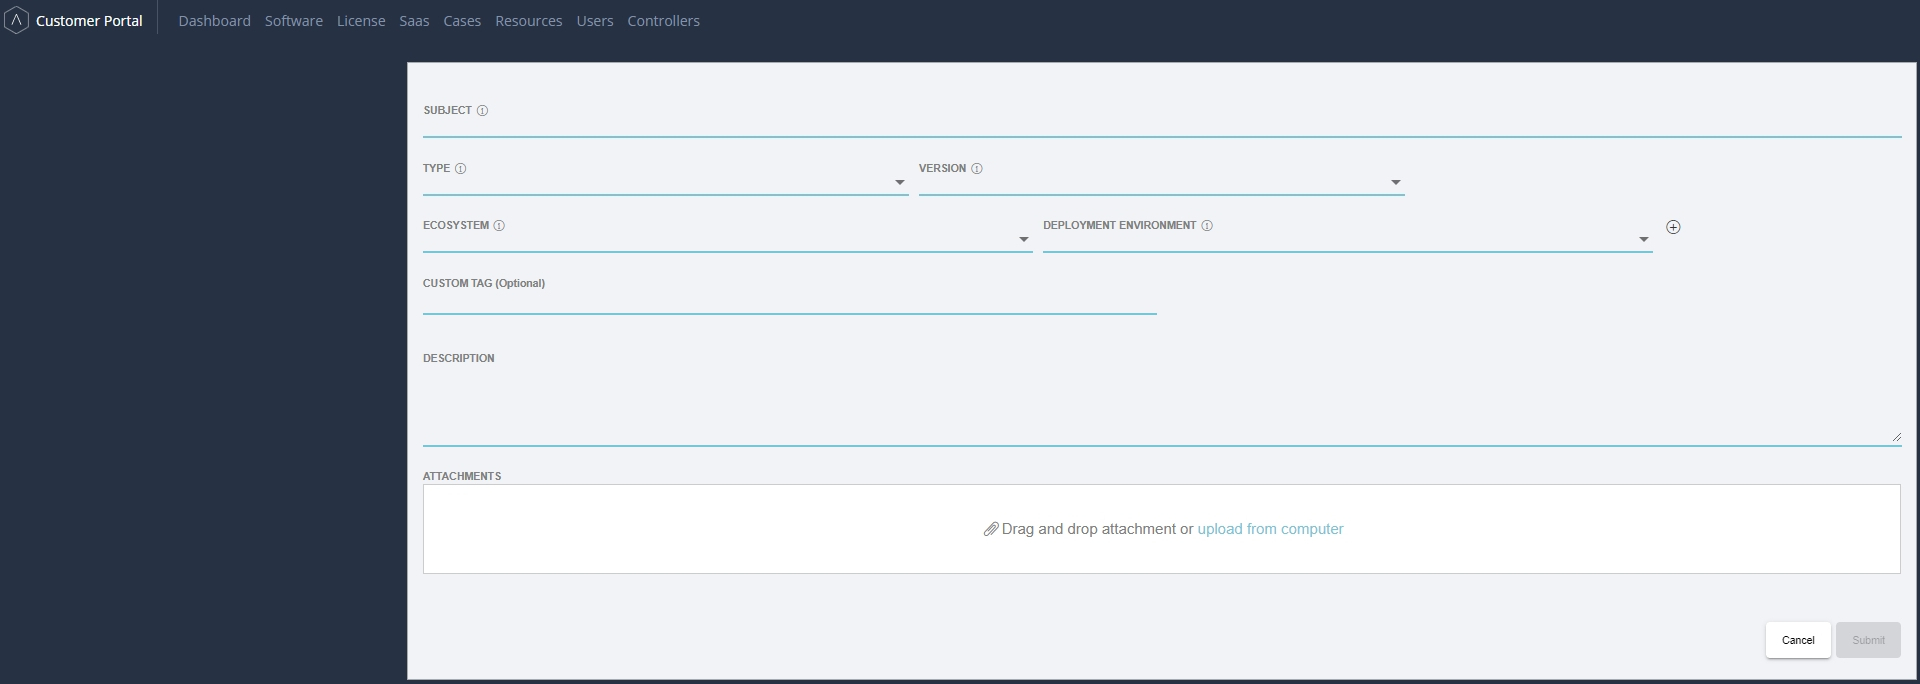
- Subject – Provide a suitable subject line for your support case.
- Type – Choose the case type from the drop-down list. The options available are Bug, Feature Request, Question, Configuration Help, Issue.
- Version – Choose the relevant Avi Vantage version from the drop-down list.
- Ecosystem – Choose the ecosystem for which you are reporting the issue from the drop-down list.
- Deployment Environment – Choose your deployment environment from the drop-down list. Click on the Add icon to add a new environment.
- Description and Attachments – Provide complete description and attach all required files related to the issue. It is recommended to attach the tech-support logs while creating a case. Refer to Collecting Tech Support Logs for complete information on how to collect support logs.
- Export to CSV – Clicking on this icon will display a window for you to export the record of your support cases in .CSV format. On the window displayed, provide the time range in the From and To fields and click on Export to CSV to download the file.
Resources
This will redirect you to Avi Networks Resource Center, where you can access Webinars, Data Sheets, White Papers, Case Studies, Videos, Solution Brief, and all resources related to Avi Vantage.
Users
Note: This tab is visible only to admin users.
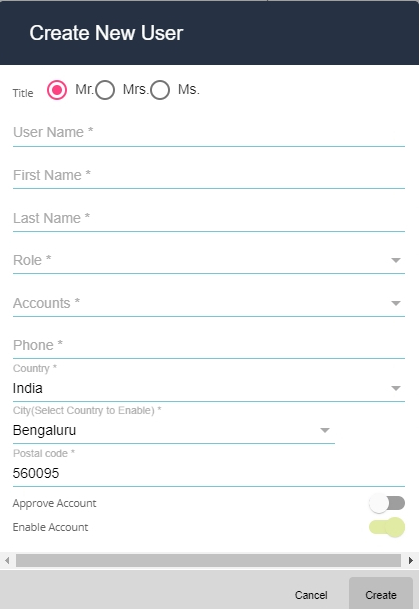
The Users tab displays all Approved and Pending user requests for an account. You can also create a new user profile by clicking on the Create User icon.