User Roles
Each Avi Vantage user account is associated with a role. The role defines the type of access the user has to each area of NSX Advanced Load Balancer.
Roles provide granular Role-Based Access Control (RBAC) within Avi Vantage.
The role, in combination with the tenant (optional), comprise the authorization settings for an Avi Vantage user.
Access Types
For each Avi Vantage resource (object type) and within each group of resources (system area), the user can have the following privileges:
- Write: The user has full access to create, read, modify, and delete resources.
- Read: The user can only read the existing configuration of resources. For example, the user can see how a virtual service is configured and view the health and analytics data of the virtual service but is unable to modify the configuration or delete the virtual service.
- No Access: The user has no access to the resources and cannot even read or enumerate these resources.
- Assorted: The user has a mixture of the above privileges for different resources within the system area.
Managing User Roles
Each user must be associated with at least one role. The role can be either predefined or a custom role.
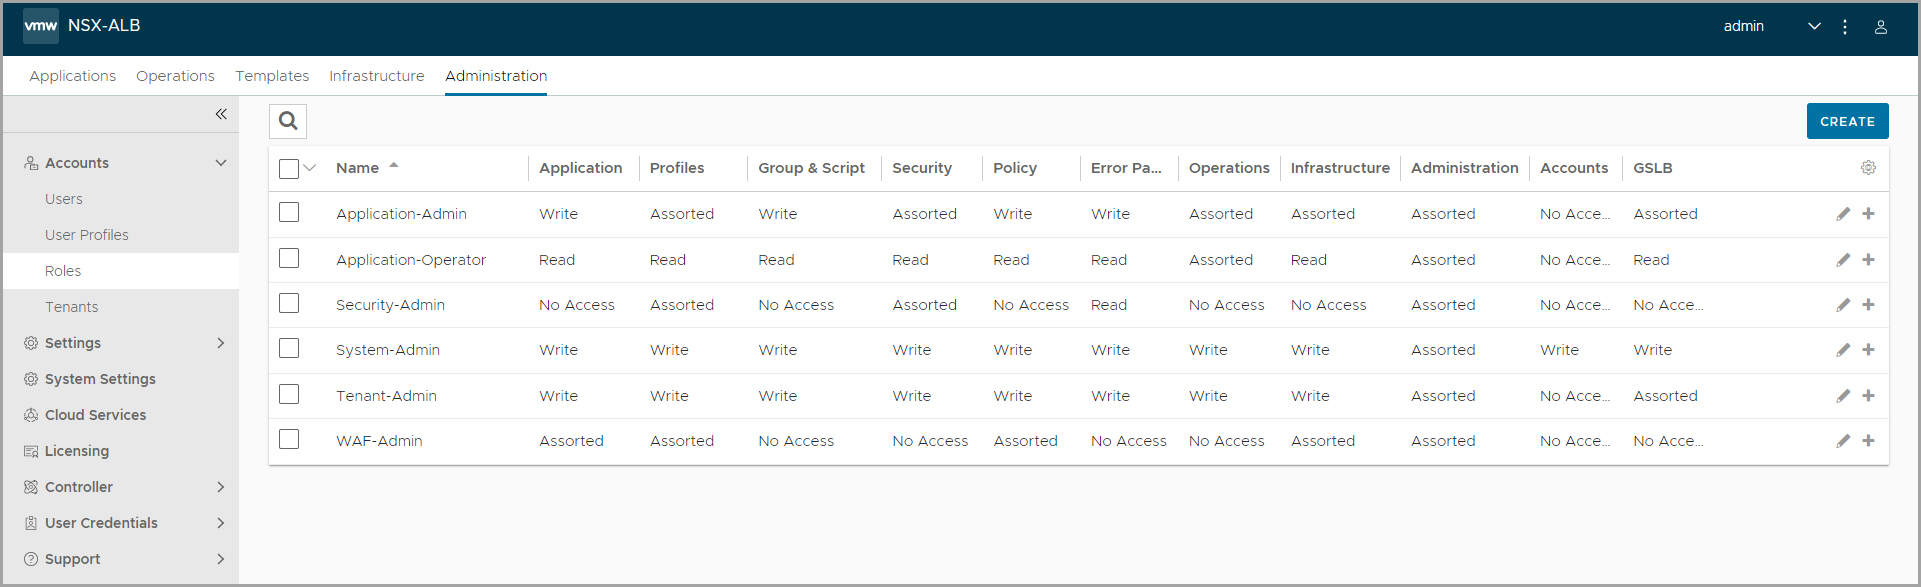
To view the different user roles,
-
From the UI, navigate to Administration > Roles. The pre-defined roles in NSX Advanced Load Balancer are listed. Each user role has different levels of access to different settings in NSX Advanced Load Balancer.
-
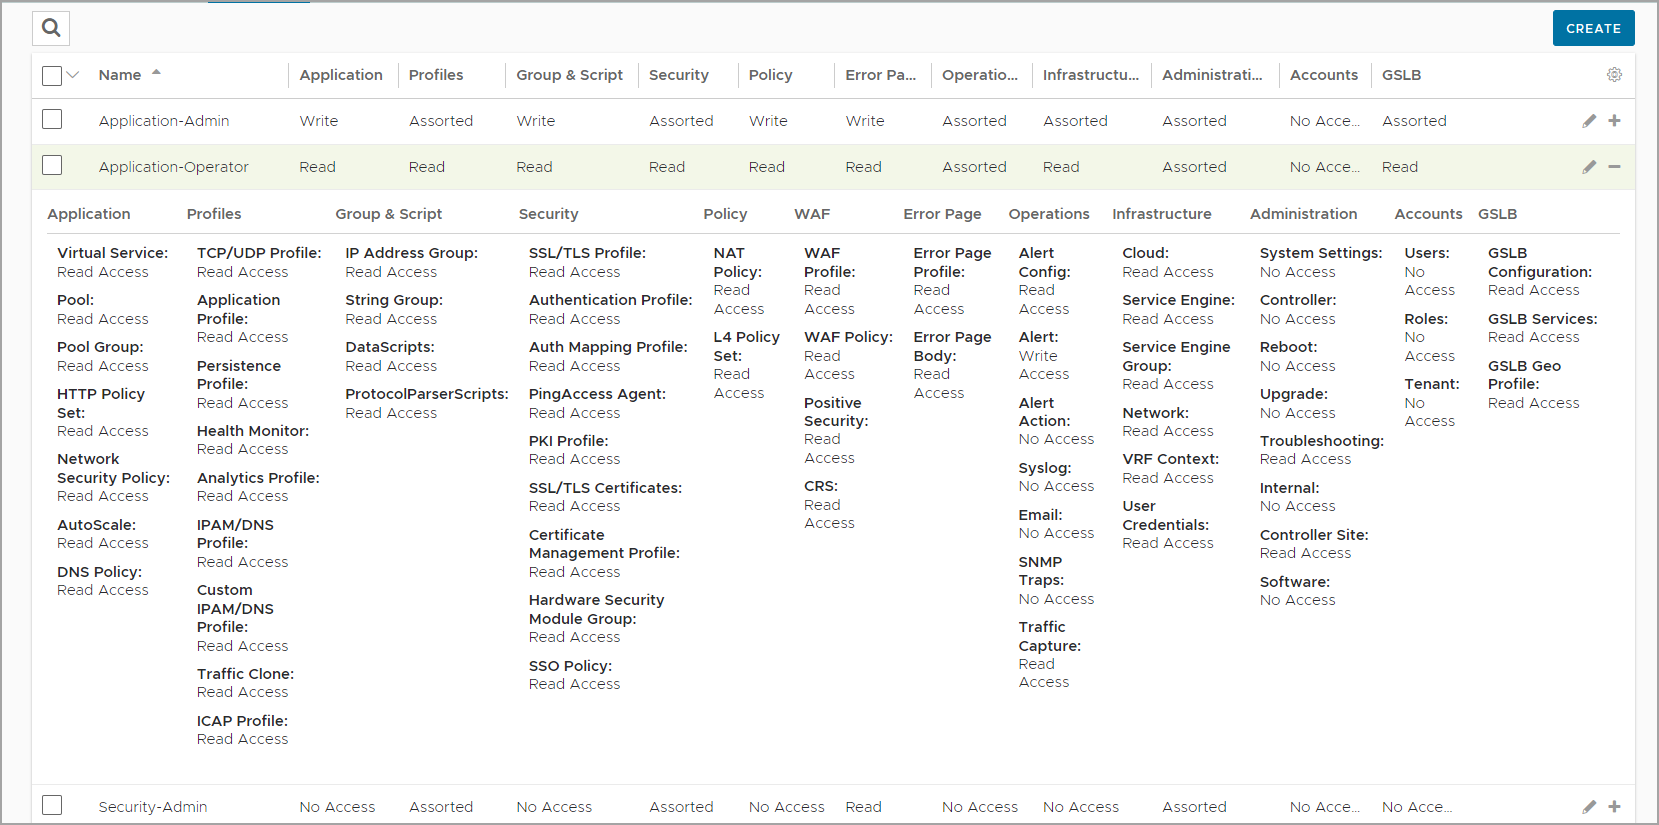
Click the + icon in the table to expand the access settings for a role.
-
Click the Edit icon against a role to configure the access settings for the role according to your requirement.
If multi-tenancy is configured, a user can be assigned to more than one tenant, and can have a separate role for each tenant.
Creating a Role
If none of the pre-defined roles exactly fit the access requirements for some user accounts, you can create custom roles according to your requirement.
To create a custom role,
-
Navigate to Administration > Accounts > Roles.
-
Click Create to open the New Role screen.
-
Under General, enter a Name for the role.
-
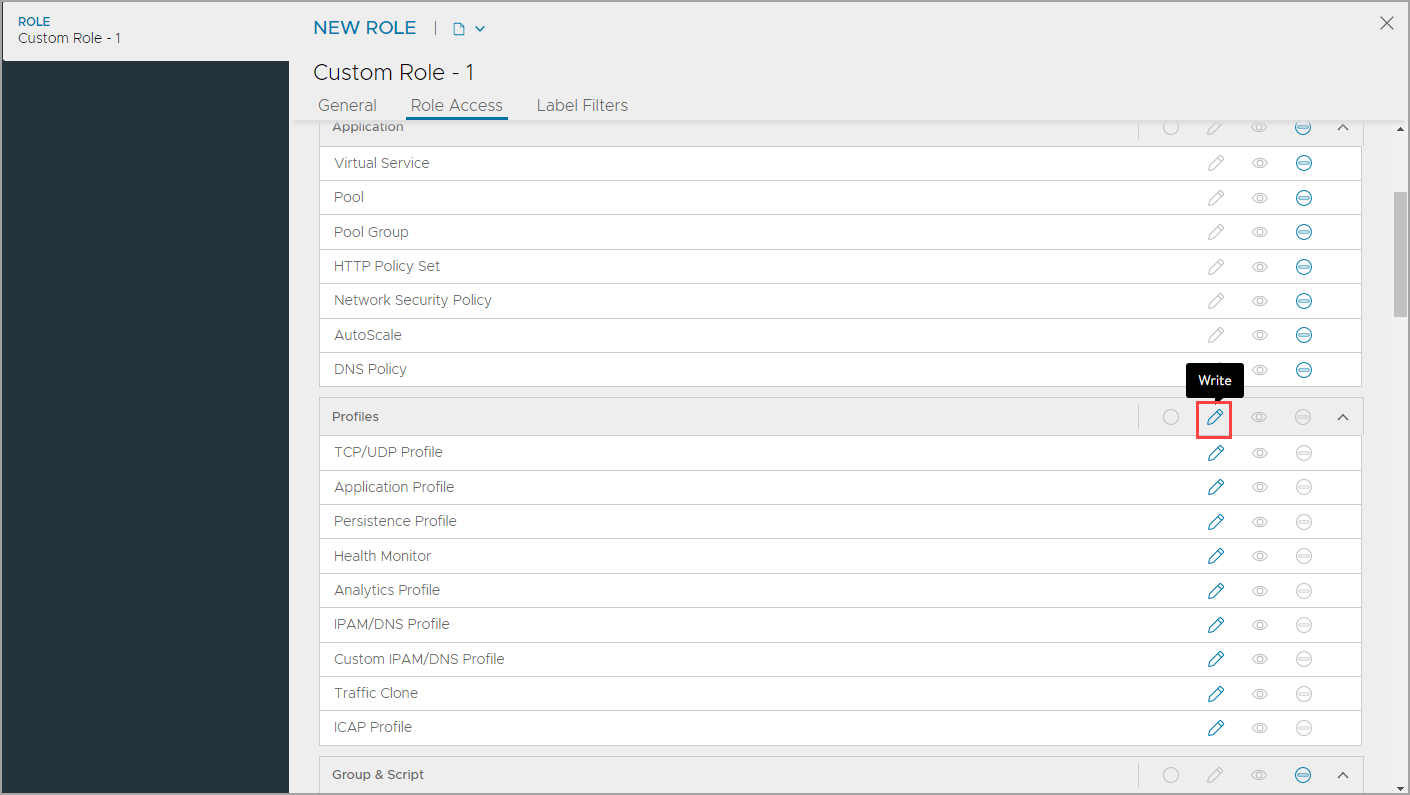
Configure the access for each system area under Role Access. By default, all the roles are set to no access.
-
To set access to all the resources within a system area, click the required access icon on the title row of the system row. For example, to provide write access to all the profiles, click the write icon in the title row for the Profiles system area:
-
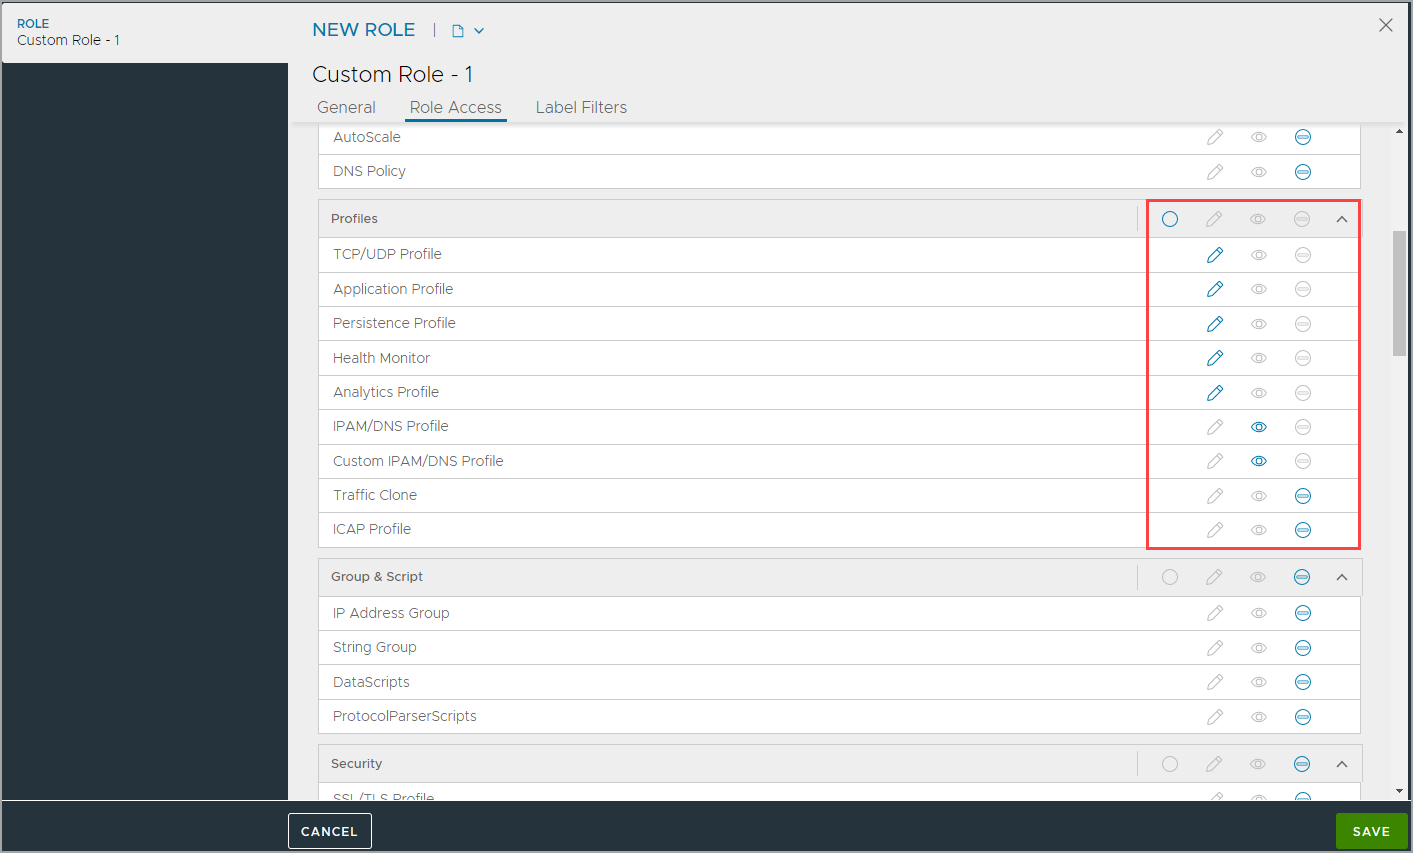
To give write, read, or no access for some resources, click the relevant icon for each resource. Automatically, the assorted access is enabled in the title row on the system area, indicating multiple types of access.
-
-
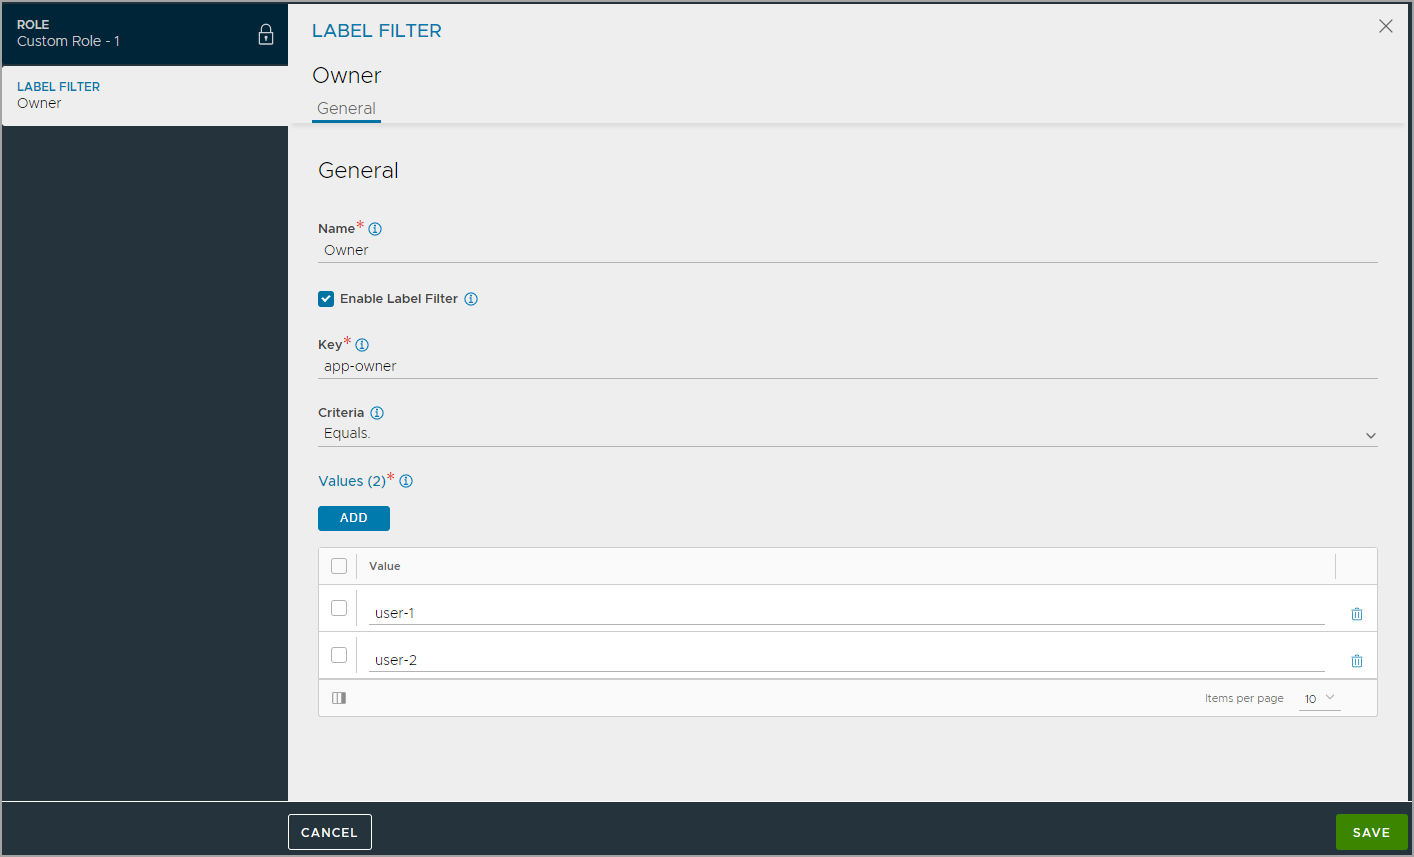
Optionally, configure Label Filters for the role to provide object-based granular access.
-
Click Add to open the LABEL FILTER sub-screen.
-
Enter the Name for the filter.
-
Select Enable Label Filter to apply the label.
-
Enter the Key.
-
Select the Criteria to match the key:value pair.
-
Enter the Value. Click Add to add more values.
-
Click Save.
-
-
Click Save to save the new role.
Note: Roles can only be created in the admin tenants.
Assigning a Role to a User
Roles can be assigned to both local and remote (LDAP, TACACS+) user accounts. The procedure differs depending on where the account is maintained.
Local User Account
Roles can be assigned to a user account when the account is created or at any time later. In either case, select the role from the Role pull-down list in the configuration popup for the user account.
- Navigate to Administration > Accounts > Users.
- If configuring a new account, click Create. Otherwise, if changing an existing account, click the Edit icon in the row for the account.
- Select the role from the Role pull-down list. If a custom role is needed but is not created, click Create.
Notes:
- User accounts are case-sensitive.
- When creating the user, if the Email field is configured, Avi will attempt to send an email leveraging the mail server defined in the Email/SMTP settings. User creation can take 40 seconds if the email server is down or unreachable.
LDAP or TACACS+ User Accounts
If LDAP or TACACS+ remote authentication is used, roles can be assigned to users based on the following:
- LDAP group: A role can be assigned to users in any group, or specifically to users who either are or are not members of specific groups.
- LDAP attributes: For users who match the LDAP group filter, the role is assigned to those users with any attributes and values, or who either do or do not have specific attributes and values.
The mappings are configured within Avi Vantage rather than the LDAP or TACACS+ server.
To map LDAP or TACACS+ users to Avi Vantage roles, use the following steps. Multiple mappings can be configured if needed, for any combination of user group name and attribute:value pair.
Notes:
- These steps assume that Avi Vantage authentication/authorization is set to remote, and an LDAP or TACACS+ Auth profile has been applied.
- Group names are case-sensitive for LDAP mapping.
- Navigate to Administration > Settings > Authentication/Authorization.
- Click New Mapping.
- Select the filter for the LDAP group:
- Any: Users in any LDAP group match the filter.
- Member: Users must be members of the specified groups. If entering multiple group names, use commas between the names.
- Not a Member: Users must not be members of the specified groups.
- Select the filter for the LDAP attribute:
- Any: Users match regardless of attributes or their values.
- Contains: User must have the specified attribute, and the attribute must have one of the specified values.
- Does Not Contain: User must not have the specified attribute and value(s).
- Select the role from the User Role pull-down list:
- From Select List: Displays a Roles pull-down list. Select the role from the list.
- All: Assigns all roles.
- Matching Attribute Value: Assigns the role whose name matches an attribute value from the LDAP server.
- Matching Group Name: Assigns the role whose name matches a group name on the LDAP server.
- If using multitenancy, users also can be mapped to tenants. Read more about tenants and tenancy.
- Click Save. The new mapping appears in the Tenant and Role Mapping table.