Load Balancing RADIUS with Cisco ISE
Overview
This guide explains the steps to configure Avi Vantage to load balance RADIUS traffic to Cisco Identity Services Engine (ISE). Avi Vantage uses L4 DataScripts to achieve persistence using various RADIUS attributes and load balance DHCP profiling traffic to the same server as RADIUS.
Prerequisites
- Knowledge of Cisco ISE and its configuration is required before configuring Avi Vantage to load balance RADIUS traffic to Cisco ISE.
- An active/standby SE group with IP routing enabled is required to support the preservation of client IP for the RADIUS virtual service.
Topology
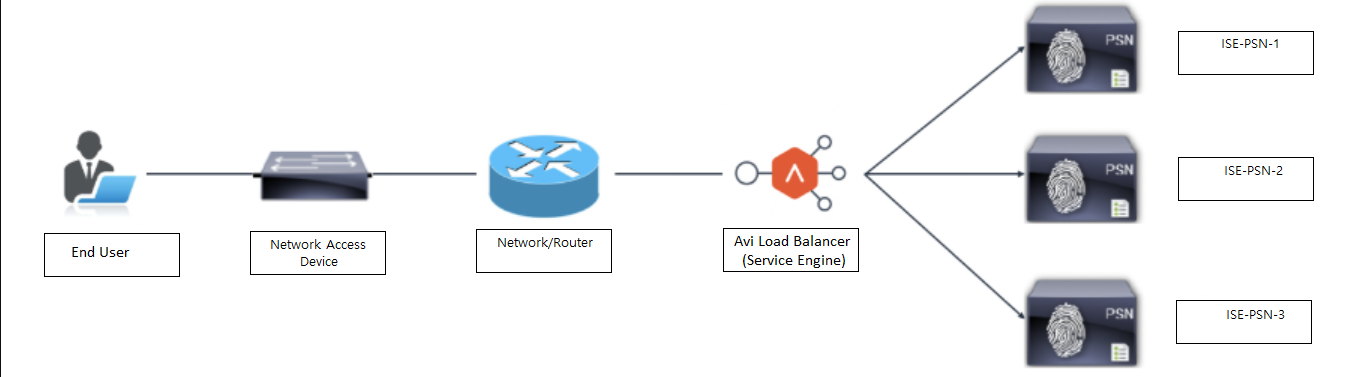
As shown in the topology, Avi Vantage is logically inline between the user’s network and the ISE Policy Service nodes (PSN). All traffic to ISE PSNs flow via Avi load balancers (Service Engines), as well as return traffic from ISE PSNs to users.
Scenario
An Avi VIP is configured as a RADIUS server on the network access device (NAD). Once Avi receives the RADIUS authentication traffic from the users, it is load balanced to one of the ISE PSNs using configured load balancing algorithms. A persistence entry is created using DataScripts which parses the RADIUS requests and creates an entry based on the configured RADIUS attributes. Any subsequent RADIUS authentication traffic or DHCP profile traffic from the same client will be sent to the same server using the persistence entry.
Change of Authorization Source NAT Support
The Cisco-ISE will send a Change of Authorization (CoA) request with the following details:
- The source IP of the individual PSN originating the CoA
- The destination IP of the NAD
- The destination port, UDP 1700 (by default)
The NAD expects the source IP to be that of the configured RADIUS server; in this case, it is the Avi VIP.
The NAT policy has been configured on Avi Vantage to NAT the source IP of the server to the VIP, if the destination port of the packet is UDP 1700.
Configuration
Follow the below mentioned steps to configure Avi Vantage for RADIUS load balancing:
- Configure DataScript to parse RADIUS and DHCP packets and persistence using required fields.
- Configure the health monitor for RADIUS. The SE IP needs to be configured as NAD on the ISE with the same credentials on the ISE and Avi Vantage.
- Configure the virtual service and pool.
- Attach DataScript to the virtual service.
- Configure NAT for CoA and attach to required Service Engine group.
Configuring DataScript to Parse RADIUS/DHCP Traffic
The functionality of the DataScript is explained using a sample DataScript. The DataScript can be modified as per the user’s requirements. Refer to the DataScript function descriptions in Layer 4 DataScripts.
DataScript
The DataScript details are provided in RADIUS-DHCP-HTTPS.
DataScript Logic
RADIUS requests are parsed, and NAS-IP-ADDRESS, CALLING-STATION-ID and NAS-PORT-TYPE attributes are noted. If NAS-PORT-TYPE is 19 (wireless clients), then the aging time for the entries is set to 3600. For all other client types (wired/virtual), the aging time is 28800. If a CALLING-STATION-ID is populated in the RADIUS request, then that is used for persistence. If the request does not contain a CALLING-STATION-ID, NAS-IP-ADDRESS is used for persistence.
DHCP packets are parsed and the host populated client-identifier is noted, if any. Client-identifier is expected to be host MAC address. If client-identifier is populated, then it will match the persistence entry created for RADIUS using calling-station-id and will send DHCP packet to the same PSN as RADIUS. If client-identifier is not present in the DHCP packet, it will be forwarded using the configured load balancing algorithms to one of the three ISE PSNs.
DataScript also creates persistence entry using framed-ip-address, if present, in RADIUS accounting packets. Any subsequent HTTPS request from the same client to the VIP will be sent to the same PSN using the source IP of the packet, by matching the framed-ip-address entry.
Creating RADIUS Health Monitoring
To create the RADIUS health monitor,
-
From the NSX Advanced Load Balancer UI, navigate to Templates > Profiles > Health Monitors.
-
Click on Create to open the CREATE HEALTH MONITOR screen.
-
Under the General tab, enter the basic information about the health monitor. Note: Select RADIUS as the Type to view the settings specific to external health monitor.
-
Configure RADIUS health monitor settings.
-
Configure Role-Based Access Control (RBAC).
-
Click Save to complete the RADIUS Health Monitor creation.
Configuring General Settings
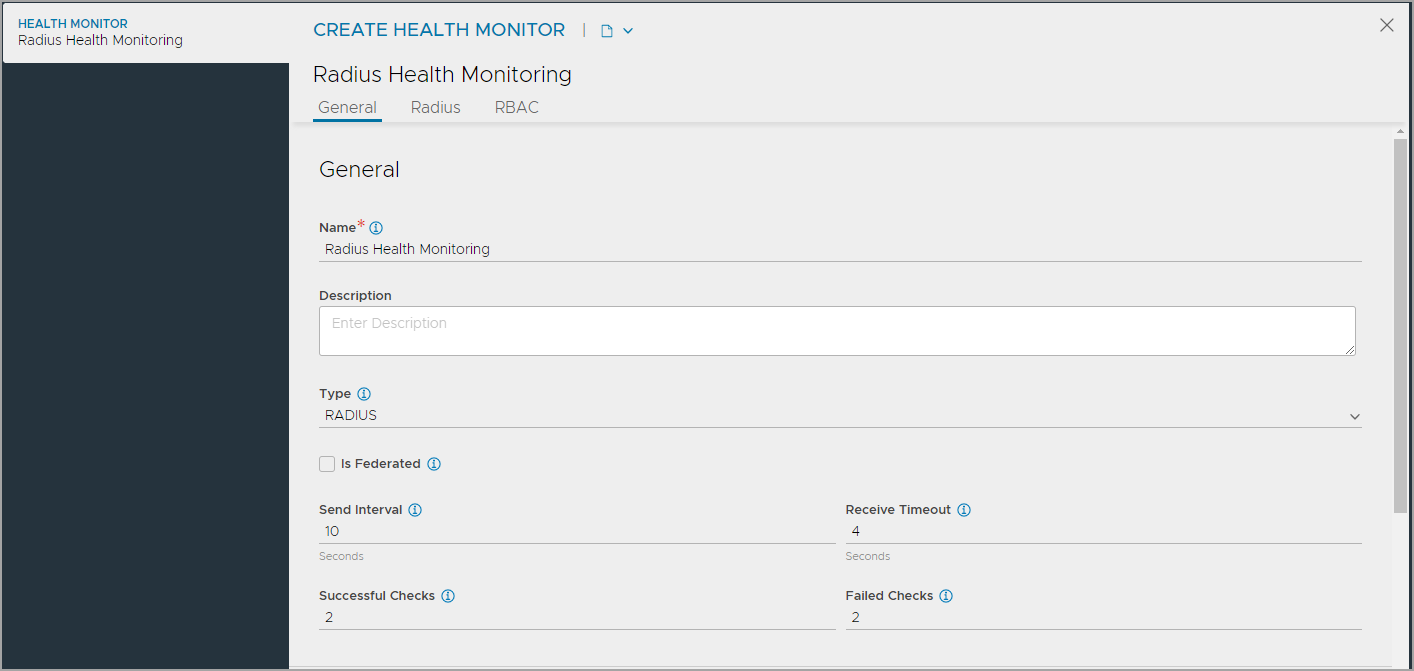
Under the General tab of the CREATE HEALTH MONITOR screen, configure the following:
-
Enter a unique Name for the monitor.
-
Enter a Description.
-
Select RADIUS as the Type of Health Monitor.
Note: Once the Type of Monitor is selected, options specific to the health monitor type are displayed. -
Select the option Is Federated? to replicate the object across the federation. When this option is not selected, the object is visible within the Controller-cluster and its associated SEs.This option is enabled only when GSLB is activated. A federated health monitor is used for GSLB purposes while it is not applicable for a regular health-monitor. A GSLB service cannot be associated with a regular health monitor, because GSLB service is a federated object, while the health monitor is not. Conversely, a pool cannot be associated with a federated health monitor because the pool is not a federated object.
-
Enter the Send Interval value (in seconds). This value determines how frequently the health monitor initiates an active check of a server. The frequency range is 1 to 3600.
-
Enter the Receive Timeout value (in seconds). The server must return a valid response to the health monitor within the specified time limit. The receive timeout range is 1 to 2400 or the send interval value minus 1 second.
Note: If the status of a server continually flips between up and down, this may indicate that the receive timeout is too aggressive for the server. -
Enter Successful Checks. This is the number of consecutive health checks that must succeed before NSX Advanced Load Balancer marks a down server as up. The minimum is 1, and the maximum is 50.
-
Enter Failed Checks. This is the number of consecutive health checks that on failing, NSX Advanced Load Balancer marks a server as down. The minimum is 1, and the maximum is 50.
Configuring RADIUS Health Monitor Settings
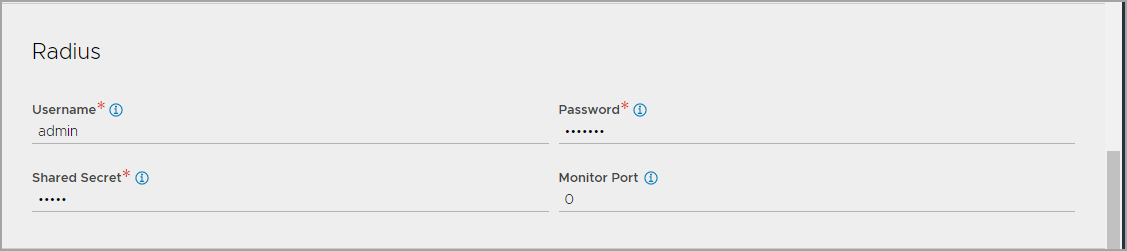
To configure the RADIUS health monitor settings, under the Radius tab,
1.Enter the Username and Password with which the radius health monitor will query the RADIUS server.
-
Enter the Shared Secret used to secure the connection.
-
Enter the port to override the port defined in the server pool. To use the server port, enter 0.
Configuring RBAC
Under the Role-Based Access Control (RBAC) section, configure labels to control access to the health monitor based on the defined roles
- Click Add.
- Enter the Key and the corresponding values.
See granular-rbac for more information.
Configuring Pool
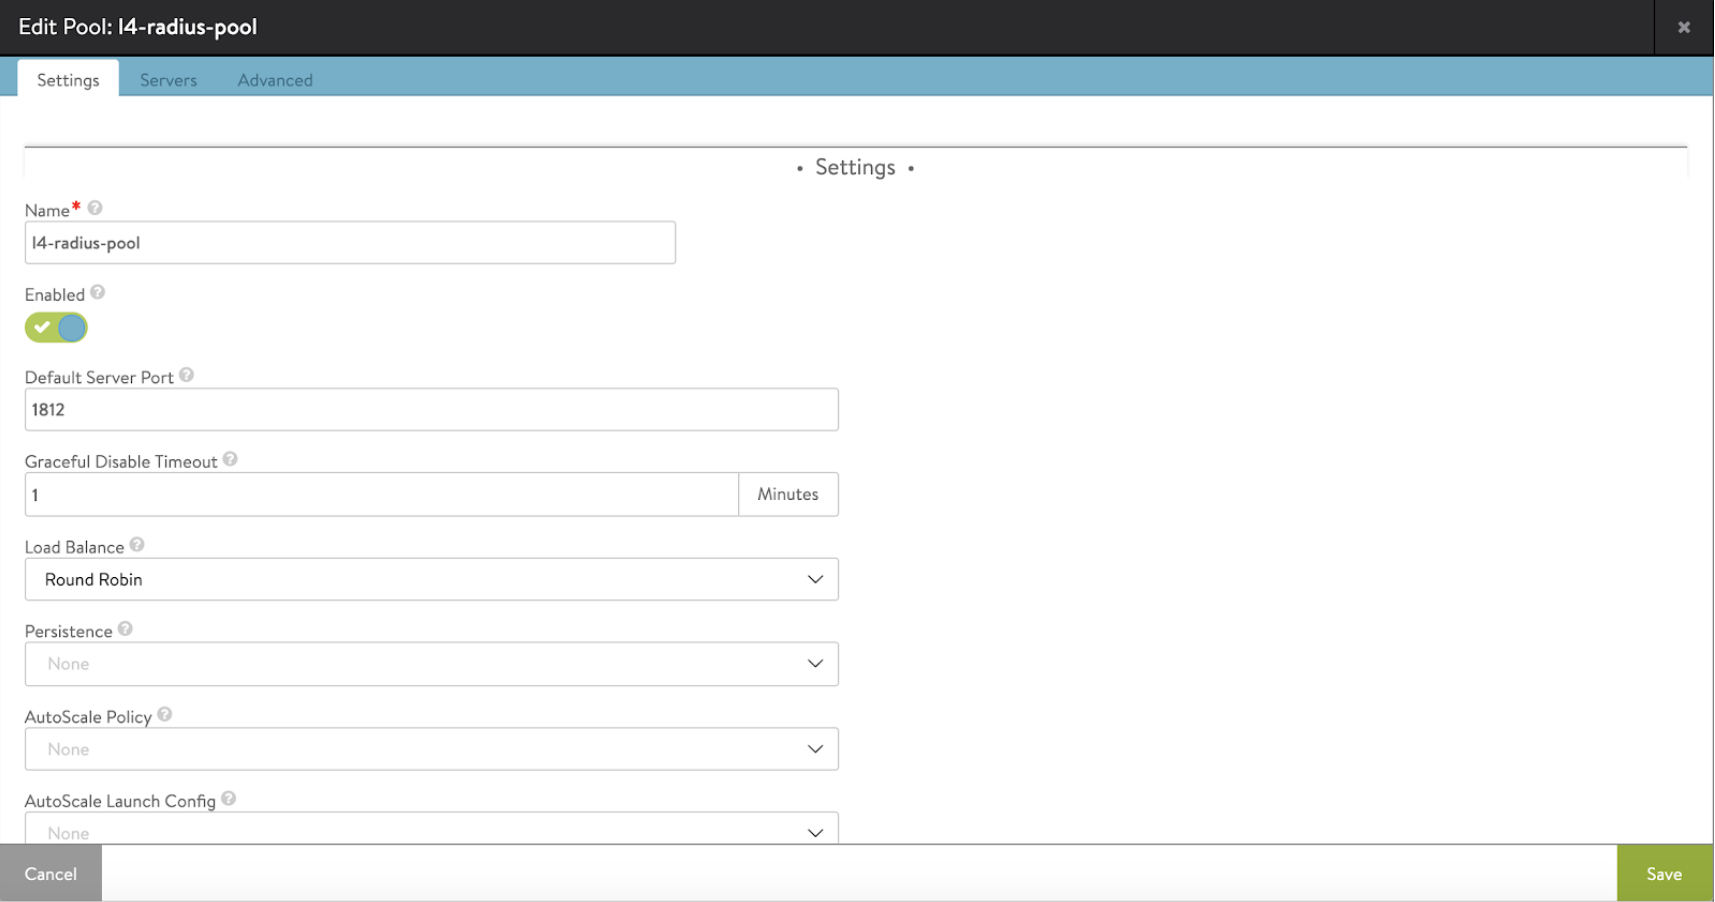
-
A single pool needs to be configured for all protocols. The pool members will be ISE-PSN. The default server port should be 1812.
-
Attach the RADIUS health monitor created to the pool.

-
In the Advanced tab of pool, select Disable Port Translation.
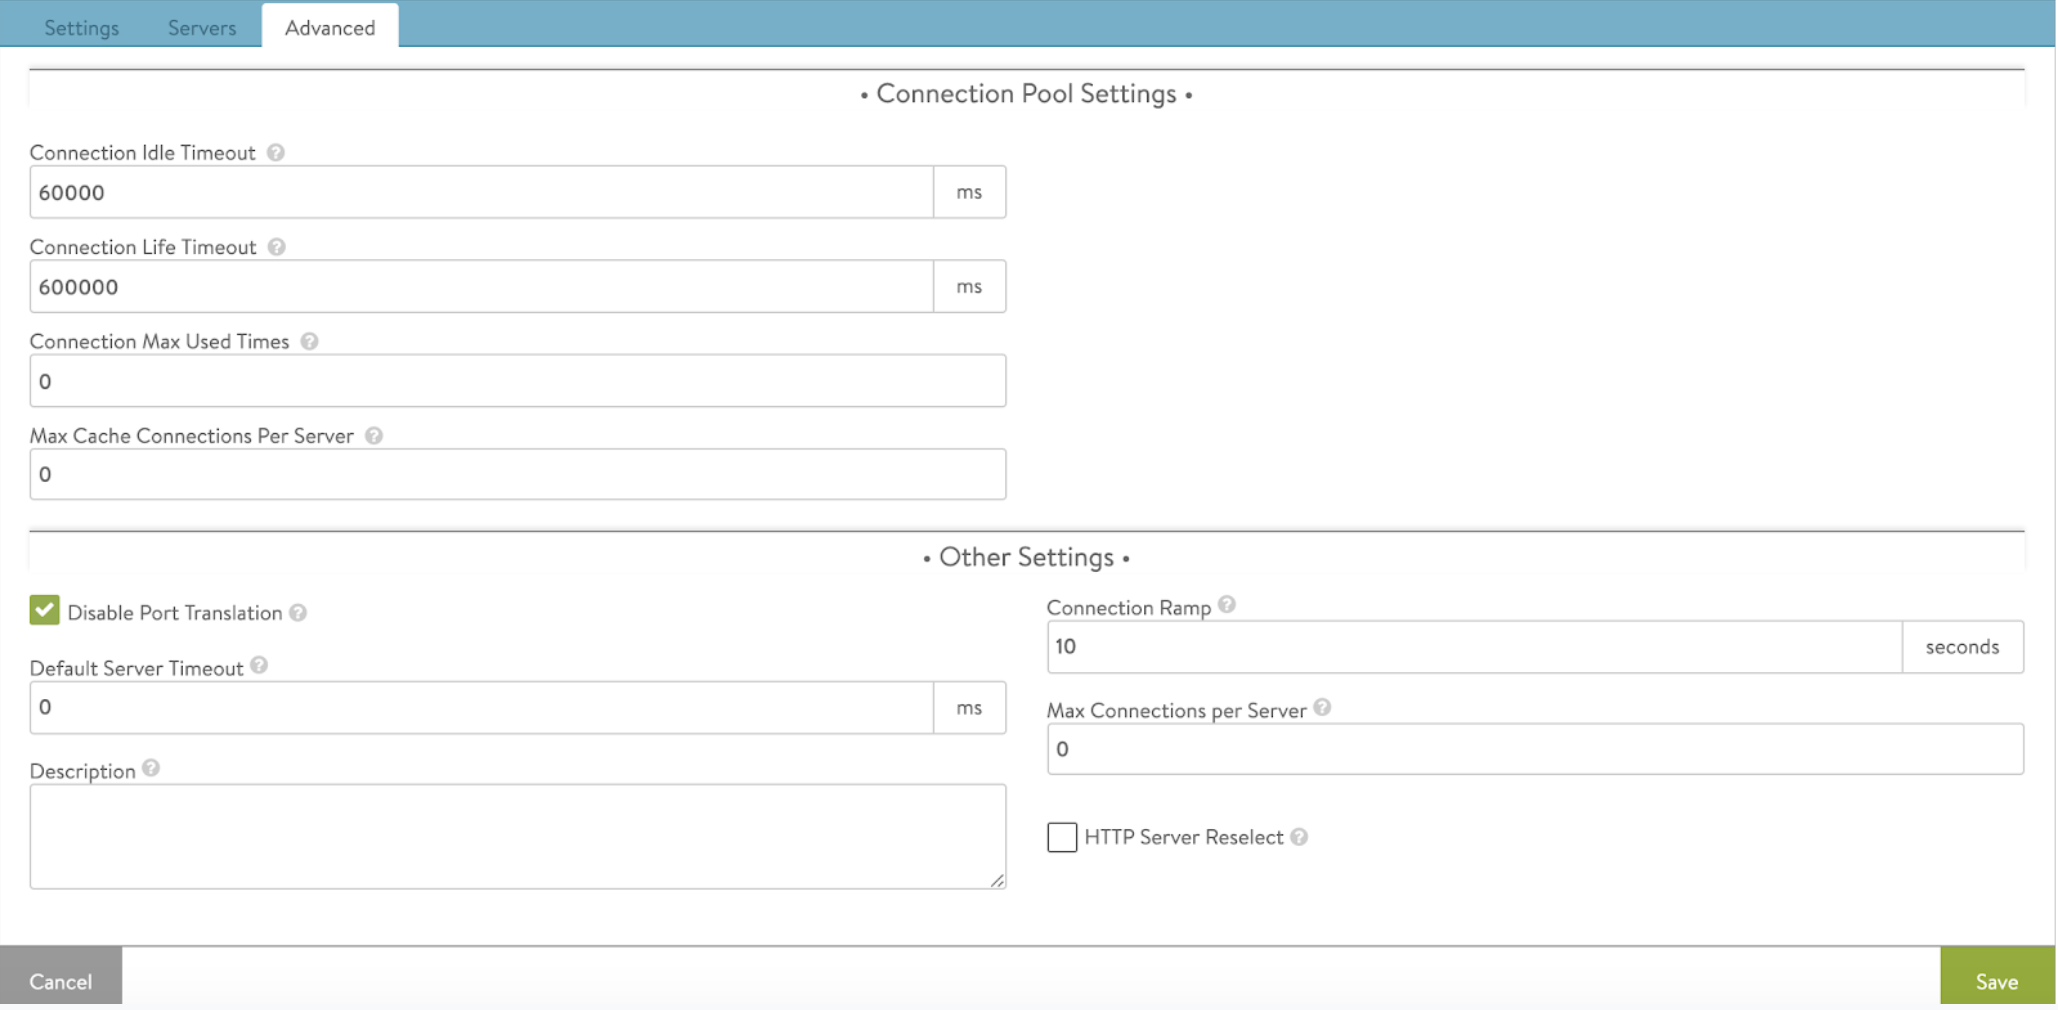
-
Save the configuration.
Configuring Virtual Service
-
Configure a virtual service to accept all required RADIUS traffic and DHCP traffic. Also accept HTTPS traffic and SNMP if required.
Notes:
- The application profile chosen should be System-L4-Application with Preserve Client IP option enabled.
- The network profile chosen should be System-UDP-Fast-Path.
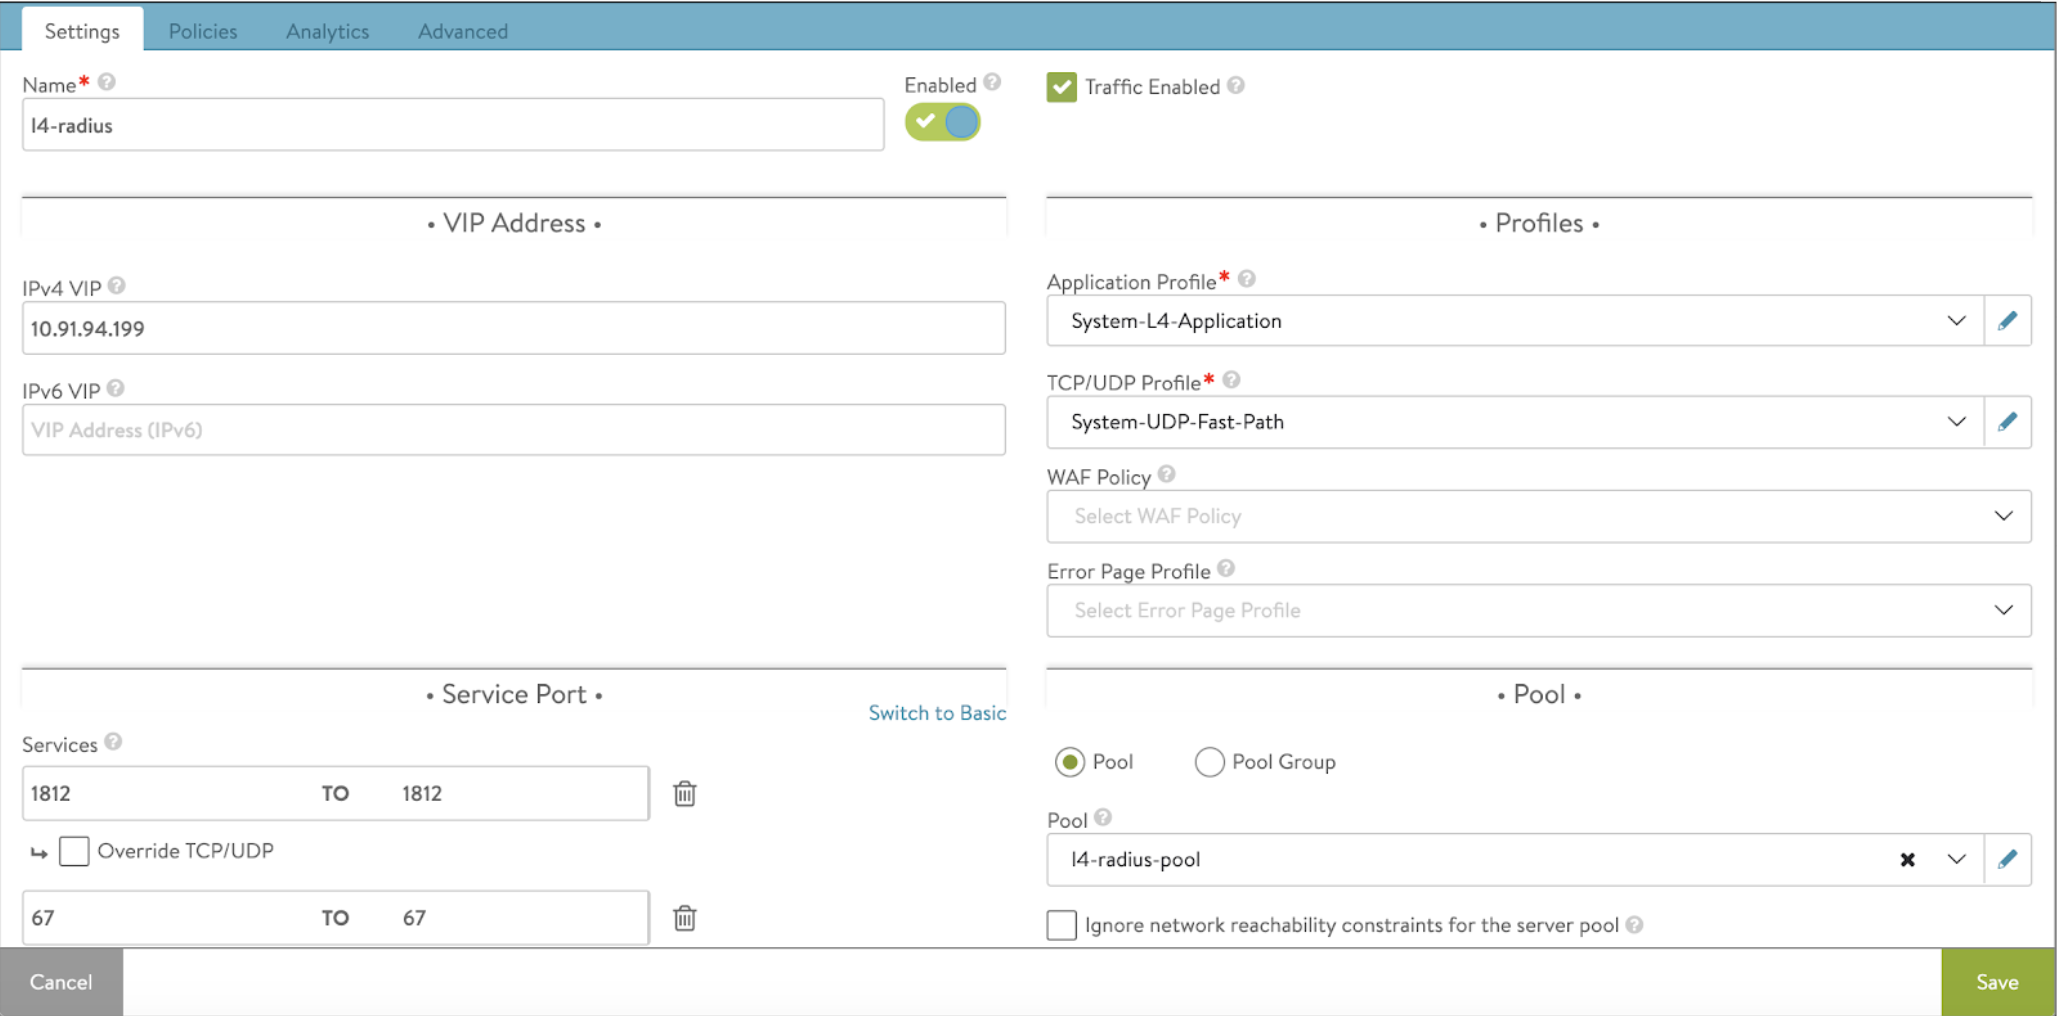
-
Configure all required ports for RADIUS and DHCP. For DHCP, use System-UDP-Per-Pkt by overriding the TCP/UDP profile. Use UDP per packet profile as the ISE does not respond to the DHCP packets. If HTTPS is configured, it should be overriden to use System-TCP-Proxy profile.

-
Attach the pool configured earlier and save the configuration.
Configuring and Attaching DataScript to the Virtual Service
The following are the steps to configure and attach the DataScript to the virtual service:
-
Navigate to Templates > Scripts.

-
Click on the Create button to create a new DataScript.
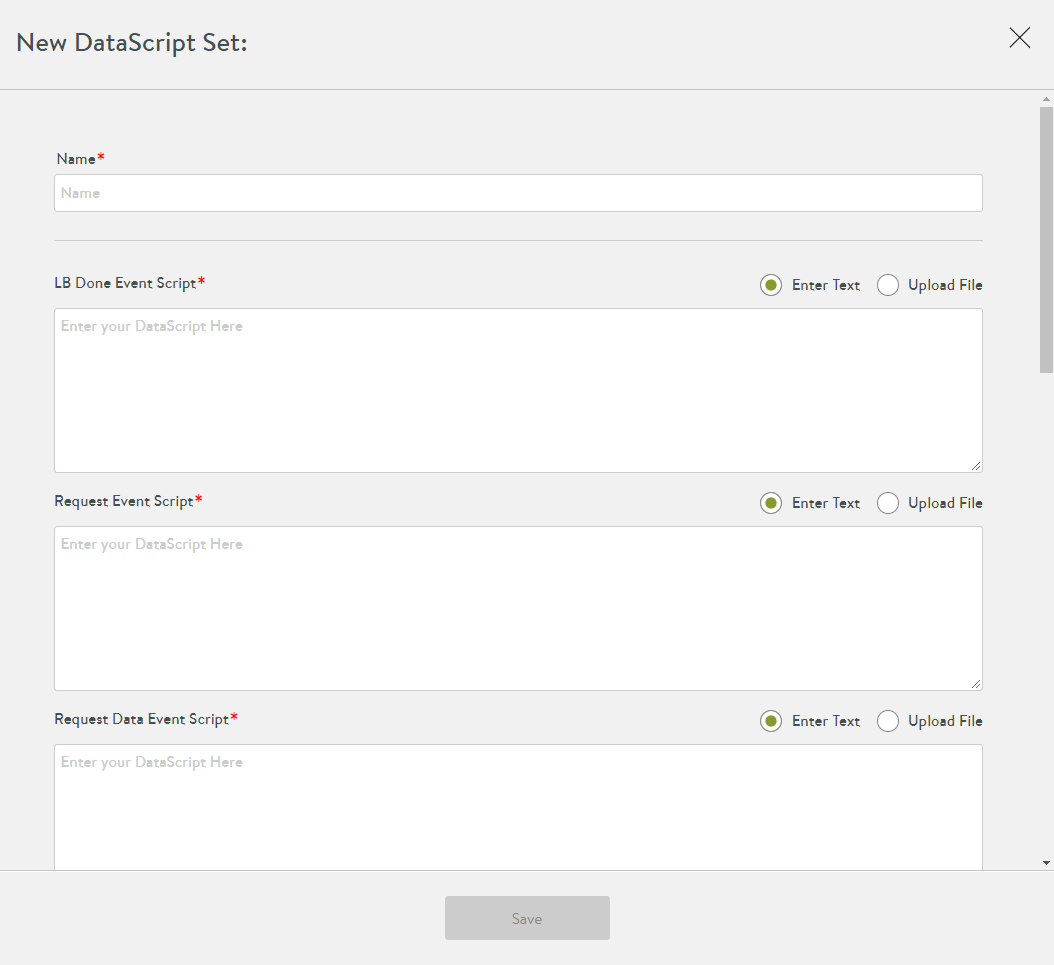
Scroll down to the VS Datascript Evt L4 Request Event Script section.
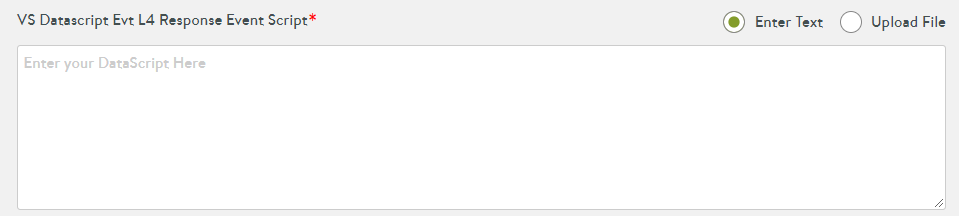
The script parses requests from the client towards server; hence, it is a request event script.
-
Attach the script to this event.
-
In the Pools section, select the pool configured for RADIUS and dhcp.
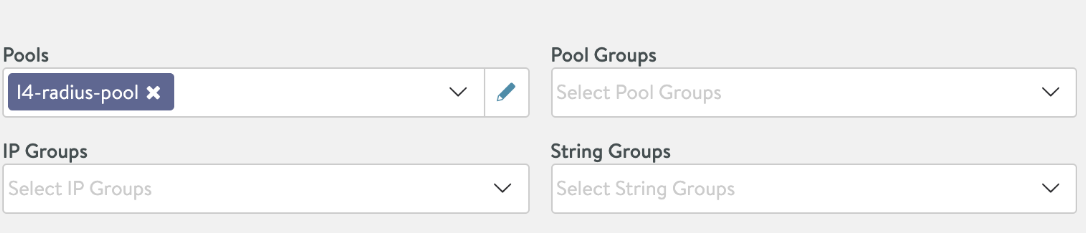
-
Save the DataScript.
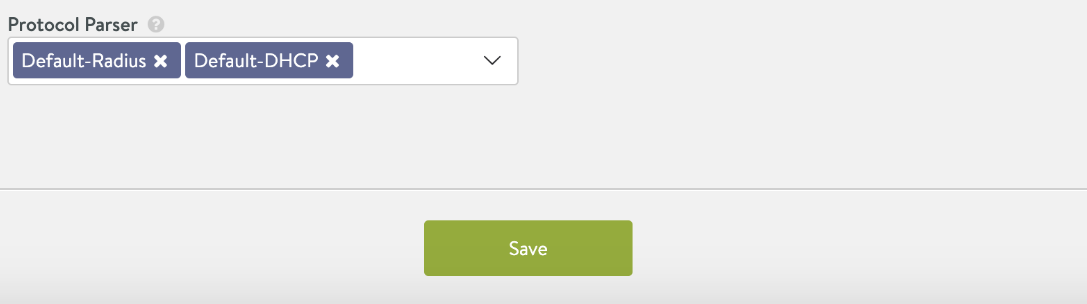
-
Choose required protocol parsers. Choose Default-DHCP and Default-Radius in this DataScript.
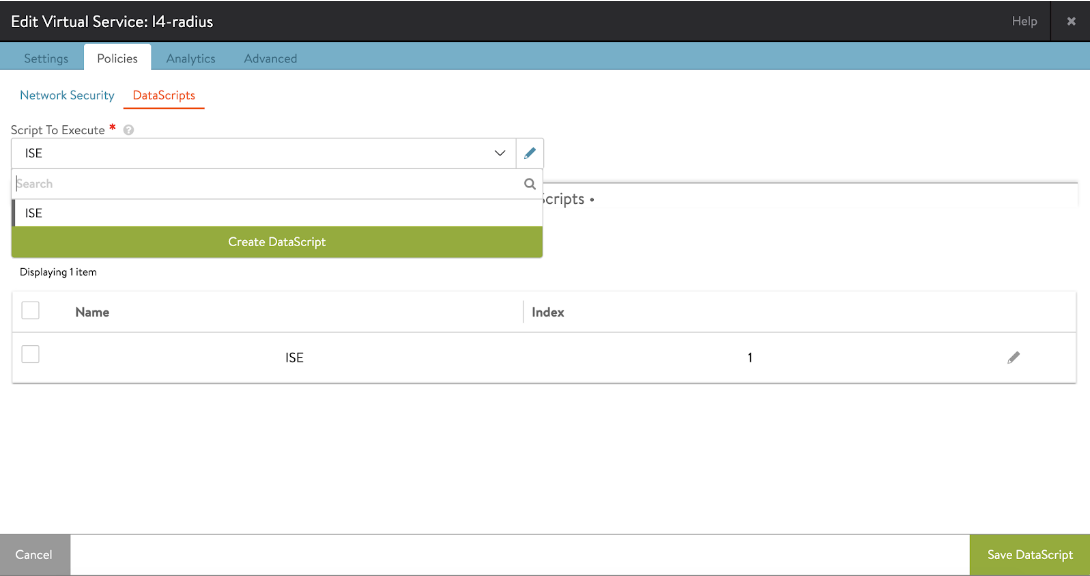
-
Attach the DataScript to the VS. Go to Edit Virtual Service > Policies > DataScripts > Add DataScript and choose the configured DataScript. Save the DataScript.
Configuring NAT
NAT rules are configured as a policy called natpolicy via the Avi CLI and is attached to the Service Engine group. NAT rules are per-VRF. NAT rules match criteria can be from source/dest IP/ranges, or source/dest port/ranges.
The action for NAT in the ISE use case is to set the source IP as the virtual service VIP for CoA packets. The ISE sends the CoA packets to UDP port 1700 (by default) to ensure there is match criteria. The nat_ip is the IP, that the source IP of the matched traffic will be translated to. In this case, it is the Avi VIP of the RADIUS virtual service.
Refer to Configuring NAT on Avi Service Engine for more details on NAT configuration. It is recommended to use a separate Service Engine group for RADIUS load balancing.
Notes:
- NAT will work only if IP routing is enabled on SE group, hence all the limitations that are applicable to enable IP routing will apply here. SEs must be in legacy active/standby. Refer to Default Gateway (IP Routing on Avi SE) for more details.
- For RADIUS load balancing with ISE, it is recommended to preserve the client IP, since the ISE sends CoA to the NAD IP which is obtained from the IP header and not the IP from the RADIUS header. If the client IP is not preserved, the ISE will see SE as NAD and CoA will fail. Refer to Preserve Client IP for more details.
- NAT will work only for UDP traffic as of release 18.2.5. It will not work for any other traffic (ICMP/TCP).
Forwarding for Non-load Balanced Traffic
Since Avi SEs are configured with IP routing enabled, any traffic that does not require load balancing and is destined directly to/from the ISE PSN IPs will be routed by the SE from/to network hosts.