NSX Advanced Load Balancer in in Google Cloud VMware Engine
Overview
About Google Cloud VMware Engine
Google Cloud VMware Engine is one of the fastest and easiest ways to extend, migrate and run your VMware-based applications in Google Cloud without changes to your apps, tools, or processes.
Google Cloud VMware Engine is a fully managed service that lets you run the VMware platform in Google Cloud. VMware Engine provides you with VMware operational continuity so you can benefit from a cloud consumption model and lower your total cost of ownership. VMware Engine also offers on-demand provisioning, pay-as-you-grow, and capacity optimization. The service provides all the hardware and VMware licenses you need to run in a dedicated VMware SDDC in Google Cloud.
Your VMware environment runs natively on Google Cloud bare metal, single-tenant infrastructure in Google Cloud locations and fully integrates with the rest of Google Cloud. Google manages the infrastructure and all the necessary networking and management services so you can consume the VMware platform efficiently and securely.
VMware Engine includes vSphere, vCenter, vSAN, NSX-T, HCX, and corresponding tools, so it’s fully compatible with your existing VMware tools, processes, and skills training. This compatibility enables your team to manage workloads without disrupting existing policies, such as those related to networking, security, data protection, and auditing.
Continue to run your workloads in a fully compatible Software Defined Datacenter (SDDC) stack while leveraging the same tools and processes as you use on-premises today. Free up time to develop next-gen hybrid apps and services while reducing the operational burden on IT. Increase business agility by unlocking intelligent insights with Google services via BigQuery to analyse your data in real time and better connect with your customers.
About NSX Advanced Load Balancer (NSX ALB)
VMware NSX Advanced Load Balancer (NSX ALB, also known as Avi Vantage) is an enterprise grade, full featured load balancer, web application firewall and GSLB solution. Avi is a software based, distributed solution capable of providing application delivery features in both private and public cloud environments.
Network Services in Google Cloud VMware Engine
The following diagram demonstrates high-level network architecture of Google Cloud VMware Engine - Private Cloud VMware Network services:
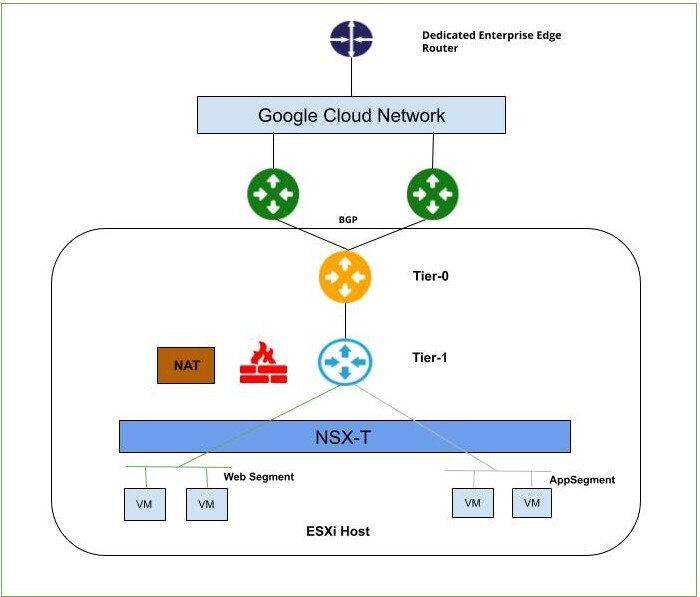
As shown in the diagram,
Google Cloud VMware Engine is pre-provisioned with the following NSX-T network configuration:
- Tier-0 Gateway configured for ECMP
- Northbound connectivity through BGP on Tier-0 Gateway
- Pre-provisioned Tier-1 Gateway for workload segment connectivity
- Route advertisement enabled on pre-provisioned Tier-1 Gateway
- Route redistribution enabled on Tier-0 Gateway
- Default Internet Access for SDDC workloads with an option to enable/disable
The service allows you to add the following NSX-T network configuration:
- Create overlay segments and connect workloads
- Deploy additional Tier-1 Gateways
- Deploy distributed services such as DFW
- Deploy stateful services such as Load Balancer, DNS and DHCP on Tier-1 Gateway
NSX Advanced Load Balancer for Google Cloud VMware Engine
Avi provides load Balancing for applications running in Google Cloud VMware Engine SDDC. Avi integrates as a 2nd party load balancing solution, with communication between the Avi Controller, NSX Manager and VMware vCenter within Google Cloud VMware Engine. This integration enables Avi to deploy and manage Service Engines automatically based on demand, providing for an elastic, automated approach to load balancing.
Avi leverages the NSX-T Cloud Connector mode of operation in Google Cloud VMware Engine as well. This is facilitated by the similarity in the VMware infrastructure between an on-premises NSX-T deployment as well as Google Cloud VMware Engine deployment, as far as objects of interest for Avi are concerned.
The following schematic provides an overview of the integration:

From the deployment shown above:
- The Avi Controller is a cluster of three control plane VMs. The Avi Controllers can run within the Google Cloud VMware Engine SDDC, or outside it in your on-premises datacenter / Google Cloud native VPC. The Controllers need IP reachability from the Service Engines.
- The Controller connects with the NSX-Manager and VMware vSphere vCenter within Google Cloud VMware Engine and discovers the VMware objects such as Port groups, clusters, NSX T1, Segments etc.
- The Controller automatically deploys an Avi Service Engine, which is the data path instance. The Avi SE is a virtual machine running within the Google Cloud VMware Engine SDDC.
- The Controller ensures that the NSX-T DFW is programmed correctly to allow traffic.
- Avi allows for various deployment configurations of the underlying NSX system, such as shared segment for the Virtual Service front-end IP (VS IP) and pool members, as well as dedicated segments for each.
- Avi also supports the default Tier 1 gateway as well as additional Tier 1 gateways created within Google Cloud VMware Engine by the customer.
- While Avi supports various VLAN backed segment topologies, these are not applicable in the context of Google Cloud VMware Engine as the service supports overlay segments created by customers.
Installing Avi in Google Cloud VMware Engine
Prerequisites
Licensing
- NSX Advanced load balancer only supports Enterprise Edition license for Google Cloud VMware Engine integration. To know more about the Enterprise Edition license, see License Management on NSX Advanced load balancer.
- NSX ALB Licenses can be added to the Controller at any time as per the requirement. The licenses are available at my.vmware.com. Login to your account at my.vmware.com to access the VMware serial key(DLF).
- NSX ALB Controllers manage licenses and central capacity pool for NSX ALB Service Engines.
- NSX ALB allows for a 10% overage of the total license capacity.
Role Requirements
The Avi Controller requires:
- An NSX Network Engineer role or higher.
- VMware vCenter permissions
You can use the CloudAdmin role provided for Google Cloud VMware Engine. This role is a superset of the required permissions and is sufficient for the integration.
Content Library
The Avi Controller uploads the Service Engine image to the content library on the vCenter server and uses this to create new virtual machine (VM) every time a new Service Engine is required.
Create the content libraries in vCenter before configuring the NSX-T cloud.
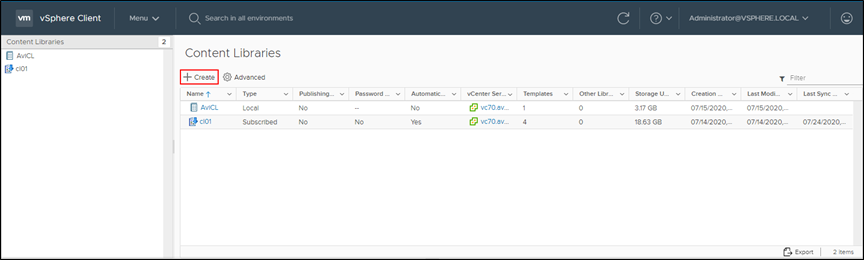
In the vCenter vSphere client, navigate to Content Libraries.
-
In the vCenter vSphere client, navigate to Content Libraries.
-
Click on Create. The New Content Library wizard opens.
-
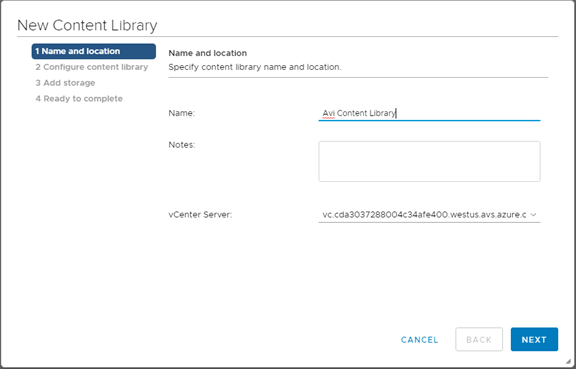
In the Name and location page, enter the Name and select a vCenter Server instance for the content library as shown below:
-
Click on Next.
-
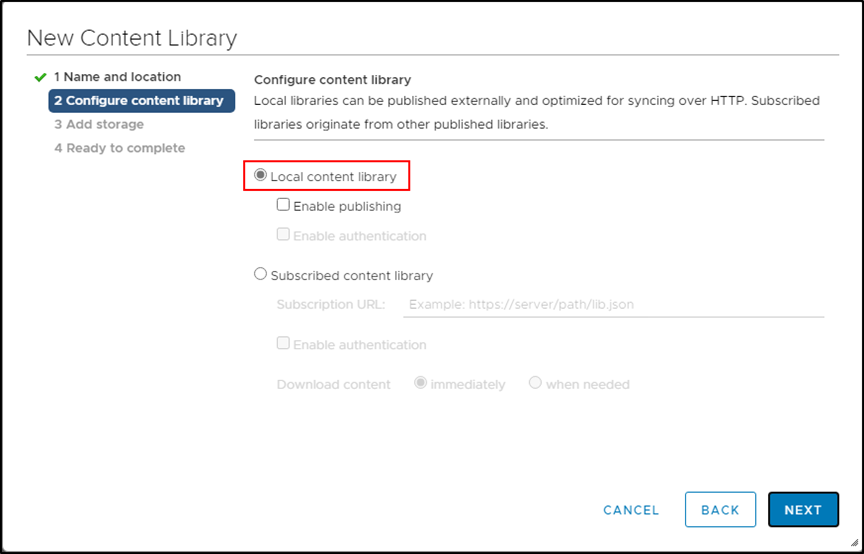
In the Configure content library page, select Local content library.
-
Click on Next.
-
In the Add storage page, select datastore as a storage location for the content library contents
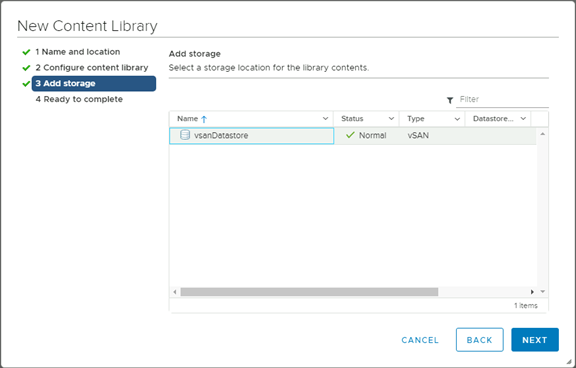
-
Click on Next
-
In the Ready to complete page, review the details.
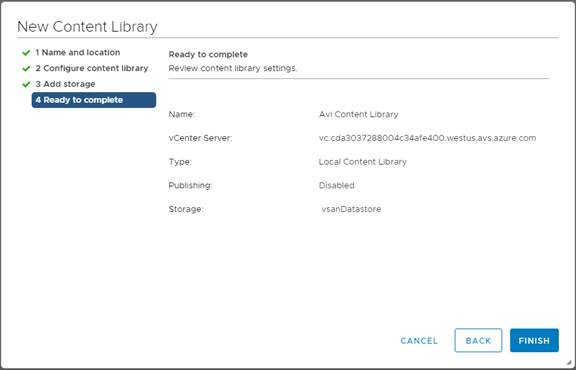
-
Click on Finish.
Deploying the Avi Controller OVA
To deploy the Avi Controller OVA,
-
Log in to the vCenter server through a vCenter client.
-
From the File menu, select Deploy OVF Template.

-
Select the
controller.ovafile from your local machine. - In the Deploy OVF Template wizard,
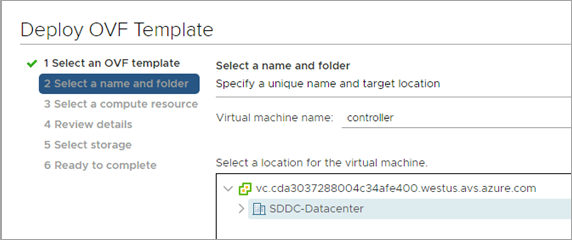
-
Select the VM name and the location to deploy.
-
Select the compute resource.

-
Review the details.
-
Select the storage as shown below:
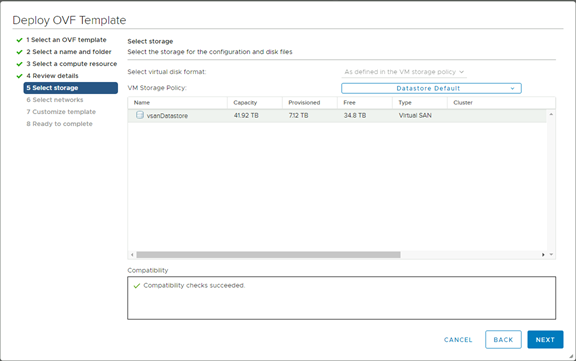
-
Choose a management network for the Avi Controller.
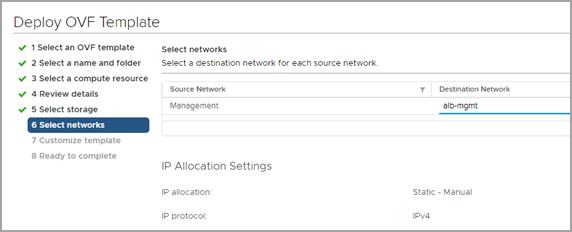
-
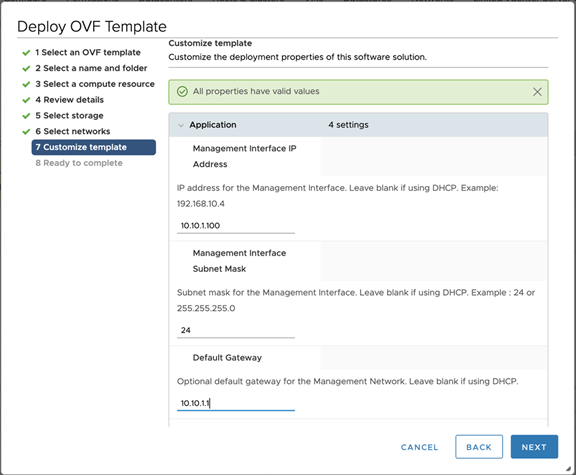
Enter the management IP address, subnet mask and default gateway. In the case of DHCP, leave this field empty.
Note: Using static IP address is recommended for production setups.
-
Review the settings and click on Finish.
-
- Power on the virtual machine.
Setting up the Avi Controller
This section shows the steps to perform initial configuration of the Avi Controller using its deployment wizard. You can change or customize settings following initial deployment using the Avi Controller’s web interface.
To complete the setup,
-
Navigate to the Avi Controller IP on your browser.
Note: While the system is booting up, a 503 status code or a page with following message will appear, “Controller is not yet ready. Please try again after a couple of minutes”. Wait for about 5 to 10 minutes and refresh the page. Then follow the instructions below for the setup wizard.
-
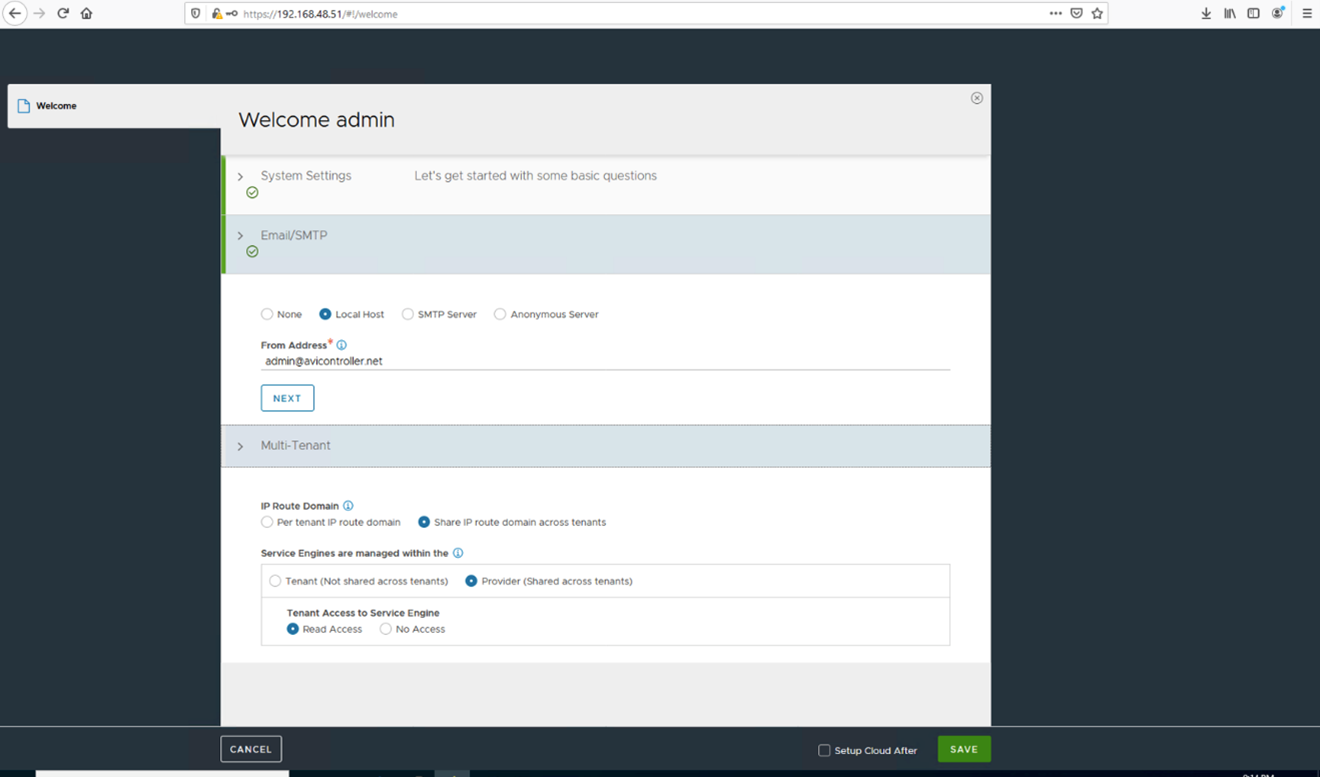
Enter the admin details as shown below:
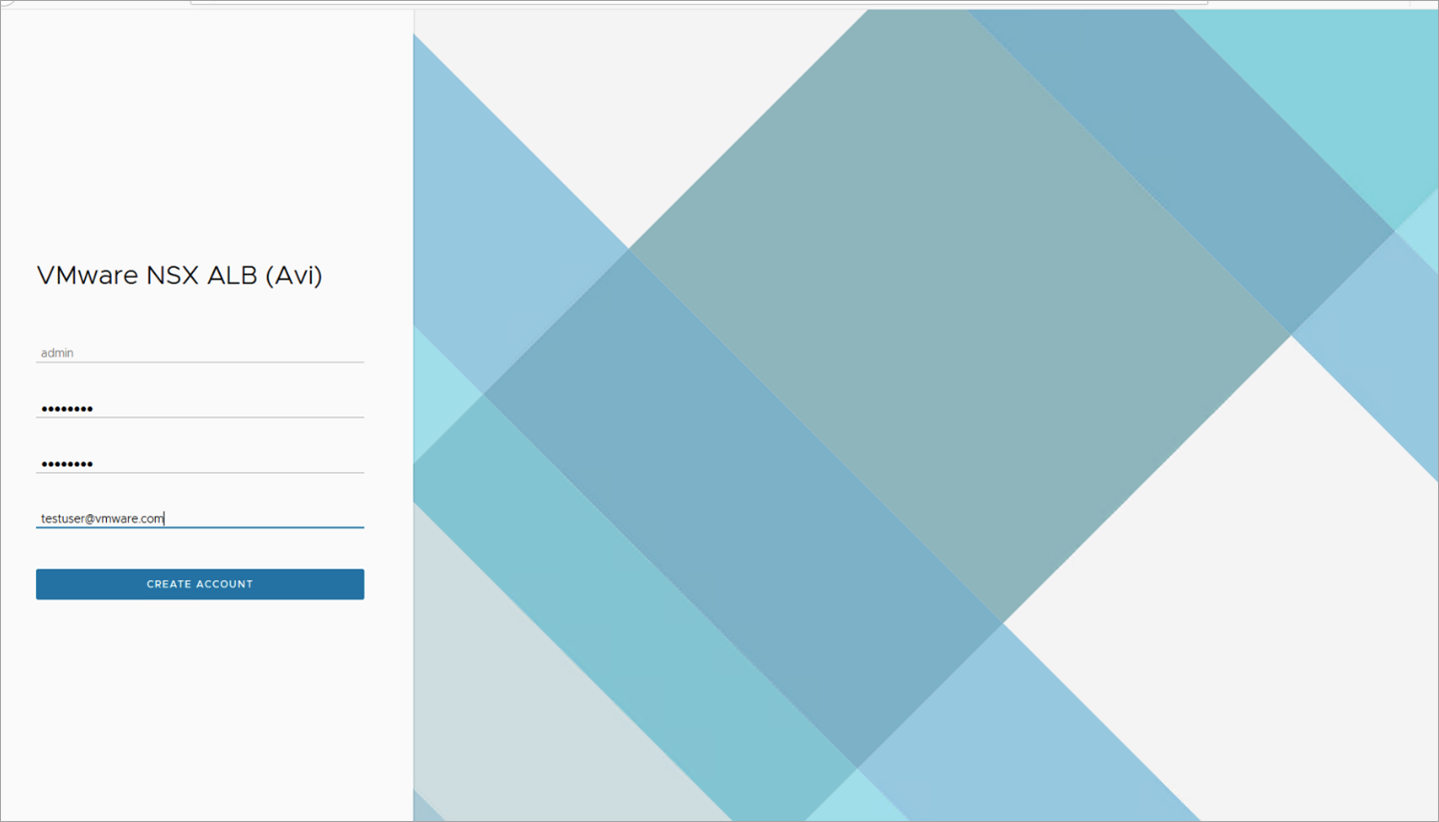
Note: The Email Address is required for admin password reset in case of lockout.
-
Enter the backup passphrase and DNS server information.
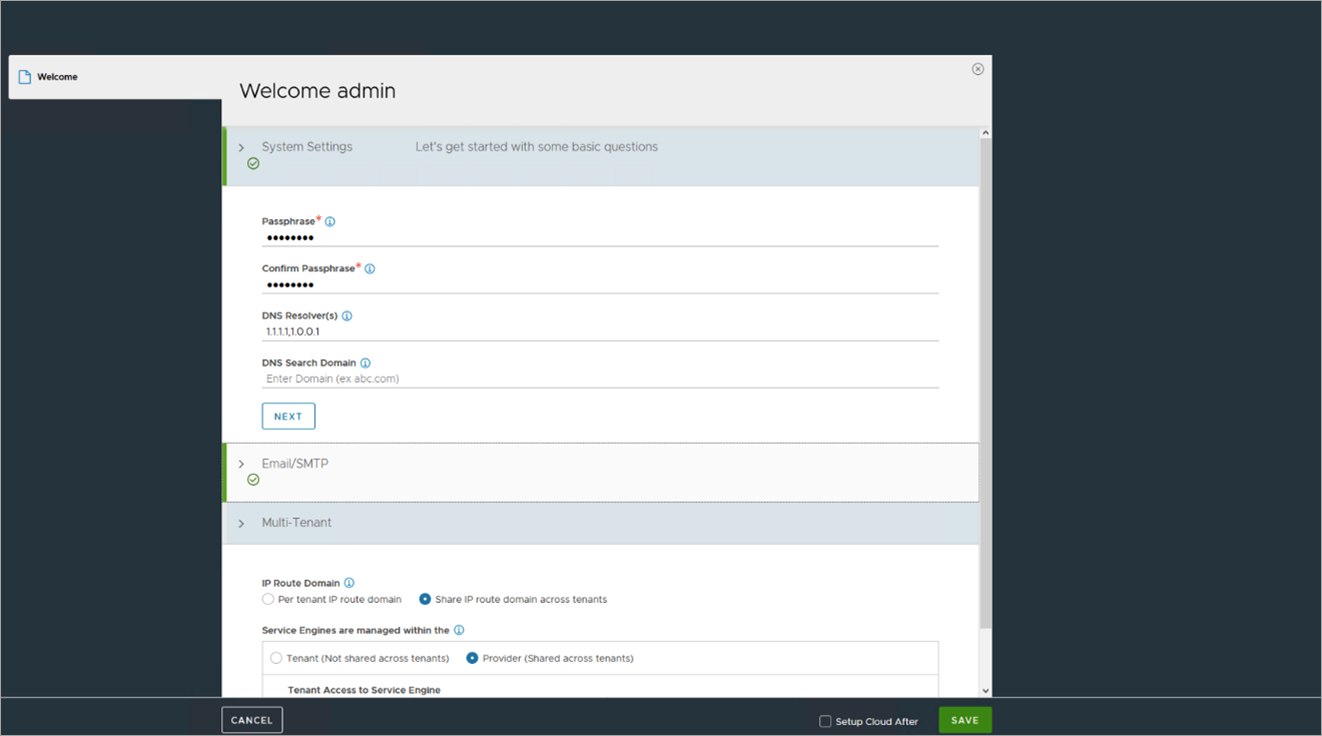
-
Configure the Email/SMTP information.
-
Click on Save.
Creating an NSX-T Cloud
To create an NSX-T cloud, log in in to the Avi Controller and follow the steps given below:
Create Credentials
From the Avi UI,
-
Navigate to Administration > User Credentials.
-
Click on Create.
-
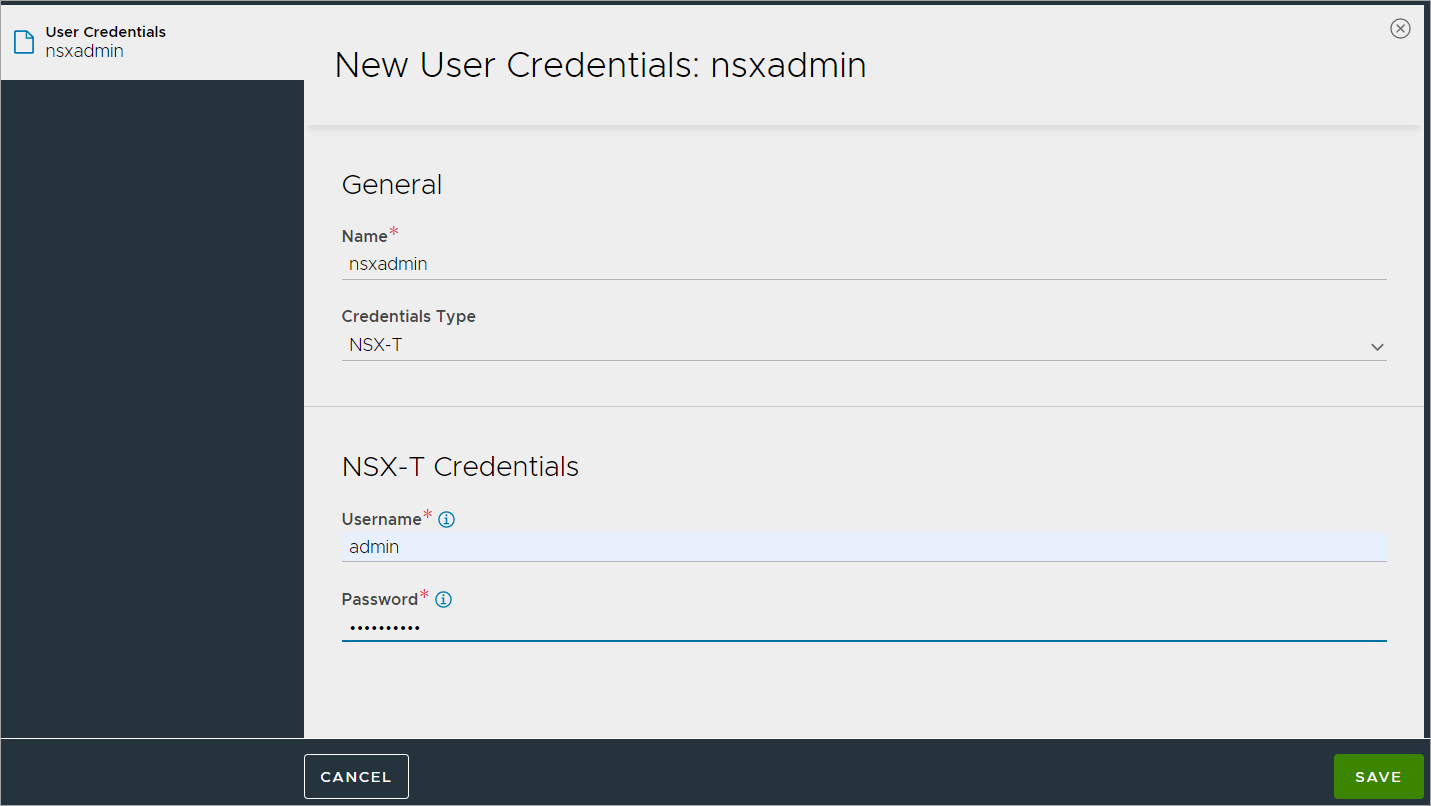
Provide a Name.
-
Select
NSX-Tas the Credentials Type. -
Enter the NSX Username and Password.
-
Click on Save.
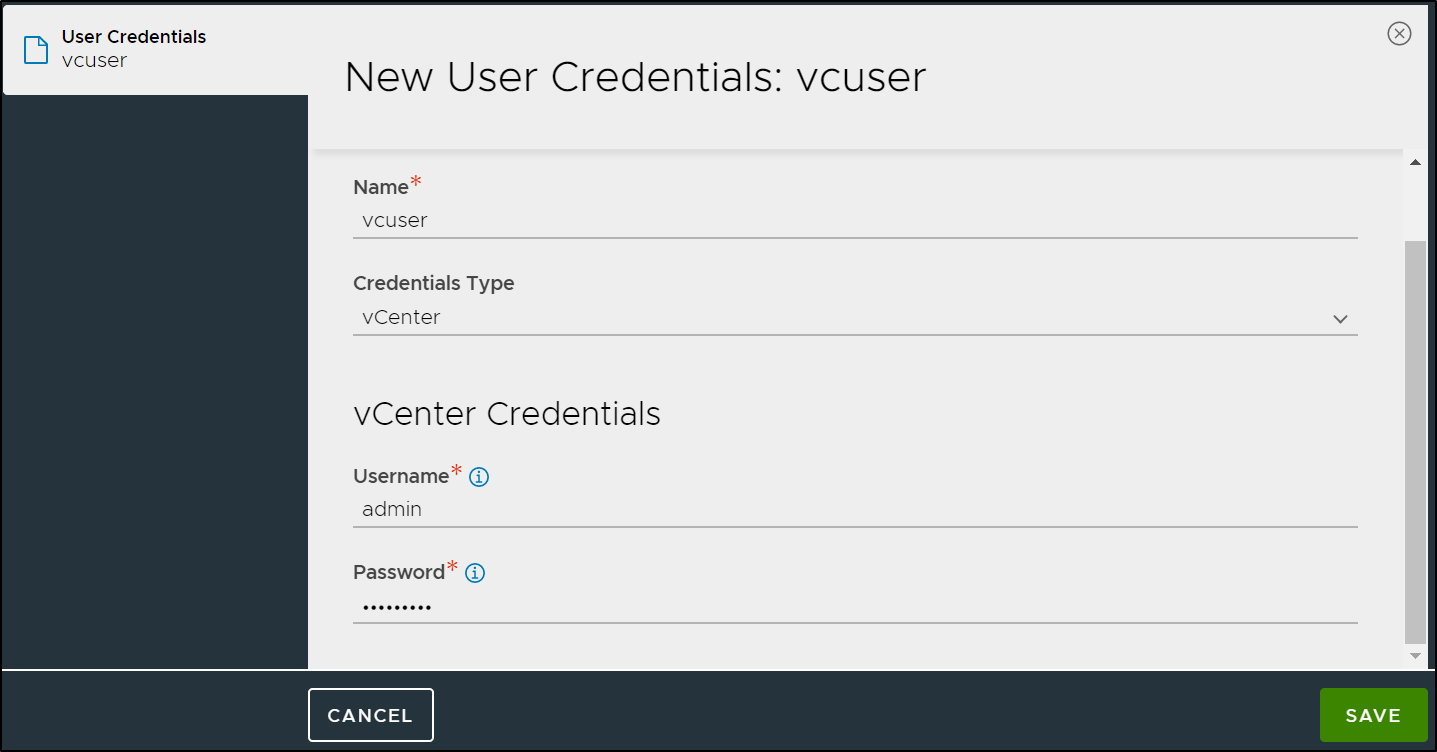
Similarly, create vCenter Credentials.
Configuring the NSX-T Cloud
From the Avi UI,
-
Navigate to Infrastructure > Clouds.
-
Click on Create and select NSX-T Cloud.

-
Enter the cloud’s Name.
-
Enable the DHCP option if the SE management segment has DHCP enabled.
-
Enter the Object Name Prefix String. Note: The prefix string can only have letters, numbers, and underscores. This field cannot be changed once the cloud is configured.
-
Enter the NSX-T manager hostname or IP address as the NSX-T Manager Address and select the NSX-T Manager Credentials.
-
Click on Connect to authenticate with the NSX-T manager.
-
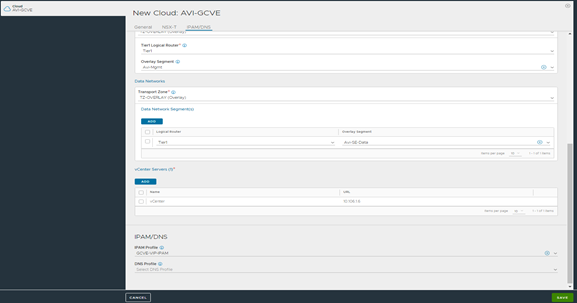
In the In the Management Network section, select the Transport Zone required from the drop-down.
-
Select the Tier1 Logical Router ID and the Segment ID.

-
Under Data Network Segment(s), Select the Tier-1 gateway and logical switch for VIP placement.
-
Click on Add to select one more Tier-1 router and a connected logical segment for VIP placement.
-
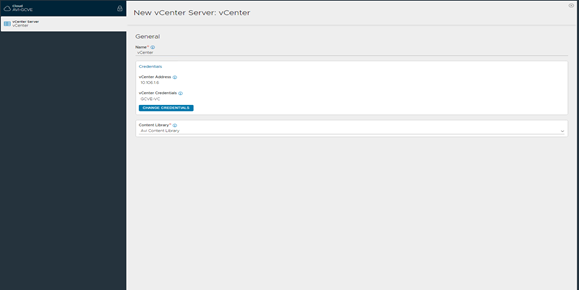
Under vCenters click on Add. In the New vCenter Server screen,
-
Enter the vCenter Name.
-
Enter the Credentials.
-
Click on Connect.
-
Select the Content Library.
-
Click on Done.
-
-
Select the IPAM/ DNS profiles, as required.
-
Click on Save to complete the configuration.
The Cloud Connector Status will turn green, and the system is ready for creation of a virtual service.
Creating a Virtual Service
From the Avi UI,
-
Go to Applications.
-
Click on Create Virtual Service > Basic Setup.
-
Select the NSX-T cloud which was created.

-
Enter the details related to the virtual service IP, Pool members, Tier 1 Logical Router, and more as required.

-
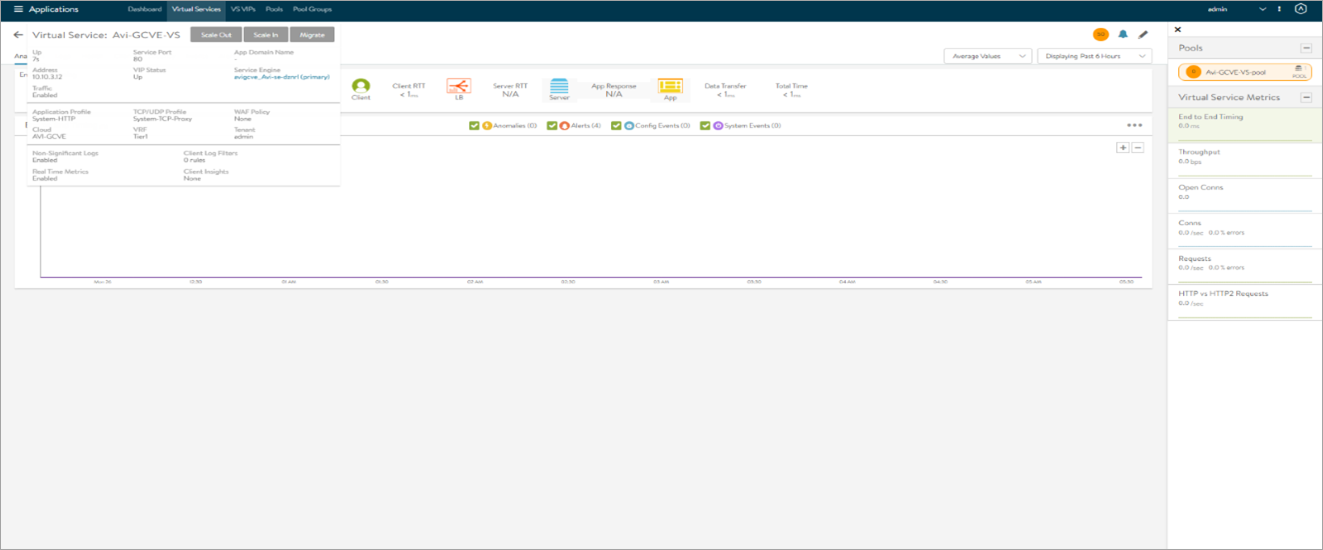
Click on Save to create the virtual service.
On successful creation of a Service Engine, the Virtual Service will come up and will be ready to process traffic.
Configure Public IP to Avi VIP
To configure public IP to Avi VIP,
-
Enable internet access and public IP service in a region.
-
Allocate Public IP for mapping the public IP to VIP IP.
-
Create a firewall table to allow inbound and outbound traffic for public IP allocated
Enabling Internet Access and Public IP Service in a Region
To enable internet access and public IP service in a region,
-
From the GCVE project, navigate to Network > Regional settings.
-
In the row corresponding to the region of interest, select Edit.
-
Toggle the Internet access and Public IP buttons to enabled.
-
Enter the Edge services CIDR (/26 address range).
-
Click Submit.
Allocating Public IP for Mapping the Public IP to VIP IP
To allocate a public IP address,
-
Go to Network > Public IPs.
-
Click Allocate.
-
Select the Location where you want to serve the allocated public IP.
-
Attach the subnet for NSX-T Edge uplinks to the Firewall Rule.
Creating a Firewall Table to Allow Inbound and Outbound Traffic for Public IP Allocated
To create a firewall table,
-
Go to Network > Firewall tables.
-
Click Create new firewall table.
-
Enter a name for the table.
-
Add rules for inbound & outbound traffic for TCP as given below:

-
Click Done.
Document Revision History
| Date | Change Summary |
|---|---|
| August 24, 2021 | Published the Installation Guide for VMware NSX ALB in Google Cloud VMware Engine |