Installing Avi Vantage into a No-Access OpenStack Cloud
This article lists the steps need to install Avi Vantage into an OpenStack cloud for the case in which Avi Vantage has no access to OpenStack, the orchestrator.
What is No-Access Mode?
In this mode, Avi Vantage has no access to OpenStack as an orchestrator. Adding, removing, or modifying properties of a Service Engine requires an administrator to manually perform the changes. Servers and networks cannot be auto-discovered by Avi Vantage; they must be manually configured. Refer to the Orchestrator Access Modes article for a complete discussion.
Note: The document assumes that an Avi Controller has already been instantiated in the No-Orchestration mode. The document refers to the cloud “OpenStack-No-Access-Cloud (seen below)” as the No-Access Cloud for OpenStack.
Installation Steps
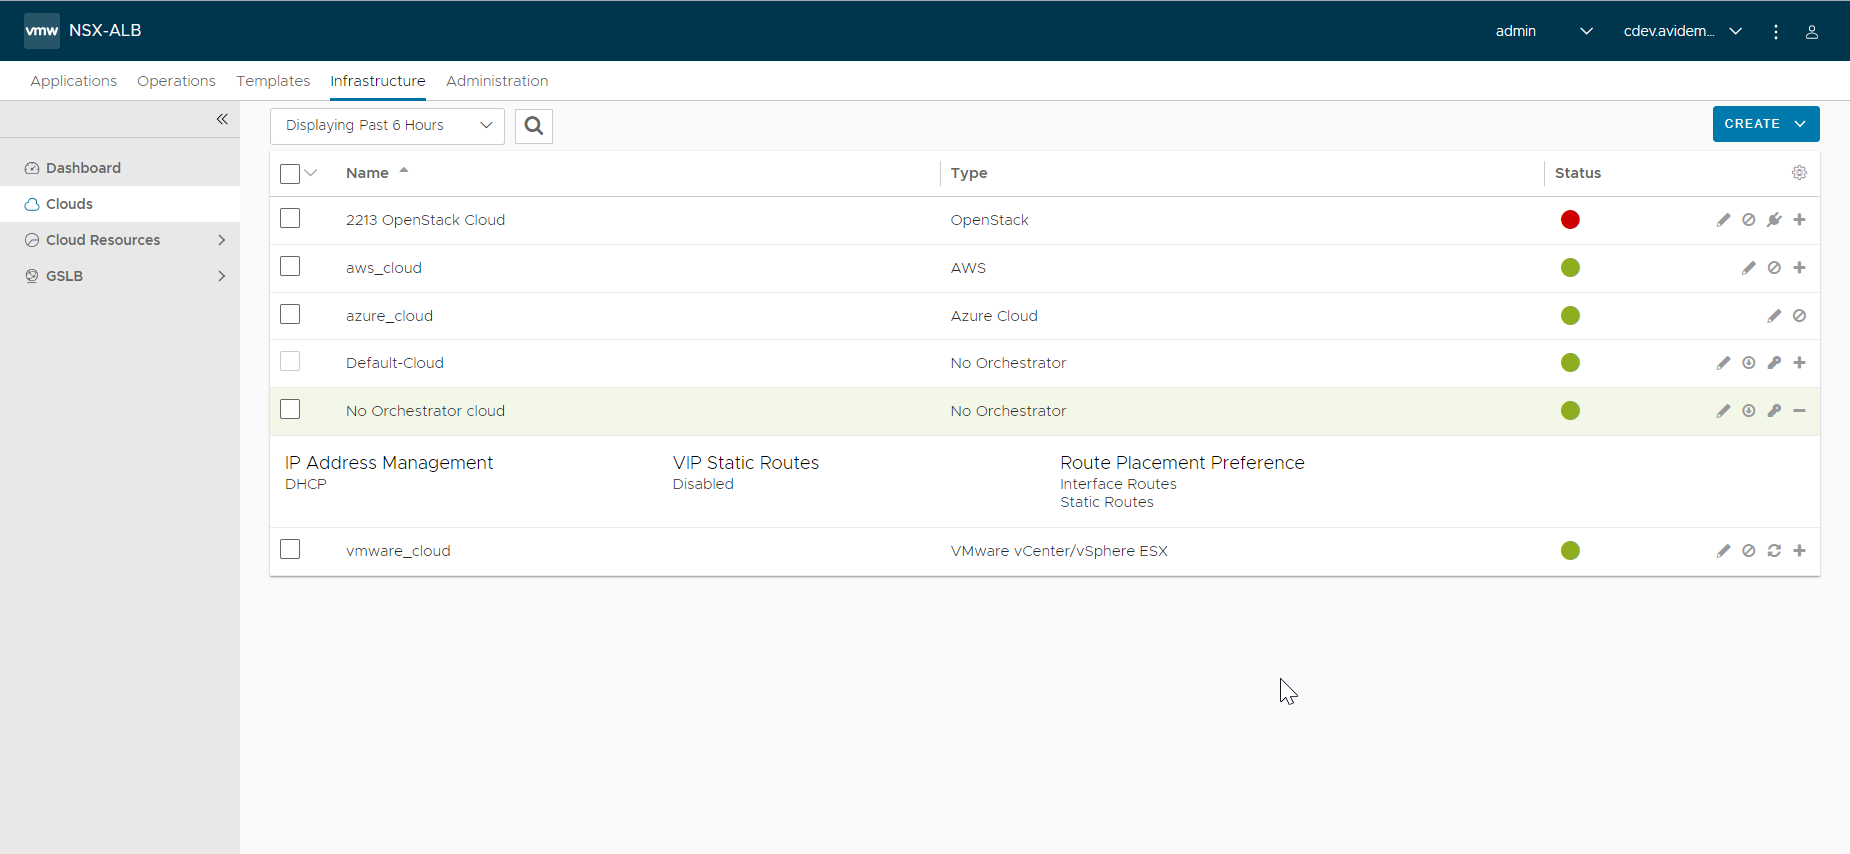
- Create an OpenStack No-Access cloud.
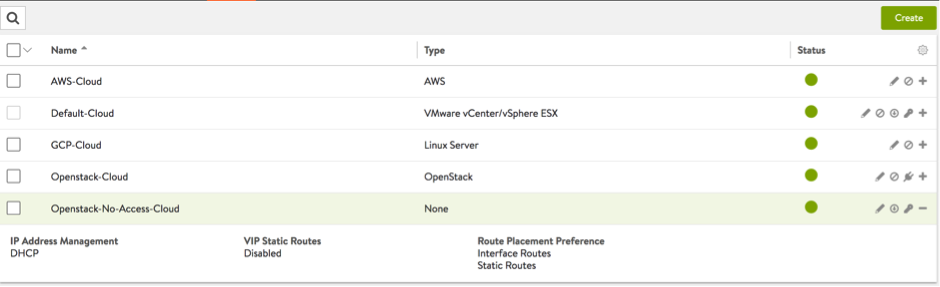
- Choose the IP address management as DHCP (more info on IPAM appears later in this article).
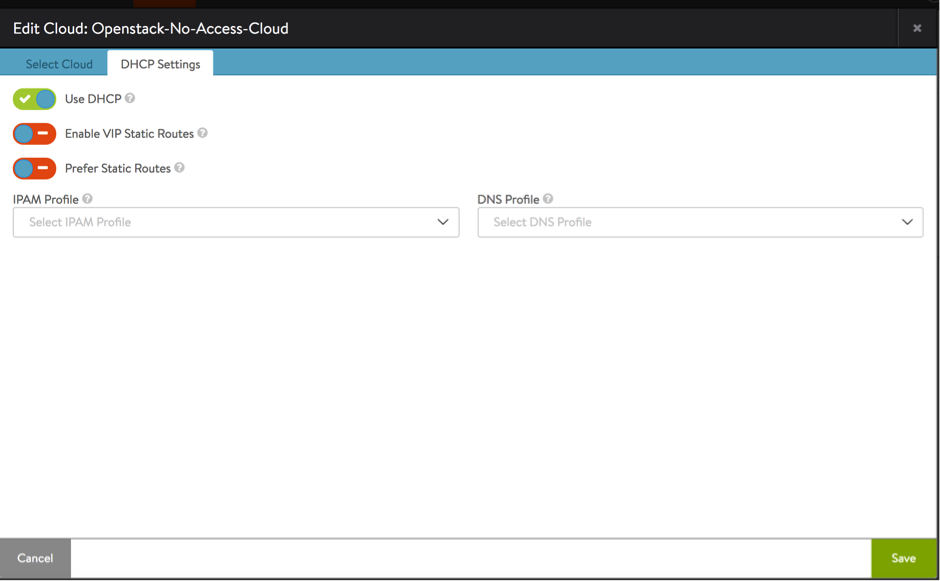 Starting with NSX Advanced Load Balancer 22.1.3, the following UI is applicable:
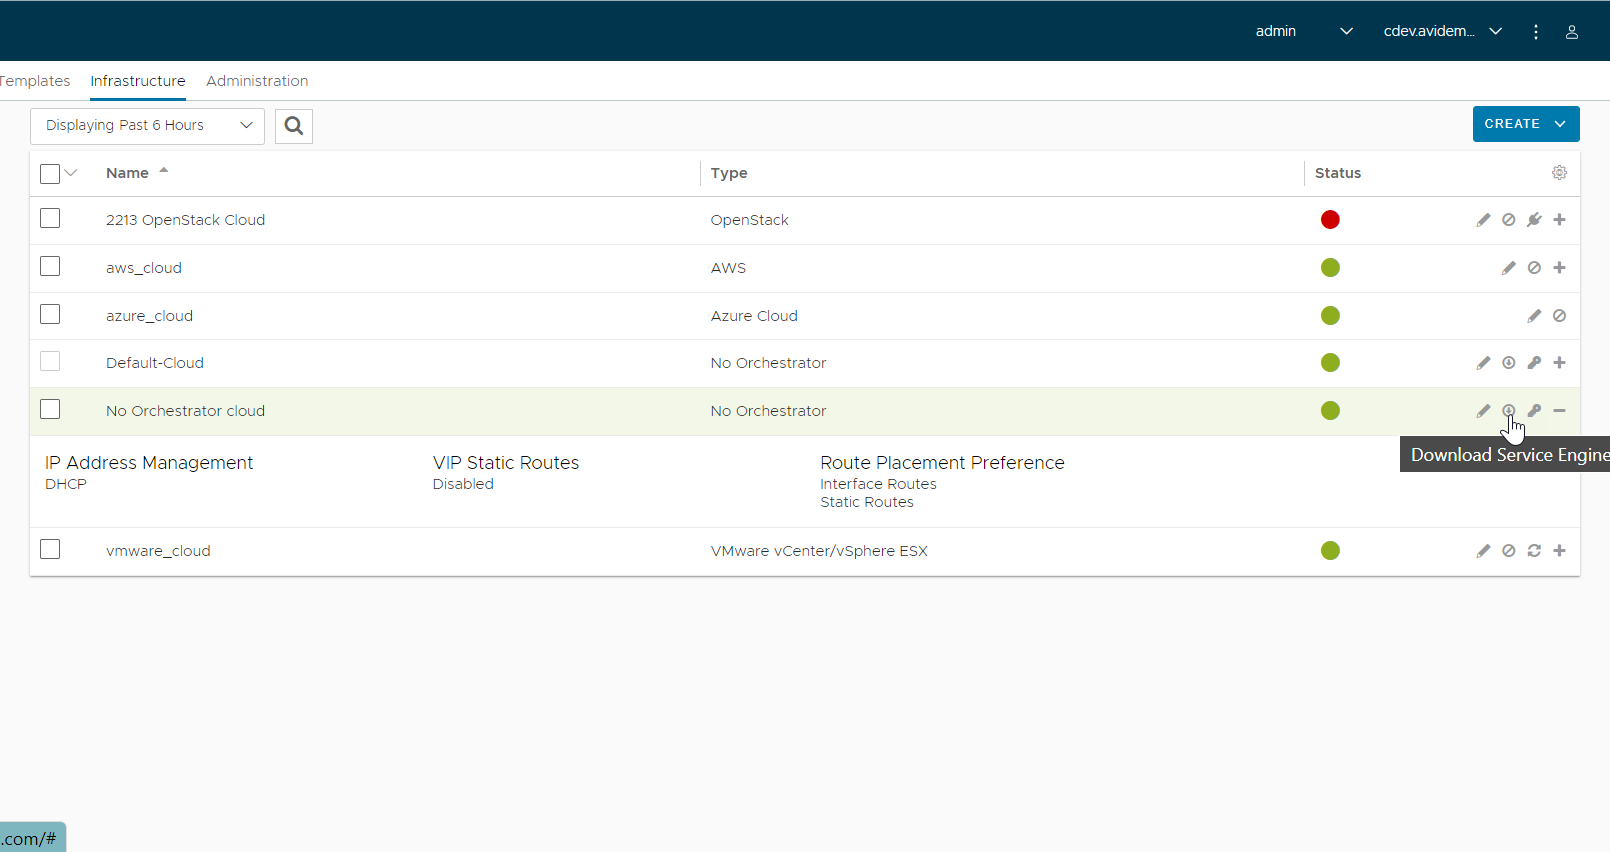
- Download SE qcow2 image, as this will be pushed to Glance.
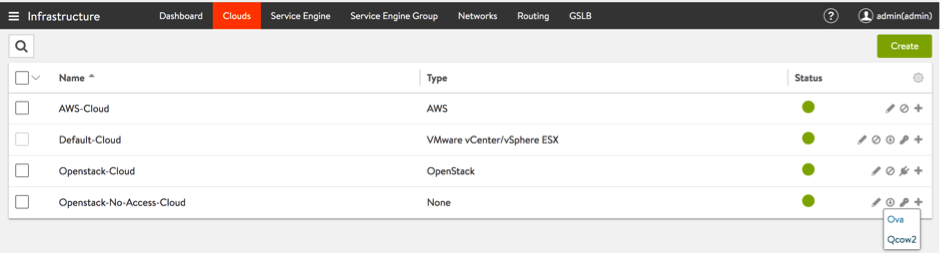 Starting with NSX Advanced Load Balancer 22.1.3, the following UI is applicable:
- Login to the OpenStack instance under the respective tenant ('admin' in this case) and click Create image. Choose the format as QCOW2 and provide the image file for the SE QCOW2 that was downloaded.

- Upload the
se.qcow2image to Glance.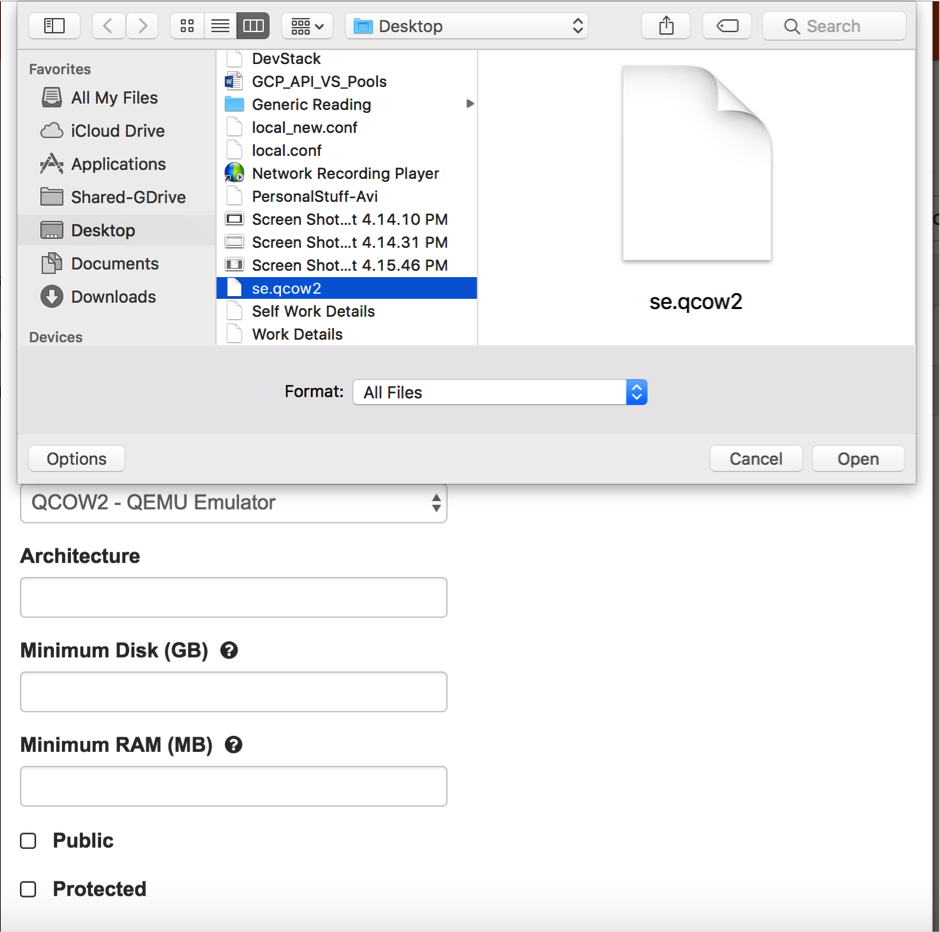 Notes:
- Create the
avimgmtnetwork.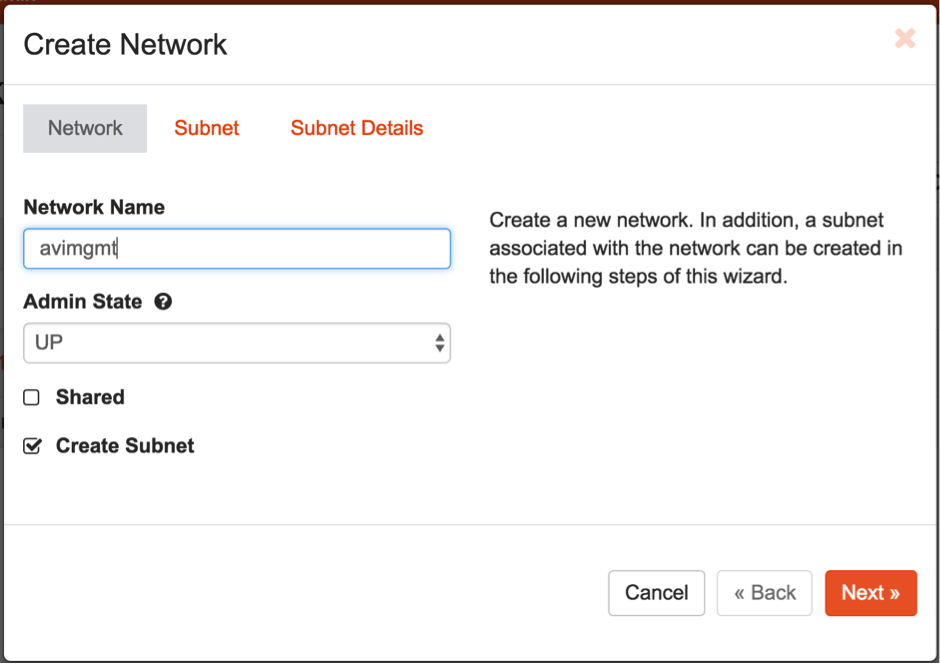 6a. Provide an appropriate subnet to the network.
- Create a security group as below and associate it with the Service Engine to make sure that ICMP traffic and SSH and HTTP traffic is allowed.

- Create an Avi Service Engine Instance.
Note: Service Engines can be created using heat-templates as well. For detailed information on this, refer to Creating Service Engine using Heat-Templates in no access OpenStack Cloud.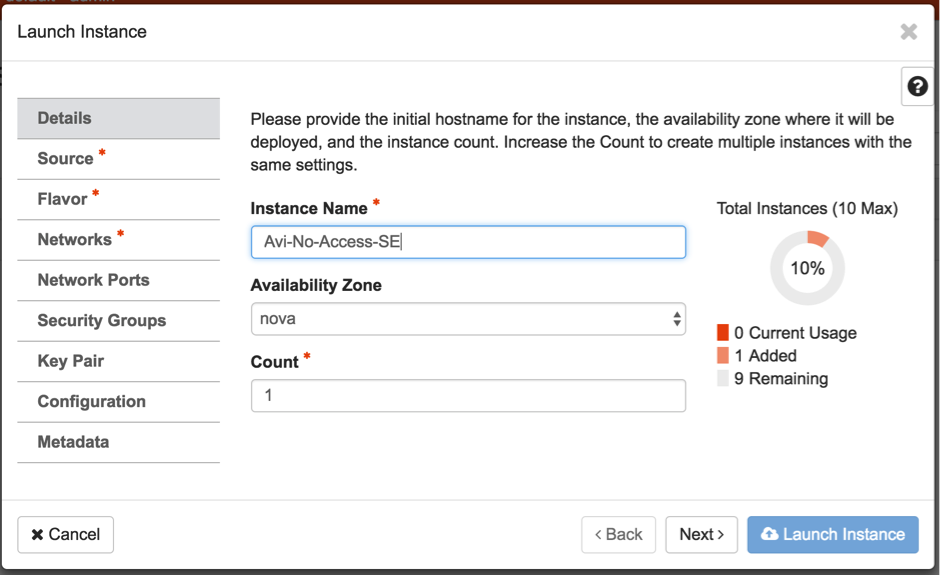
- Select the appropriate
qcow2image for the SE that needs to be instantiated.
- Choose the respective flavor for the SE. In this case it would be
m1.small. To choose/create the respective flavor type, follow the instructions available in the Deployment Prerequisites section of the Installing Avi Vantage for OpenStack article.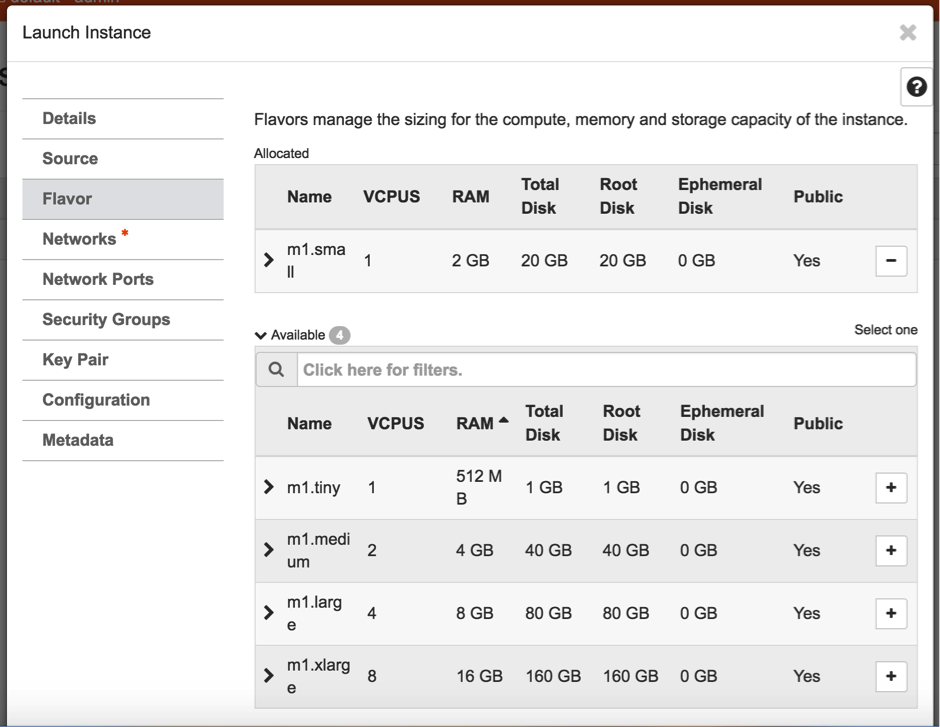
- Choose the
avimgmtnetwork for instantiating the Avi Service Engine.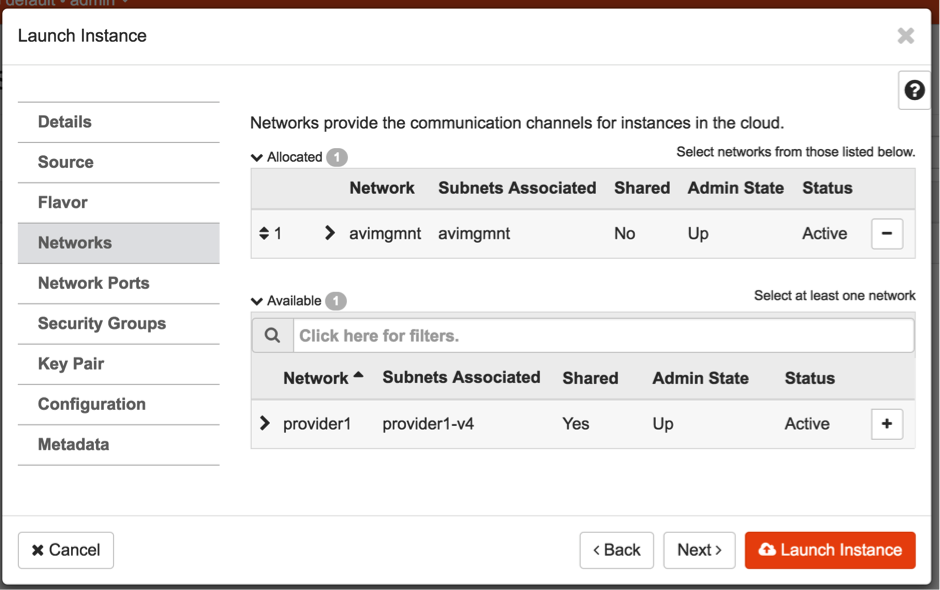
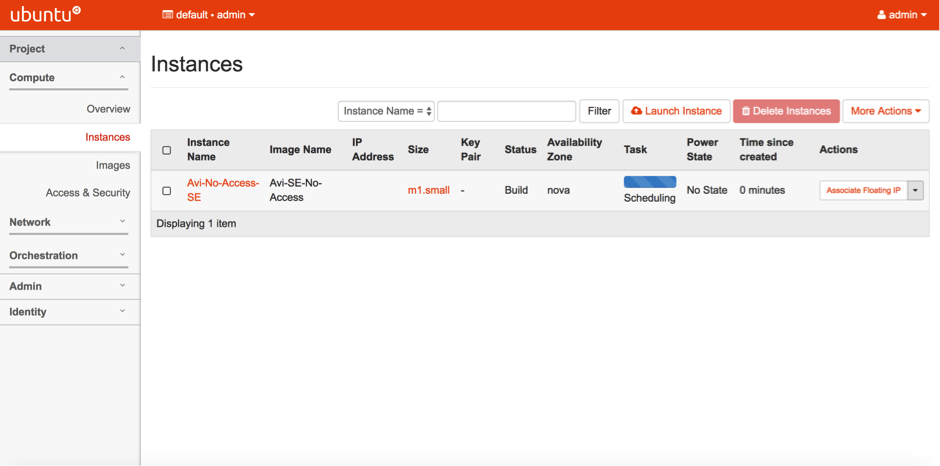
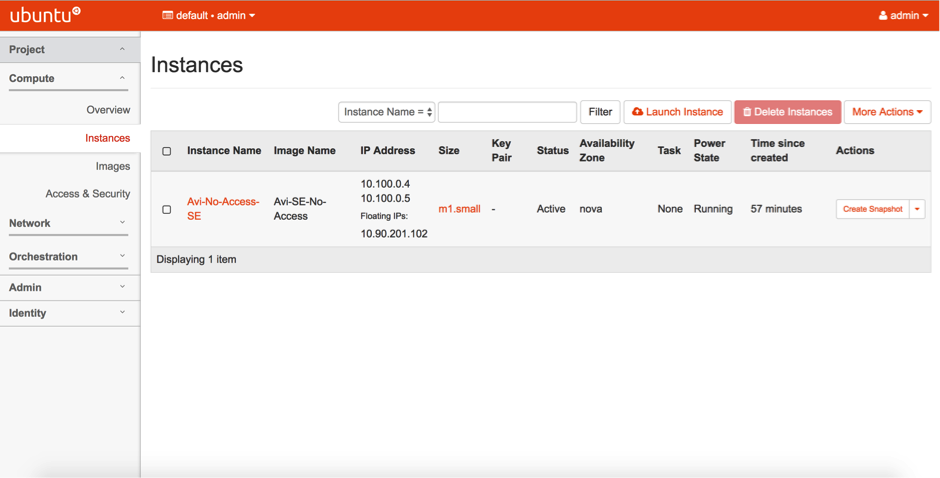
- The SE gets spawned as below.
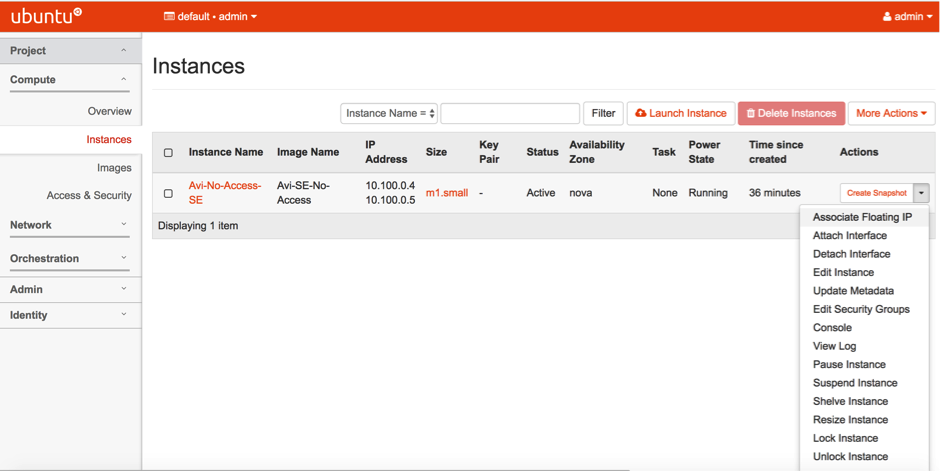
- Associate a floating IP to the instance.
Note: This step is only needed in the case where SEs are not reachable directly.
- Attach another interface to the Service Engine. This would be the data vNIC.
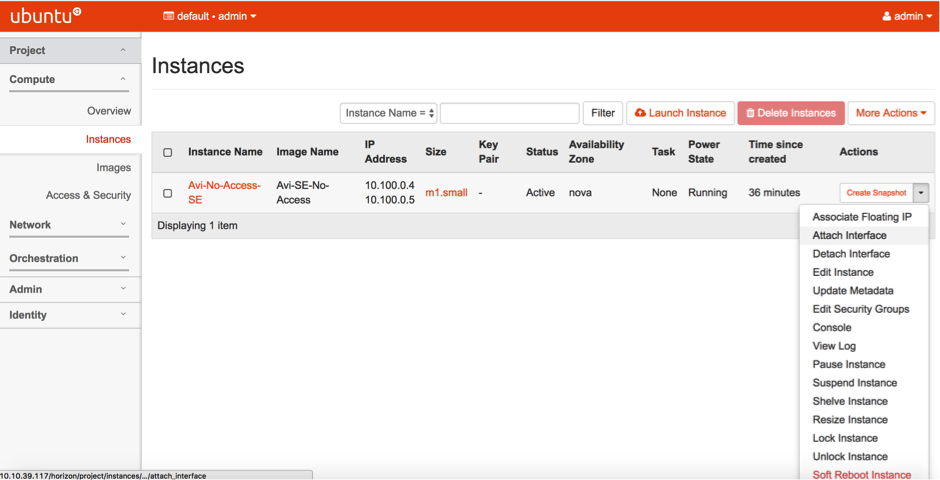
- The SE gets created with one management vNIC and one data vNIC, the latter associated with a floating IP.
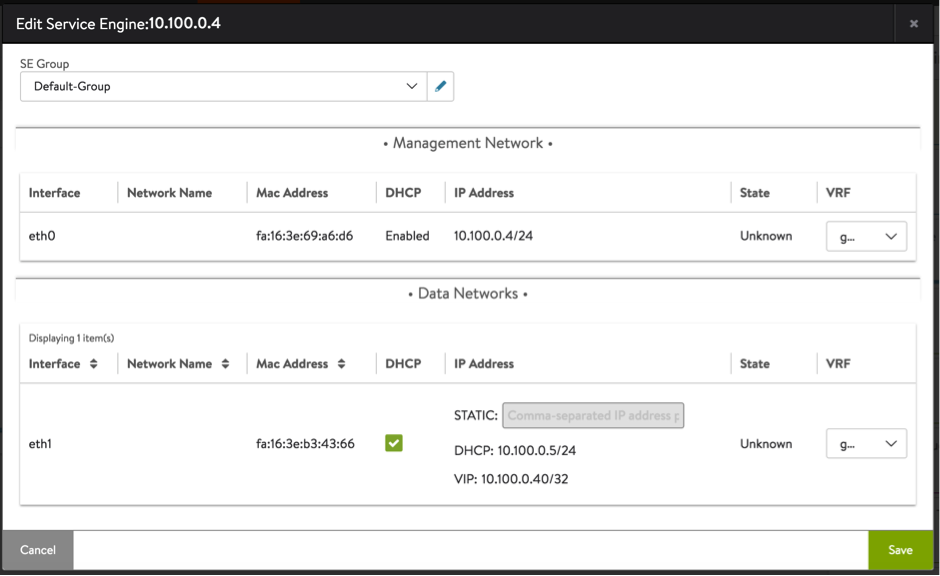
- Wait for the Avi SEs to show up in the UI's Infrastructure > Service Engine list under the respective cloud.

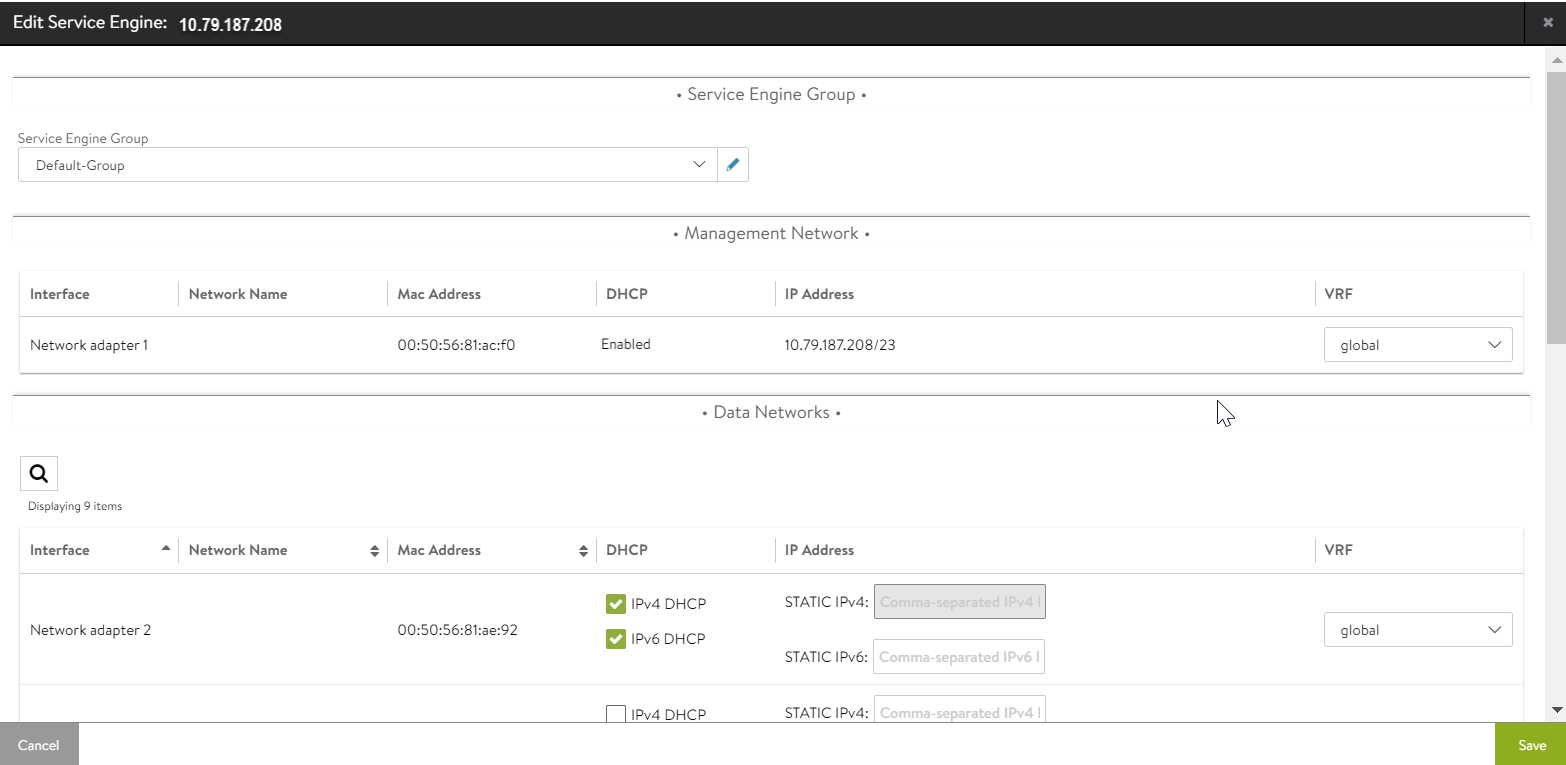
Starting with NSX Advanced Load Balancer 22.1.3, the following UI is applicable: Navigate to Infrastructure > Cloud Resources > Service Engine to check for the created SE.

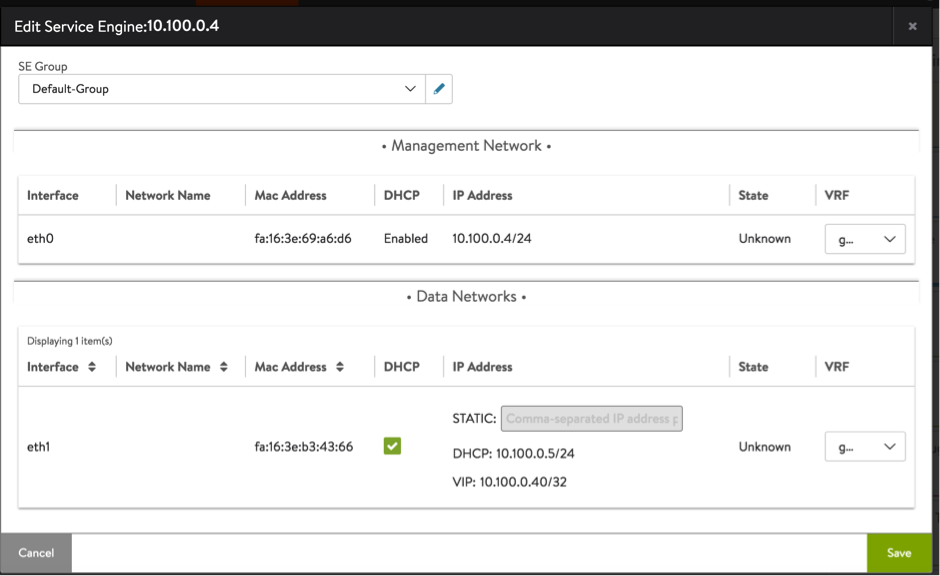
- Edit each SE and enable DHCP for each data network.
Starting with NSX Advanced Load Balancer 22.1.3, the following UI is applicable:
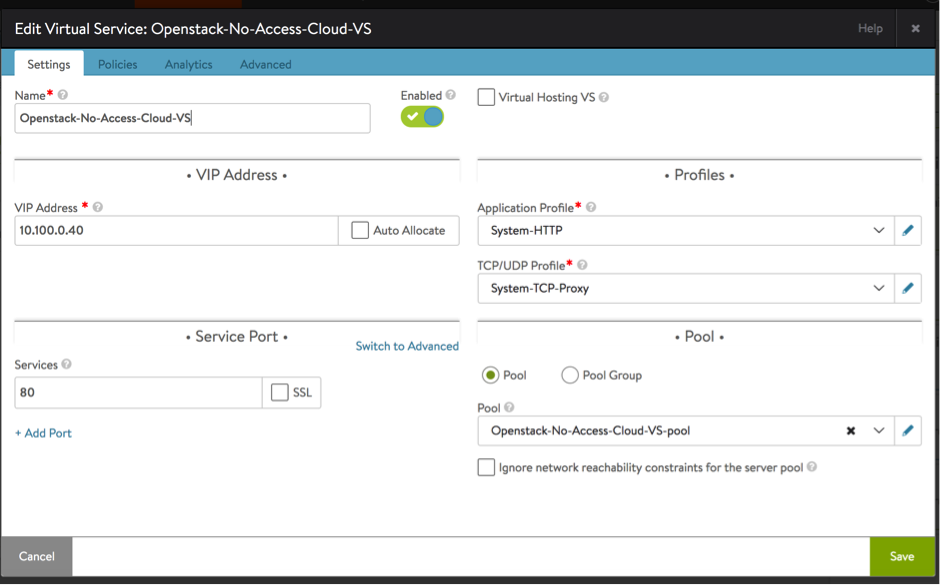
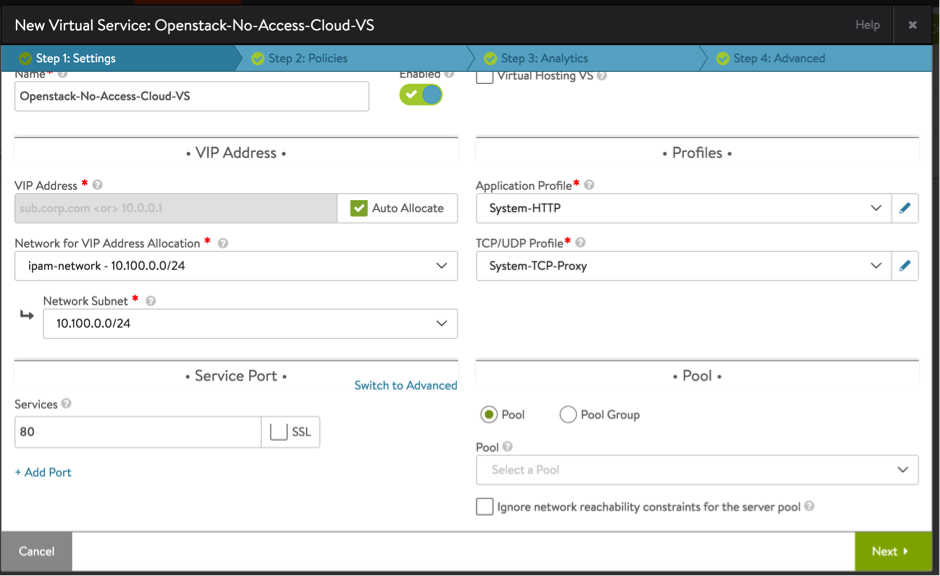
- Create a virtual service and choose an IP address from the data network.
Starting with NSX Advanced Load Balancer 22.1.3, the following UI is applicable: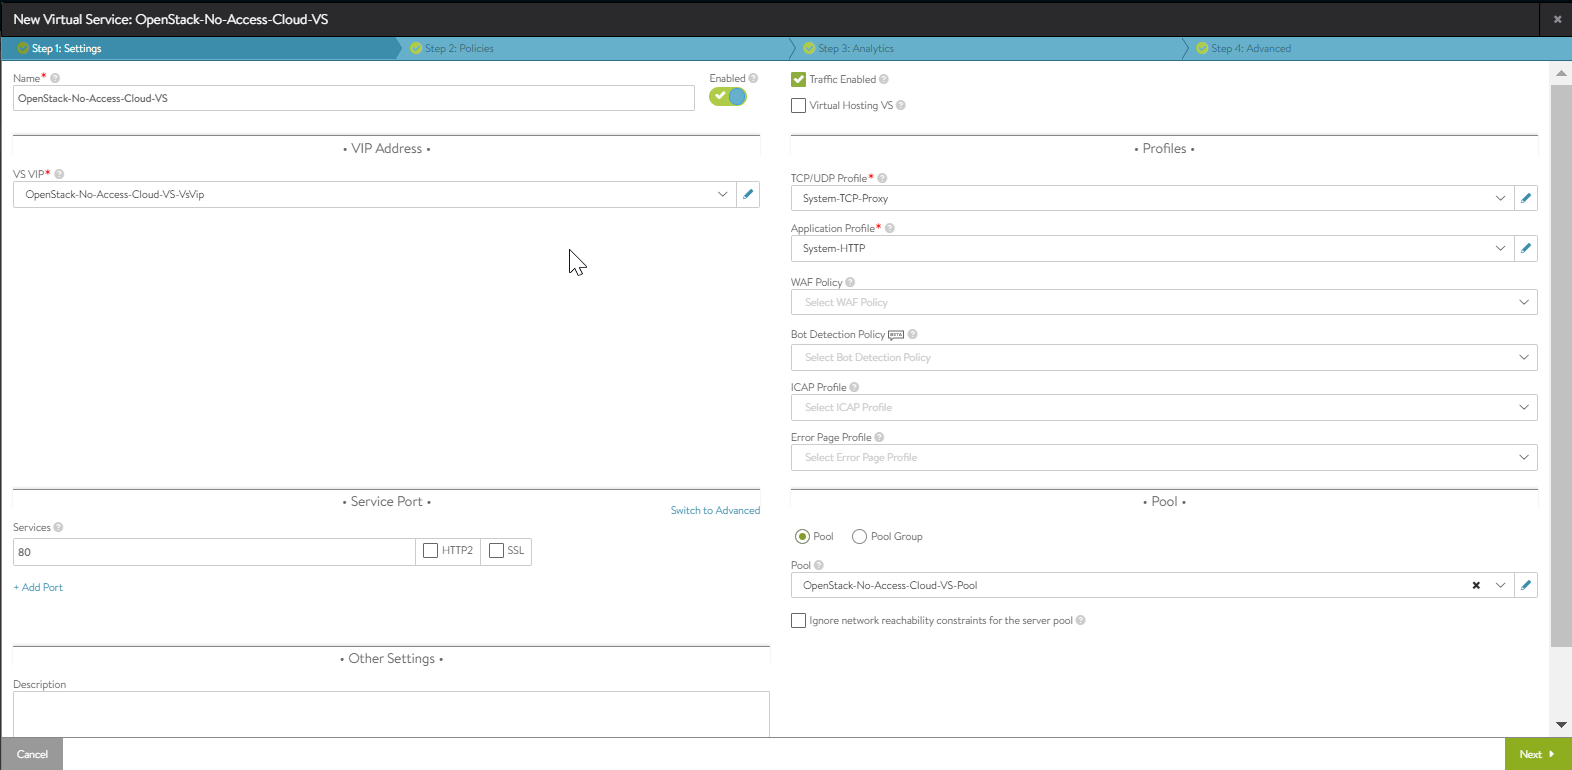
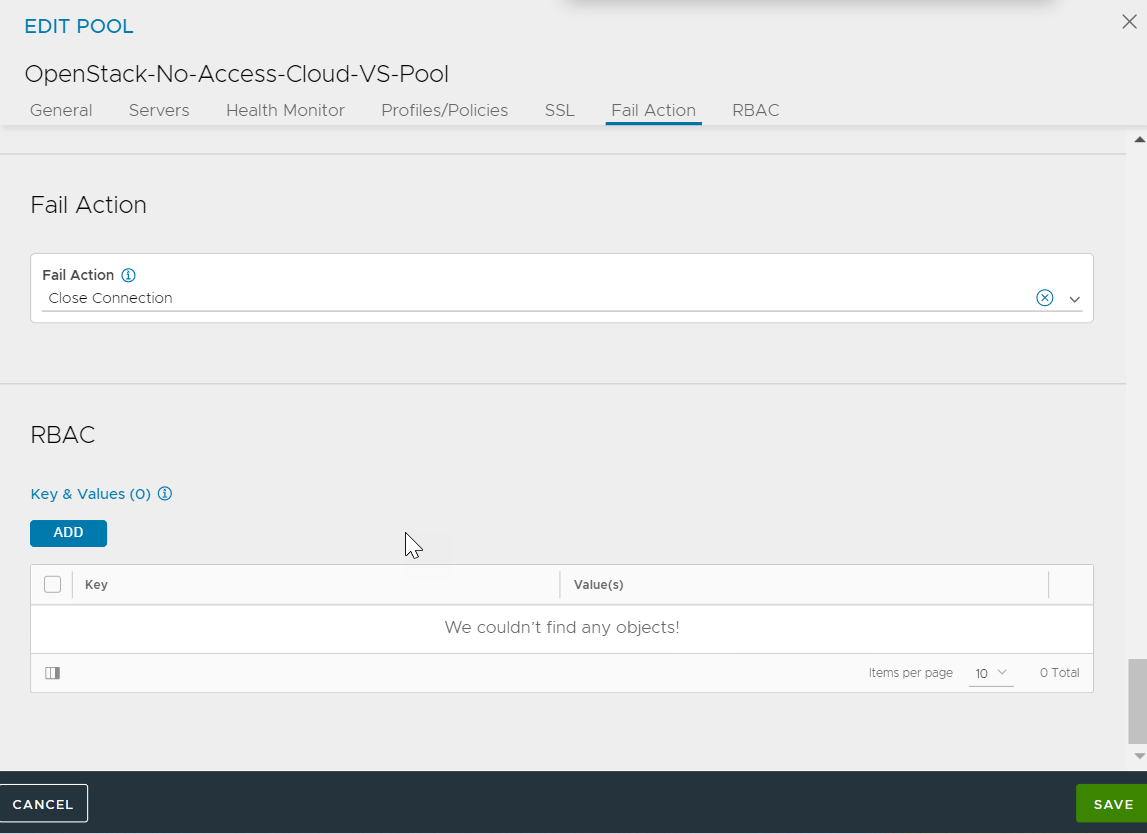
- Create a pool of server(s) to be associated with the virtual service created above. In this case, this would be the server created using the Horizon UI in step 14.
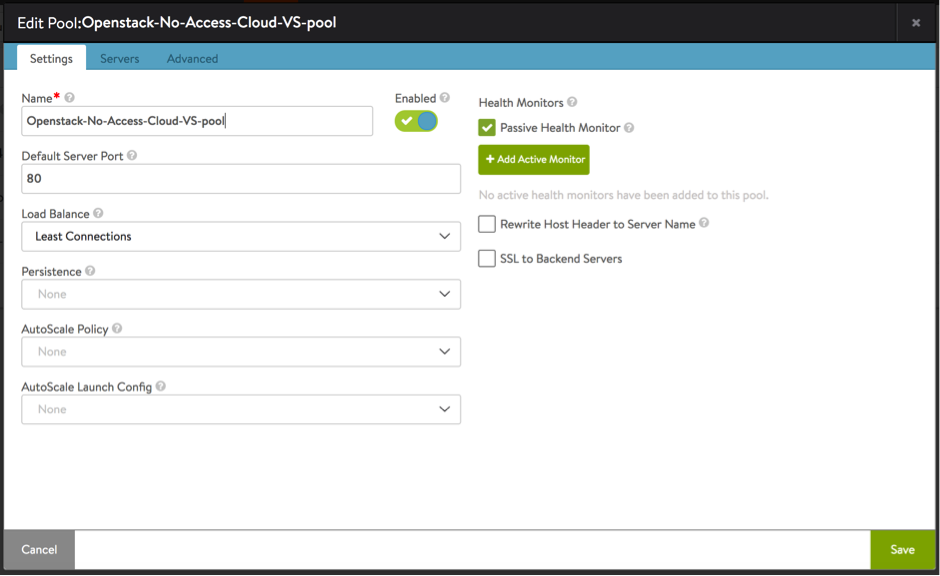
Starting with NSX Advanced Load Balancer 22.1.3, the following UI is applicable:
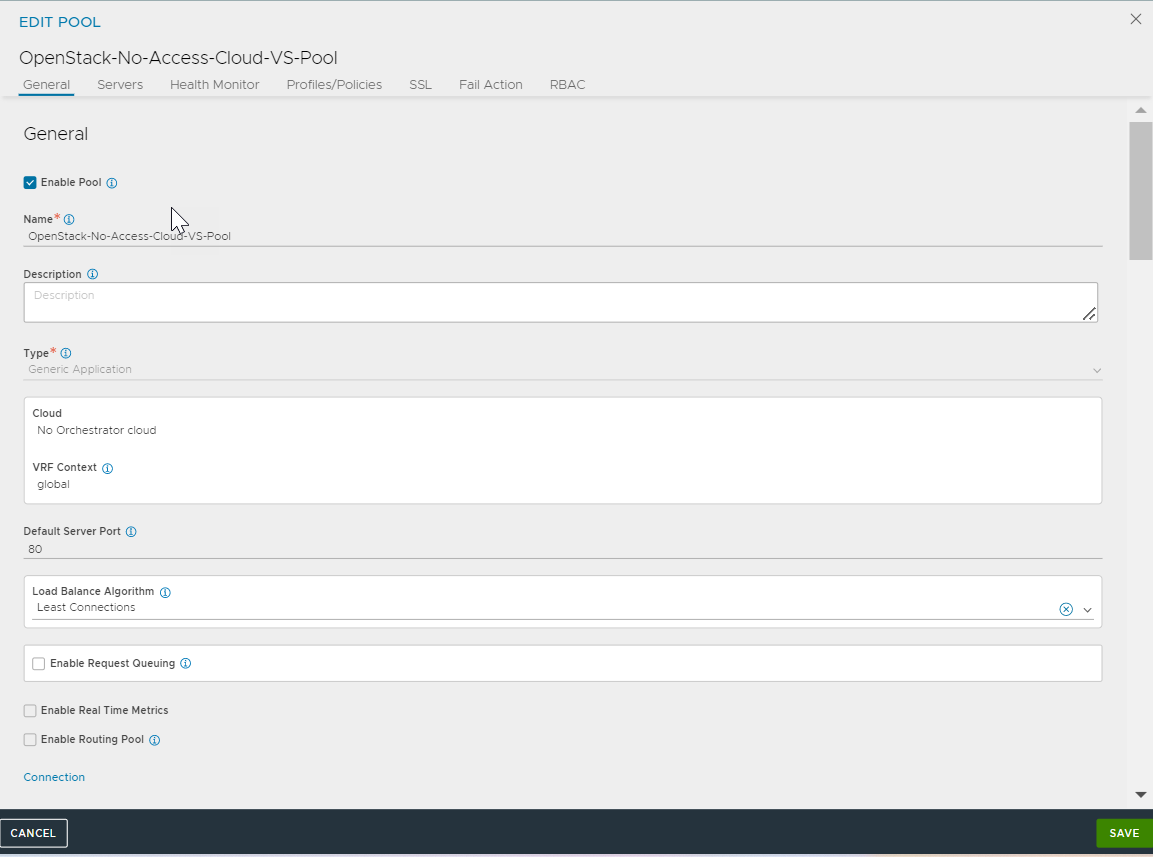
Starting with NSX Advanced Load Balancer 22.1.3, the following UI is applicable:
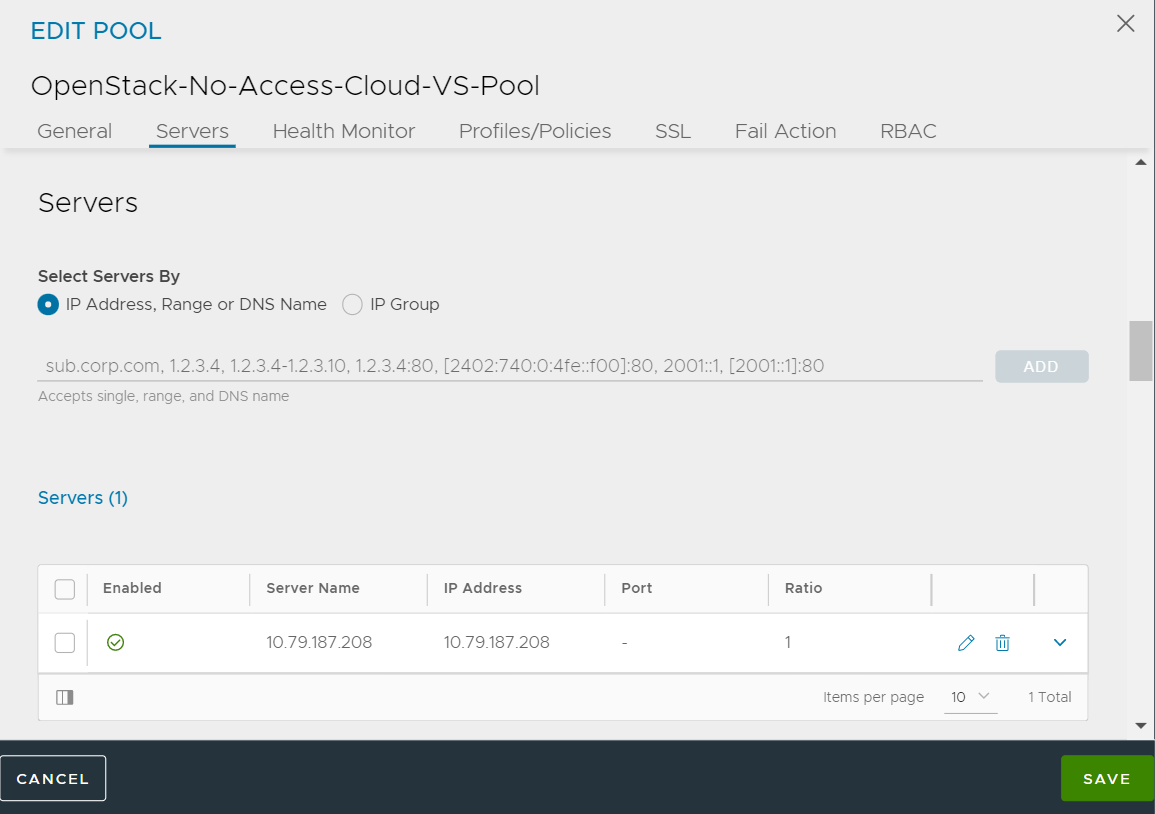
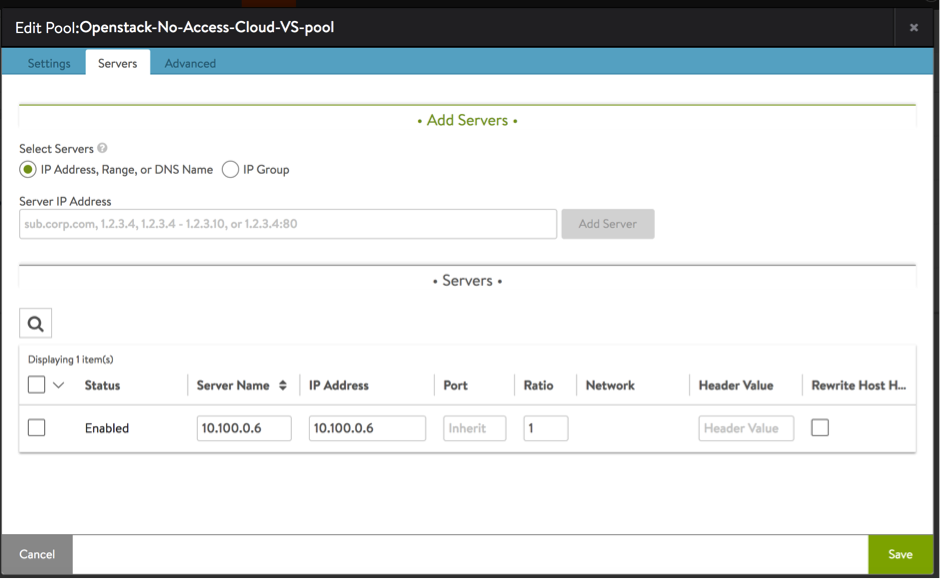
**Note:** You cannot use the select-servers-by-network feature, as we don’t have access to the infra manager. Therefore, enter the IP addresses manually.

Starting with NSX Advanced Load Balancer 22.1.3, the following UI is applicable:
- The virtual service should be up and running, as depicted below.
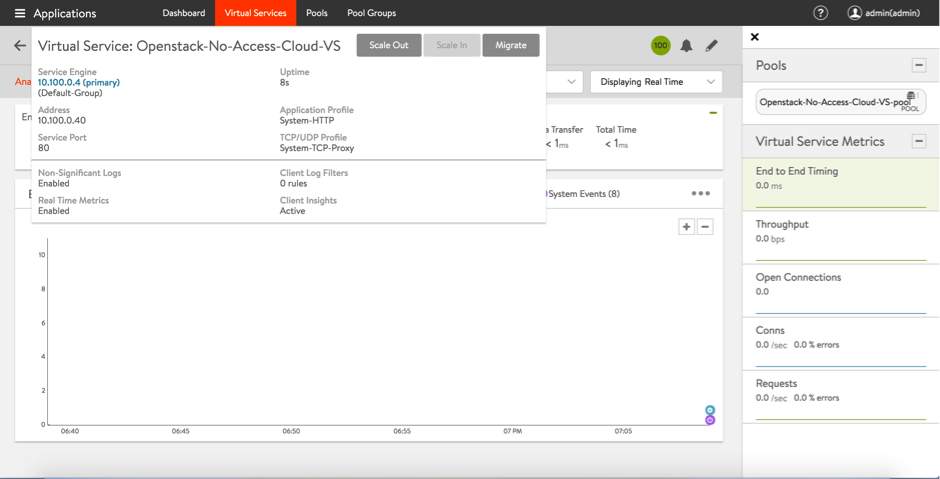
Starting with NSX Advanced Load Balancer 22.1.3, the following UI is applicable:
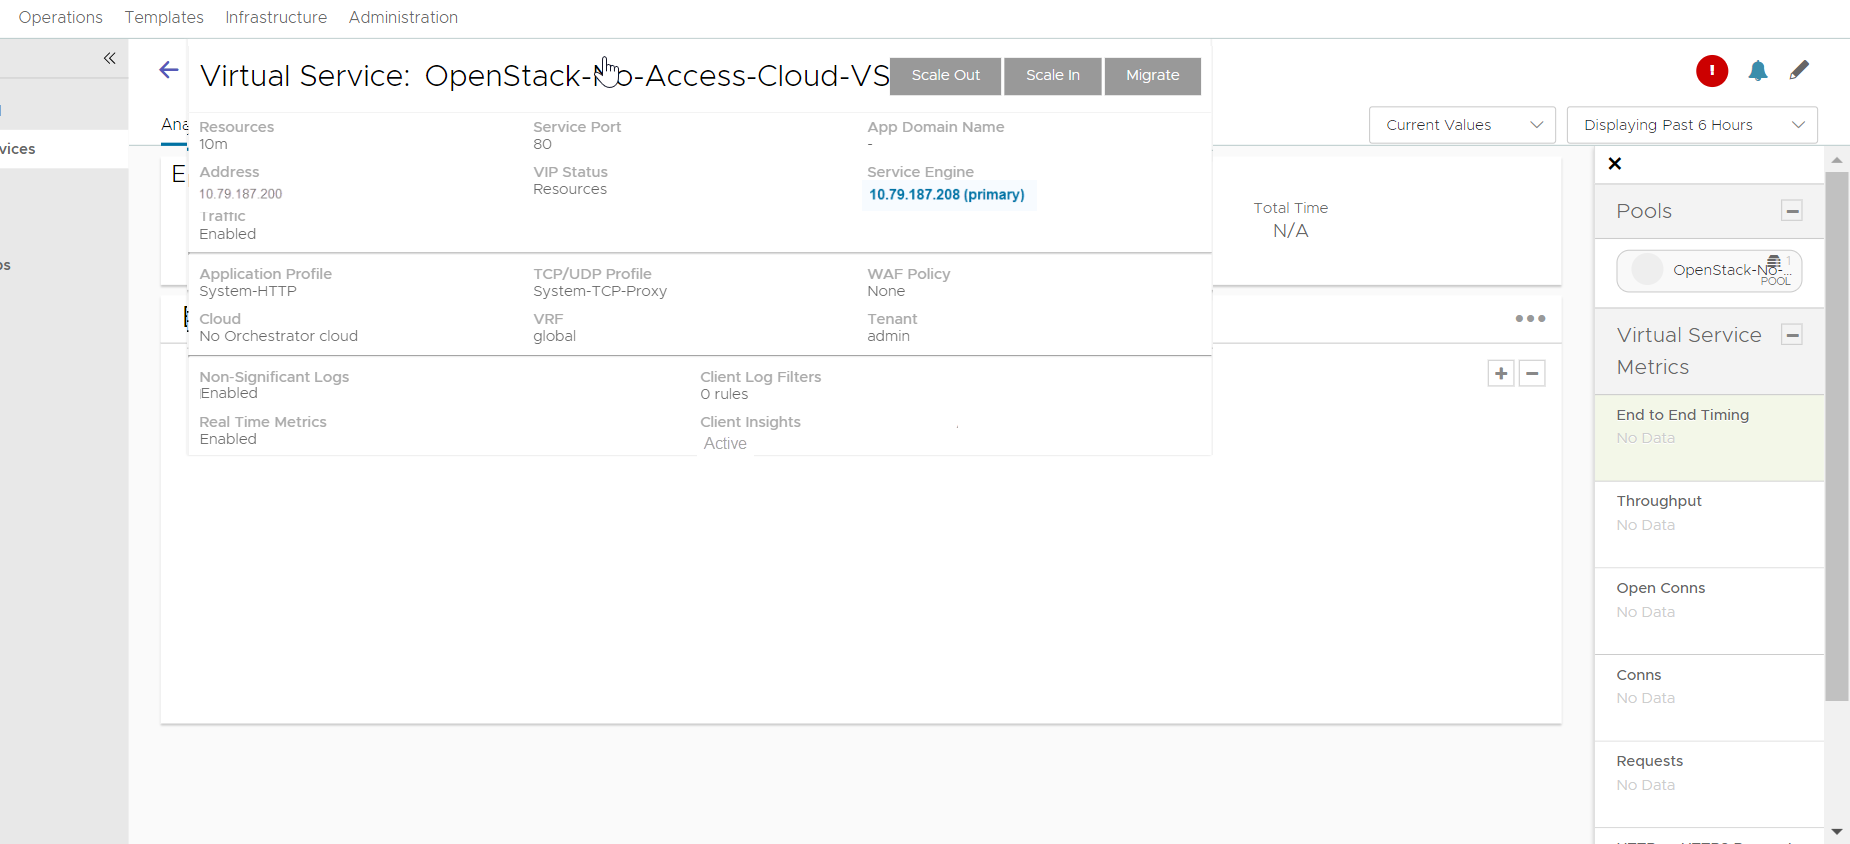
- Check the respective Service Engine to verify the VIP is associated to it.
Starting with NSX Advanced Load Balancer 22.1.3, the following UI is applicable:

Notes:
1. The "allowed-address-pairs" Neutron extension allows traffic with specific CIDRs to egress from a port. Avi Vantage uses this extension to "place" VIPs on SE data ports, thereby allowing VIP traffic to egress these data ports.
2. Add allowed-address-pairs on the SE ports so that security groups don’t drop the packets. For the ML2/OVS plugin, one can just add allowed-address-pairs with “0.0.0.0/0” once for each of the SE ports or specific VIP IP address.
3. If True, the allowed-address-pairs extension will be used. If the underlying network plugin doesn't support this feature, then VIP traffic will not work unless there are other means to achieve the same effect. This option can be turned off if the underlying network supports turning off security/firewall/spoof filter rules on ports.neutron port-update da0e1e9a-312d-41c2-b15f-f10ac344ef03 --allowed-address-pairs type=dict list=true ip_address=192.168.1.222/32
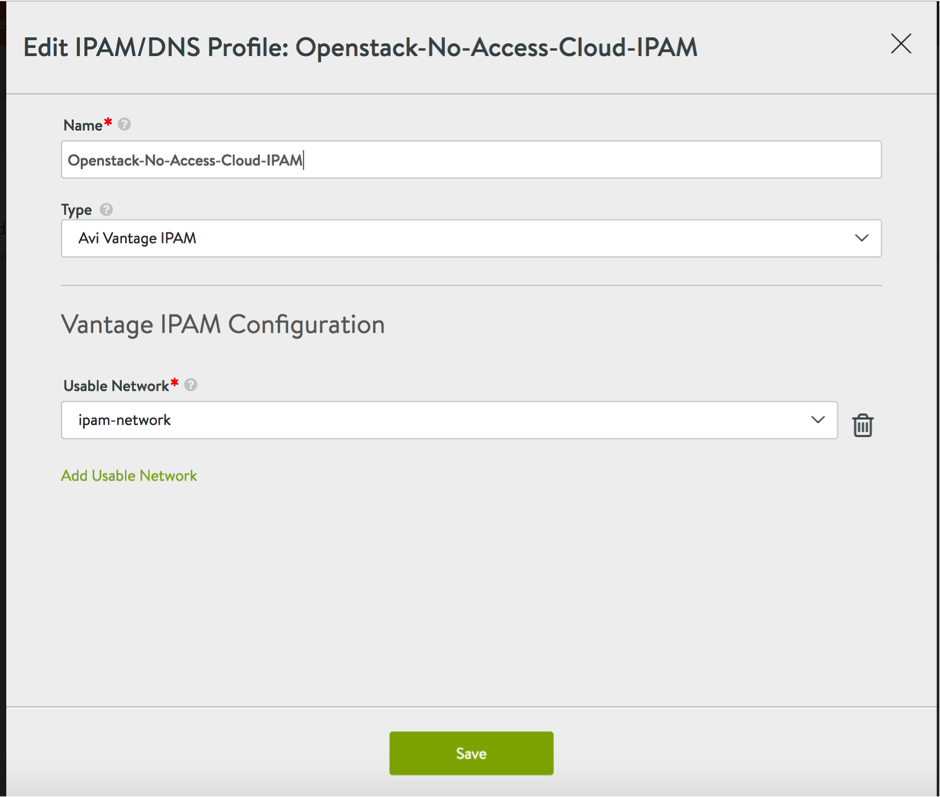
4. In cases where port-security is available, one can simply disable port-security on the SE's data vNIC Neutron port. This is another alternative for above. Make sure that you can SSH into one of the instances (Service Engines) as can be seen below: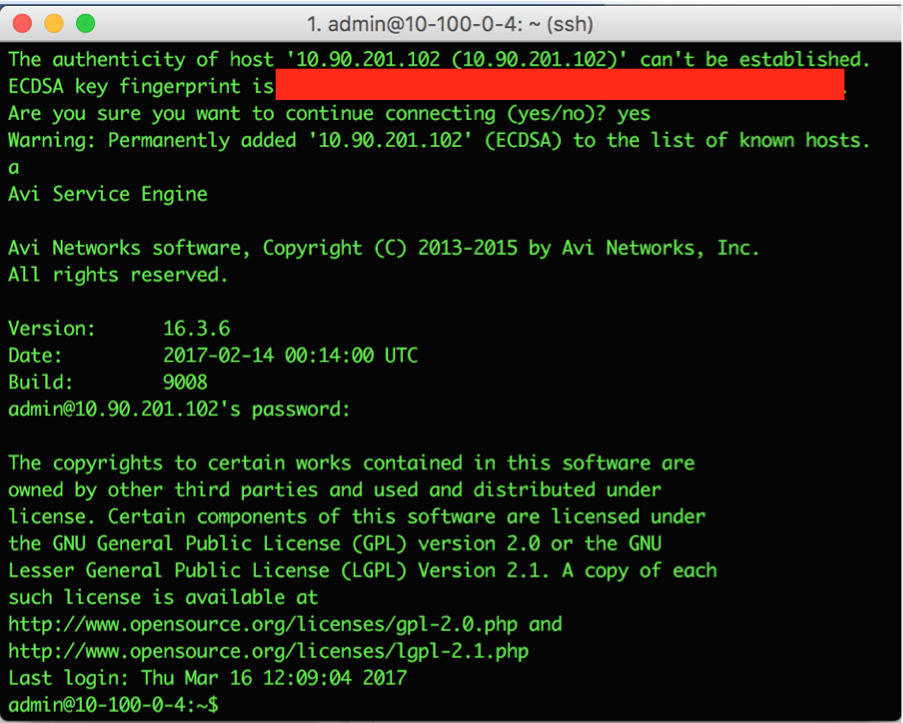 Optional: If use of Avi IPAM is required, then we can do the same by creating an IPAM network, IPAM template and associate the same to the cloud, and hence the auto-allocation of the IPs for the VIP can take place.
Starting with NSX Advanced Load Balancer 22.1.3, the following UI is applicable:
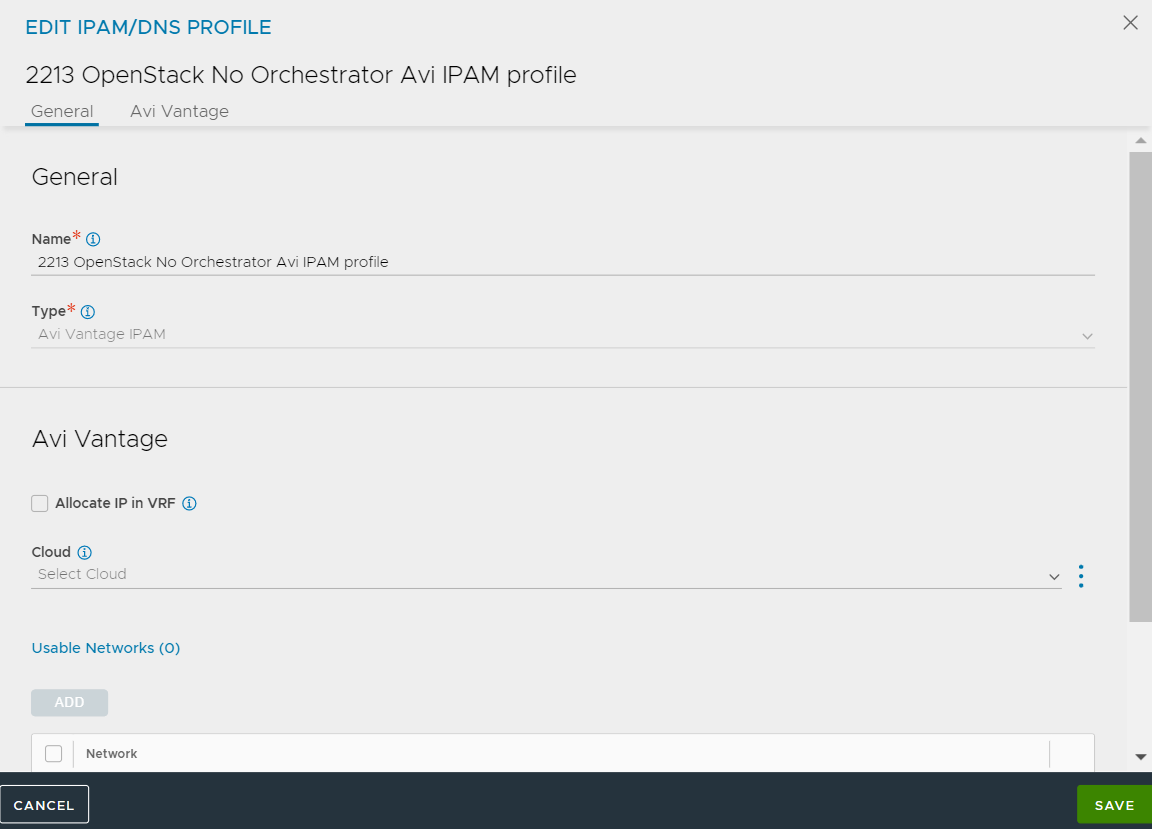
Starting with NSX Advanced Load Balancer 22.1.3, the following UI is applicable:

### Related Articles: * Upgrading Avi Vantage Software * * Upgrades in an Avi GSLB Environment
Starting with NSX Advanced Load Balancer 22.1.3, the following UI is applicable:
 </li>
</li> 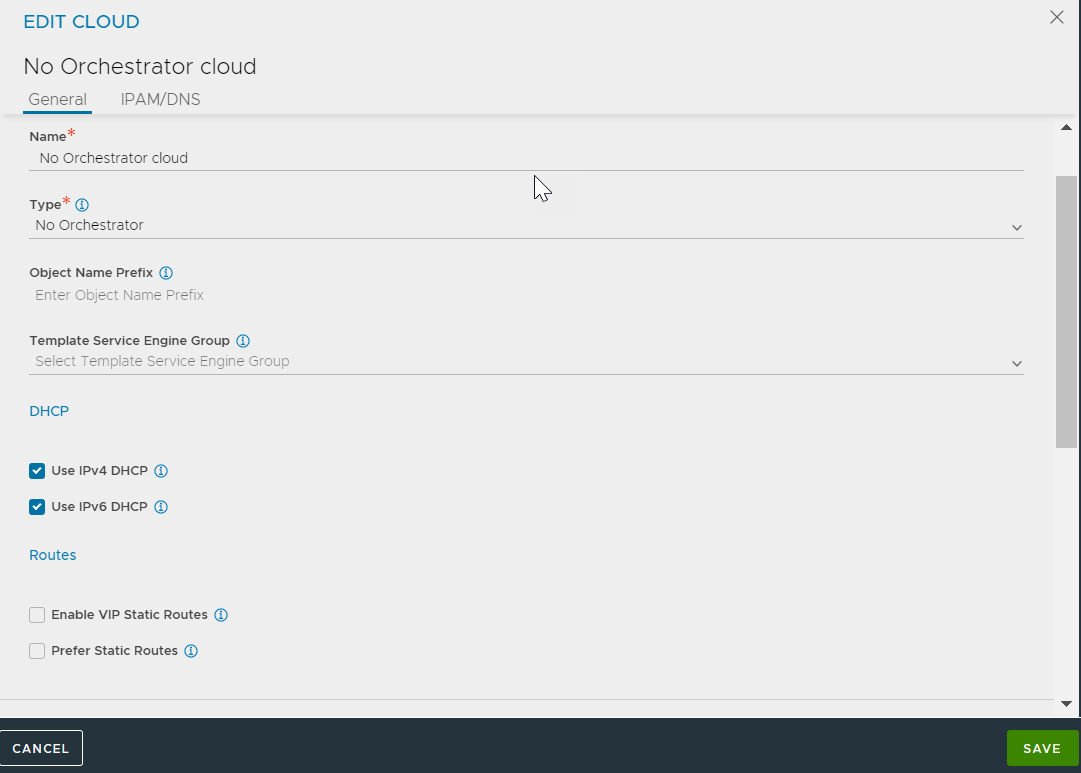 </li>
</li>
 </li>
</li>
1. This is needed only if there is no existing network that can be used as the Avi management network.
2. This network will be used by SEs to communicate with the Avi Controller. Therefore, either create a new network or use an existing network and make sure that VMs created on that network can reach the Avi Controller.
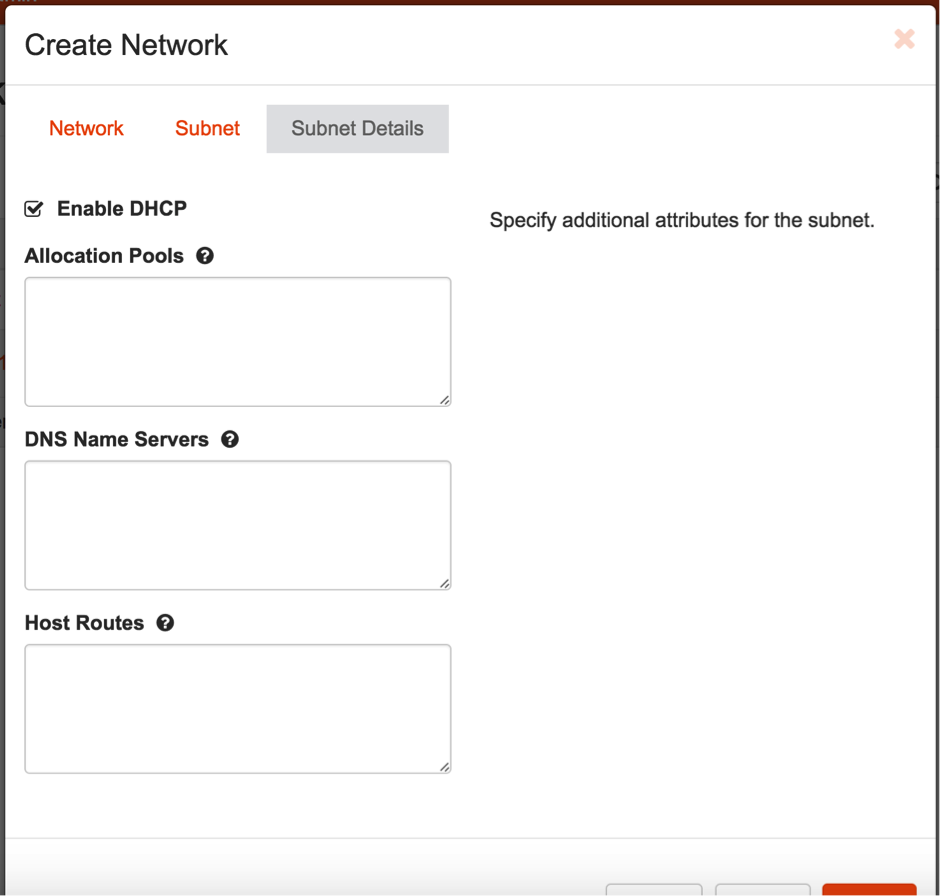
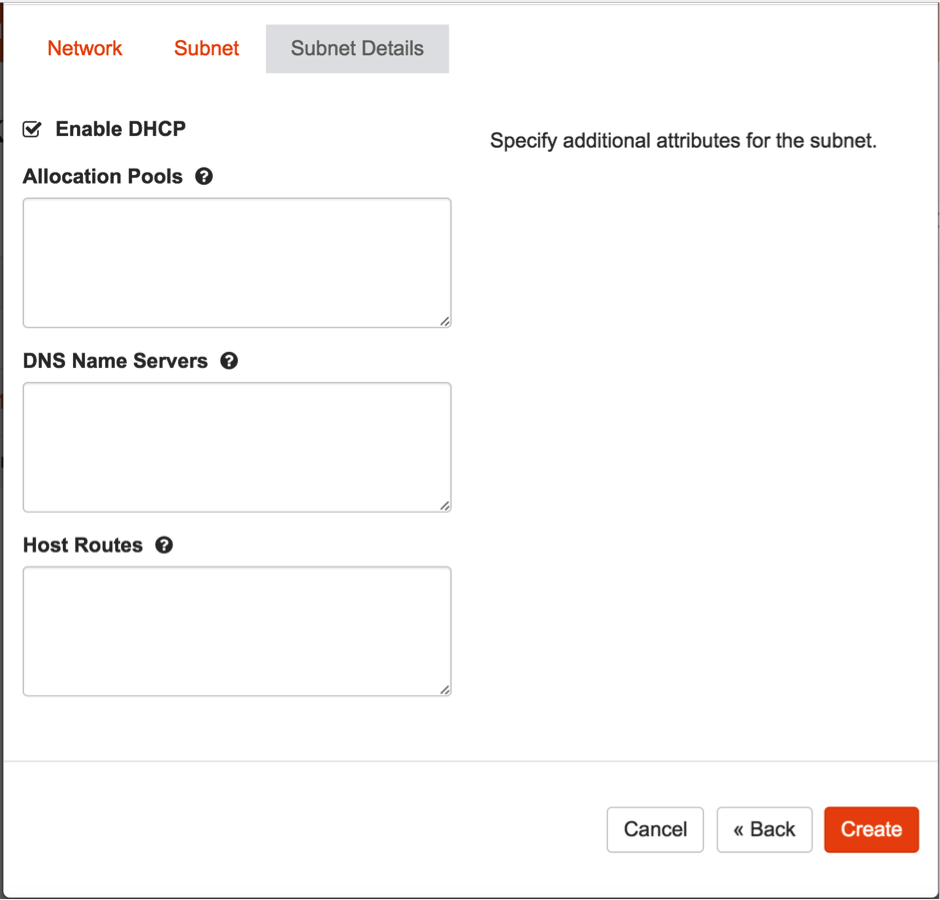
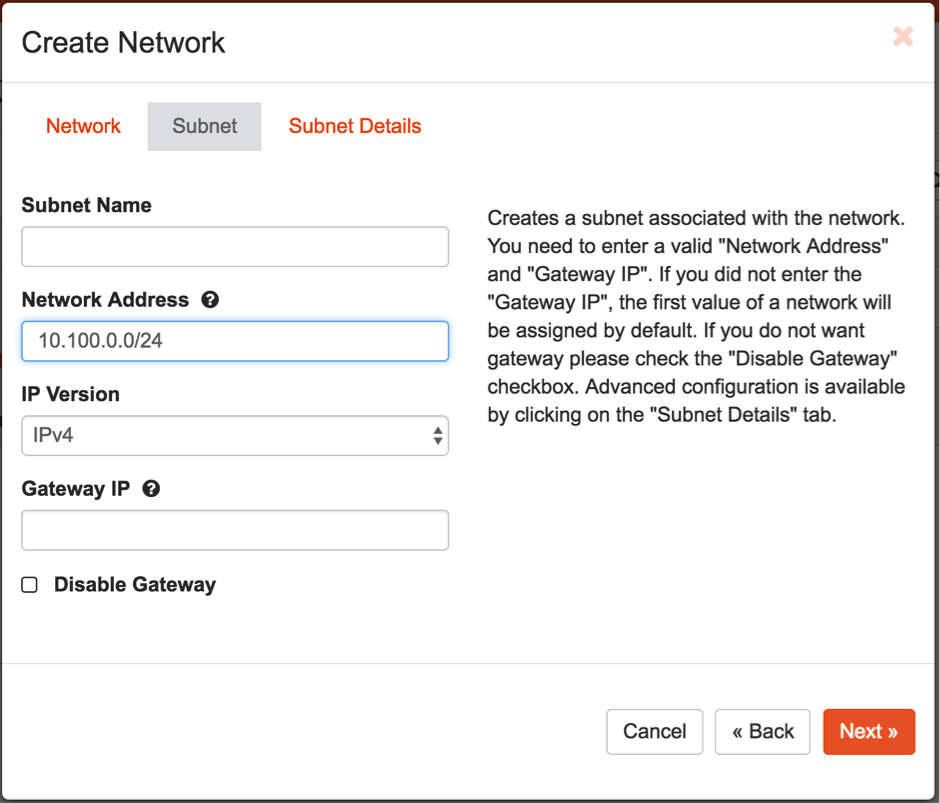 6b. Enable DHCP and create the network.
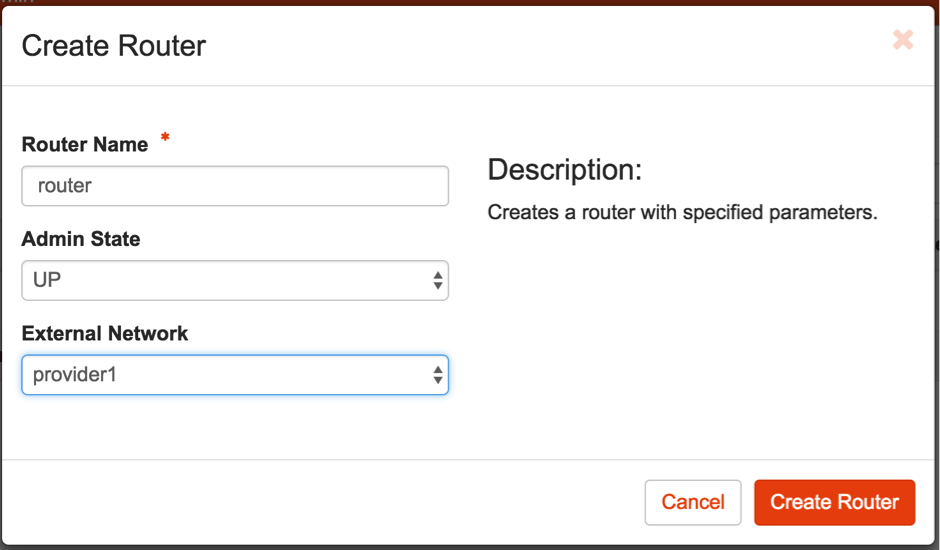
 Note: This is only needed if a new external network needs to be created.
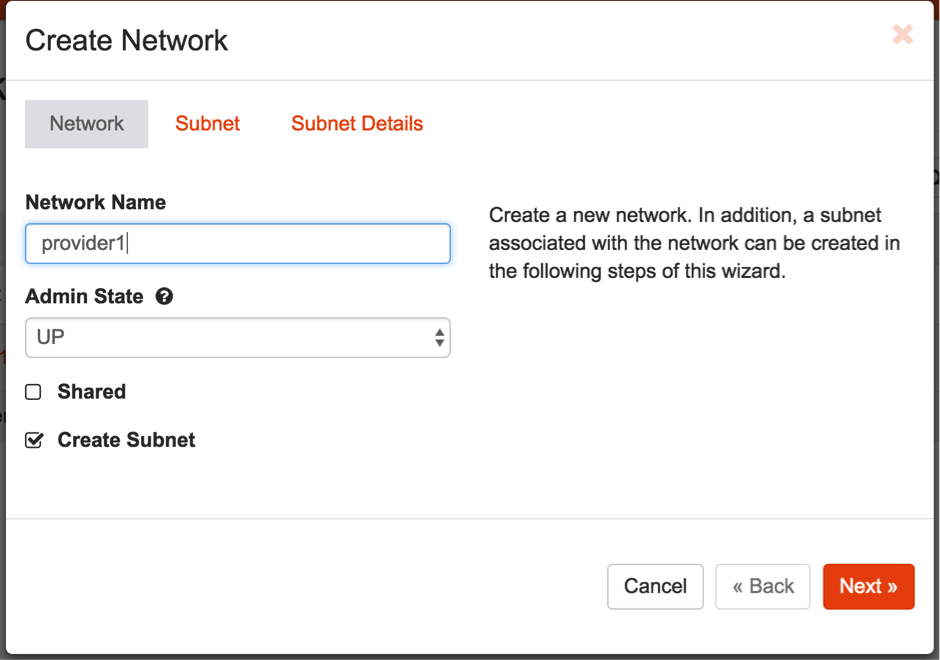
6c. Create the network that will be the outbound network and will provide floating IP access. In this example, we name it
Note: This is only needed if a new external network needs to be created.
6c. Create the network that will be the outbound network and will provide floating IP access. In this example, we name it provider1.
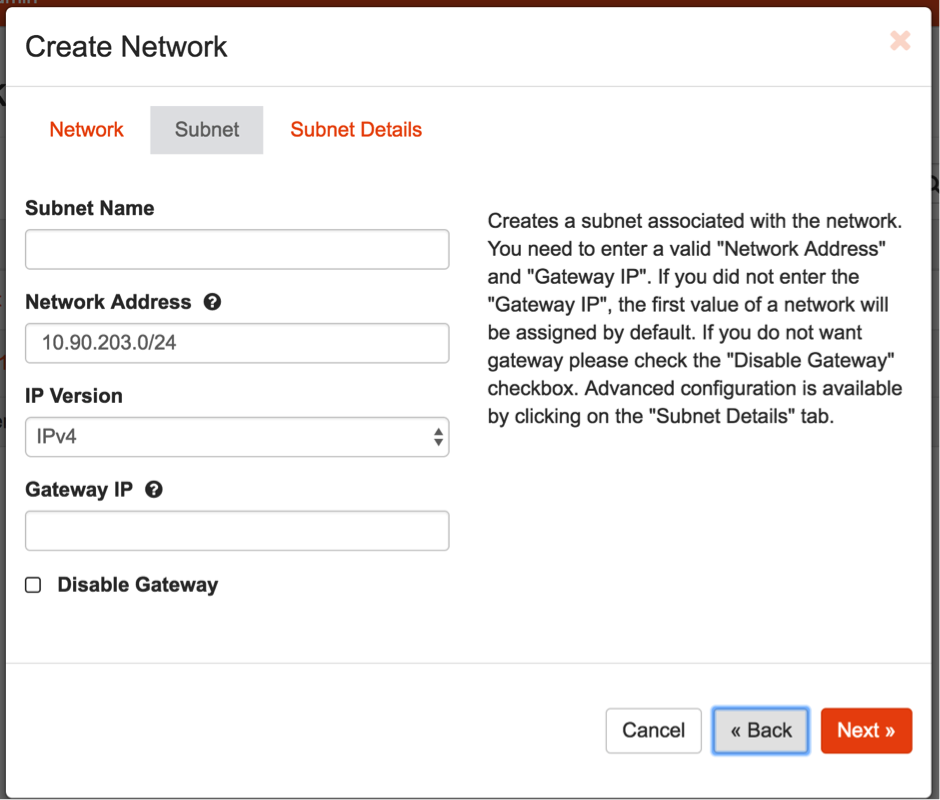
 6d. Provide an appropriate subnet for the network.
 6e. Enable DHCP and create the network.
Note: This is only needed if a new router needs to be created for external connectivity.
6f. Create a router.
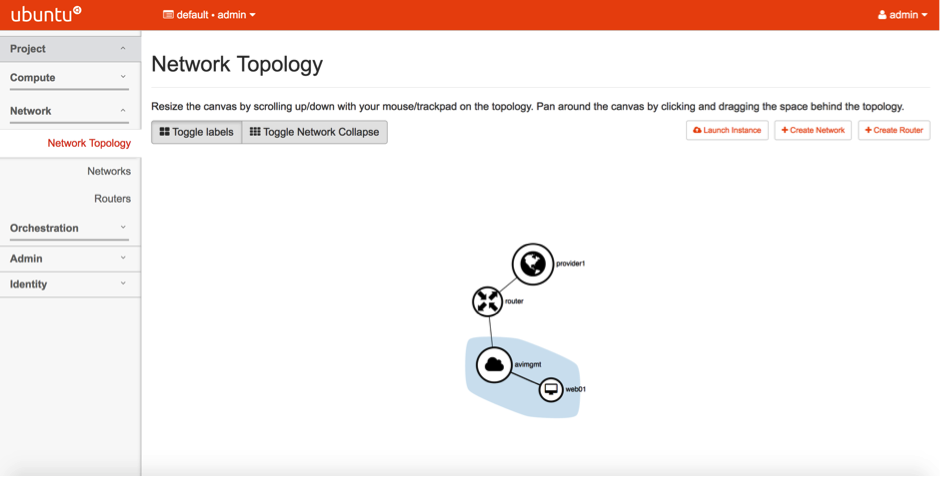
 6g. Additionally, we could deploy a web server in the
 avimgmt network to do tests. This could be a server of an OS type and the network topology would look something like this:
Notes:
1. For the SE to connect to the Controller, copy the token for the SE from Avi Vantage UI (outlined in Installing Avi Vantage for VMware vCenter) for the respective cloud and run the script at
/opt/avi/scripts/init_system.py on the SE, which would then ask for the Controller IP and the token (the token expires in 60 minutes and is for a single SE). You need root access privileges to run this script.
root@Avi-Service-Engine:/opt/avi/scripts# ./init_system.py -h
usage: init_system.py [-h] -c CONTROLLER [-d] [-i MGMT_IP] [-m MGMT_MASK]
[-g GATEWAY] [-t TOKEN] [-r]
optional arguments:
-h, --help show this help message and exit
-c CONTROLLER, --controller CONTROLLER
Controller IP address.
-d, --dhcp DHCP
-i MGMT_IP, --mgmt-ip MGMT_IP
IP address for Management Interface (eg.
192.168.10.10)
-m MGMT_MASK, --mgmt-mask MGMT_MASK
Subnet mask for Management interface (eg. 24 or
255.255.255.0)
-g GATEWAY, --gateway GATEWAY
Default gateway
-t TOKEN, --token TOKEN
Auth token generated in the Controller for this SE
-r, --restart Restart SE for changes to take effect
root@Avi-Service-Engine:/opt/avi/scripts# ./init_system.py -c 172.16.0.10 -d -i 172.16.0.7 -m 255.255.255.0 -g 172.16.0.1 -t c708a2cd-69e2-4057-923d-a09de94914f6 -r
2. Reboot the SE for it to connect to the Controller.
Note:
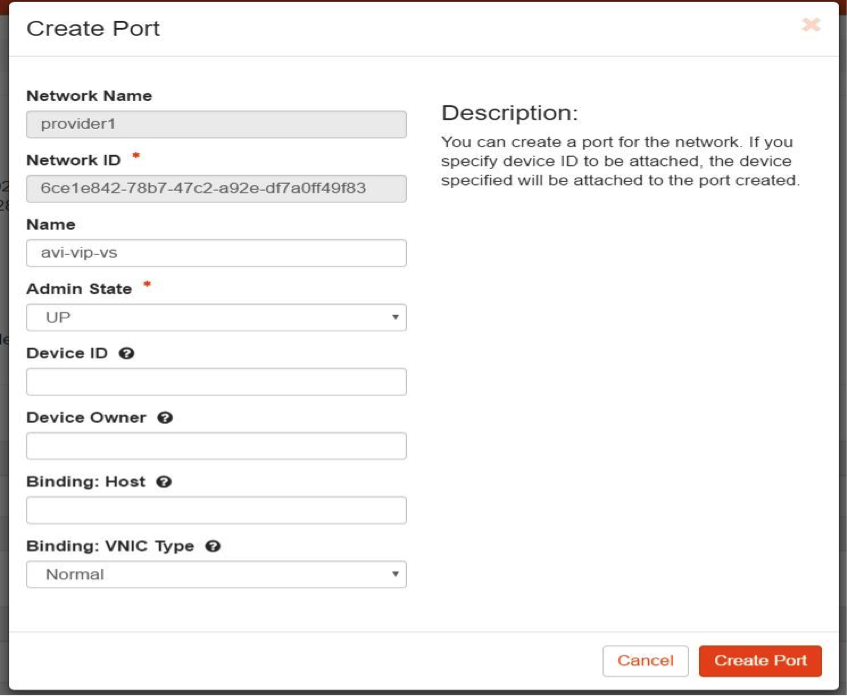
Since this is a No-Access cloud, we cannot configure a “floating VIP” in the virtual service configuration. For the Avi Controller to communicate with OpenStack Nova to assign an allocated floating IP to virtual IP address, we need to create a binding association, as shown below through the CLI for the Neutron port with the VIP.
If you need a floating IP for the VIP address, then create a port in the network wherein the VIP address lies.
$> neutron port-create --fixed-ip subnet_id=subnet ID of the network in which VIP is placed,ip_address=VIP IP --name anyname network ID in which the VIP is being placed$> neutron port-create --fixed-ip subnet_id=55daee6b-32b7-4f9c-945e-bcd2acb7272f,ip_address=172.16.0.231 --name test200vip f14eb427-4087-4dce-8477-479e10804ba1$> neutron floatingip-associate bf7c870e-6608-4512-b73d-faab5b18af04 ff67ae44-9874-43e6-a194-f336b9b1d7b5