Installing Avi Vantage in Amazon Web Services
This guide describes how to install an Amazon Web Services (AWS) EC2 instance of Avi Vantage.
Overview
This installation guide discusses how to integrate Avi Vantage with Amazon Elastic Compute Cloud (Amazon EC2) instances. The Amazon EC2 is one of the services provided by Amazon Web Service (AWS). Amazon EC2 instance types comprise various combination of memory, storage, CPU, and networking capacity. The integration of the Amazon EC2 instances with Avi Vantage provides flexibility to choose from a varied range of resources based on the an application or user requirements. Avi Vantage offers elastic application services that extend beyond load balancing to deliver real-time application and security insights, simplify troubleshooting, auto scale predictively, and enable developer self-service and automation in Amazon Web Services. The Avi Vantage Platform has three core components:
- Avi Controller: The Avi Controller analyzes traffic and, based on real-time analytics, can scale out / scale in SEs to load-balance traffic that varies over time.
- Avi Service Engines: Avi Service Engines (SEs) handle all data plane operations within Avi Vantage by receiving and executing instructions from the Avi Controller. The SEs perform load balancing and handle client and server traffic.
- Avi admin console: The Avi Console is a modern web-based user interface that provides role-based access to control, manage and monitor applications.
For more information on Avi Vantage’s components, refer to Avi Vantage Architectural Overview.
Prerequisites
- Ports for management and network services
- Credential methods
- Knowledge of AWS VPC
Enabling Ports for Management and Network Services
Avi Controller and Avi Service Engines use specific ports for management and network services. The firewall should allow traffic for these ports.
For the detailed information on the required management ports, refer to Protocol Ports Used by Avi Vantage for Management Communication
Configuring Credential Methods
When deploying Avi Vantage within Amazon Web Services (AWS), the installation wizard prompts for input of credential information.
You are not required to enter AWS Secret and Access key credentials. The credentials can be entered in either of the following forms:
- Identity and Access Management (IAM) roles: IAM roles are the set of policies that define access to resources within AWS. The roles and the policies that define their access are defined in JSON files. This method does not require an AWS account key. Instead, the role and policy files must be downloaded from Avi Networks and installed using the AWS CLI. (Download links for the role and policy files, and the required AWS CLI syntax, are provided in this article.) After setting up the IAM roles, return to this article to install the Avi Vantage EC2 instance. Use this method if you don’t want to enter AWS credentials.
Following are the mandatory IAM roles that should be configured through Amazon Management Console:
- vmiport
- AviController-Refined-Role
Note: During cloud creation in AWS, an AMI is created using which Service Engines are created. As part of AMI creation, a vmdk disk image is imported to AWS as a snapshot and then the snapshot is registered as an AMI. So, vmimport role is required for importing VMDK disk image in AWS as a snapshot.
For more details on IAM roles, refer to IAM Role Setup for Installation into AWS..
-
AWS customer account key: A unique authentication key associated with the AWS account. For deploying AWS on Avi Vantage, To obtain If using this method, continue reading. For recommendations regarding using access key on AWS, refer to https://docs.aws.amazon.com/general/latest/gr/managing-aws-access-keys.html.
-
Use Cross-Account AssumeRole: Avi Vantage can be deployed for Amazon Web Services (AWS) with multiple AWS accounts utilizing the IAM AssumeRole functionality that provides access across AWS accounts to the AWS resources/API from the respective accounts, instead of sharing user Access Key ID and Secret Access Key from different accounts.
For the detailed information on Cross-Account AssumeRole, refer to AWS Cross-Account AssumeRole Support.
Knowledge of AWS VPC
Knowledge of AWS VPC (Virtual Private Cloud) is required for configuring your network space (e.g., availability zone, subnets of Controller and SEs).
All IP addresses (e.g., Controller management IP, SE management IP, virtual service IPs, and server IP addresses) need to be planned and configured accordingly.
Minimum Requirements and Recommendations
Minimum Requirements for AWS virtual machines
The following table lists the minimum requirements for the VMs on which the Avi Controller and Avi SEs are installed.
| Component | Memory | vCPUs | Disk |
|---|---|---|---|
| Avi Controller | 24 GB | 8 | 64 GB |
| Service Engine | 2 GB | 2 | 10 GB |
Instances Types according to the deployment types
For the Avi Controller, Avi recommends the following Instance Types for three deployment sizes:
| Deployment Size | Virtual Service Scale | Instance Type | Memory | vCPUs | Disk (Minimum) |
|---|---|---|---|---|---|
| Small | 100 | m4.2xlarge | 32 GB | 8 | 64 GB |
| Medium | 1000 | c4.4xlarge / m4.4xlarge |
30 GB / 64 GB |
16 / 16 |
64 GB |
| Large | 5000 | c4.8xlarge / m4.10xlarge |
60 GB / 160 GB |
32 / 40 |
64 GB |
| Medium | 1000 | c5.4xlarge | 32 GB | 32 | 64 GB |
| Large | 5000 | c5.9xlarge | 72 GB | 36 | 64 GB |
Avi Controller Sizing
Refer to the section Disk Capacity Allocation on the Avi Controller Sizing KB for recommended hard disk size.
Resiliency and Redundancy
For added resiliency and redundancy, the Avi Controller can be deployed as a 3-node cluster. [See Overview of Avi Vantage High Availability.] In this case, a separate VM is needed for each of the 3 Avi Controller nodes. The requirements are the same for each node.
5. Installation
Note: vmimport role is mandatory for installing Avi Vantage in AWS. For more details on IAM role refer to IAM Role Setup for Installation into AWS.
To install Avi Vantage in AWS, deploy an EC2 instance of the Avi Controller and then run the Avi Controller setup wizard.
5.1 Deploying an EC2 Avi Controller Instance
-
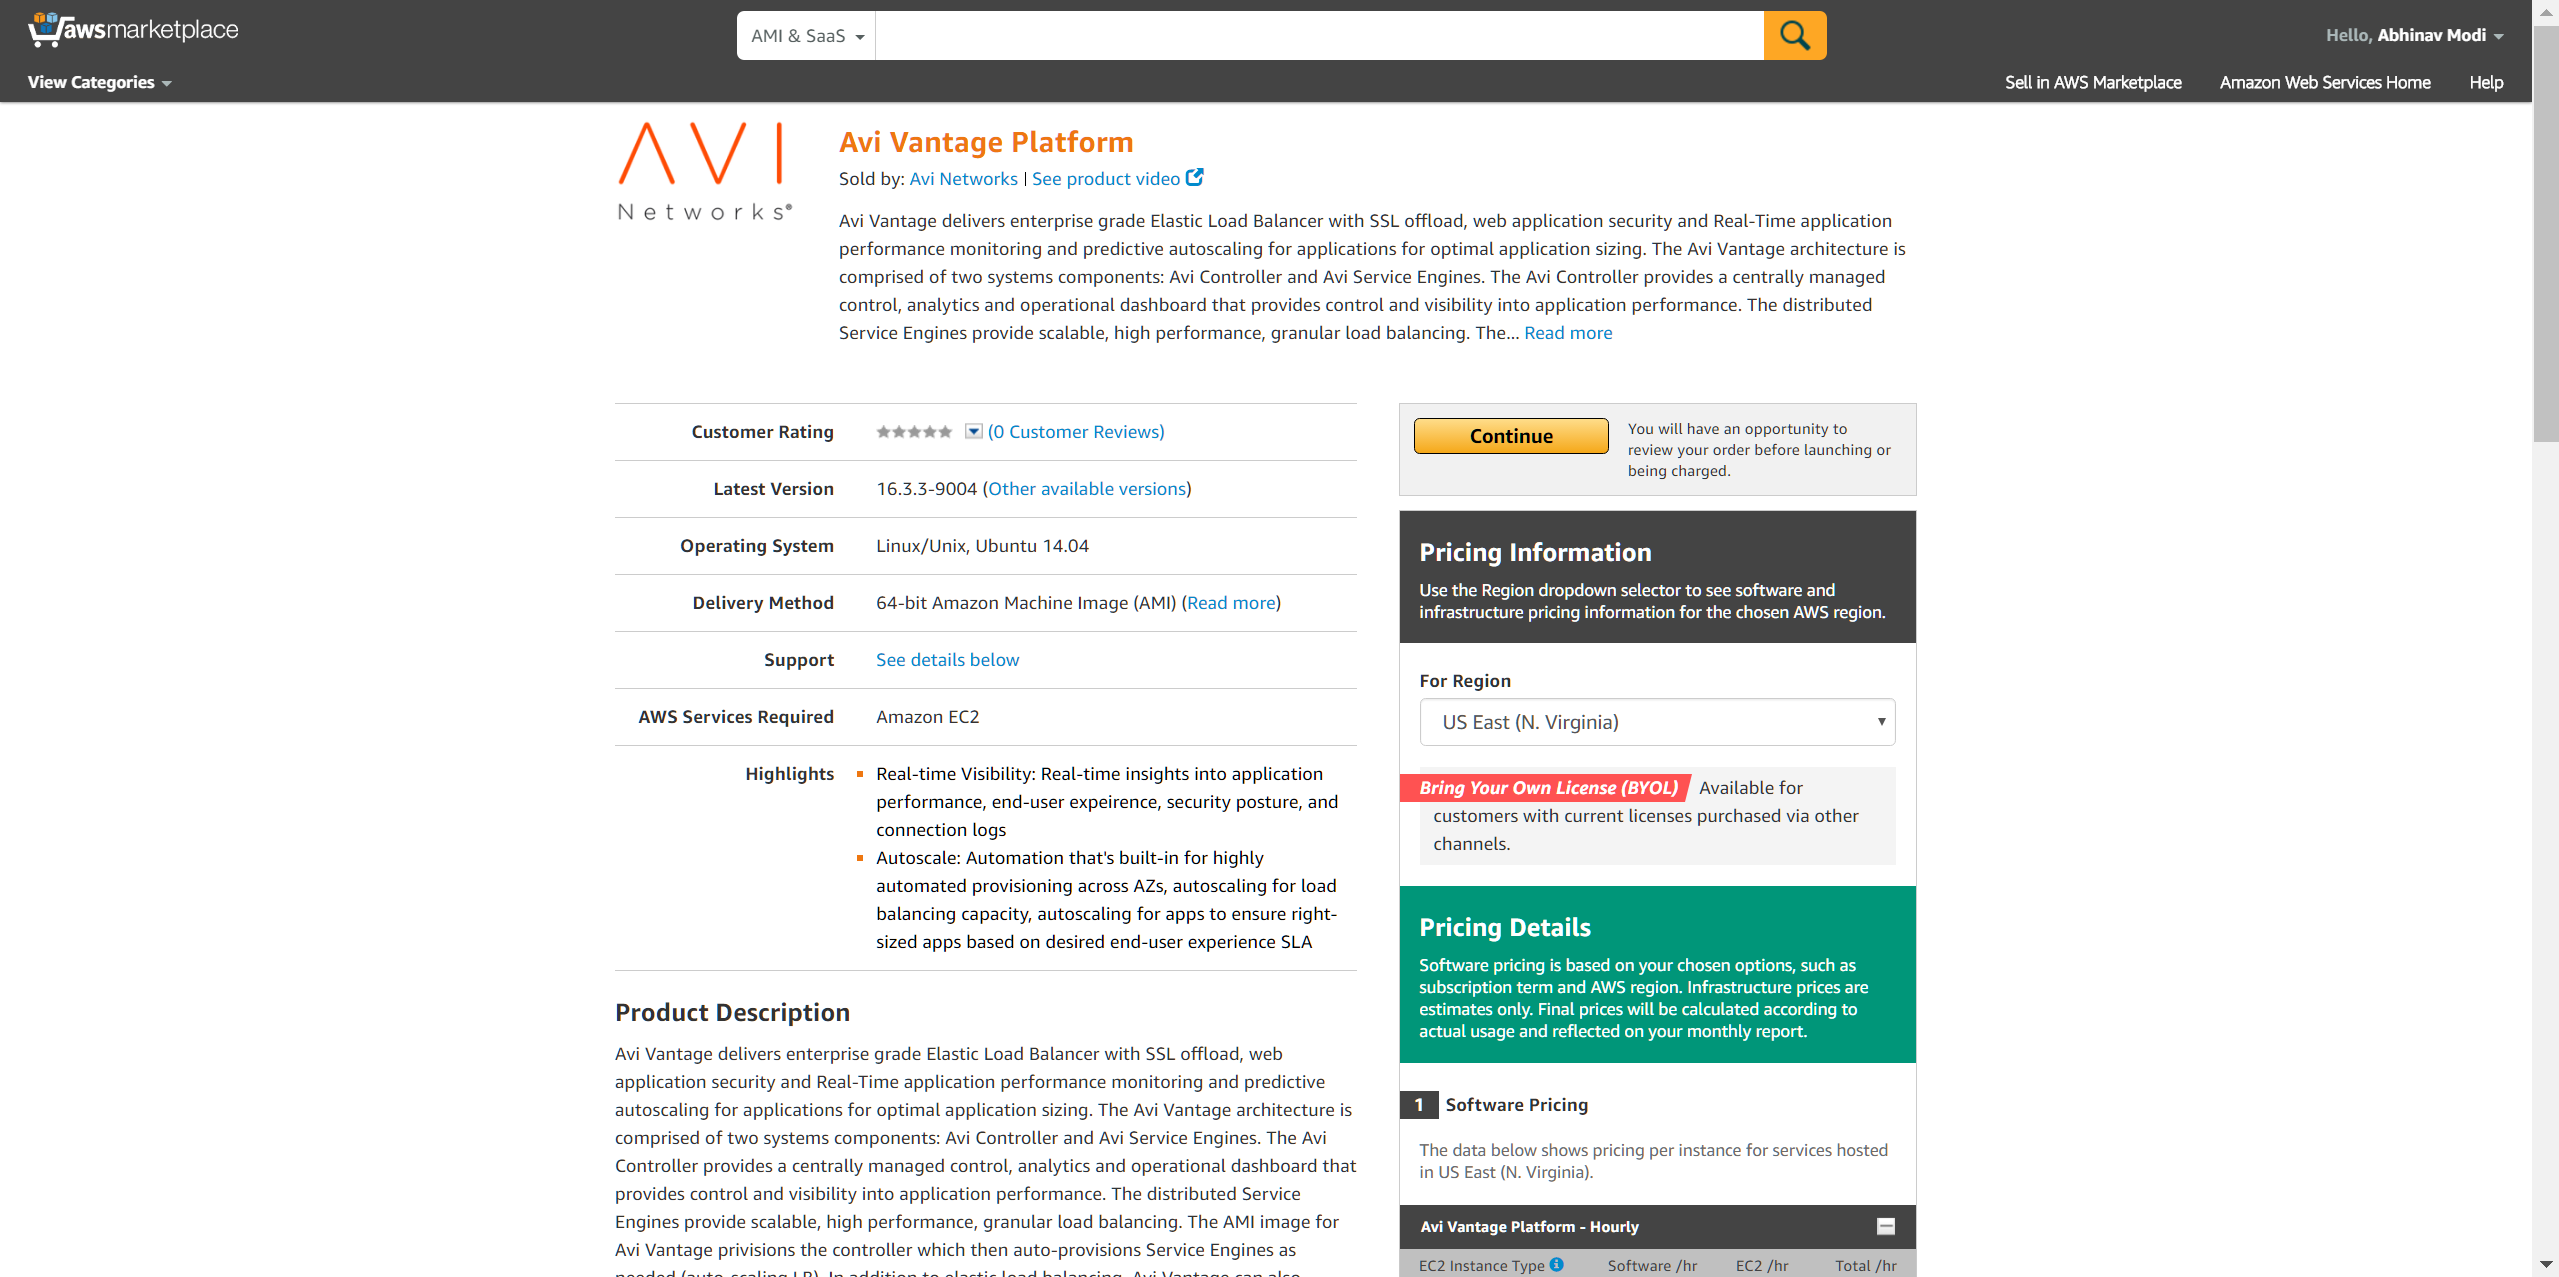
Access Amazon Web Services (AWS) using https://aws.amazon.com and log in using your AWS credentials. Go to the Avi Vantage page on AWS Marketplace here.
-
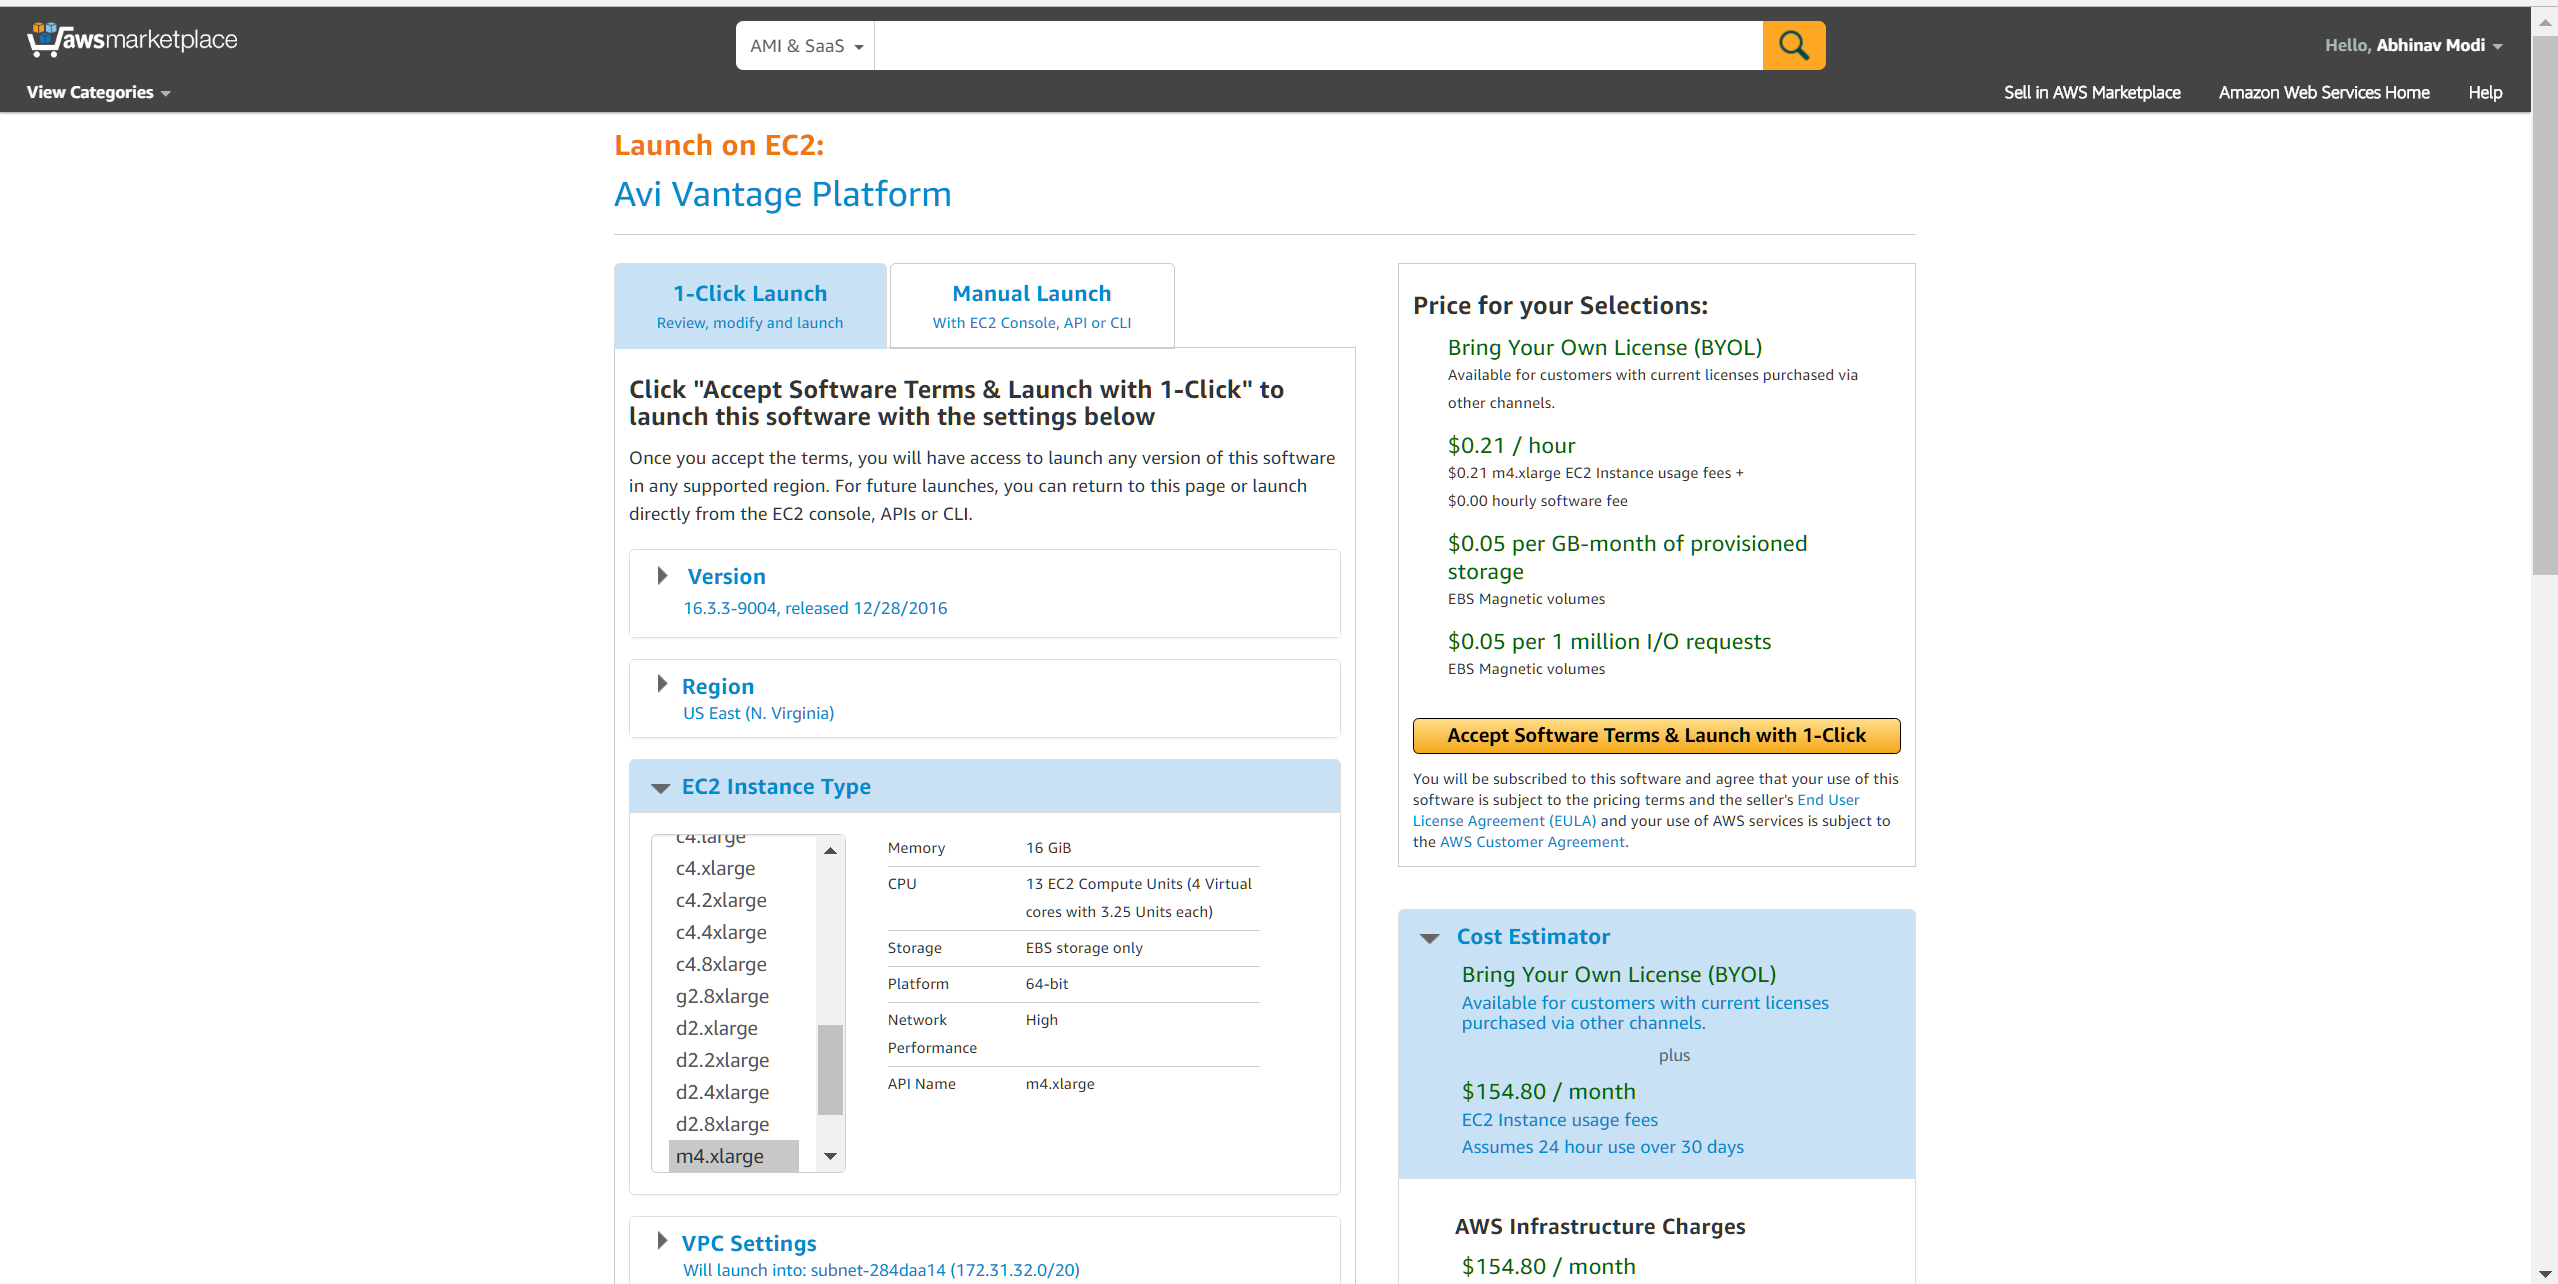
Click Continue to start the AMI deployment process. You can either perform a 1-Click launch or a Manual Launch via the EC2 console, API, or CLI. The subsequent screenshots below go through the Manual (EC2 Console) installation process.
-
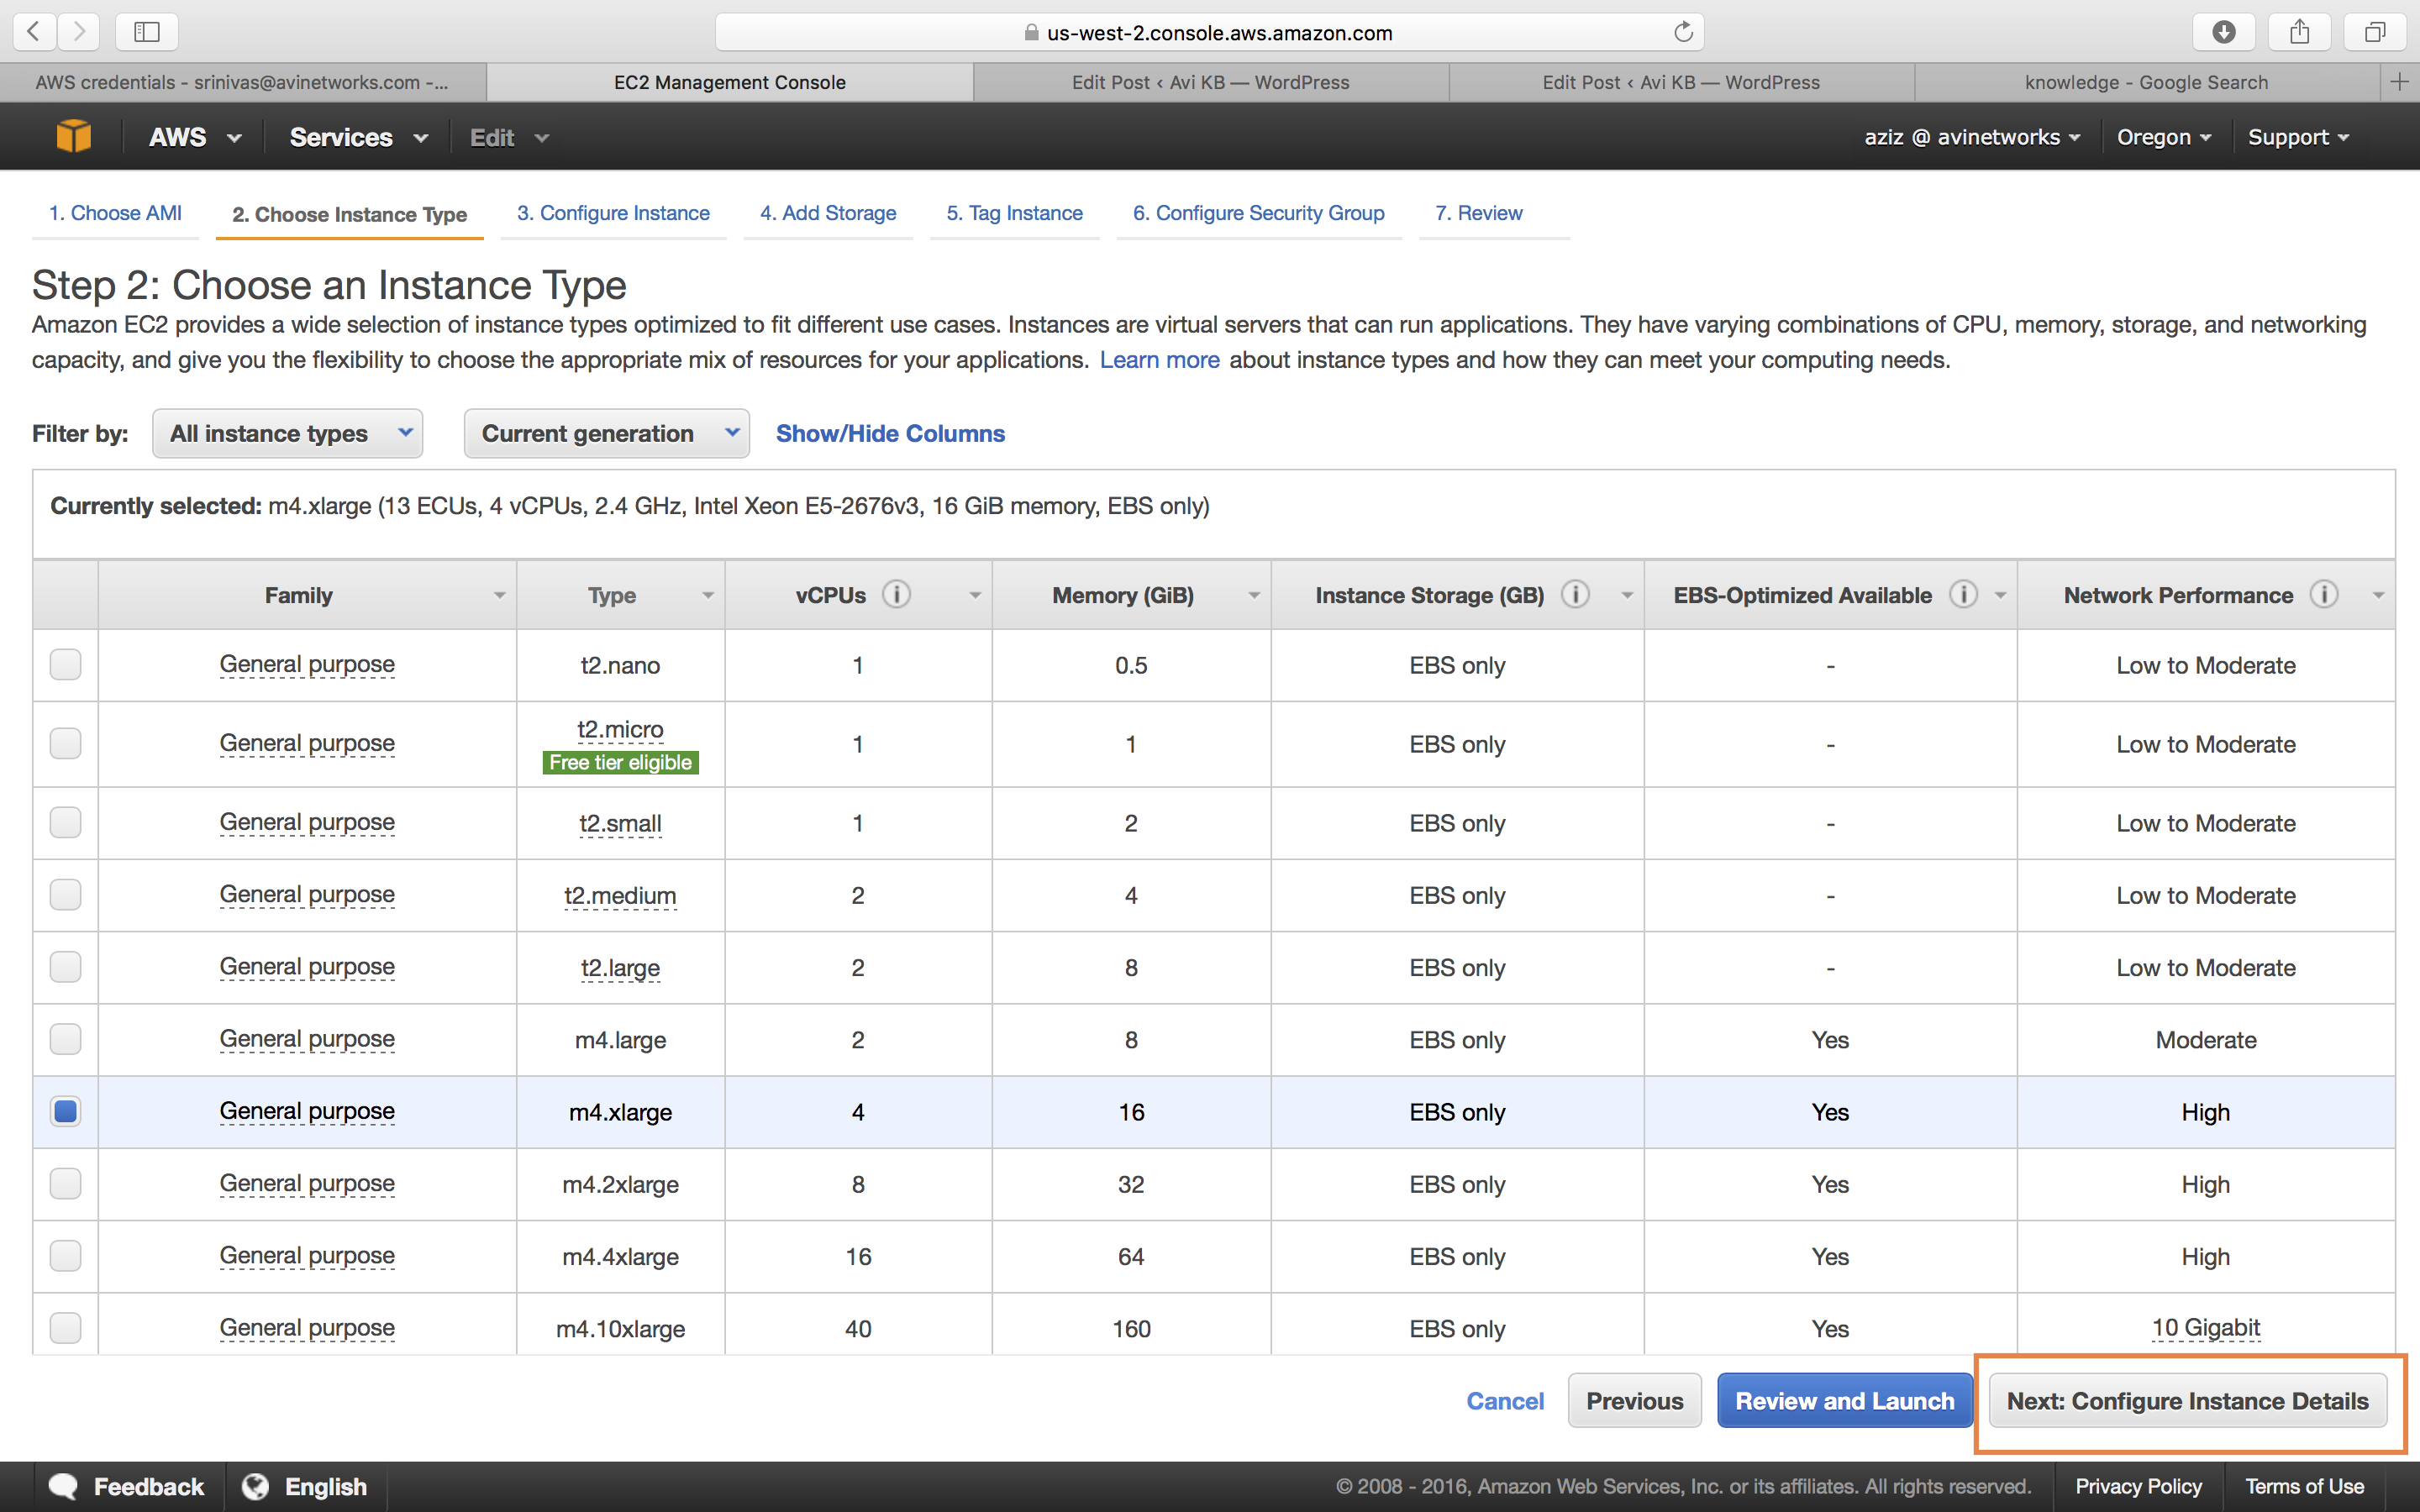
Based on the deployment scale considerations, choose an appropriate instance type. Amazon defines its EC2 instance types here.
-
Refer to the Minimum Requirements and Recommendations section for minimum requirements and recommendations as mentioned previously.
The below example shows a choice of 4 CPUs and 16 GB memory. -
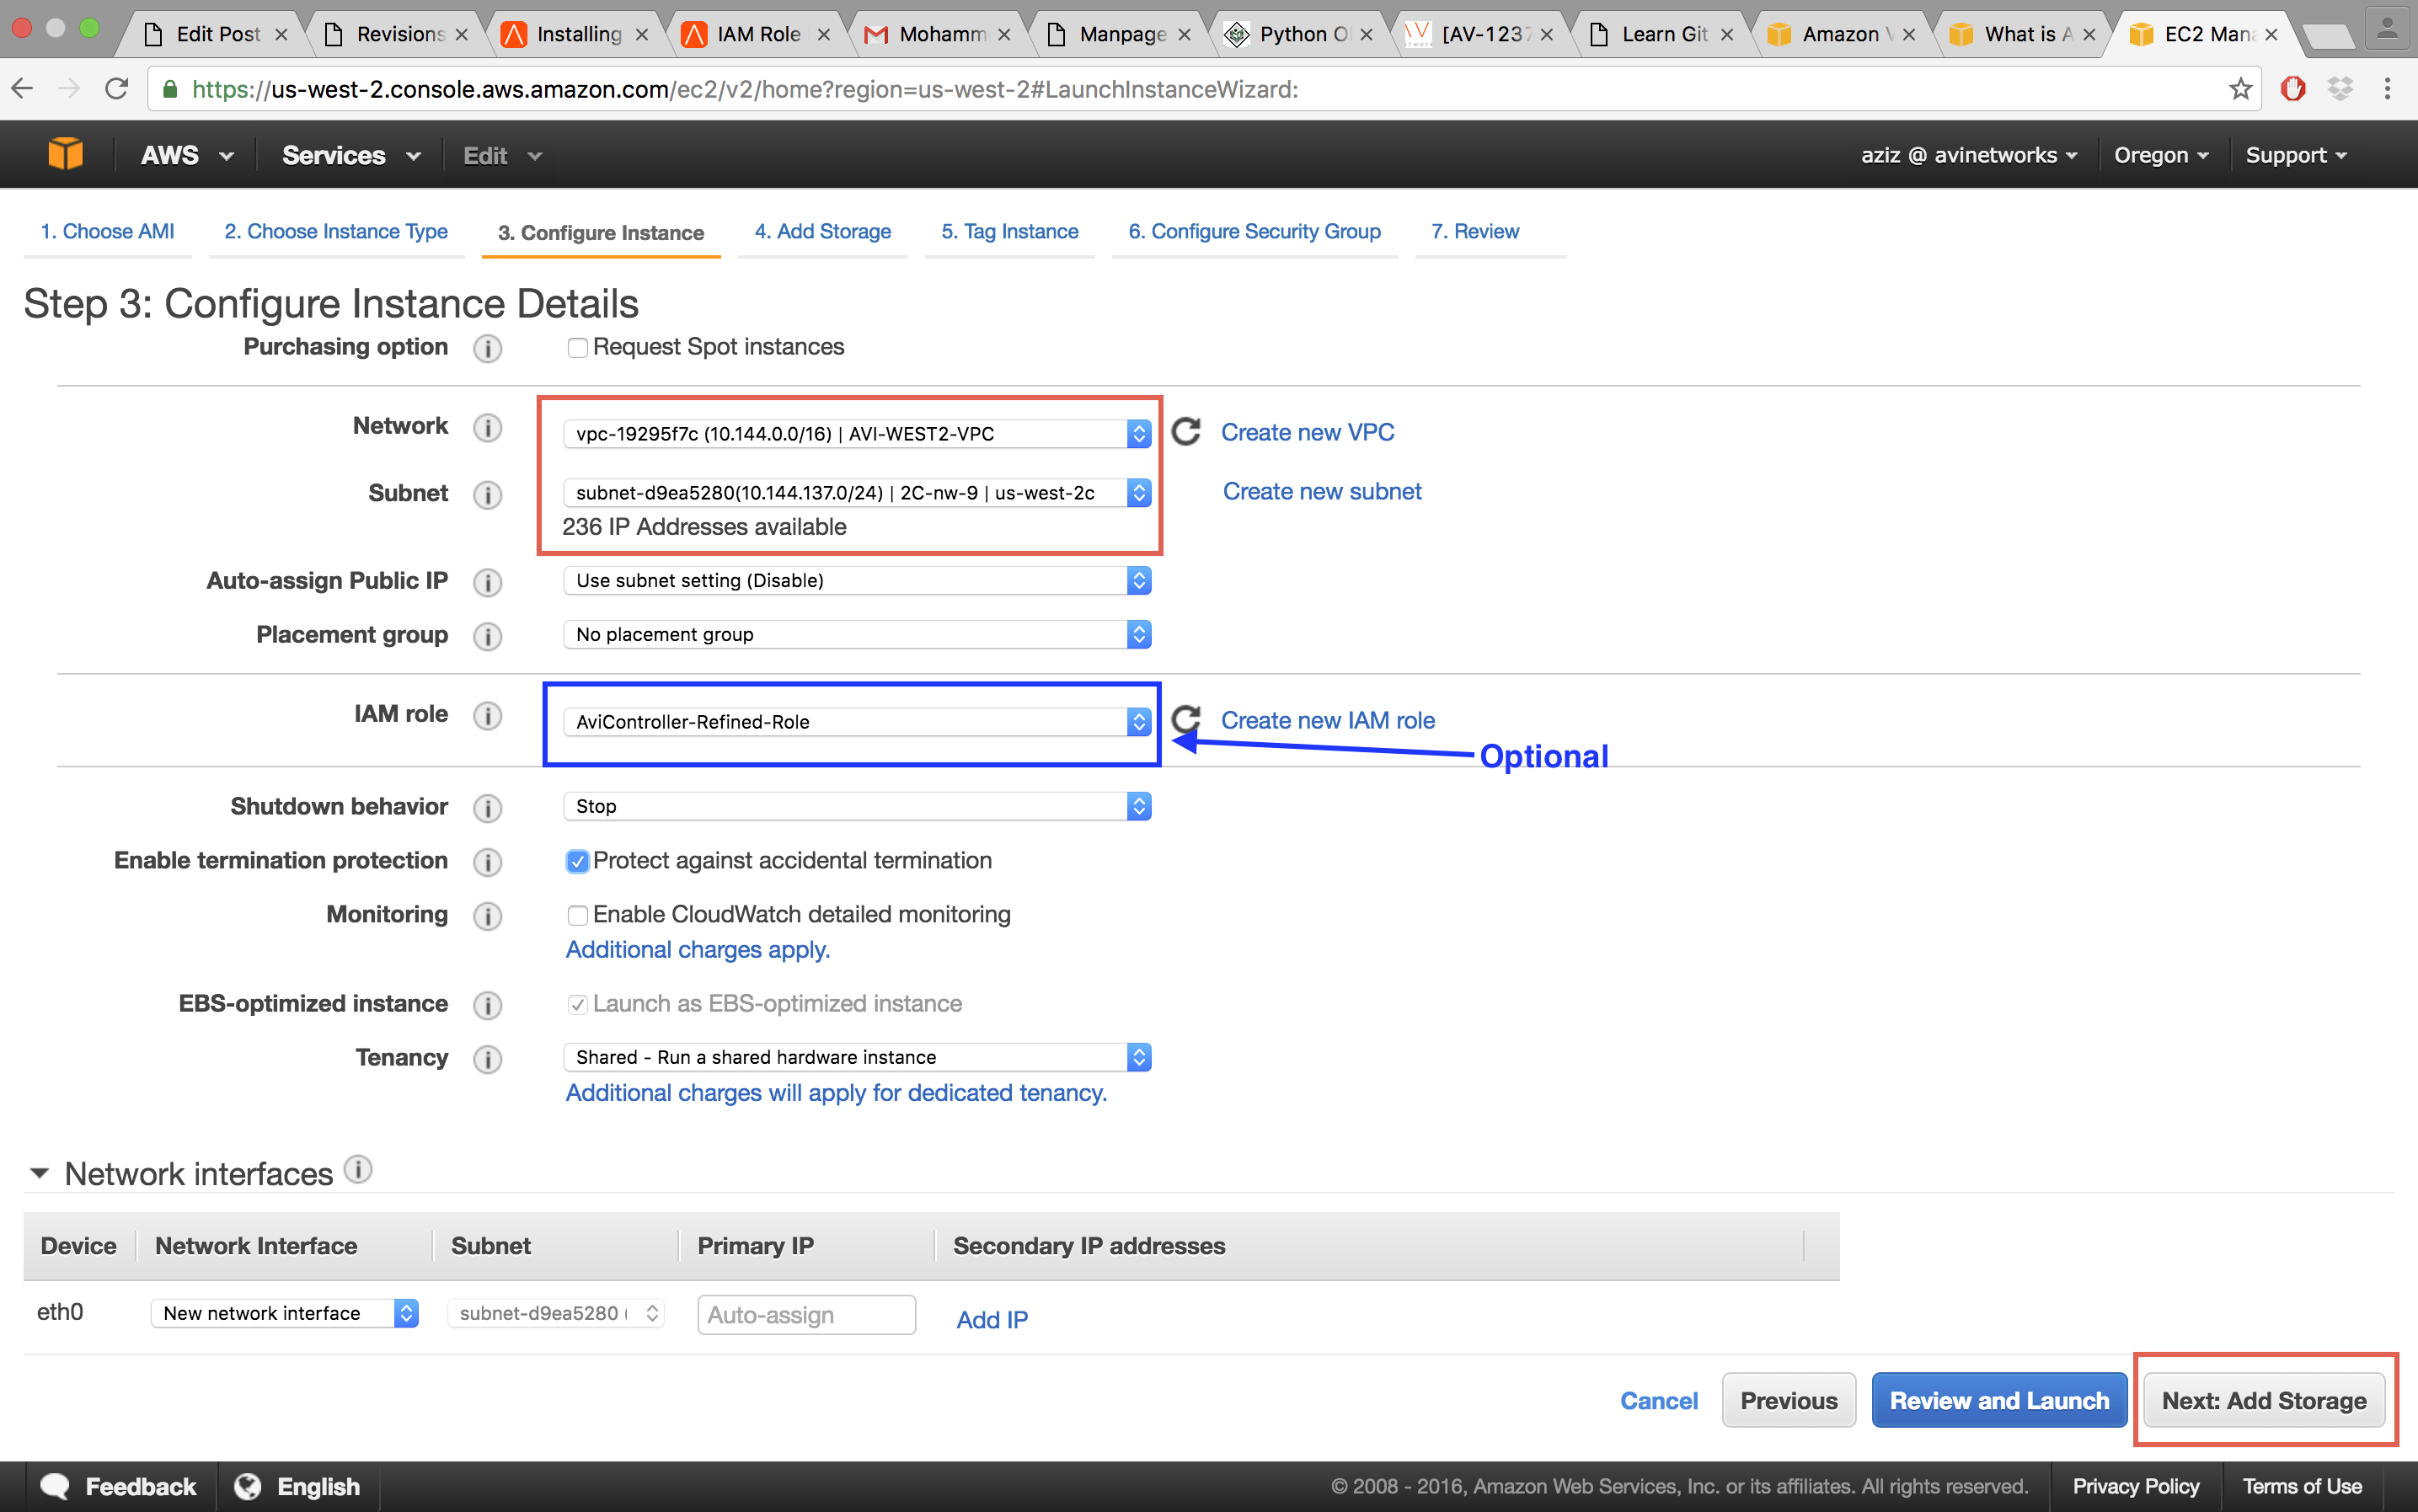
Select the appropriate VPC from the Network pull-down list and select the network from the Subnet pull-down list. This is the subnet in which the Controller will get the IP for the management NIC. Also, select the Enable termination protection option.
Note: If installing with an IAM role instead of an AWS customer account key, select IAM role if you have created as explained in Credential Method. In this example we have used the IAM Role AviController-Refined-Role.
-
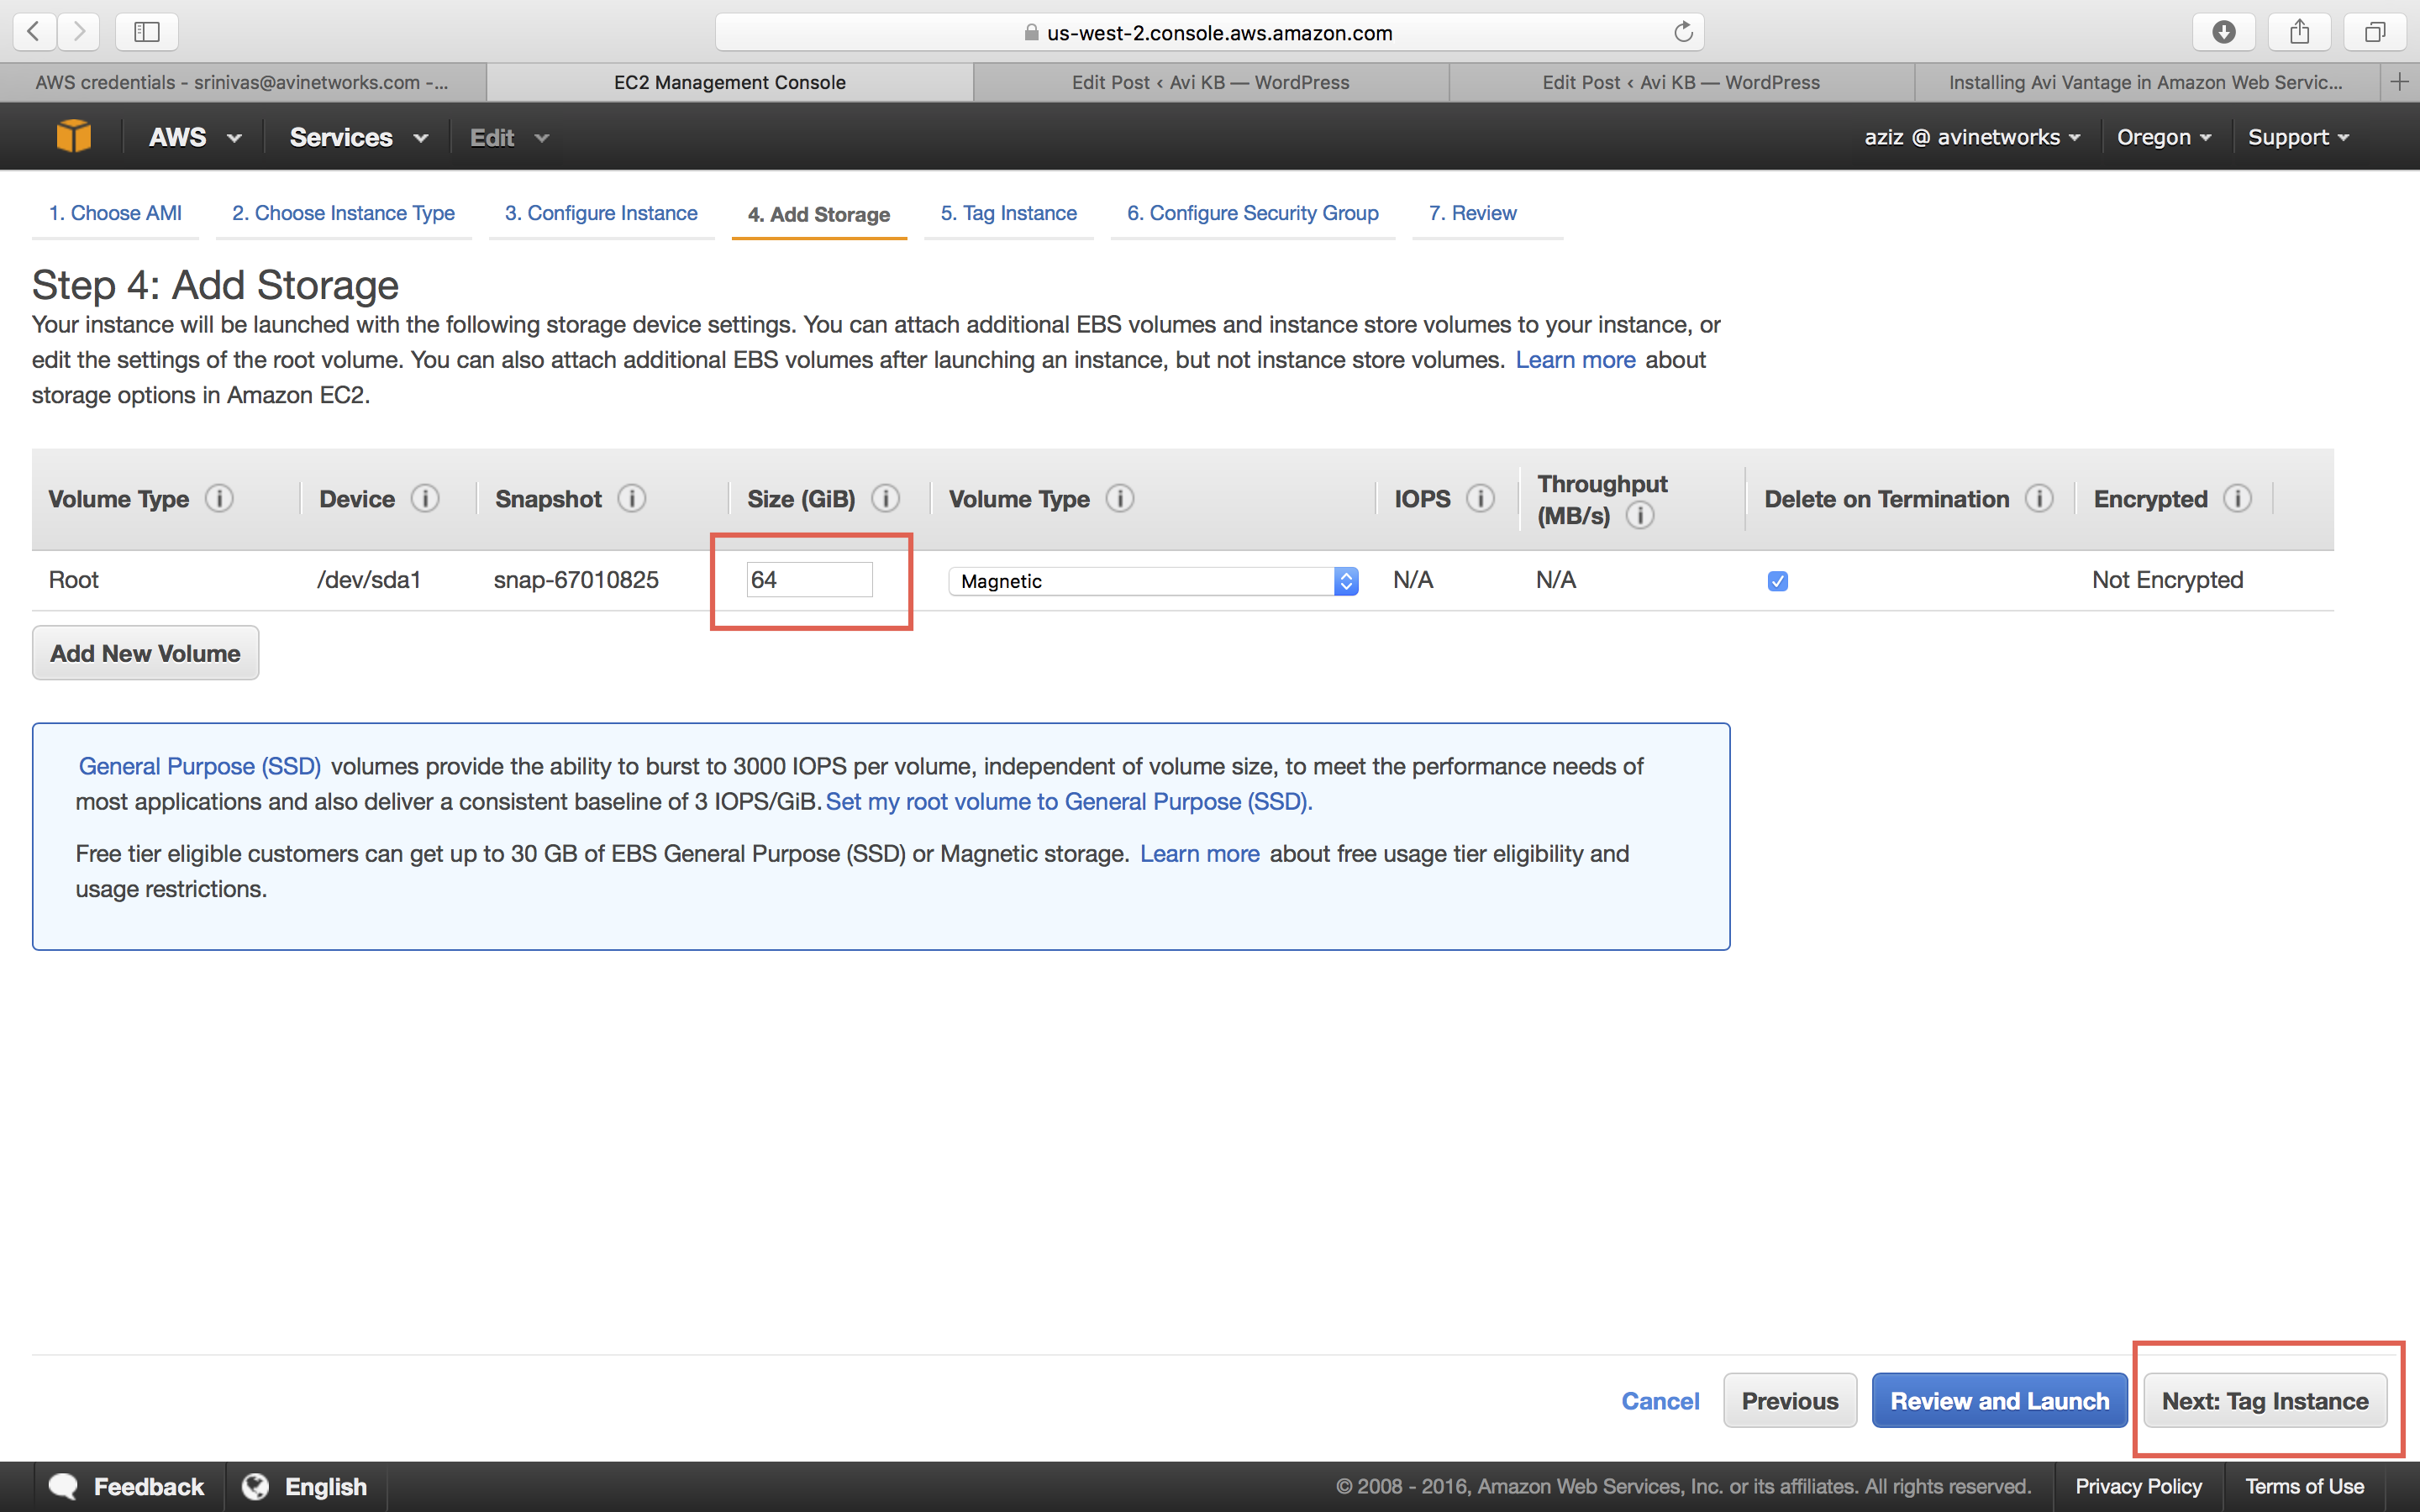
In the Size (G/B) field, enter 128 to allocate 128 GB to the Avi Controller instance, and go to the “Next:Tag Instance” option.
-
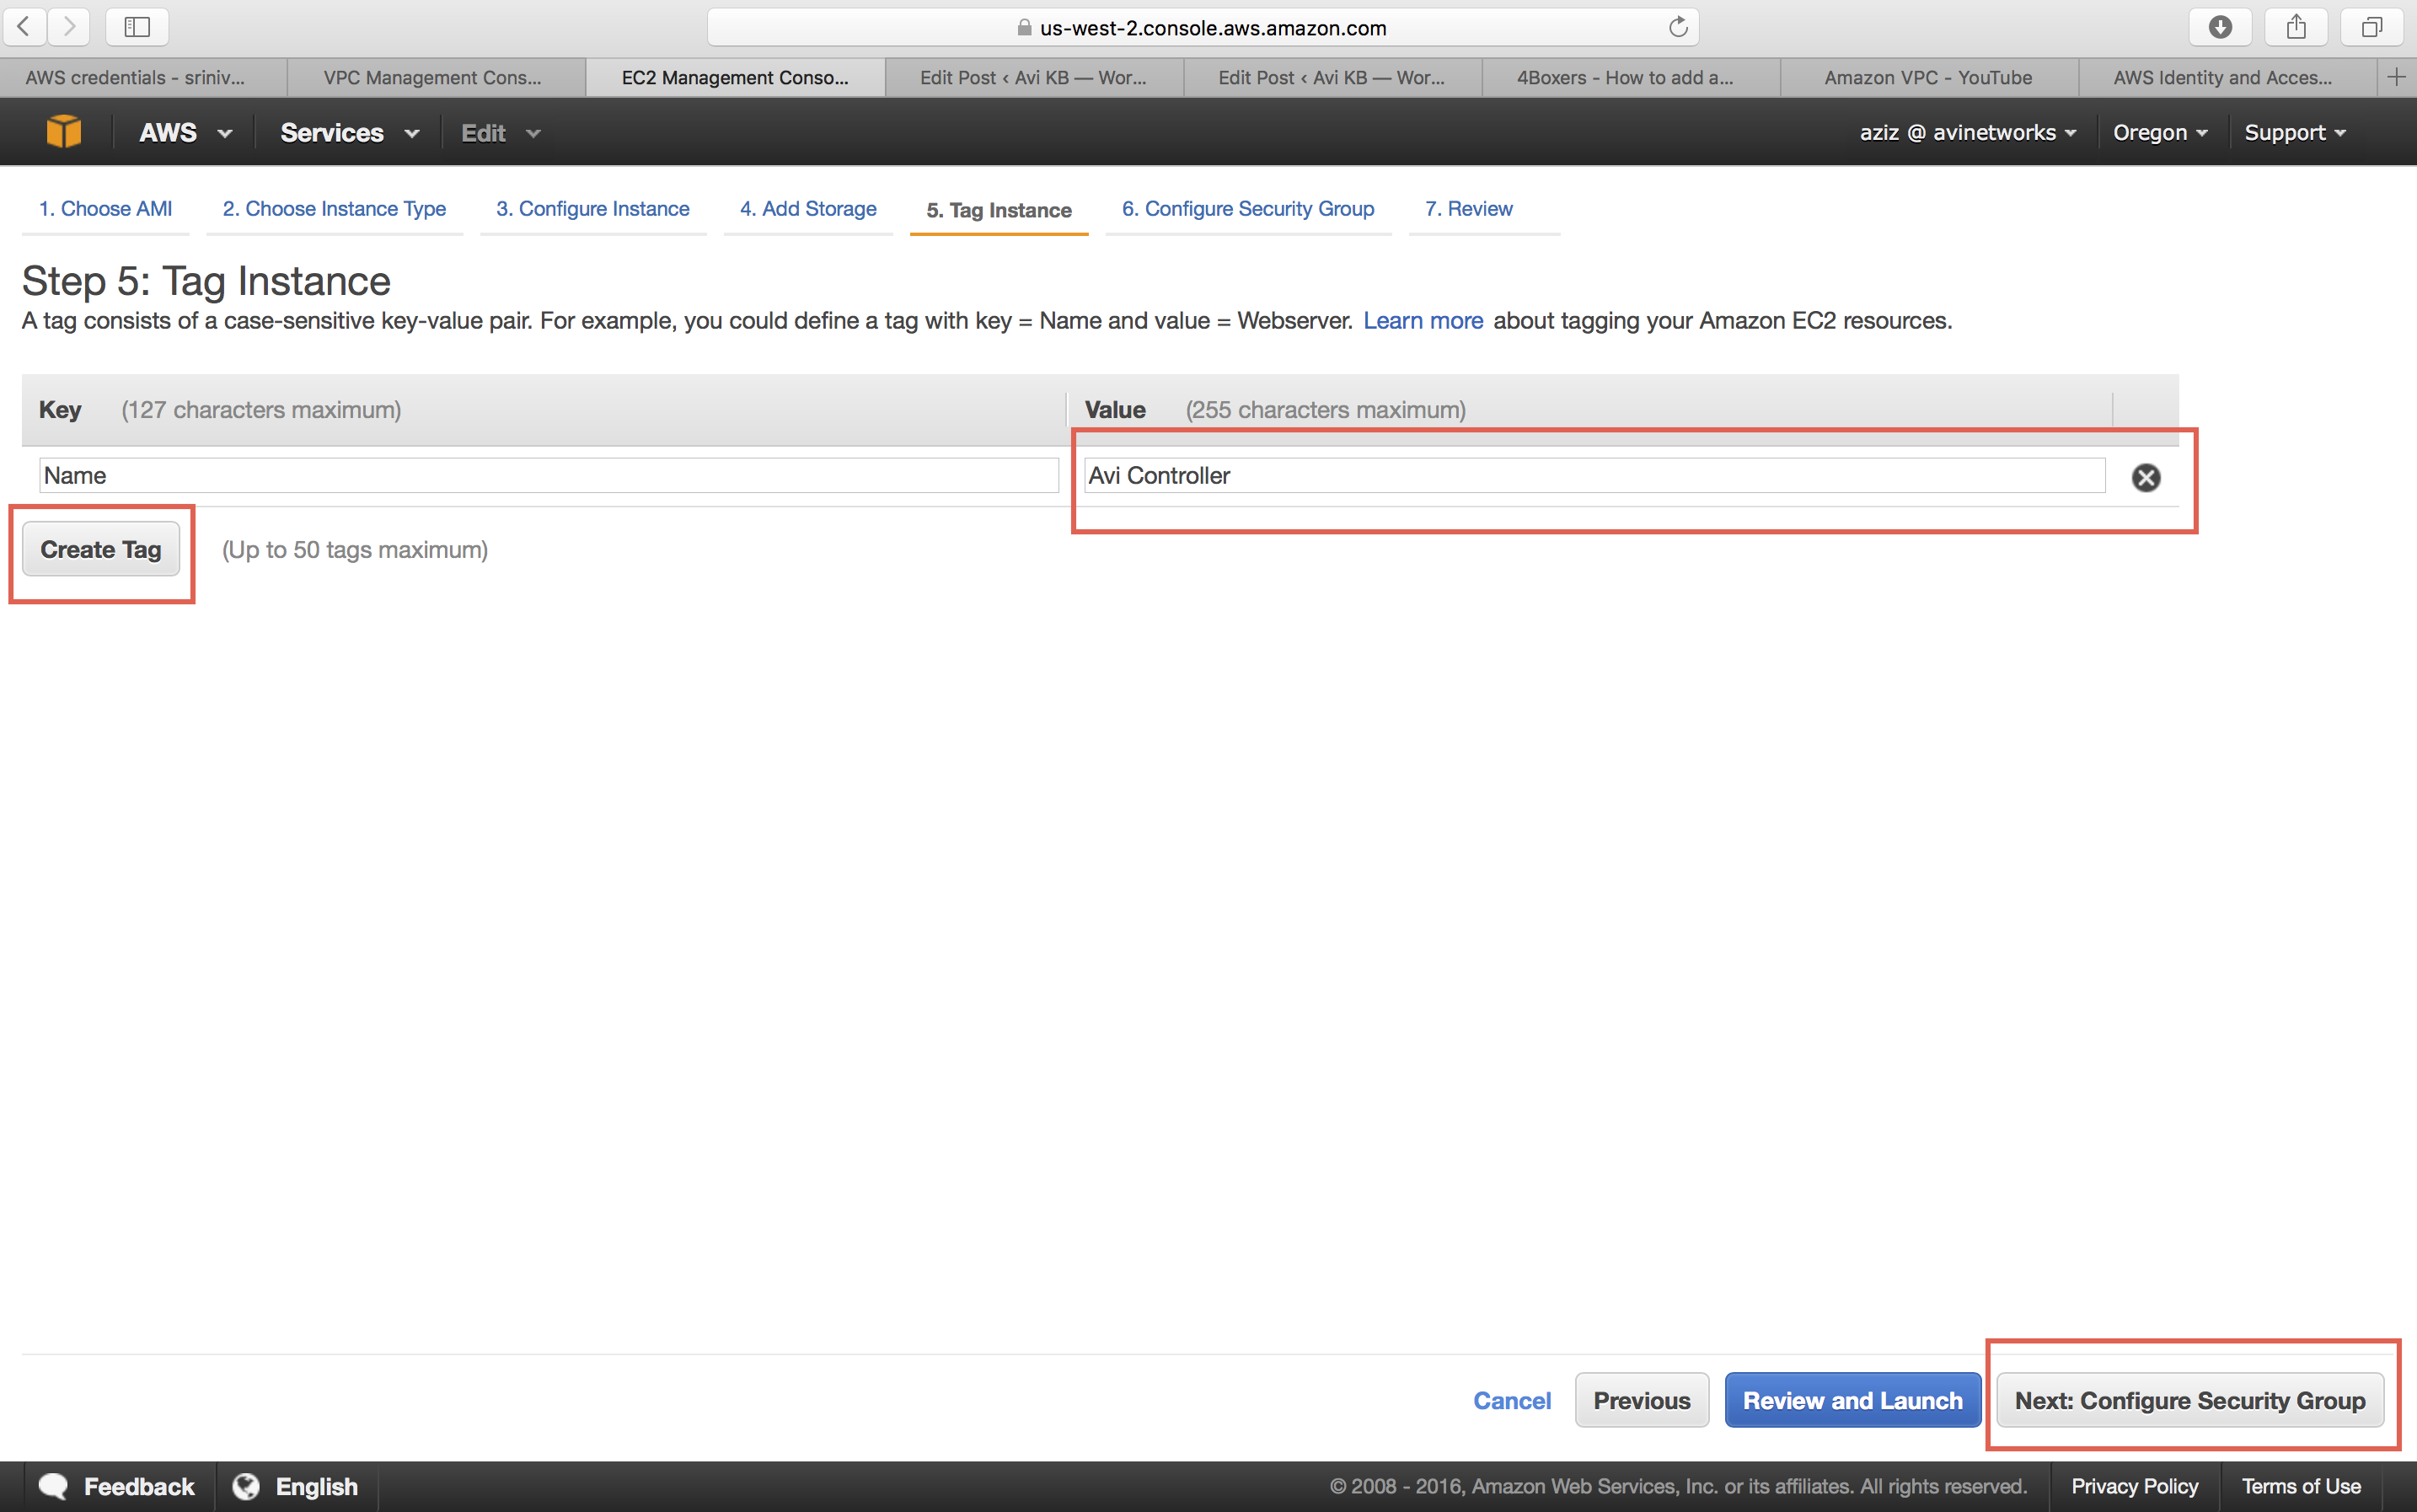
Enter a name for this Avi Controller instance.
-
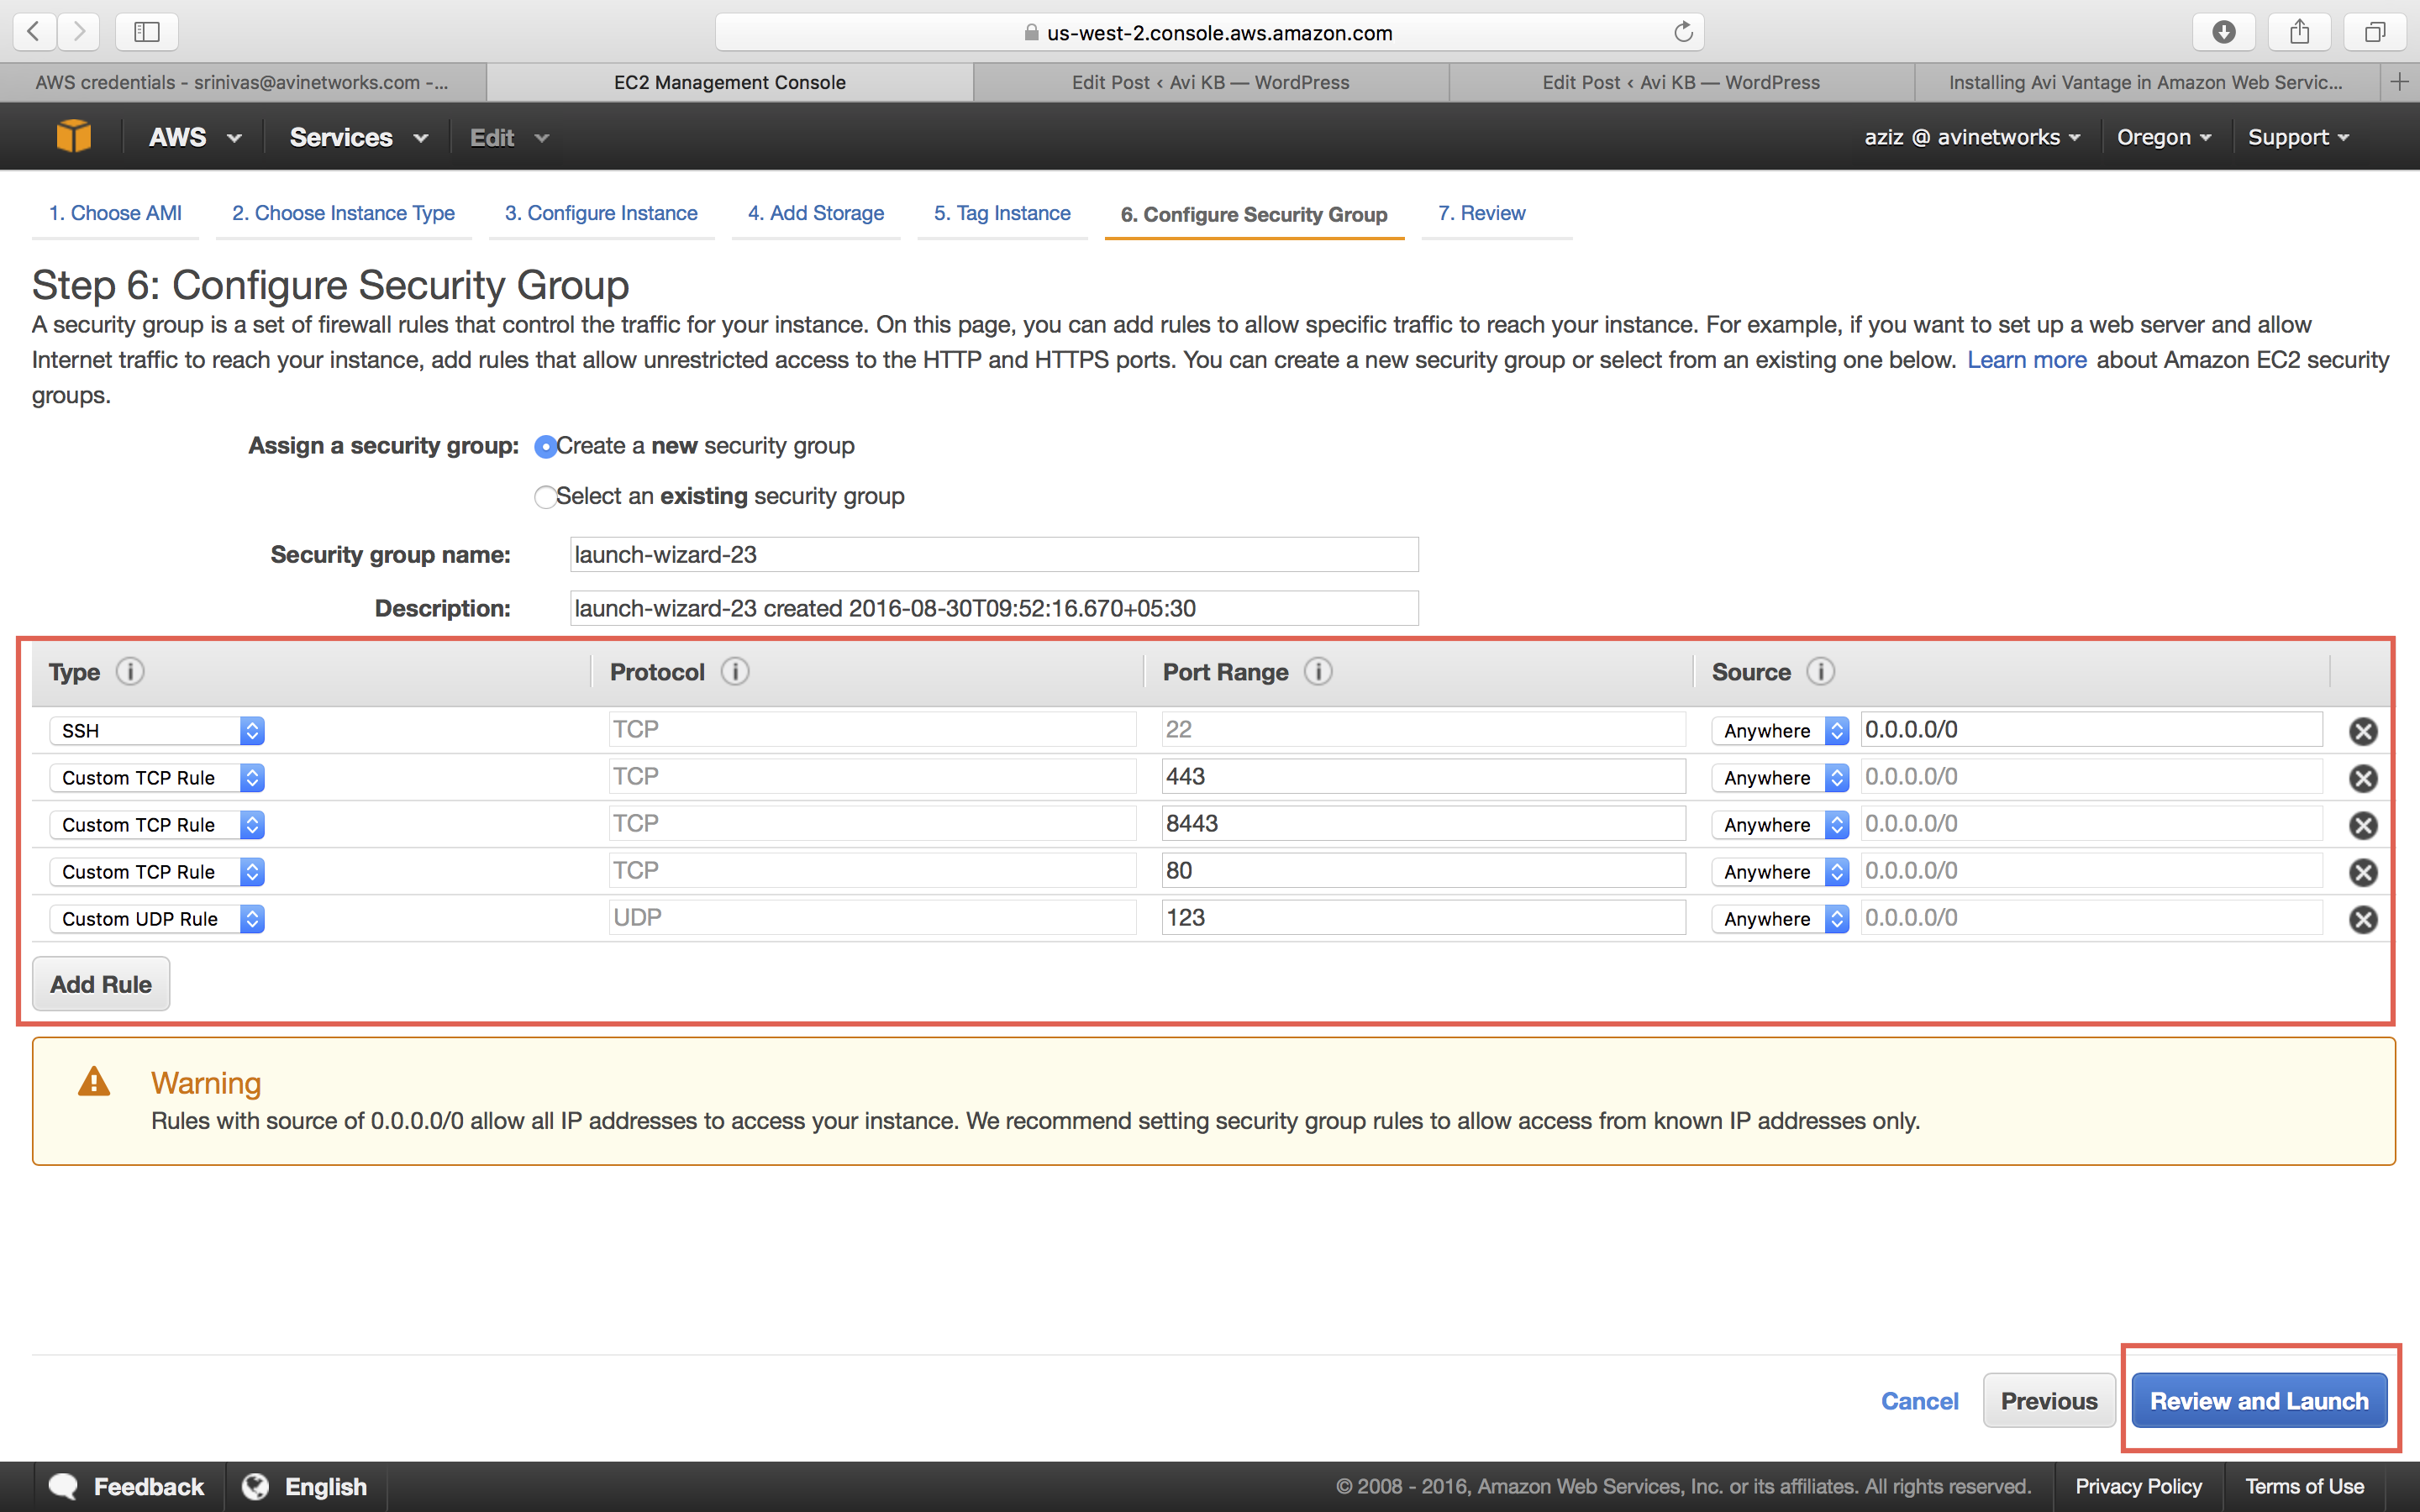
Create a security group that allows traffic through the firewall, to allow management communication between the Avi Controller and the Avi Service Engines (SEs). To know more, refer to Security Groups in AWS.
-
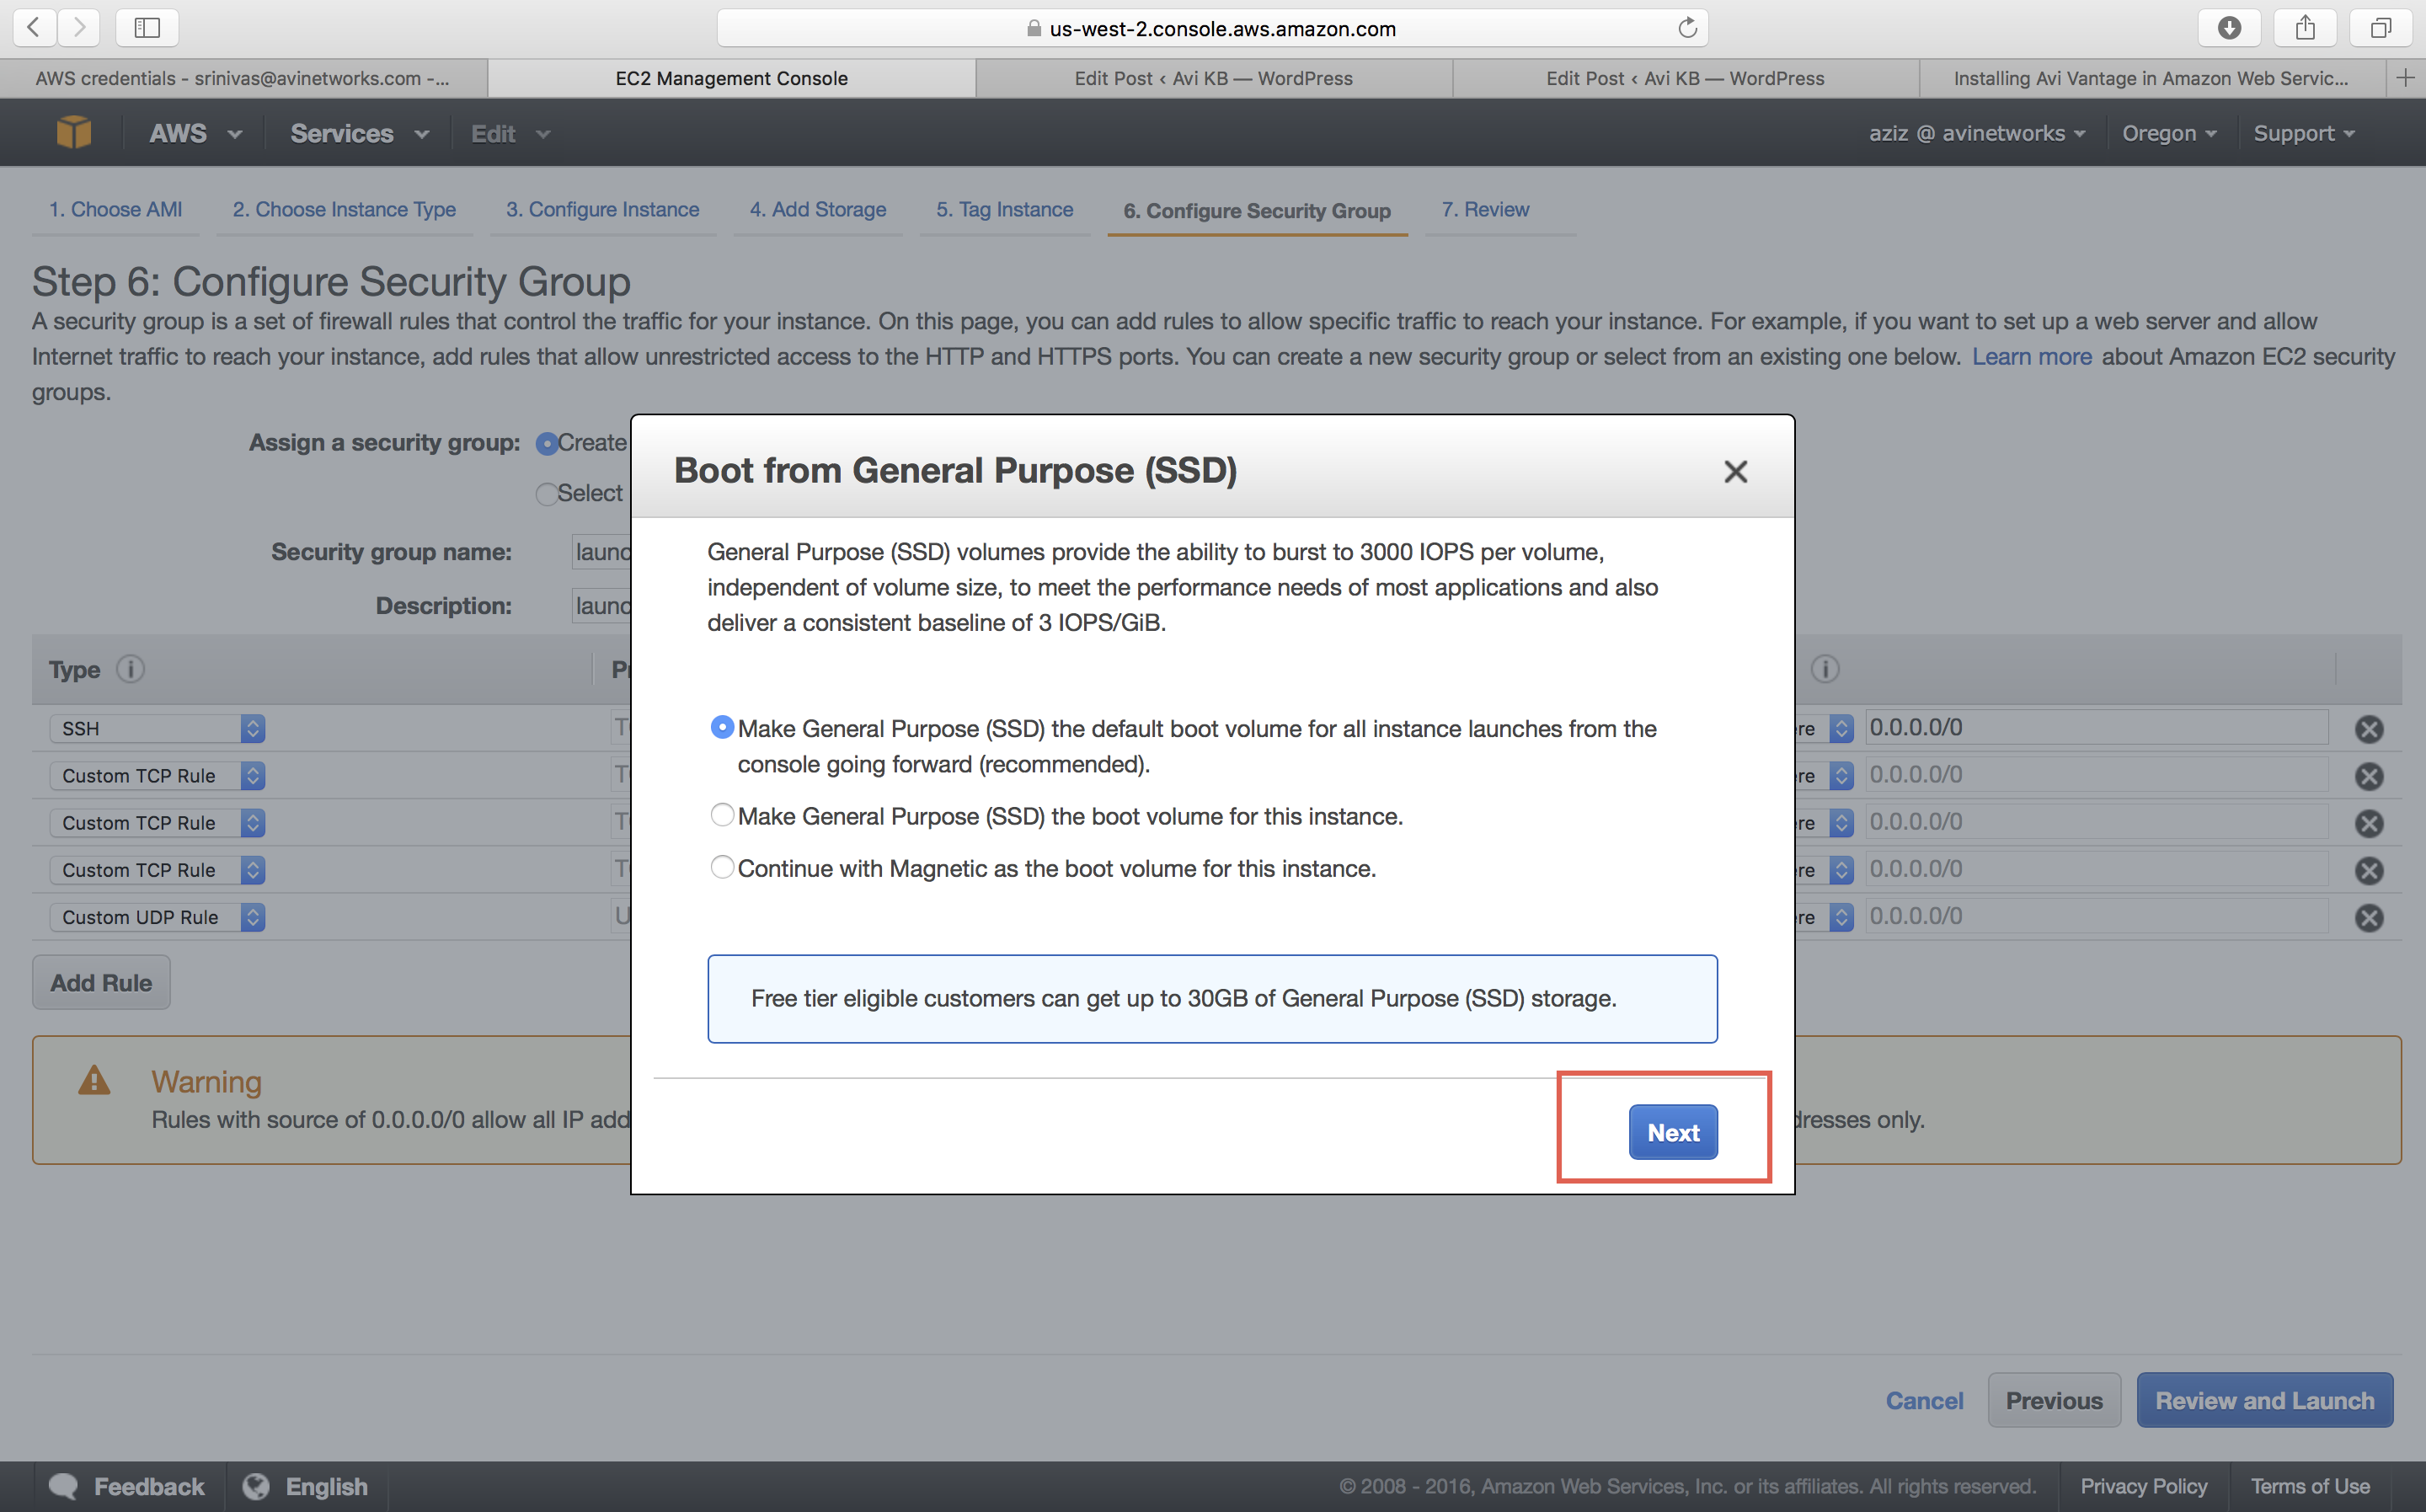
Select SSD as the storage type. (This enhances the responsiveness of the Avi Controller web interface.)
-
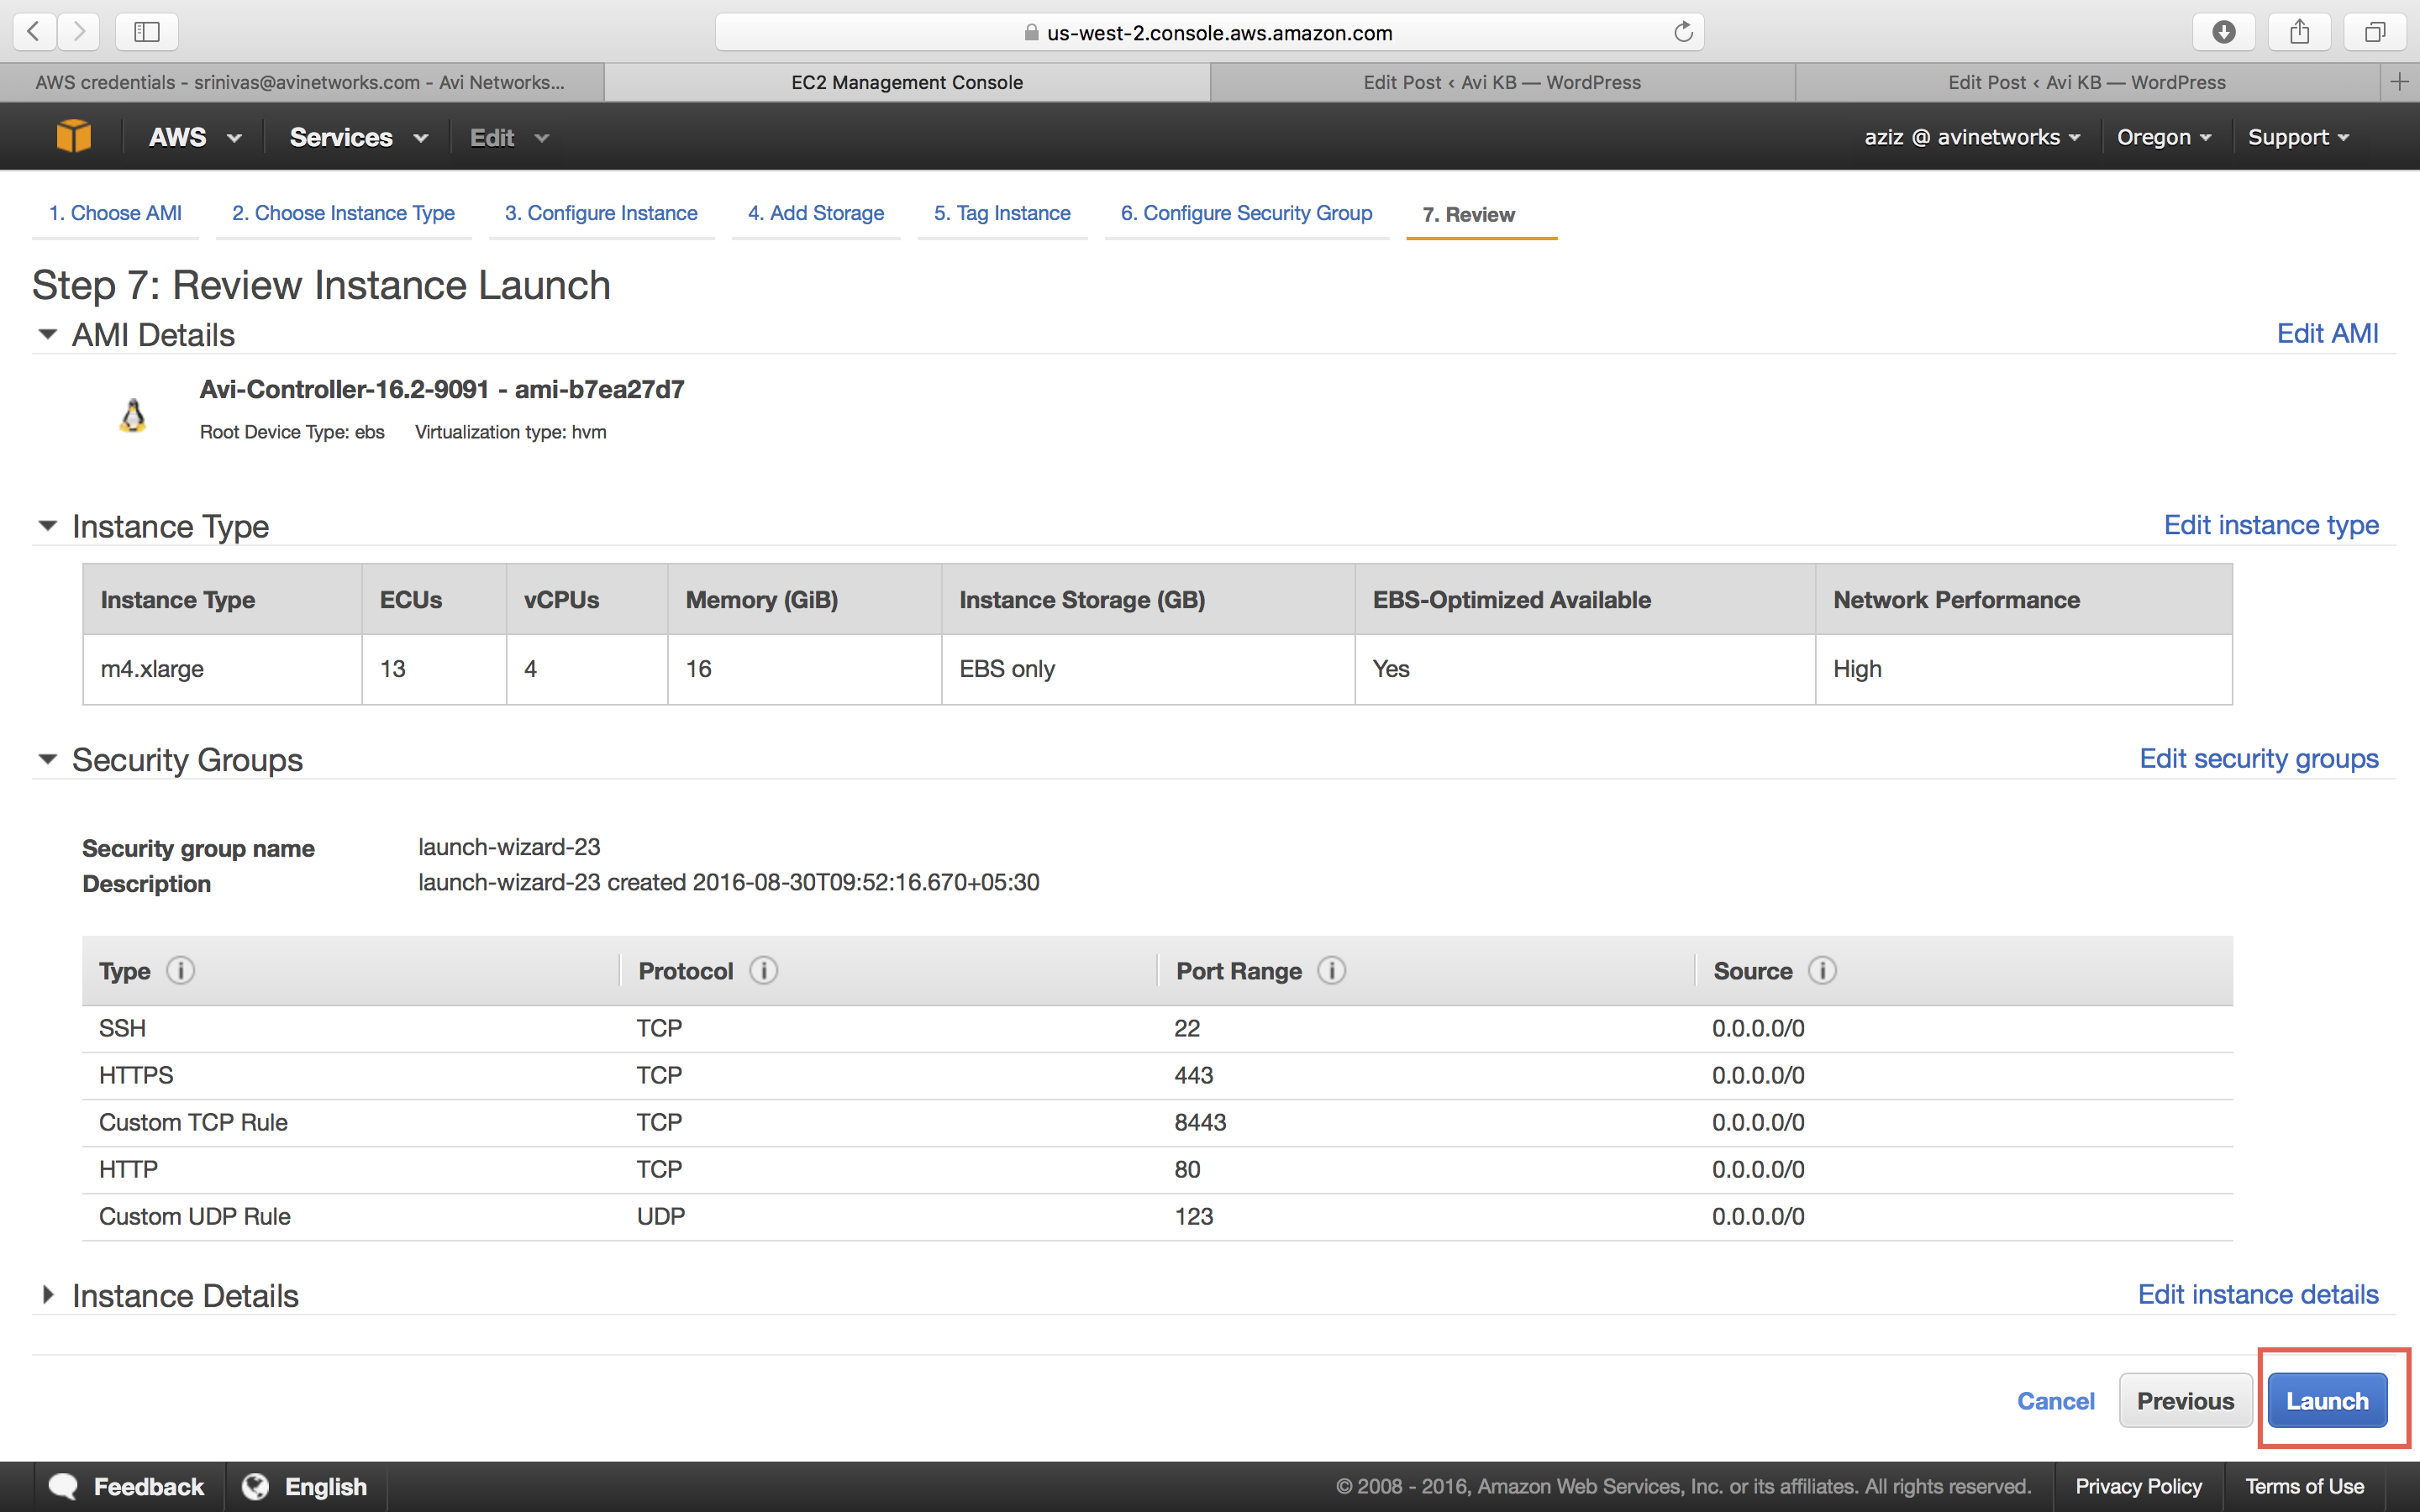
Review your EC2 instance, and click Launch.
-
Key Pair Settings
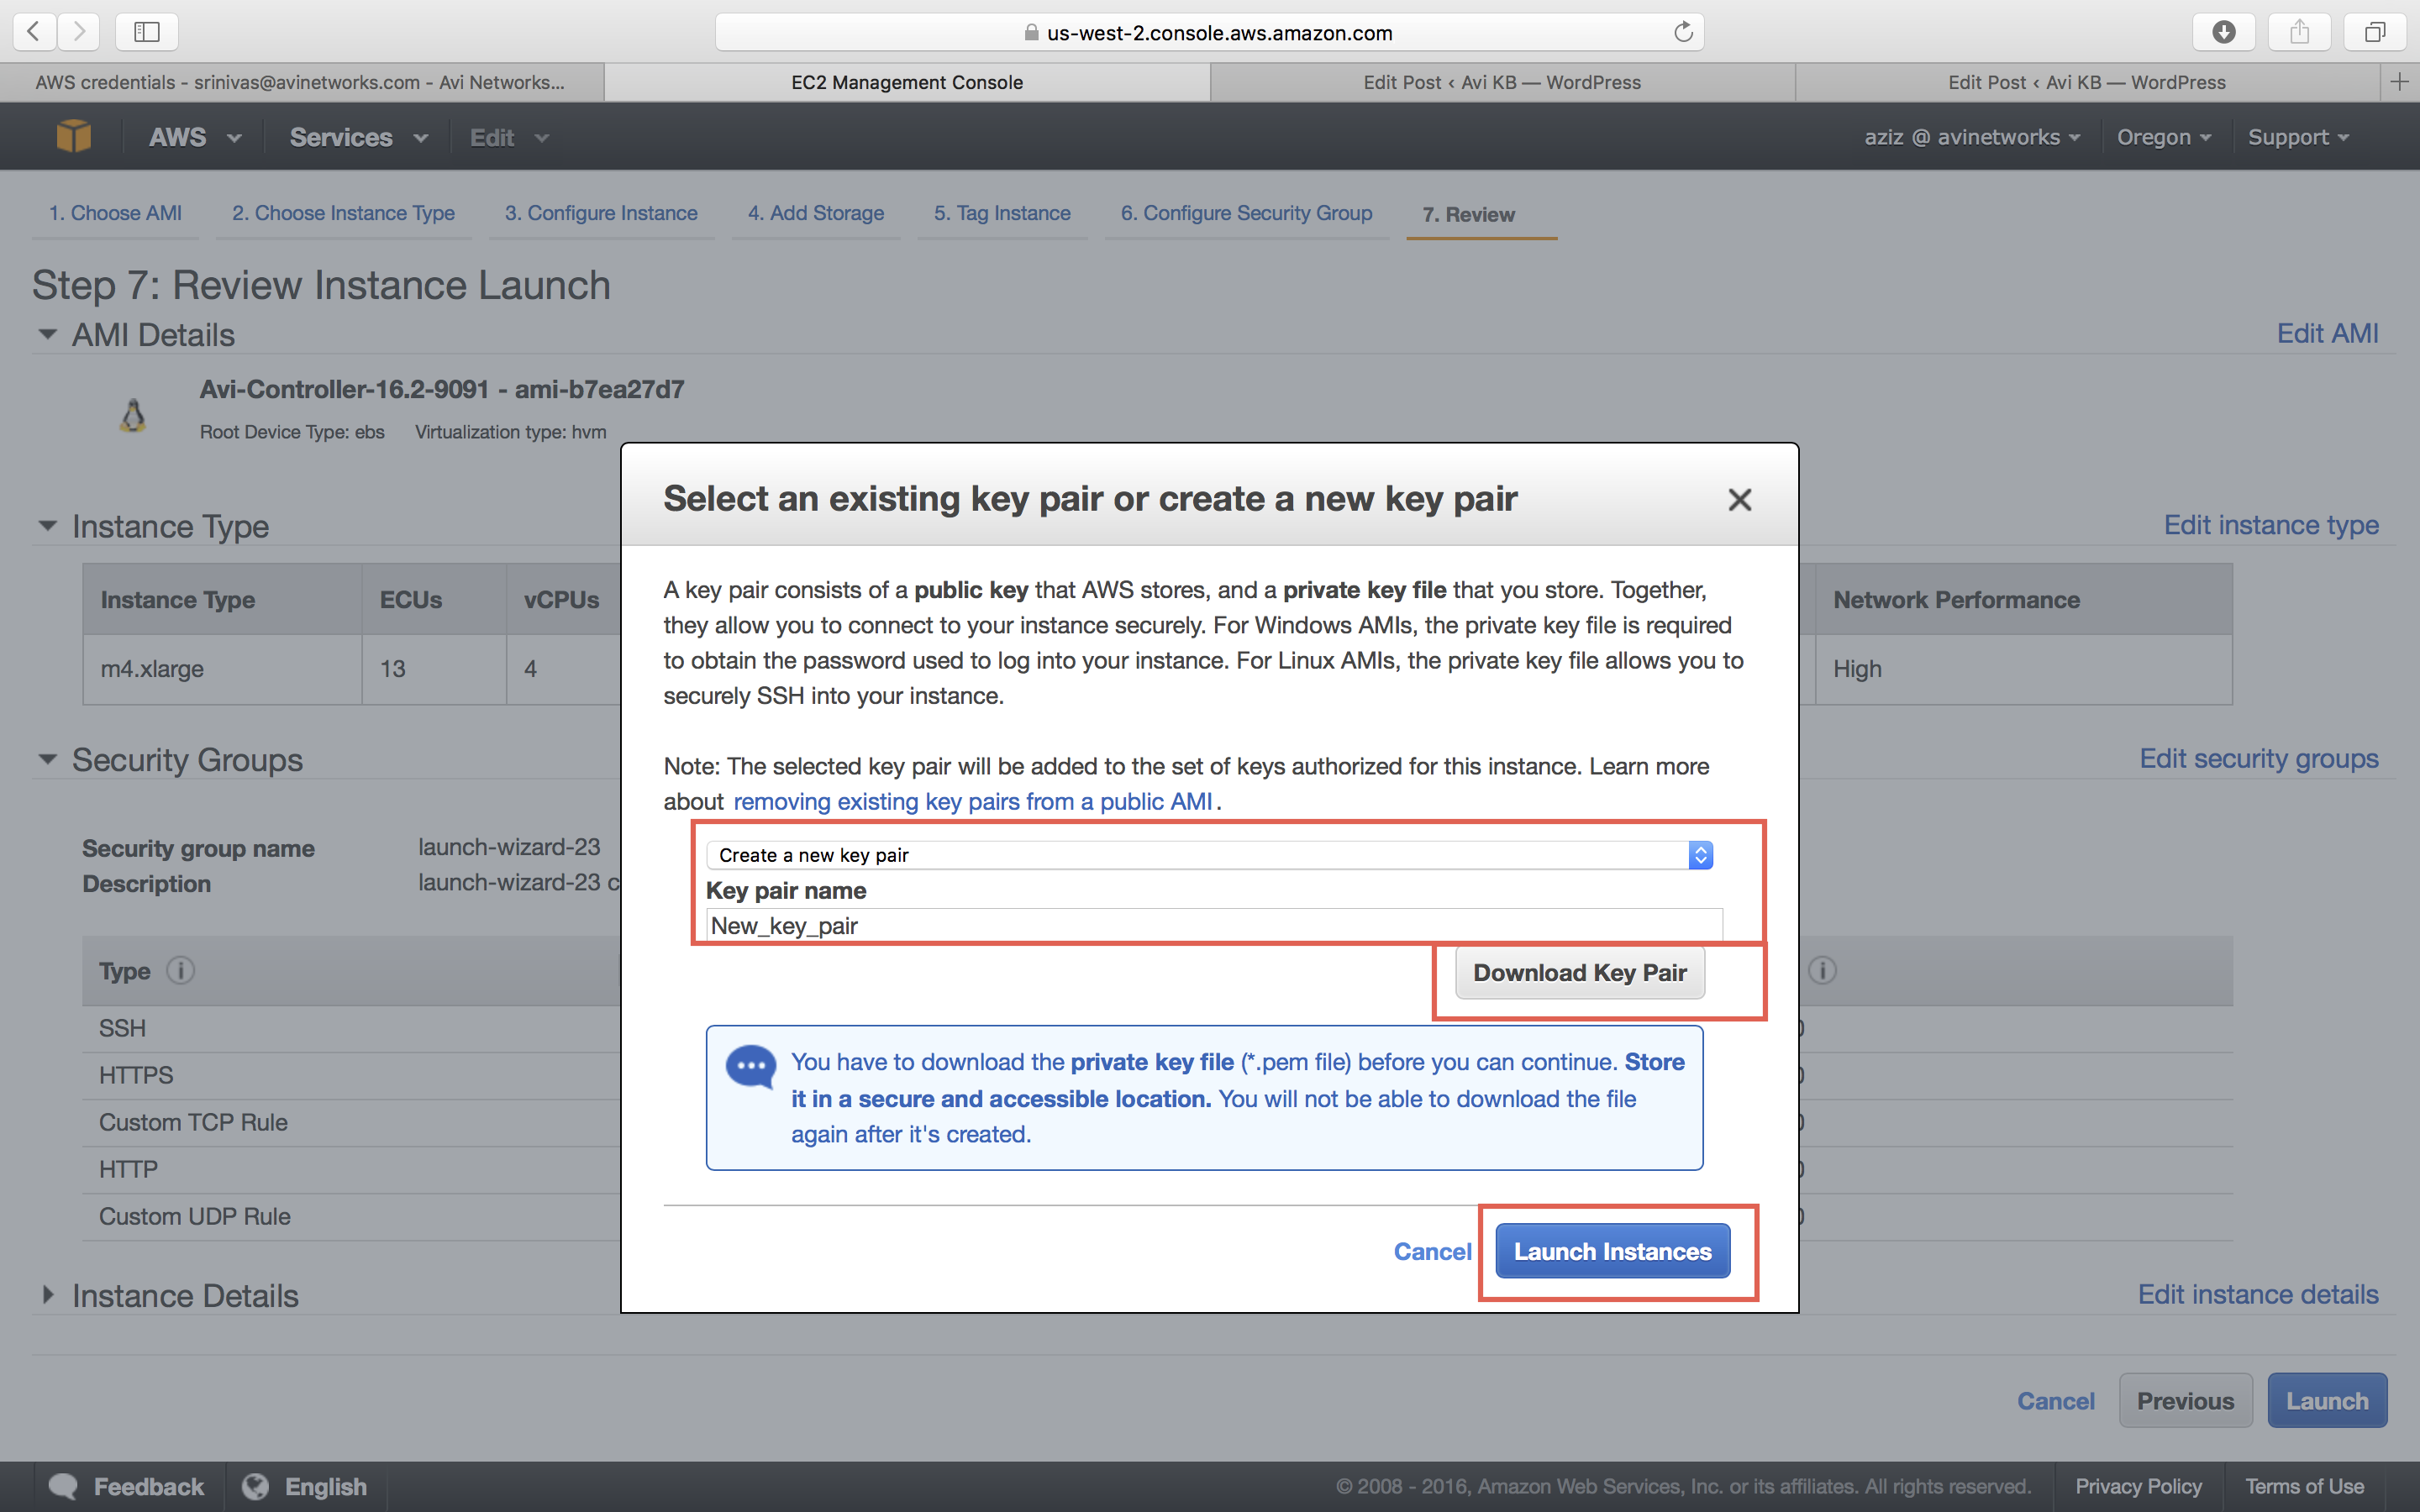
If you don’t have key pair, create new key pair. After downloading the key pair, change the permissions to “400” (chmod 400 “.pem”) to do SSH. -
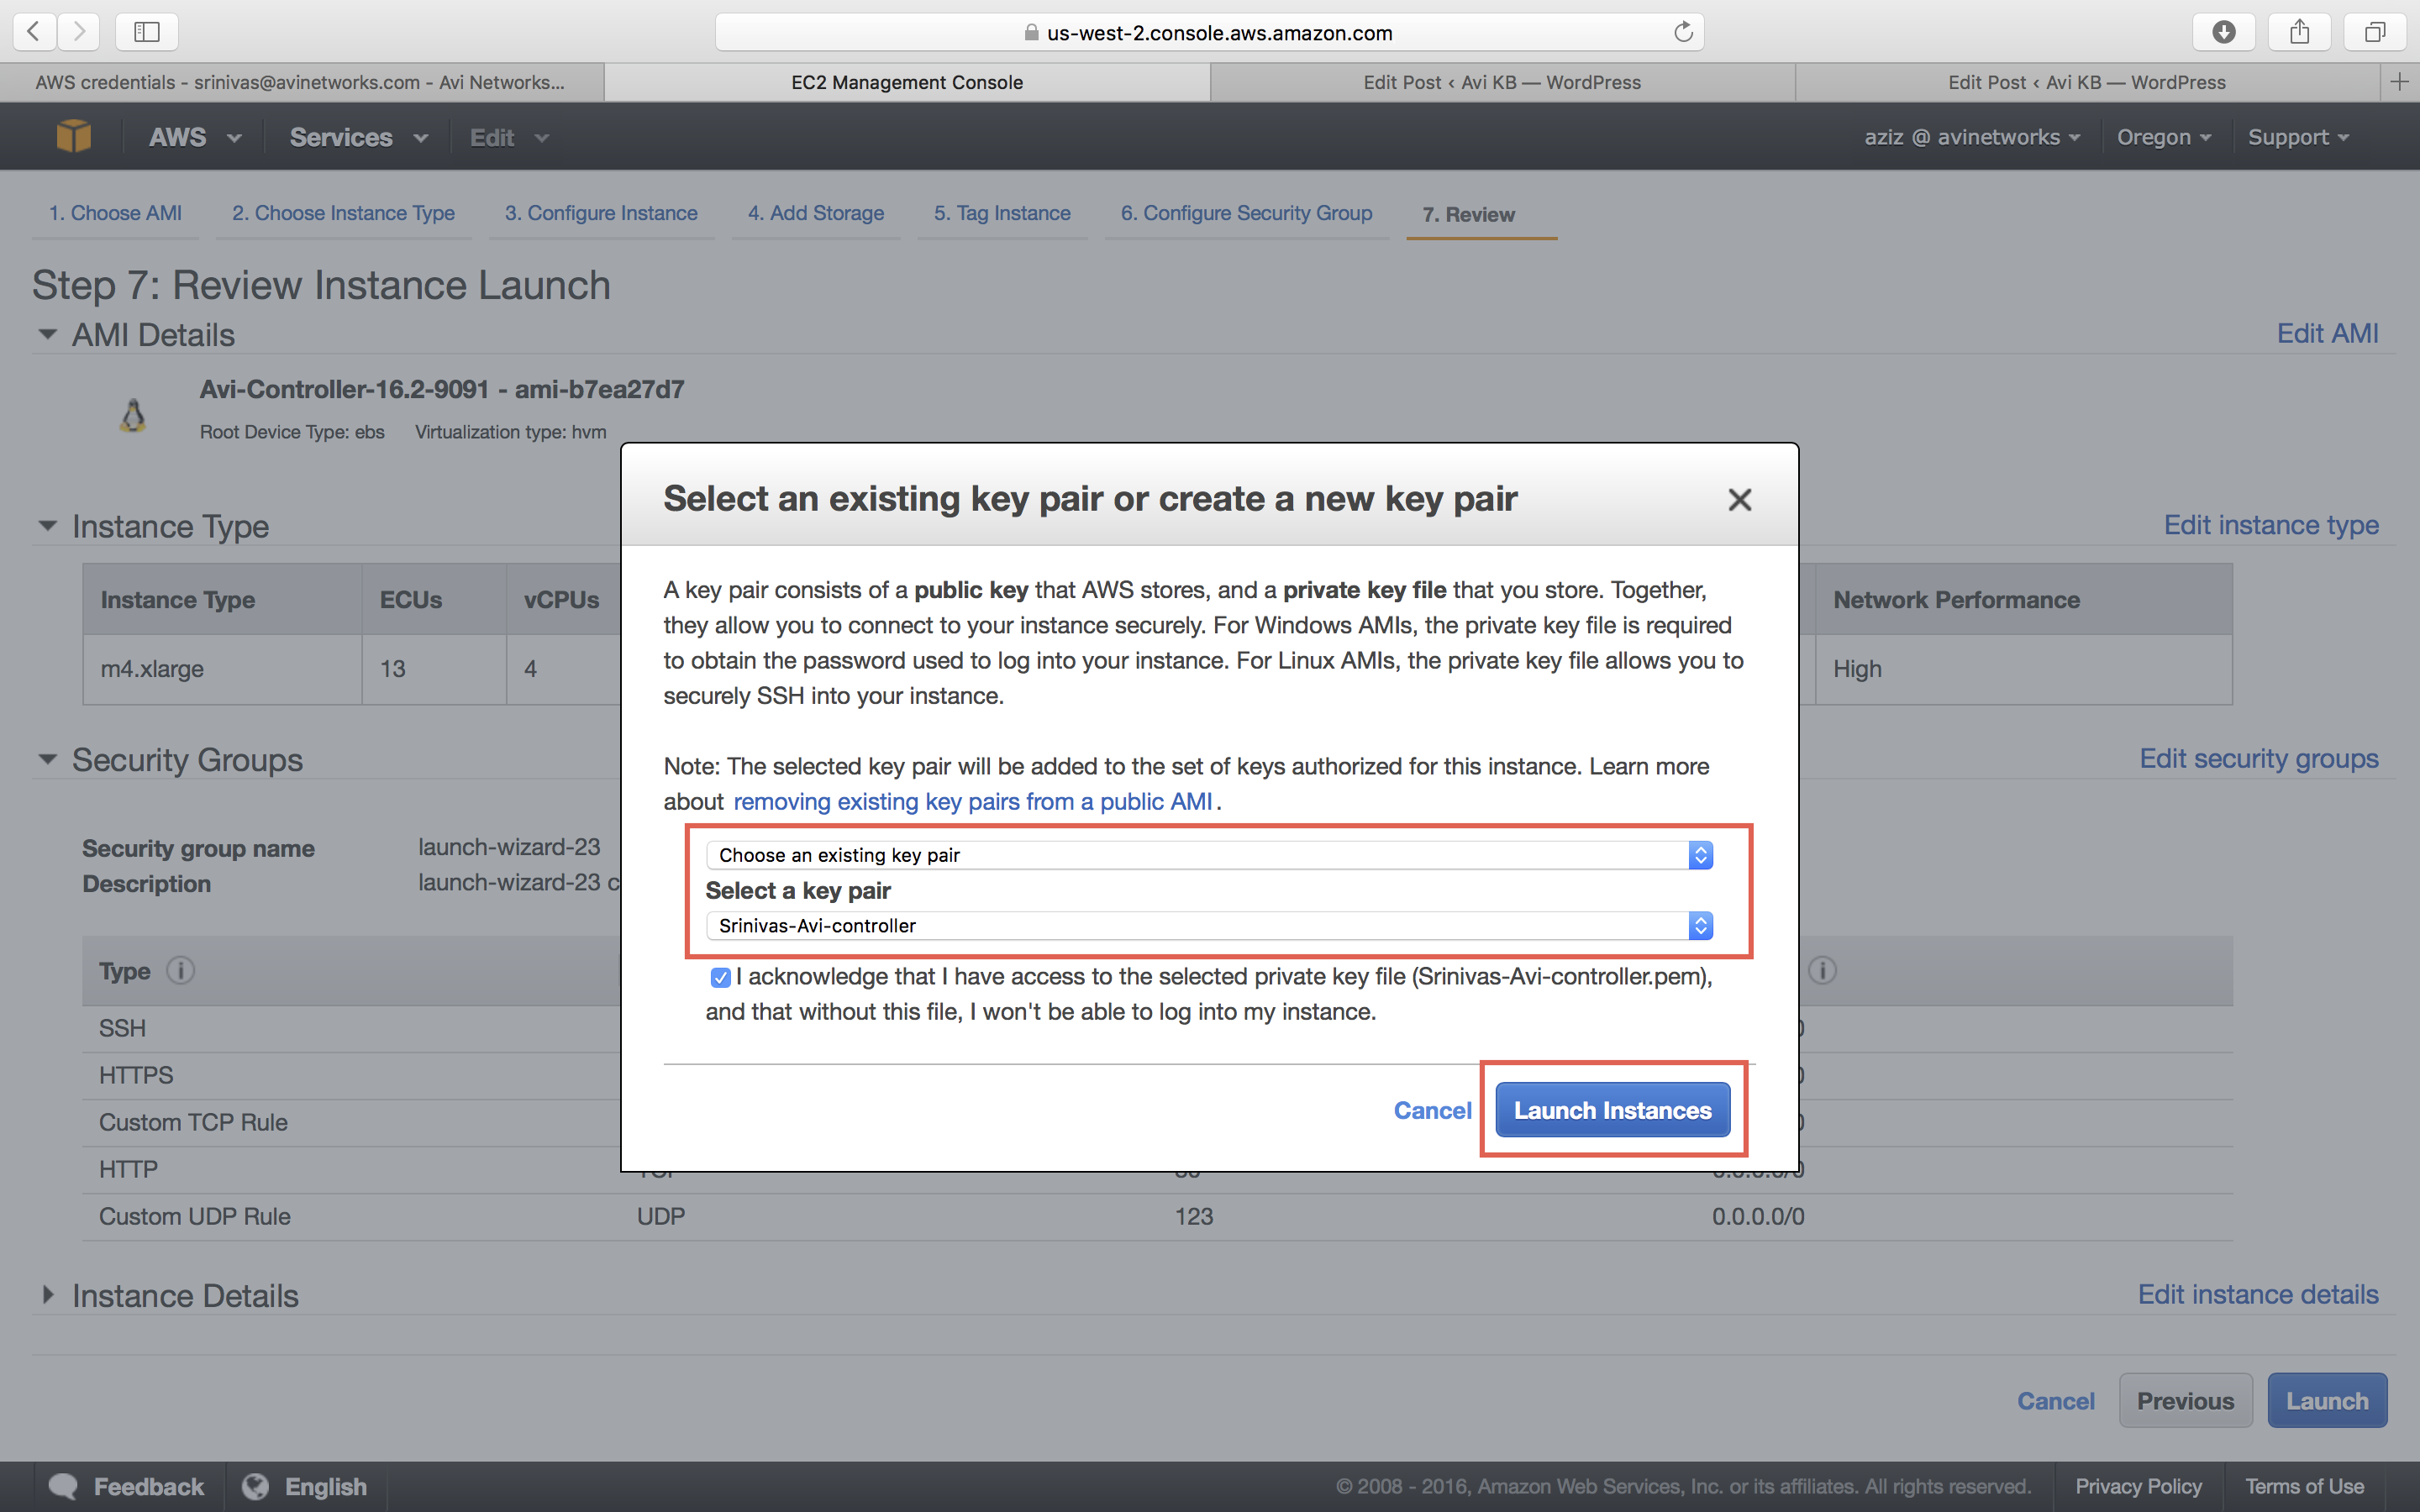
If you have key pair, select a key pair for AMI authentication.
-
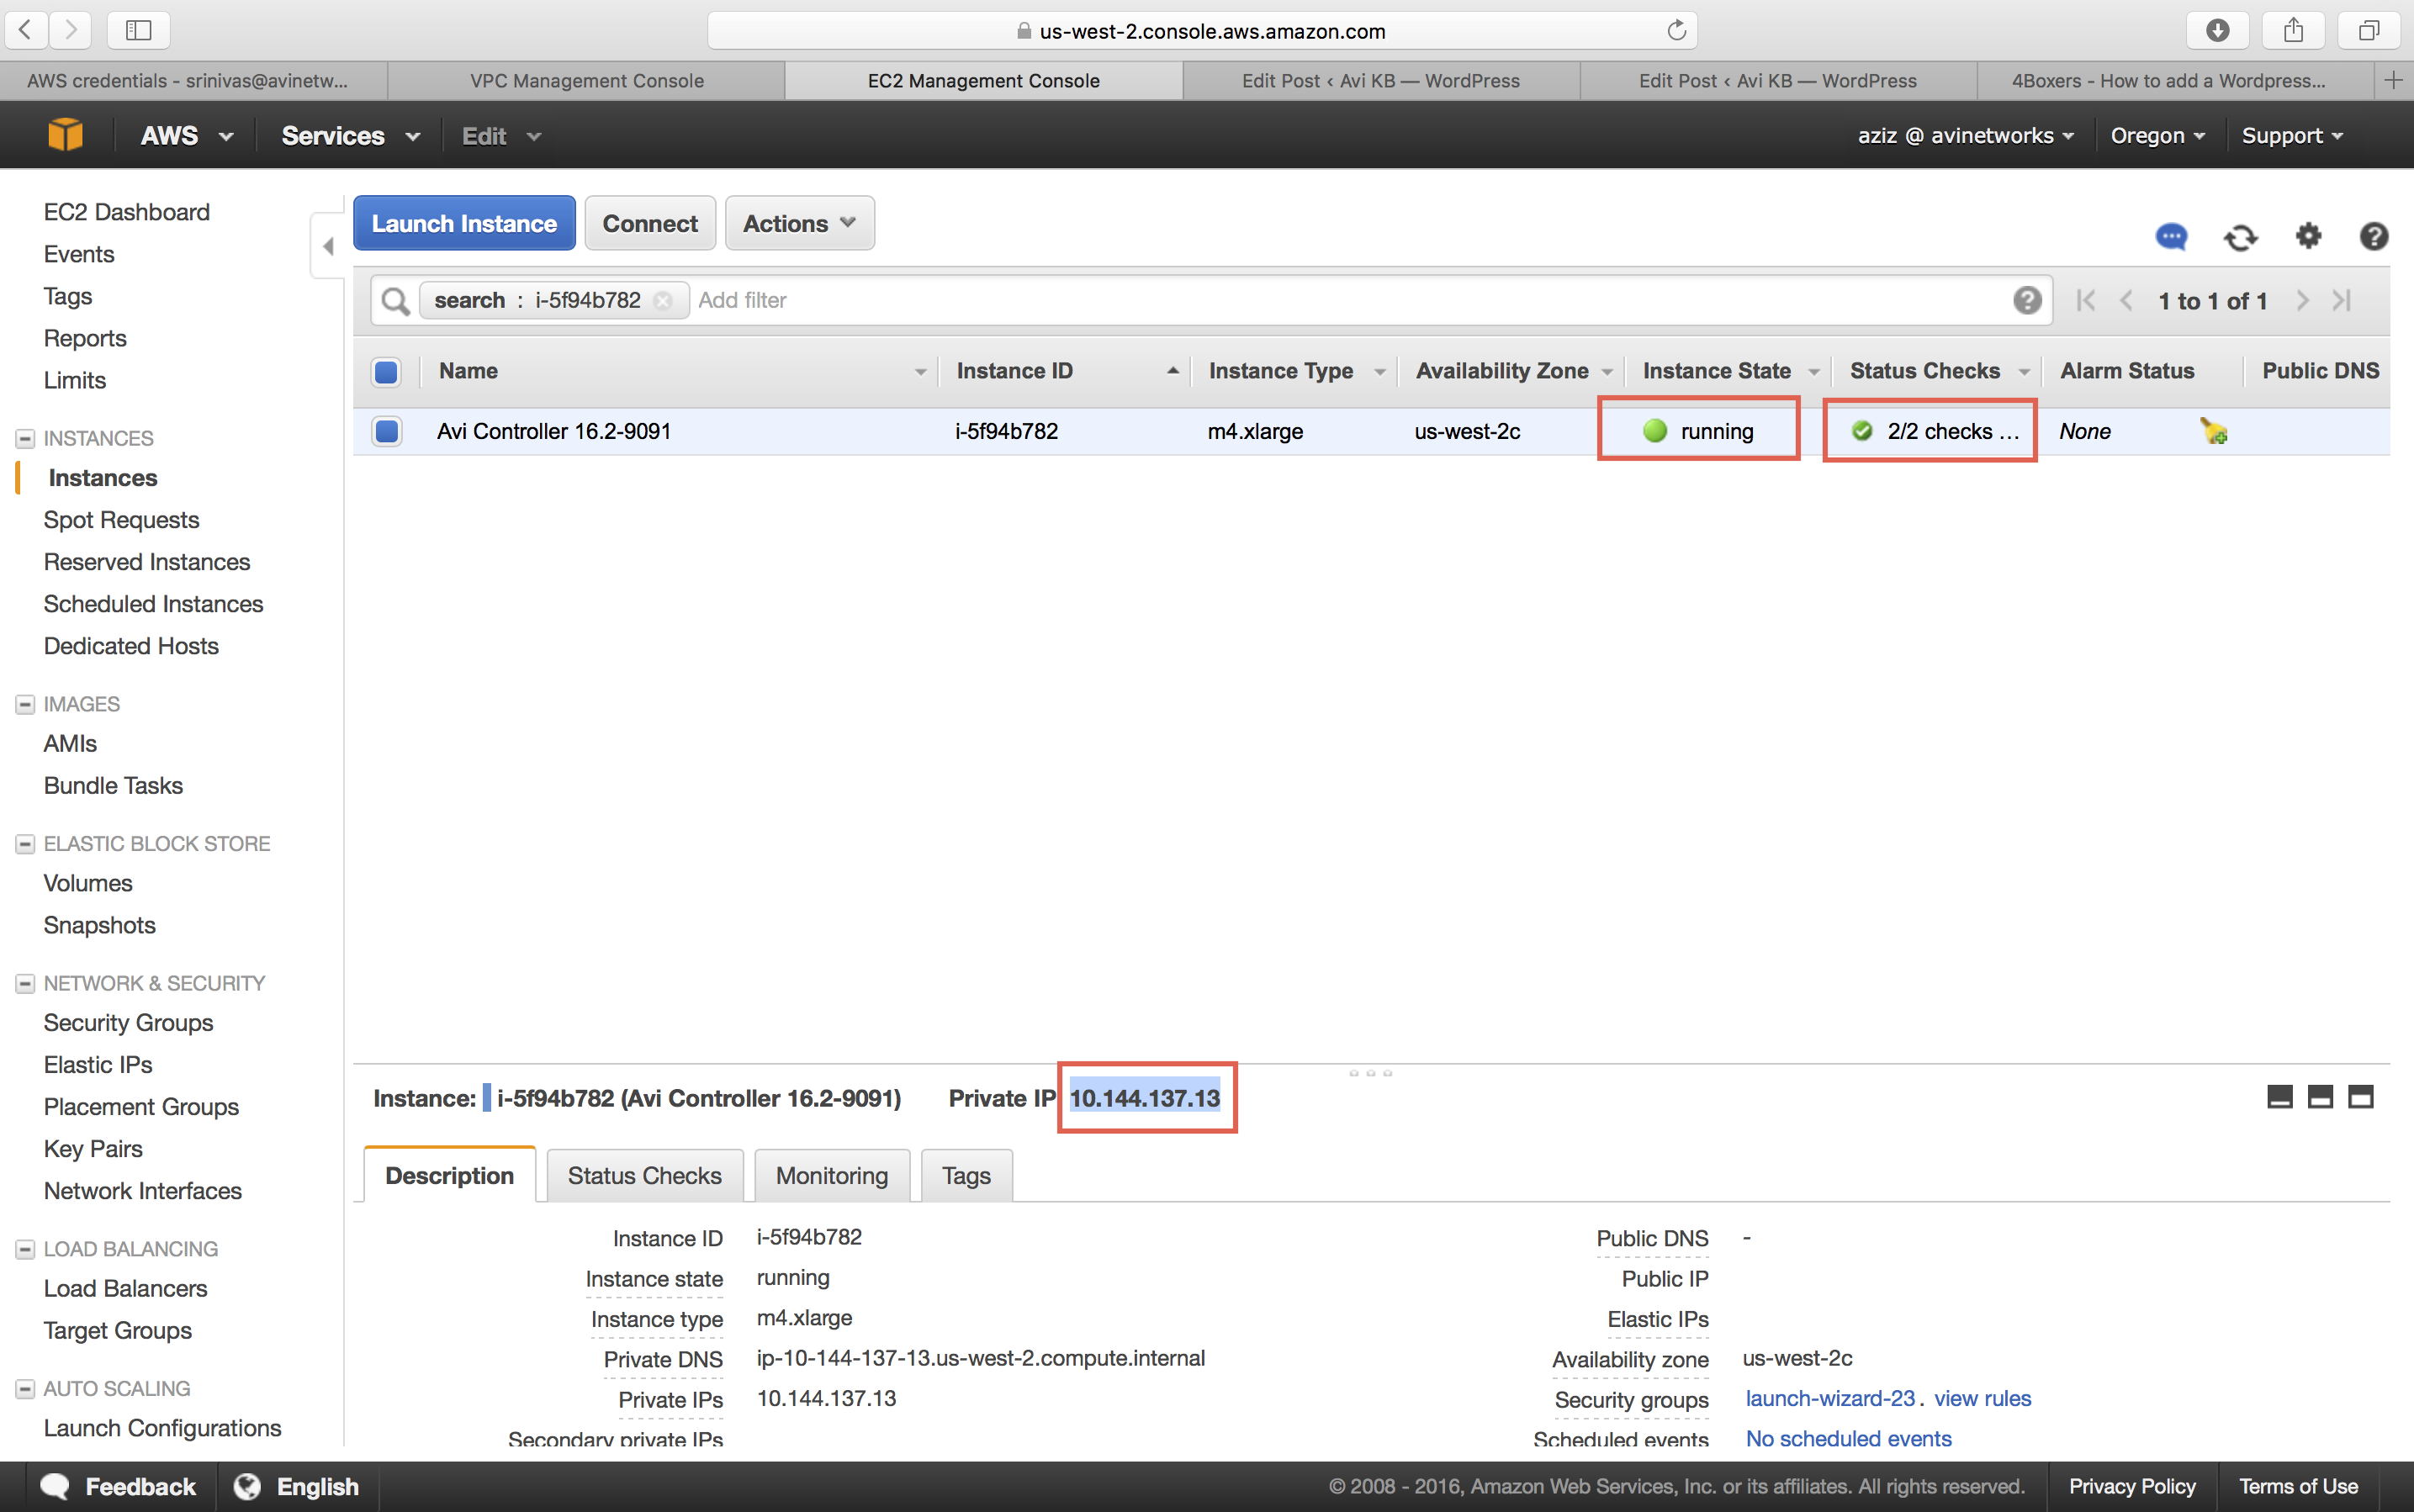
The deployment status of the Avi Controller EC2 instance into AWS is displayed. When the instance is ready (status “running”), you can access the instance using a private or public IP address. Wait for all checks to pass before setting up the Controller.
5.2 Setting Up the Avi Controller Instance
Once the Avi Controller is instantiated, run the following script to set the desired password for the admin user.
local@Avi-Dev:~# ssh -i avitest-aws-key.pem admin@10.10.1.1 "sudo /opt/avi/scripts/initialize_admin_user.py --password Password@123"

 Avi Cloud Controller

 Avi Networks software, Copyright (C) 2013-2017 by Avi Networks, Inc.
 All rights reserved.

 Version:      18.2.3
 Date:         2019-05-01 22:43:26 UTC
 Build:        9063
 Management:   10.10.1.1/24                 UP
 Gateway:      10.10.1.10                   UP


 [node1.controller.local] Executing task 'sync_linux_one_user'
 DEPLOY_OVERRIDES {}
 [node1.controller.local] sudo: export PYTHONPATH=/opt/avi/python/lib && /opt/avi/scripts/linux_user_maintenance.py --sync-user '{"username": "admin", "uid": 2000, "is_sudoer": true, "controller": true, "unix_crypt_password": "abc12345", "delete": false}'
 [node1.controller.local] out: The user `admin' is already a member of `sudo'.
 [node1.controller.local] out:

 [node1.controller.local] Executing task 'sync_cli_user'
 Resetting password for user admin.
 Password reset complete
 local@Avi-Dev:~#
Once the admin password is configured, you can point your browser to the Avi Controller IP address and follow the remaining steps as mentioned in the remaining part of this section.
For more information on the workflow changes, refer to to Initial Workflow Changes for Avi Controller.
-
Provide details for DNS and NTP Settings (This information can be entered later on too).
-
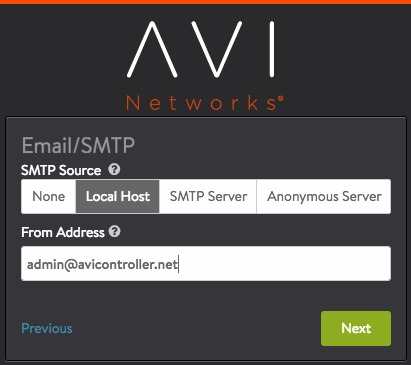
Provide the desired email address for sending alerts from the controller (Can be set up at a later stage).
-
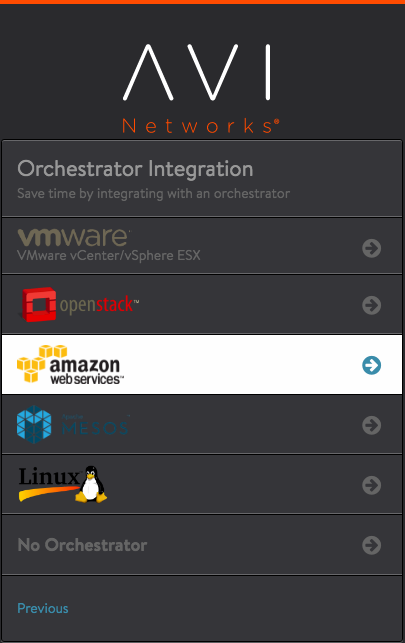
Select Amazon Web Services as the infrastructure type.
-
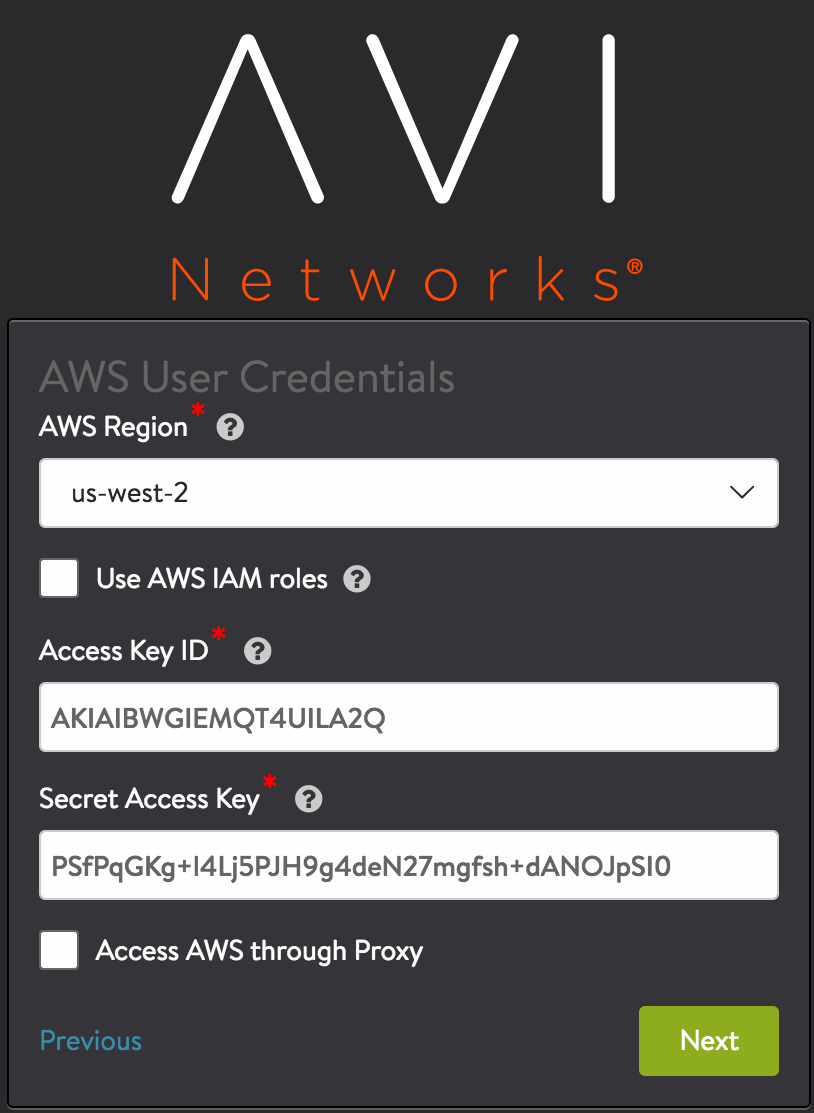
Enter AWS account settings: Access credentials are needed by the Avi Controller to communicate with AWS API. Enter the access key and secret access key.
-
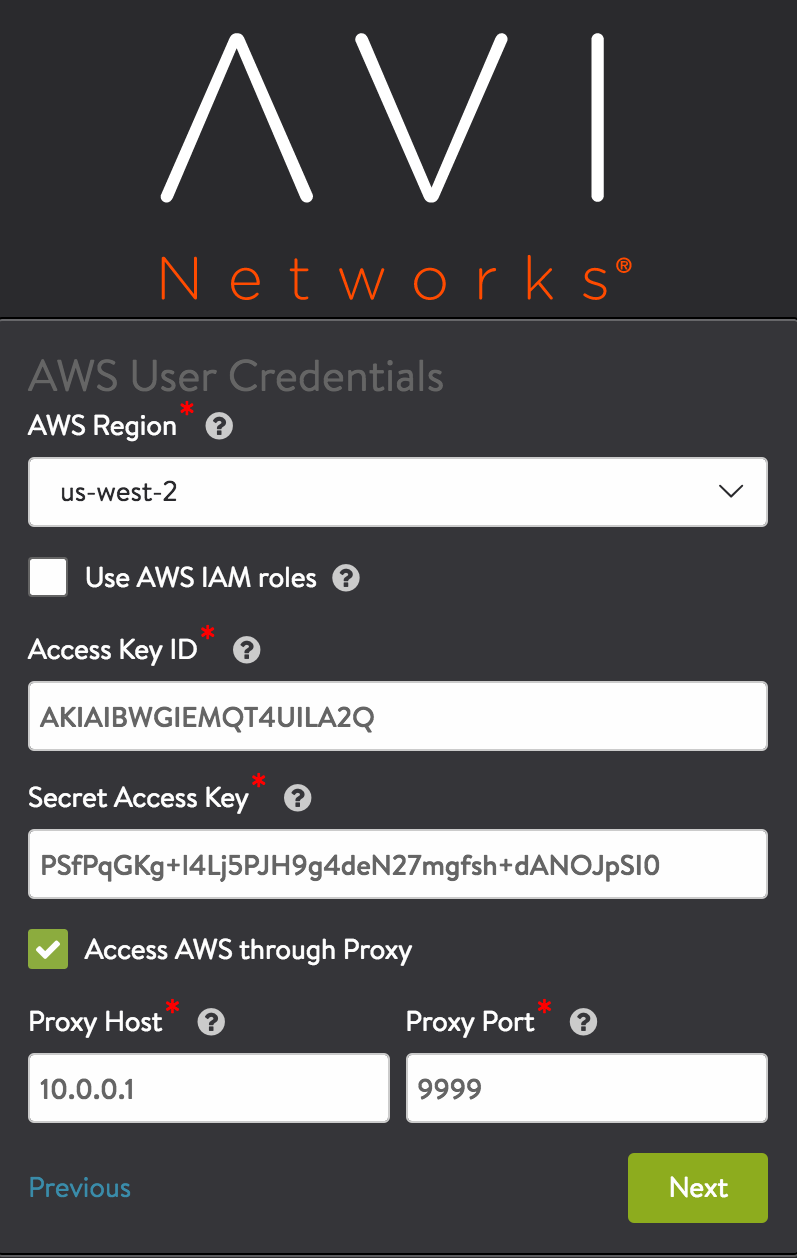
(Optional) Proxy Host and Proxy Port: Complete these fields if there is a custom proxy between your corporate network and AWS.
-
If using an IAM role, instead select Use AWS IAM Roles.
-
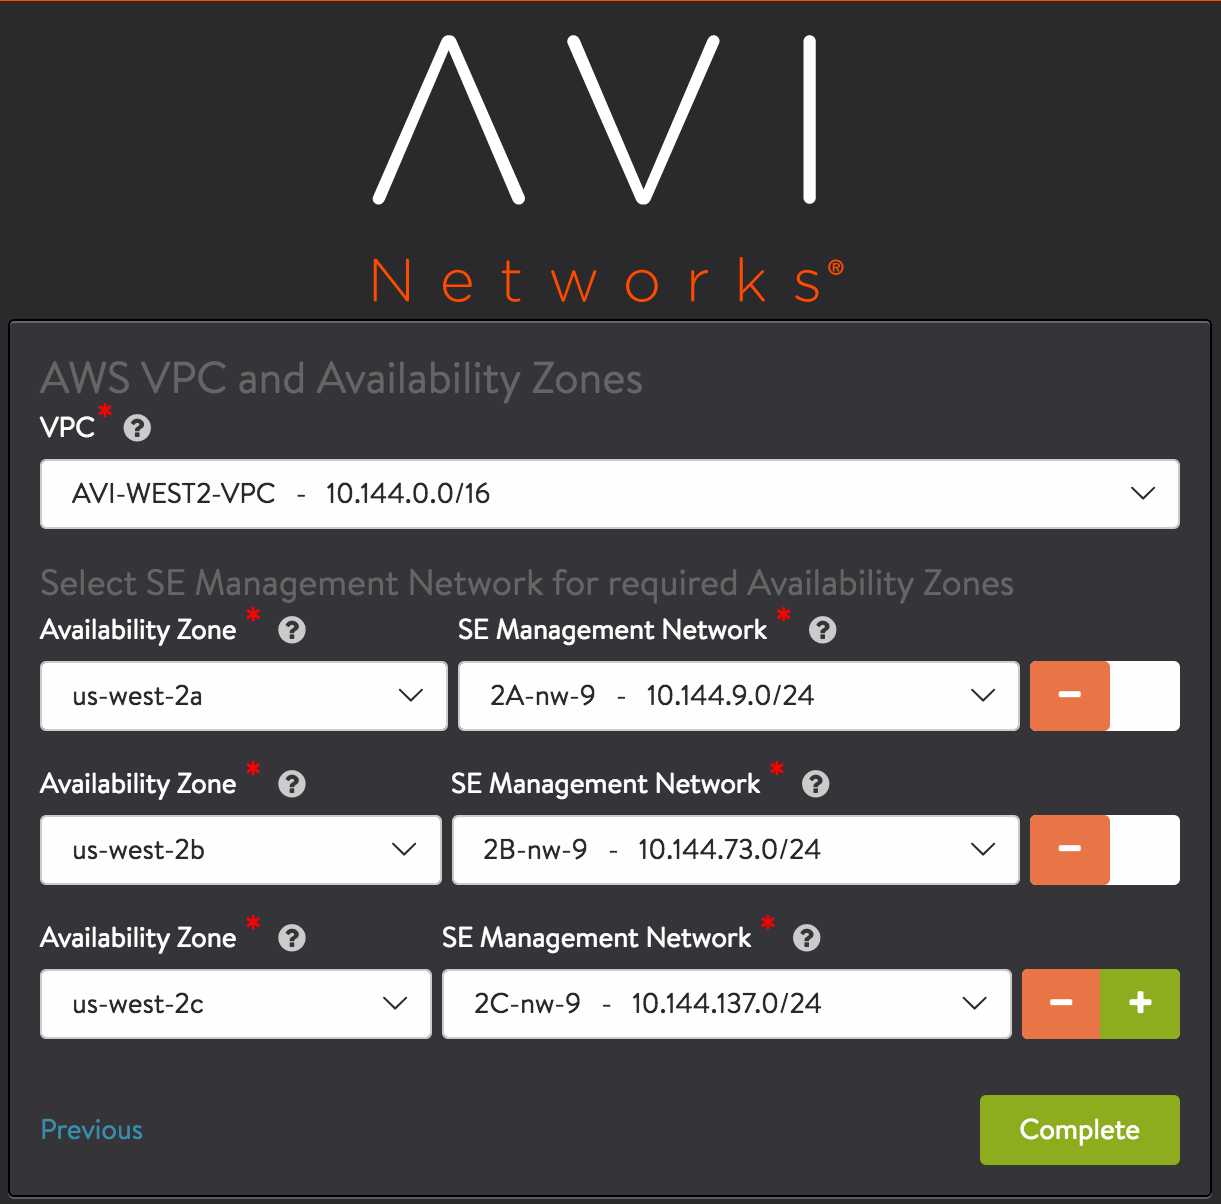
Configure SE Management Network. This is the subnet in which the Controller will place the management VNIC of SEs. The management network of SE should be reachable from Controller management IP.
Note: While creating virtual service, make sure to select a VIP subnet that has reachability to the SE’s management subnet.
-
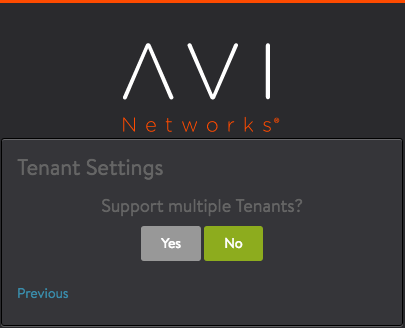
Configure tenancy settings.
-
To verify the installation, navigate to Infrastructure > Clouds, click Default-Cloud, and then click the Status button.
-
Status should turn green, indicating the installation was successful.
This completes the installation process. The Avi Controller is now ready for deploying virtual services.
Instance Types for the Avi Service Engines:
Avi Service Engines are deployed on AWS automatically by the Avi Controller, as required for the virtual services that have been configured.
Avi SEs can be run on various Instance Types. For configuration, navigate to Infrastucture > Service Engine Group, click on the edit option, and select the Advanced tab.
On a per-instance-type basis this AWS table shows the maximum number of network interfaces, as well as the maximum number of IPv4 and IPv6 addresses per interface.
The below table shows the maximum SSL TPS performance achievable on some EC2 instance types.
| Instance Type | SSL TPS Performance |
|---|---|
| c4.large | 2,400 |
| c4.xlarge | 4,900 |
| c4.4xlarge | 19,000 |
Notes :
- Currently Avi uses 1 data vNIC for all data traffic. This is apart from the 1 vNIC used for control-plane communication with the Avi Controllers and other Service Engines.
- SSL performance (TPS - transactions per second) has been measured with 1 virtual service configured (HTTPS, EC certificate) and GET requests for a 128-byte payload without session reuse. More details regarding Service Engine performance can be found here.
Encryption Options Available for AWS Deployment
- SNS and SQS Encryption
Server-Side Encryption (SSE) of Amazon Simple Queue Service (SQS) message queues is supported by Avi Vantage starting in release 17.2.8. Encrypting a queue does not encrypt backlogged messages, nor does turning off encryption remove encryption from backlogged messages. SQS queue encryption is supported only in 3 AWS regions as of the time of this writing: US EAST (N. Virginia), US EAST (Ohio), and US WEST (Oregon).
For more information on SNS and SQS encryption, refer to the following articles: - EBS Encryption
Amazon EBS encryption is a solution offered to encrypt EBS volumes. Encrypting EBS volumes and attaching it to the supported instance type encrypts the data inside the volume, all data moving between the volume and the instance, all snapshots created from the volume, and all volumes created from those snapshots. Starting release 17.2.3, Avi Vantage supports enabling EBS and S3 encryption using AWS SSE-KMS which encrypts the Amazon Machine Image (AMI).
For more information on Amazon EBS encryption support, refer to Amazon EBS Encryption Support in Avi Vantage.
Additional Information
- AWS Cross-Account AssumeRole Support
- Sizing Service Engines
- SSL Performance
- Avi Integration with AWS Auto Scaling Groups
- Multi-AZ Support for AWS
- Controller Cluster Deployment Across Two Availability Zones
- IAM Role Setup for Installation into AWS
- DNS Provider (AWS)
- DNS Provider (IPAM)
- Configuring a Tag for Auto-created SEs in AWS
- Security Groups in AWS
- Autoscaling in Public Clouds

