Virtual Service Creation: APIC
This article describes how to create a virtual service for an APIC cloud:
-
Create a contract and apply a Service Graph.
-
Create a load-balancing virtual service using Avi Vantage.
Detailed steps are provided below.
Create Contract and Apply Service Graph
-
Select the tenant where Controller was deployed.
-
Navigate to Security Policies > Contracts (left pane).
-
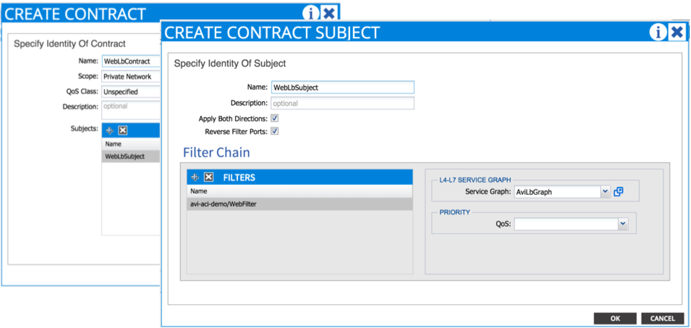
Click Actions and select Create Contract from the drop-down menu.
-
Provide the following information:
- Name for the contract
- Subject with filters
- Graph template created previously
-
Associate the contract with a consumer EPG and a provider EPG. The provider EPG must contain servers to load balance.
Configure Load-balancing Virtual Service Using Avi Vantage
Create a virtual service in the tenant where the Avi Vantage device package is deployed, or in a tenant to which the device package was exported.
-
Click admin (top right corner) and select a tenant.
-
Navigate to Applications > Dashboard.
-
Select the cloud and click New.
-
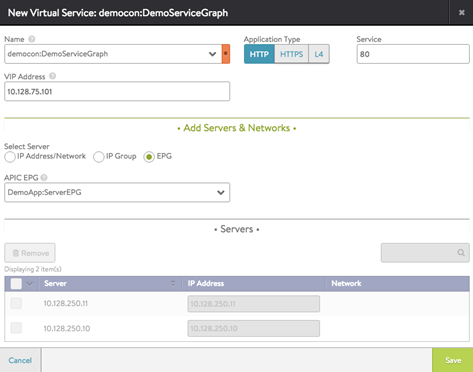
Enter a user-friendly virtual service name.
-
Enter an IP address or DNS hostname for the virtual service.
-
On the New Virtual Service edit menu, select a graph instance in the Name field (
: ). -
Check EPG on the Select Server menu.
-
Select an EPG for the servers to be load balanced from the APIC EPG drop-down list.
-
Click Save.
Note: It can take up to 3 minutes until the virtual service becomes online. This is because a new concrete device needs to be added.
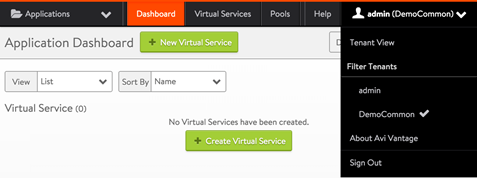
Clicking New Virtual Service (or Create Virtual Service) opens the configuration wizard for the service.