Support for Managed Services Identify (MSI) based Authentication for Microsoft Azure
Overview
Managed services identity-based authentication for Microsoft Azure provides an automatically managed identity in Azure AD. You can use the identity to authenticate to any service that supports Azure AD authentication, including Key Vault, without any credentials in your code.
Microsoft Azure supports the following two types of managed identity service-based authentication:
-
System-assigned managed identity: This feature is enabled directly on an Azure service instance. When the identity is enabled, Azure creates an identity for the instance in the Azure AD tenant that is trusted by the subscription of the instance. After the identity is created, the credentials are provisioned onto the instance. The lifecycle of a system-assigned identity is directly tied to the Azure service instance that it is enabled on. If the instance is deleted, Azure automatically cleans up the credentials and the identity in Azure AD.
-
User-assigned managed identity: This feature is created as a standalone Azure resource. Through the create process, Azure creates an identity in the Azure AD tenant that is trusted by the subscription in use. After the identity is created, the identity can be assigned to one or more Azure service instances. The lifecycle of a user-assigned identity is managed separately from the lifecycle of the Azure service instances to which it is assigned.
Avi Vantage release 18.1.4 supports managed services identity (MSI) authentication for Microsoft Azure. Avi Vantage only supports system-assigned managed identity.
This article explains how to configure MSI authentication on Avi Vantage for Microsoft Azure.
Prerequisites
- For a resource group where the Avi Controller is spawned, the role of a Contributor or higher is required.
- For the virtual network where the Avi Service Engine instances are to be deployed, the role of Avi Controller or higher is required. For more details on creating the AviController role, refer to the Role Setup for Installation into Microsoft Azure KB article.
The above privileges are used in the below section to configure MSI authentication.
Refer to Avi Deployment Guide for Microsoft Azure for the complete list of prerequisites.
Configuration
This section covers the following sections:
- Configuring Microsoft Azure for MSI authentication
- Configuring Avi Vantage to support MSI authentication
Configuring Microsoft Azure
This section covers the following:
- Enabling MSI Authentication
- Enabling MSI on Avi Controller VM
- Assigning Role to Avi Controller Resource Group
- Assigning Role to VNet Resource Group
Enabling MSI Authentication
-
Provision an Avi Controller virtual machine (VM) in Microsoft Azure. For information on deploying Microsoft Azure, refer to Avi Deployment Guide for Microsoft Azure.
-
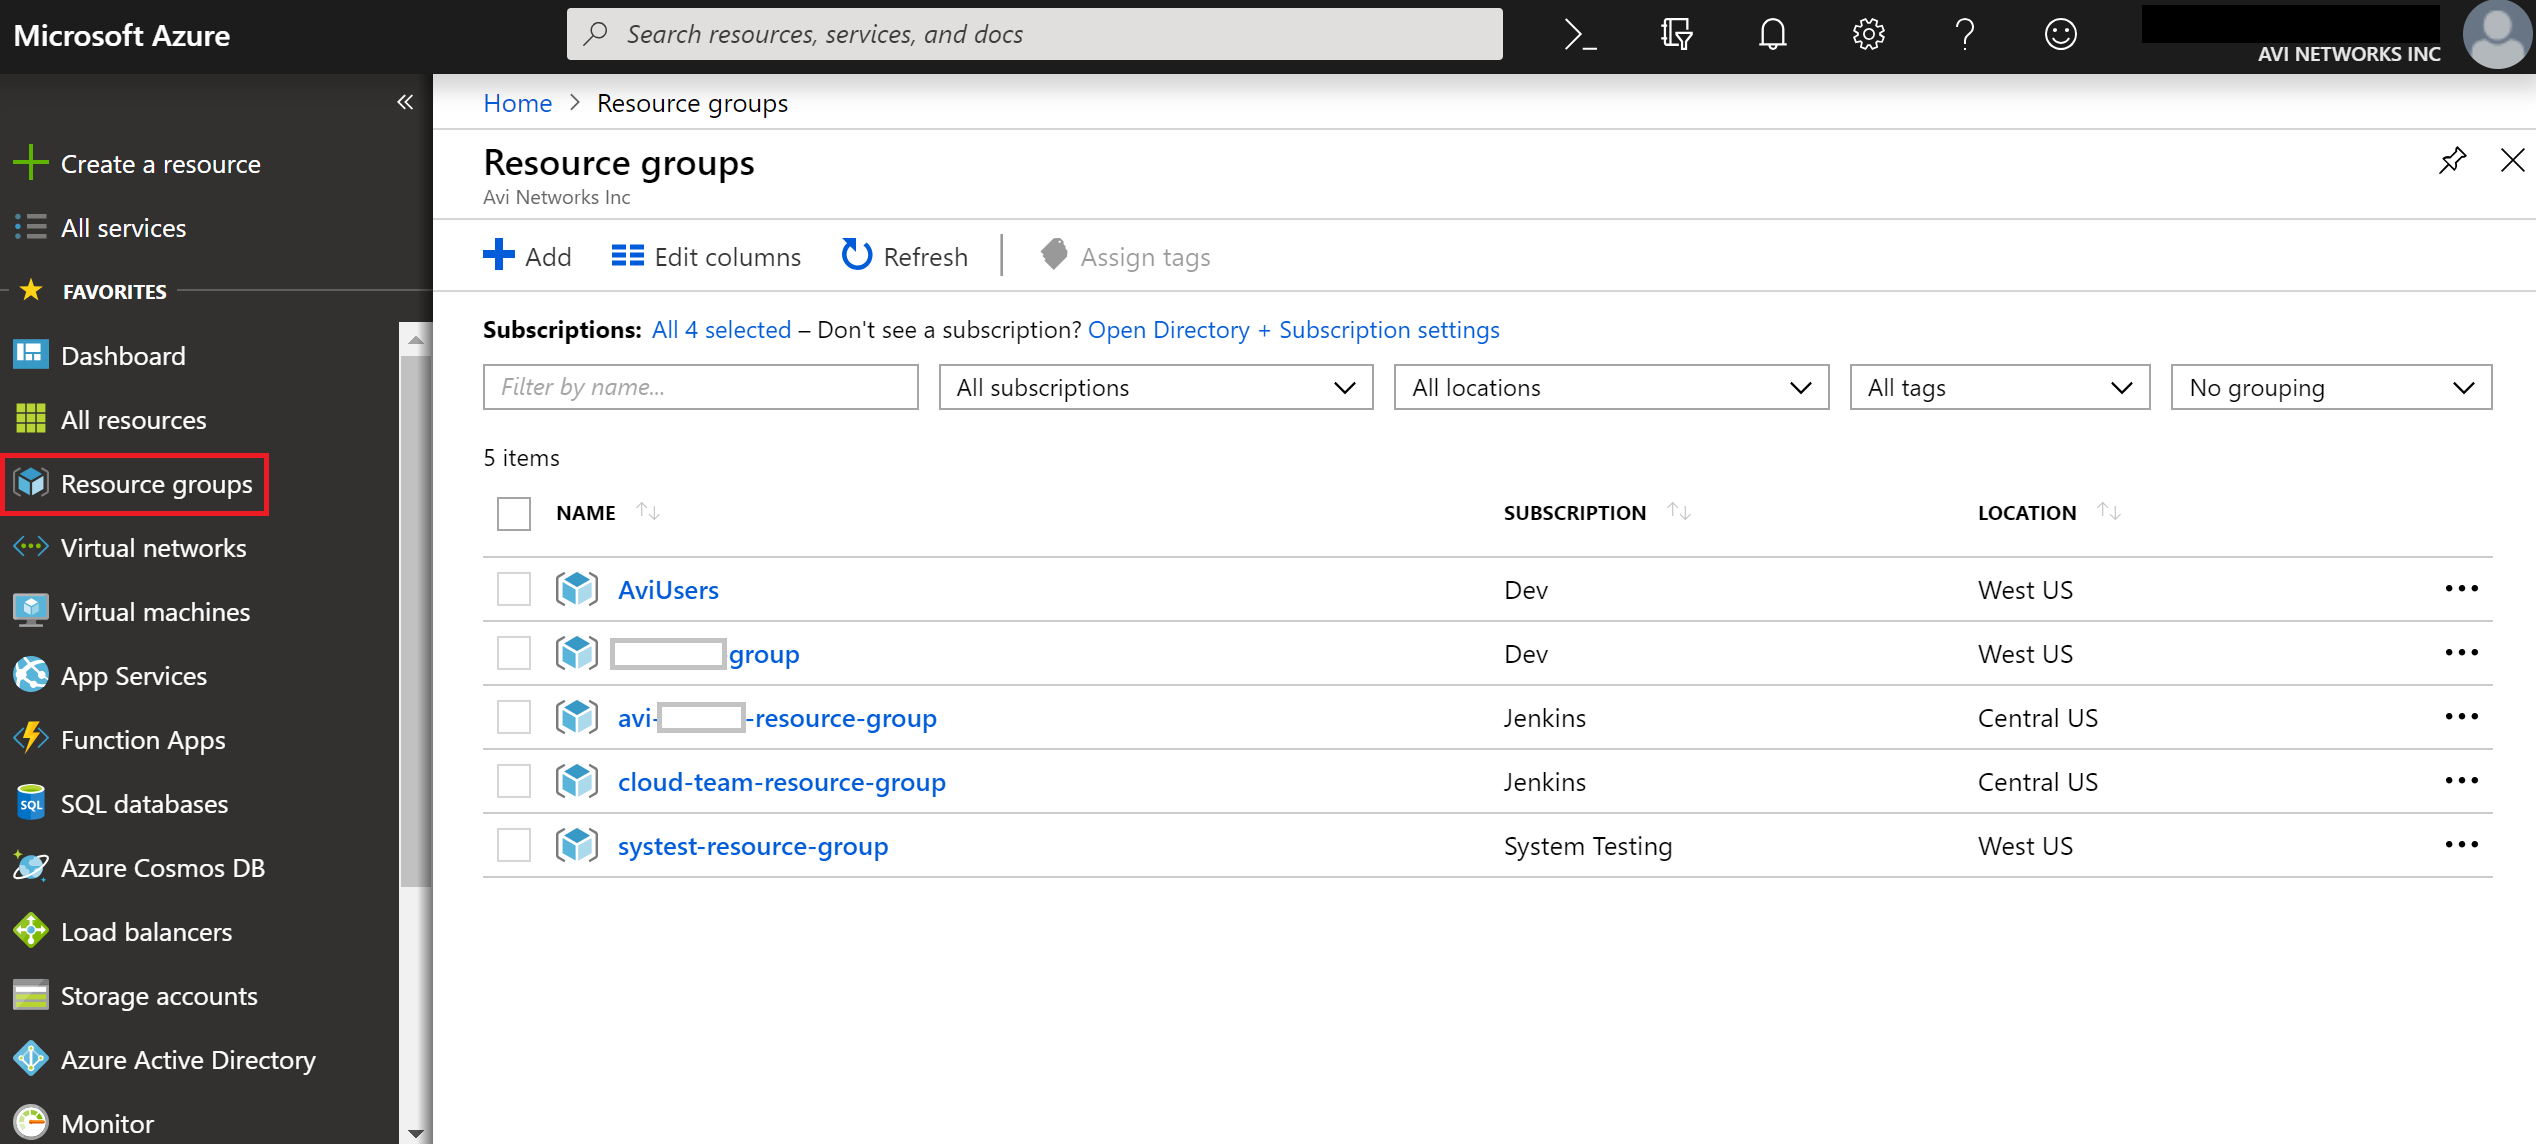
Log in to the Microsoft Azure Portal, and navigate to Resource Groups as shown below.
-
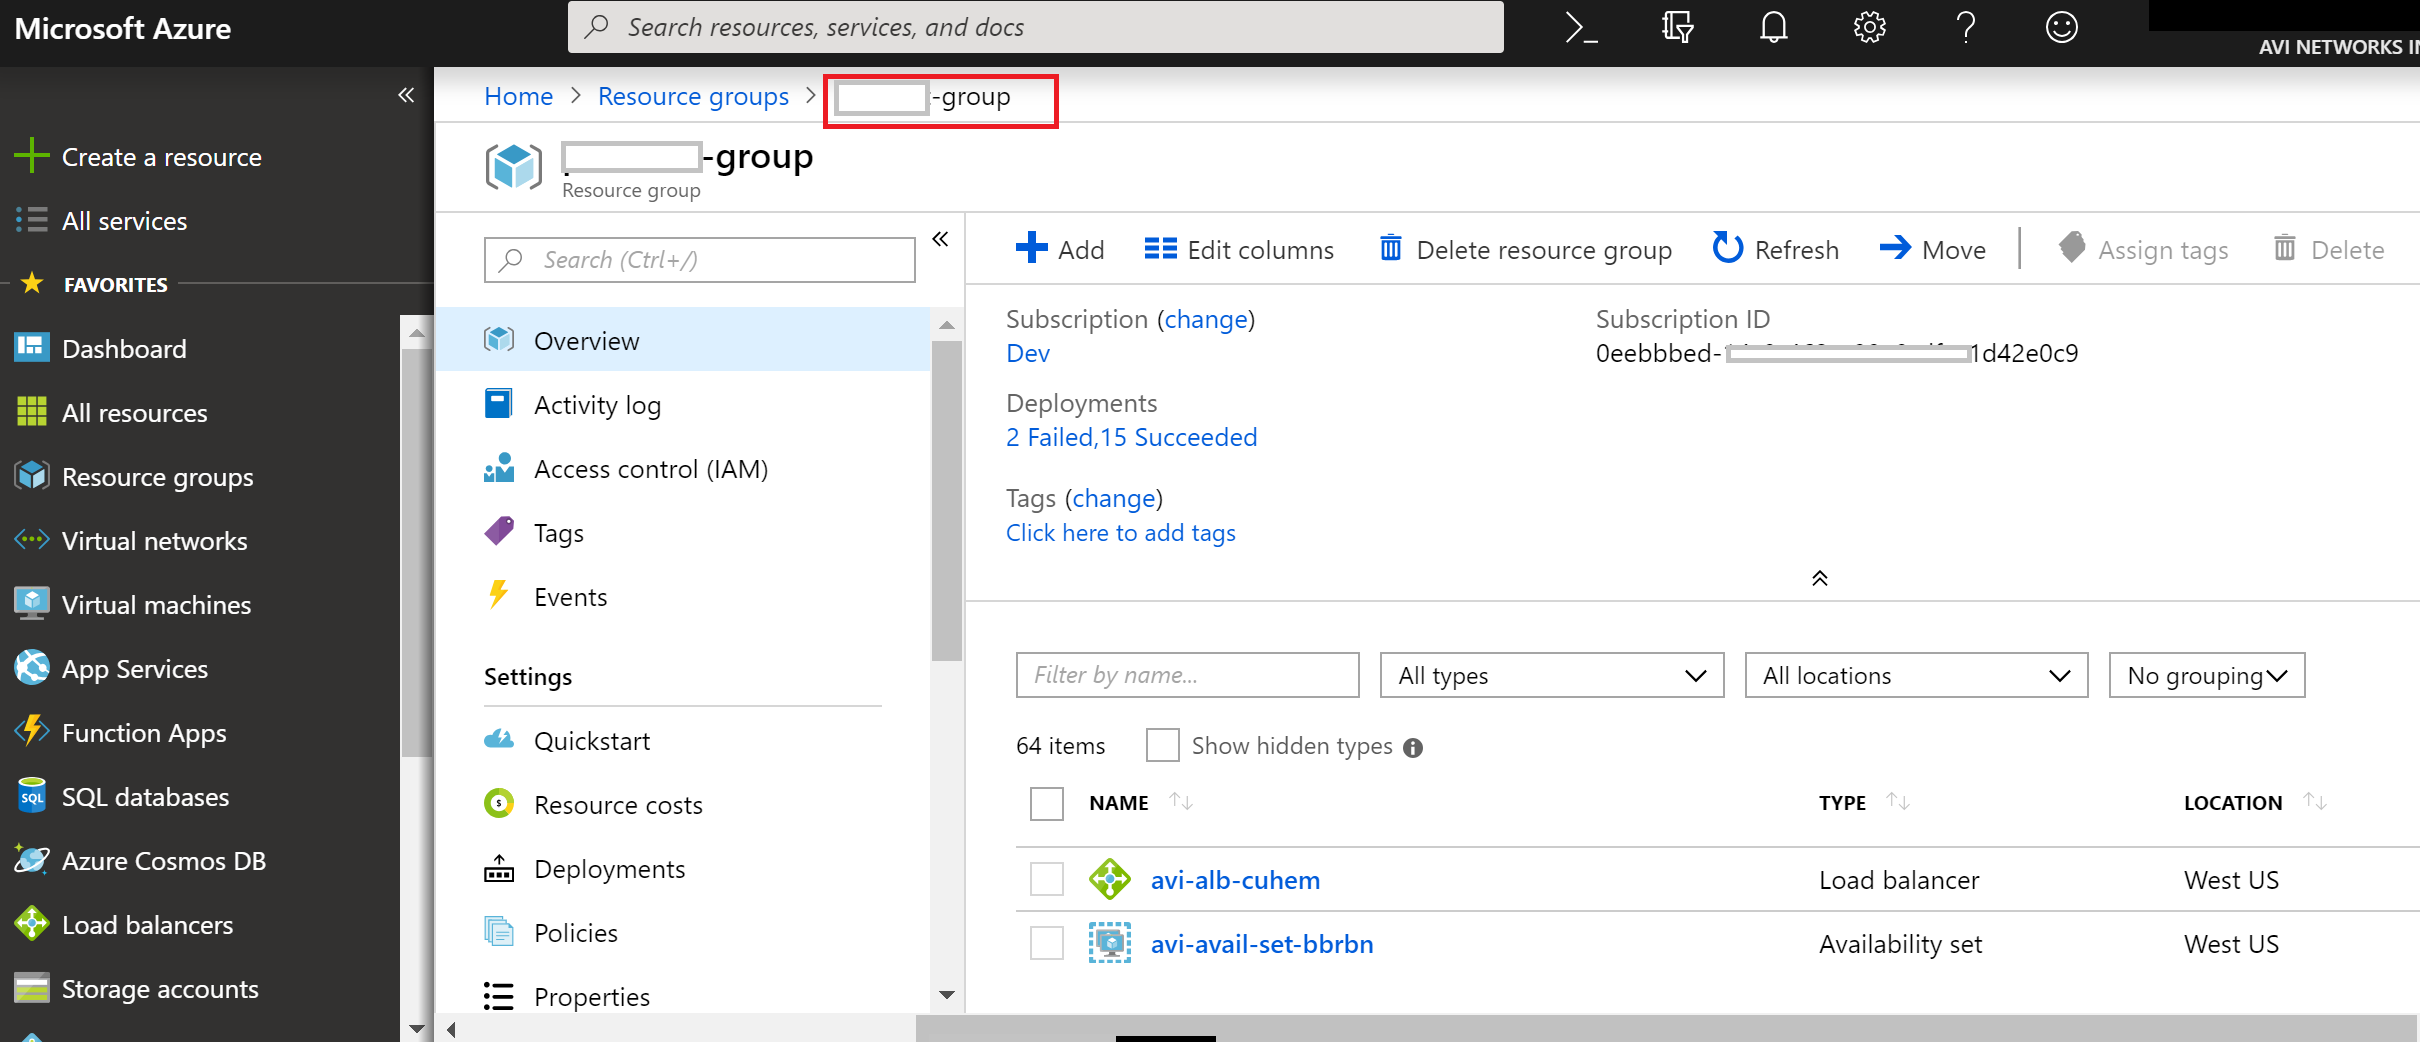
Select the specific Resource Group you created for your Controller VM. In this example, the group is the Resource Group created for the VM.
-
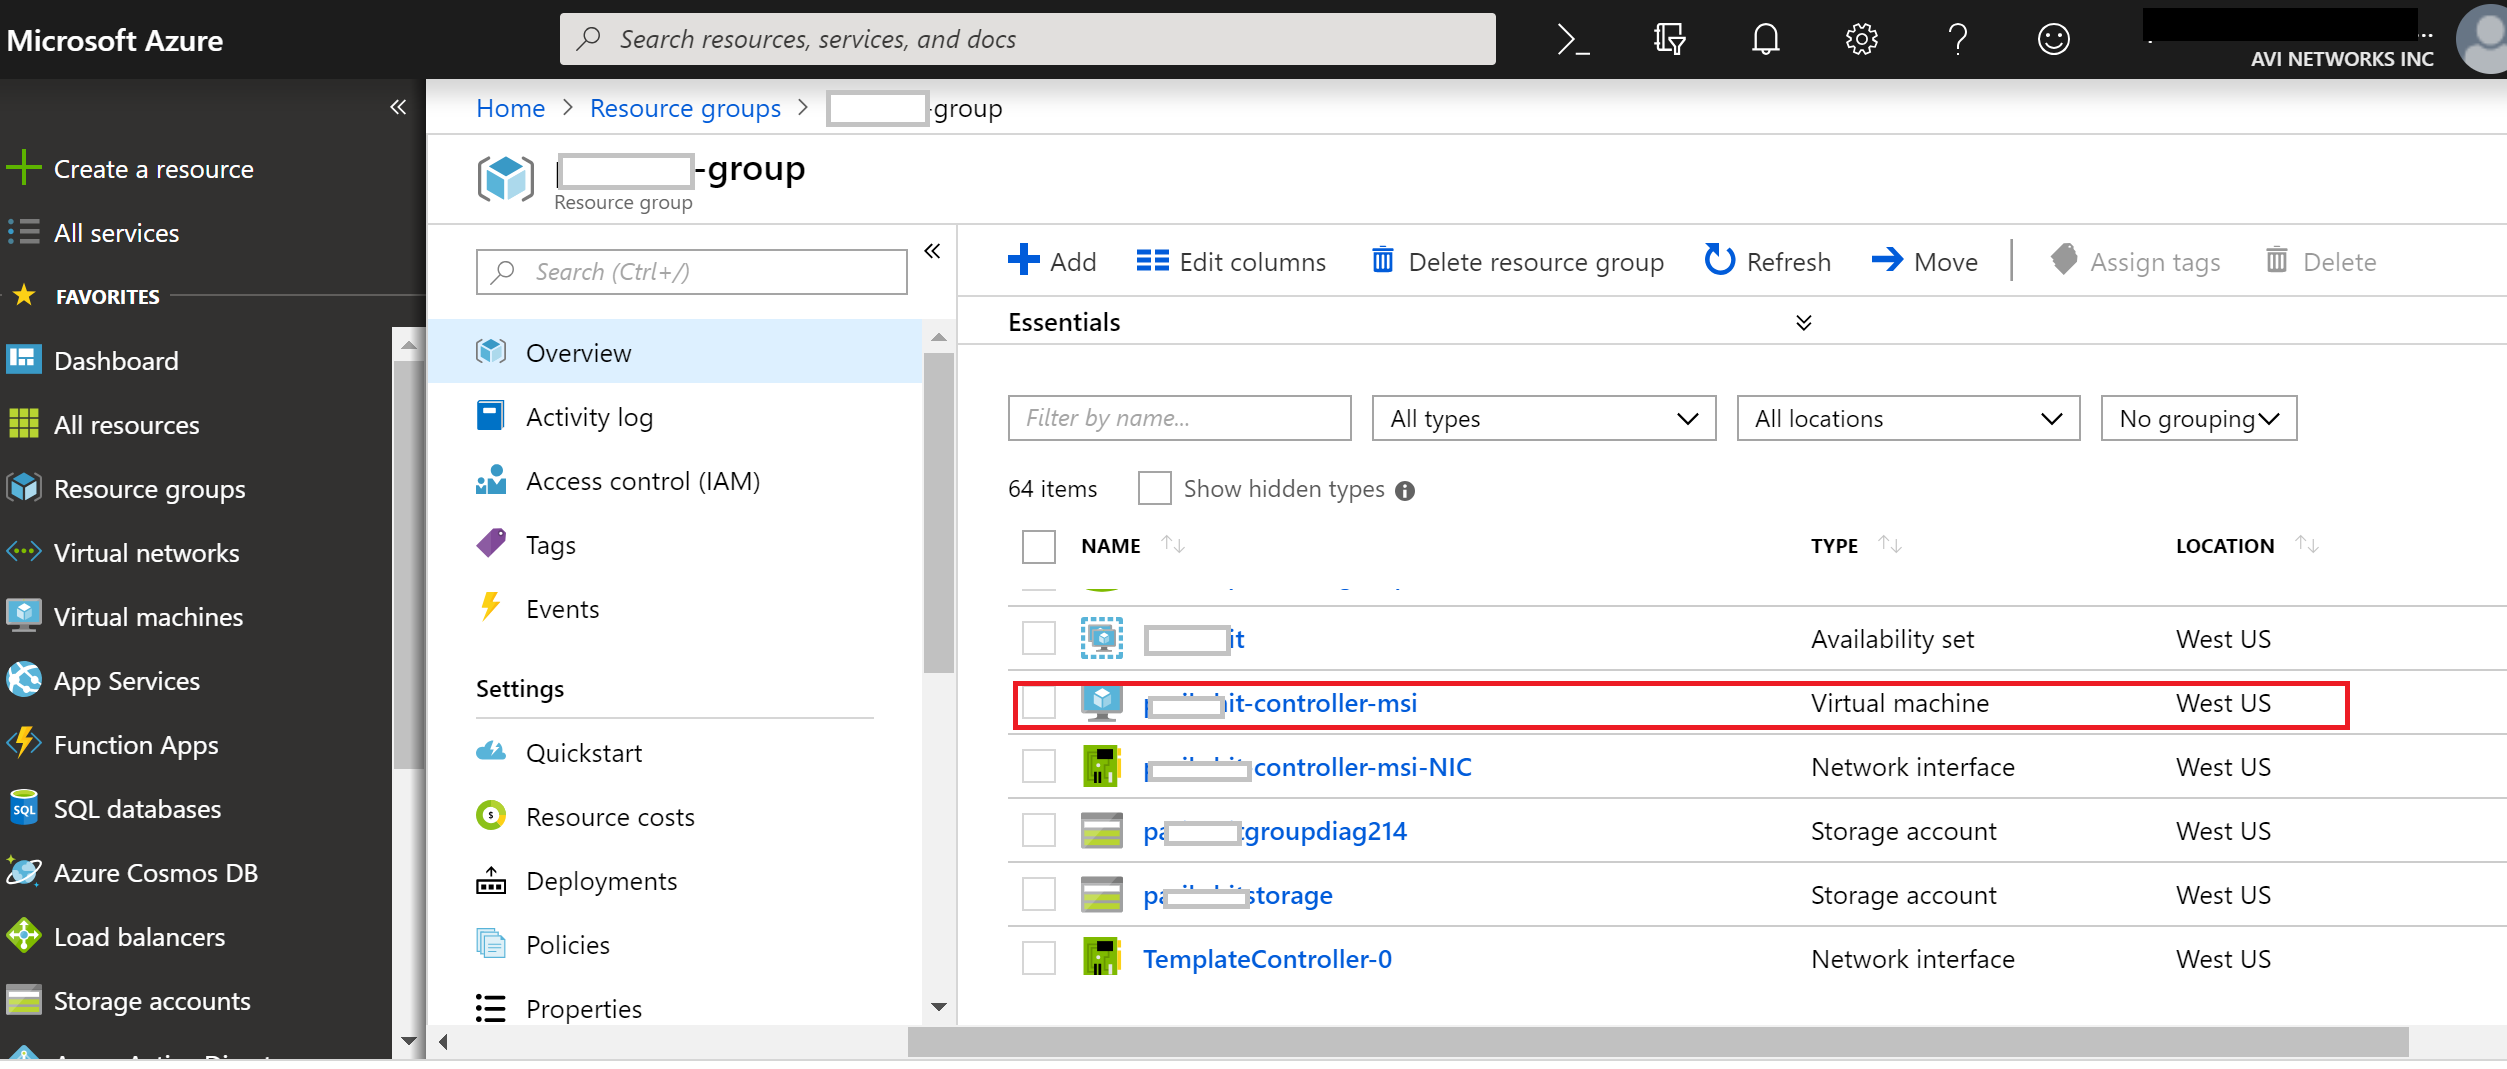
Select the VM for the Avi Controller from the list.
-
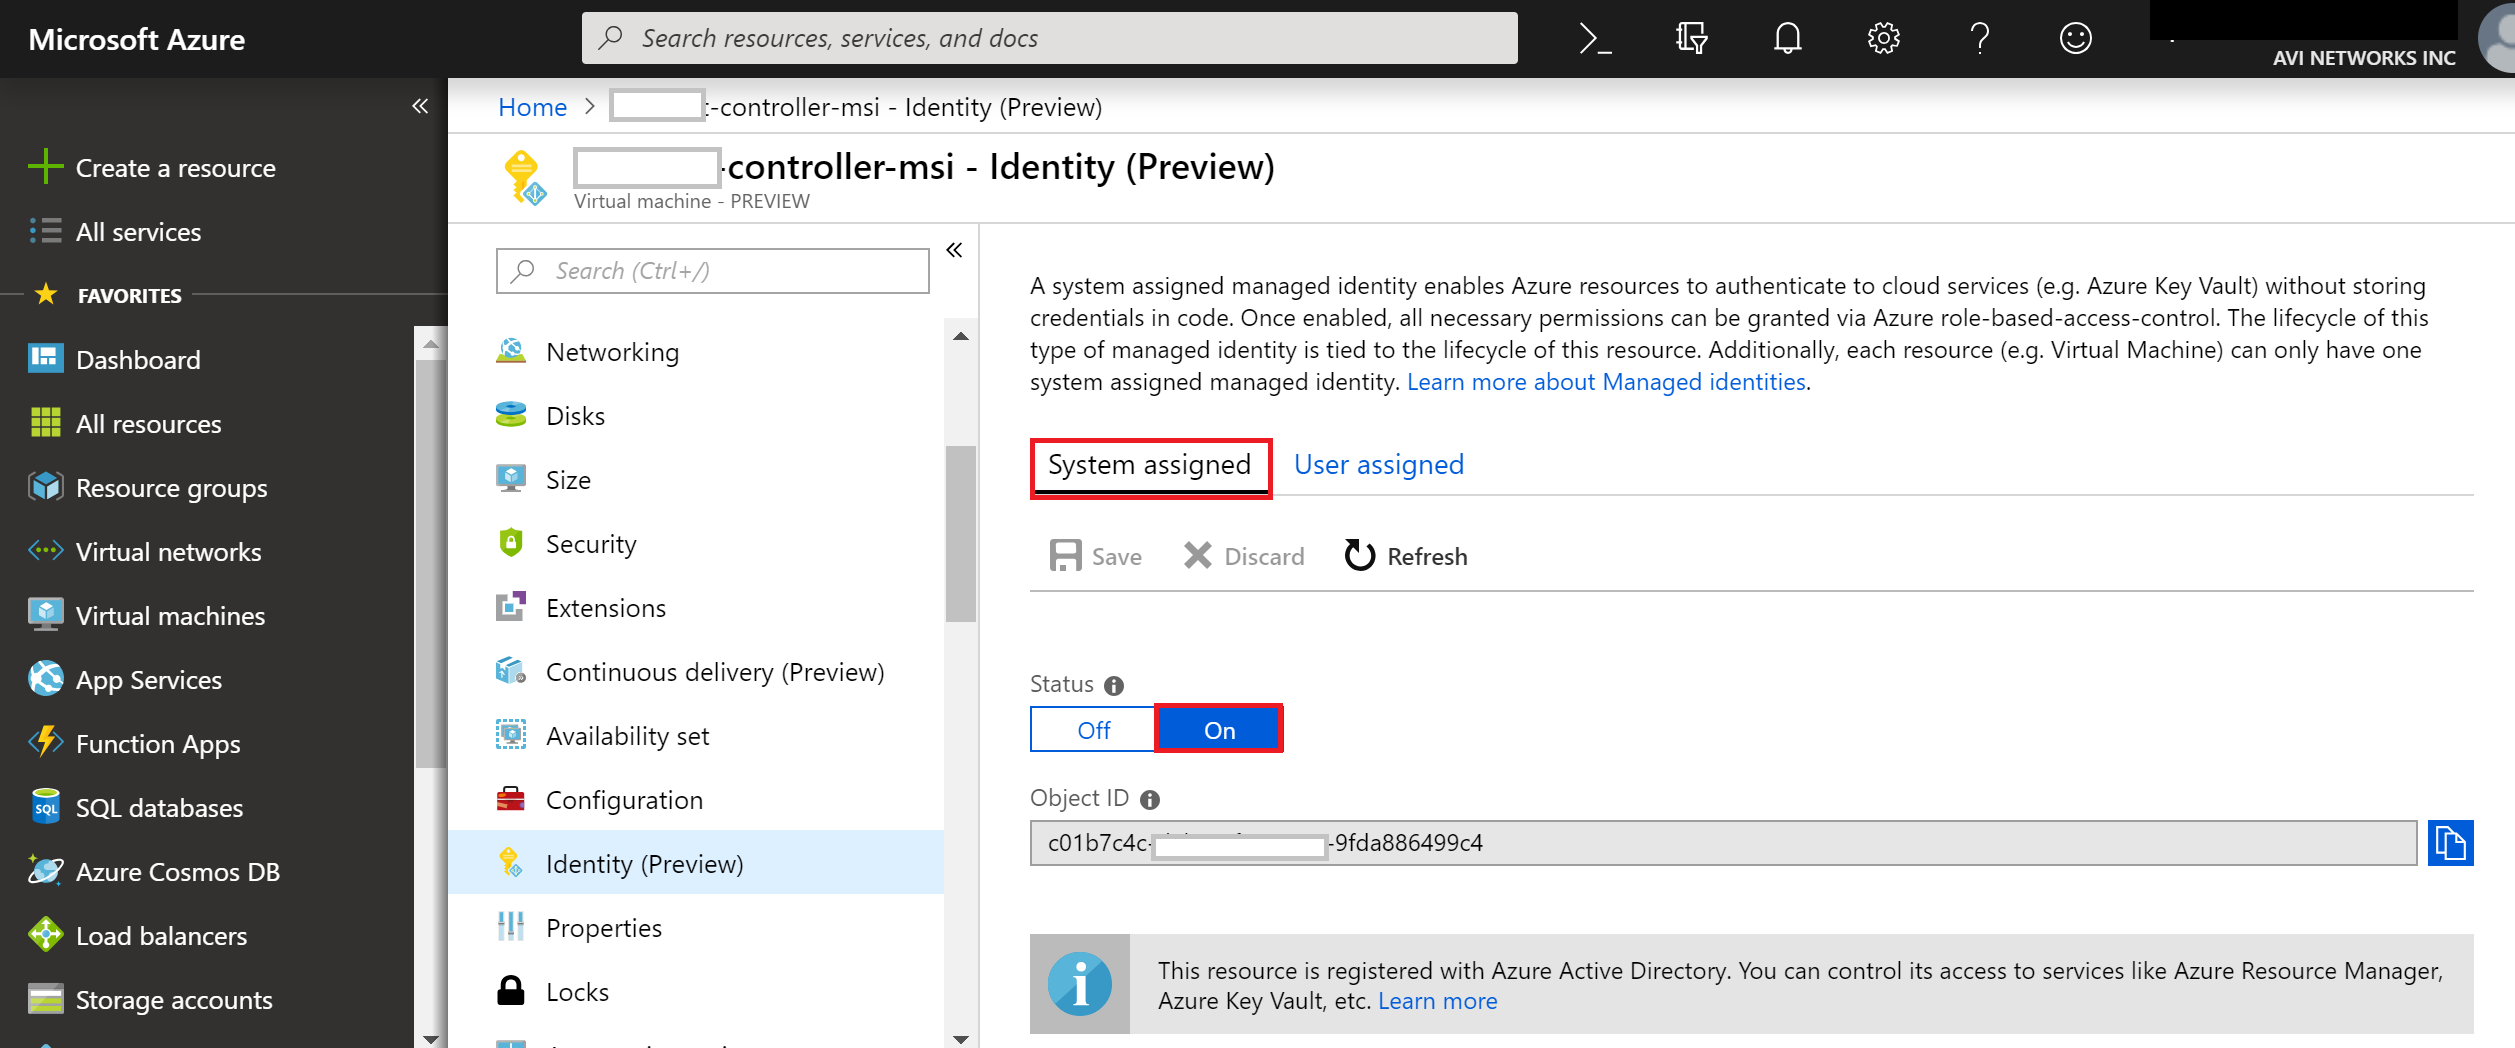
Navigate to Identity (Preview), and set System Assigned status to On to enable MSI based authentication for the selected Avi Controller.
Enabling MSI on Avi Controller VM
Refer to the following diagram for the deployment scenario. As shown in the below figure, cloud credential is a credential asset that could either be a service principal object, as in case of an application or a username/password credential set, as in the case of a user or the controller VM itself in case of an MSI.
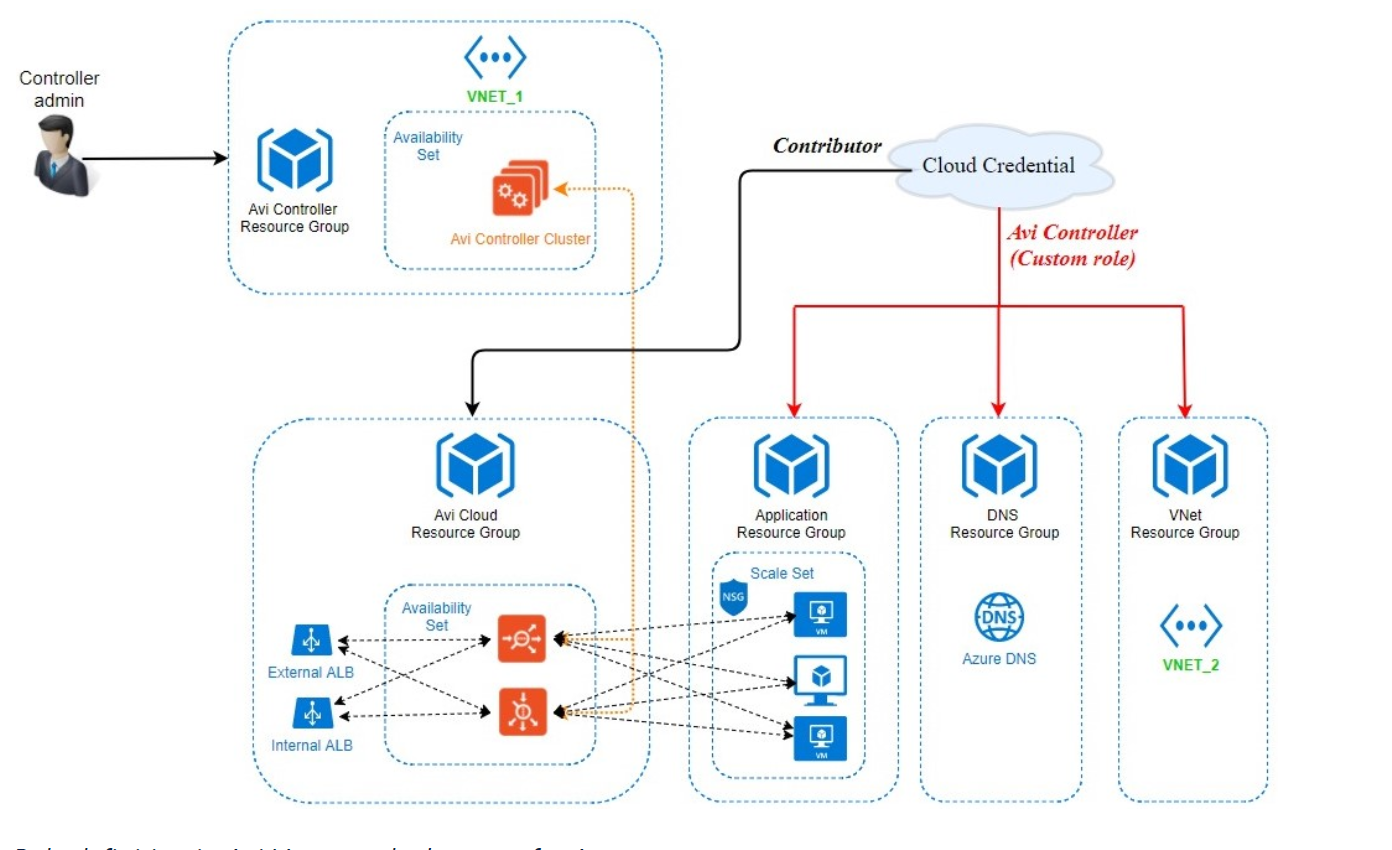
The following are the observation from the deployment diagram shown above:
- The Avi Controller belongs to Avi Controller resource group. The Controller admin exercises his or her privileges to deploy the Avi Controller in this resource group.
- Avi Controller creates the required resources in the Avi Cloud resource group cloud resource group. The credential asset needs a contributor or a role of a higher access to the Avi Cloud resource group.
- The credential asset also needs custom role access to other resources, such as VNet, DNS zones, and scale sets. This custom role helps define access to specific resources. Details on configuring custom role are provided in the following section.
- The Avi cloud and VNet resource groups are configured as a part of the credential asset.
- Refer to Role Setup for Installation in Microsoft Azure for access control requirements for deploying Avi Vantage solution in Microsoft Azure.
Assigning Role to Avi Controller Resource Group
Follow the steps below to assign a role to Avi Controller Resource Group.
-
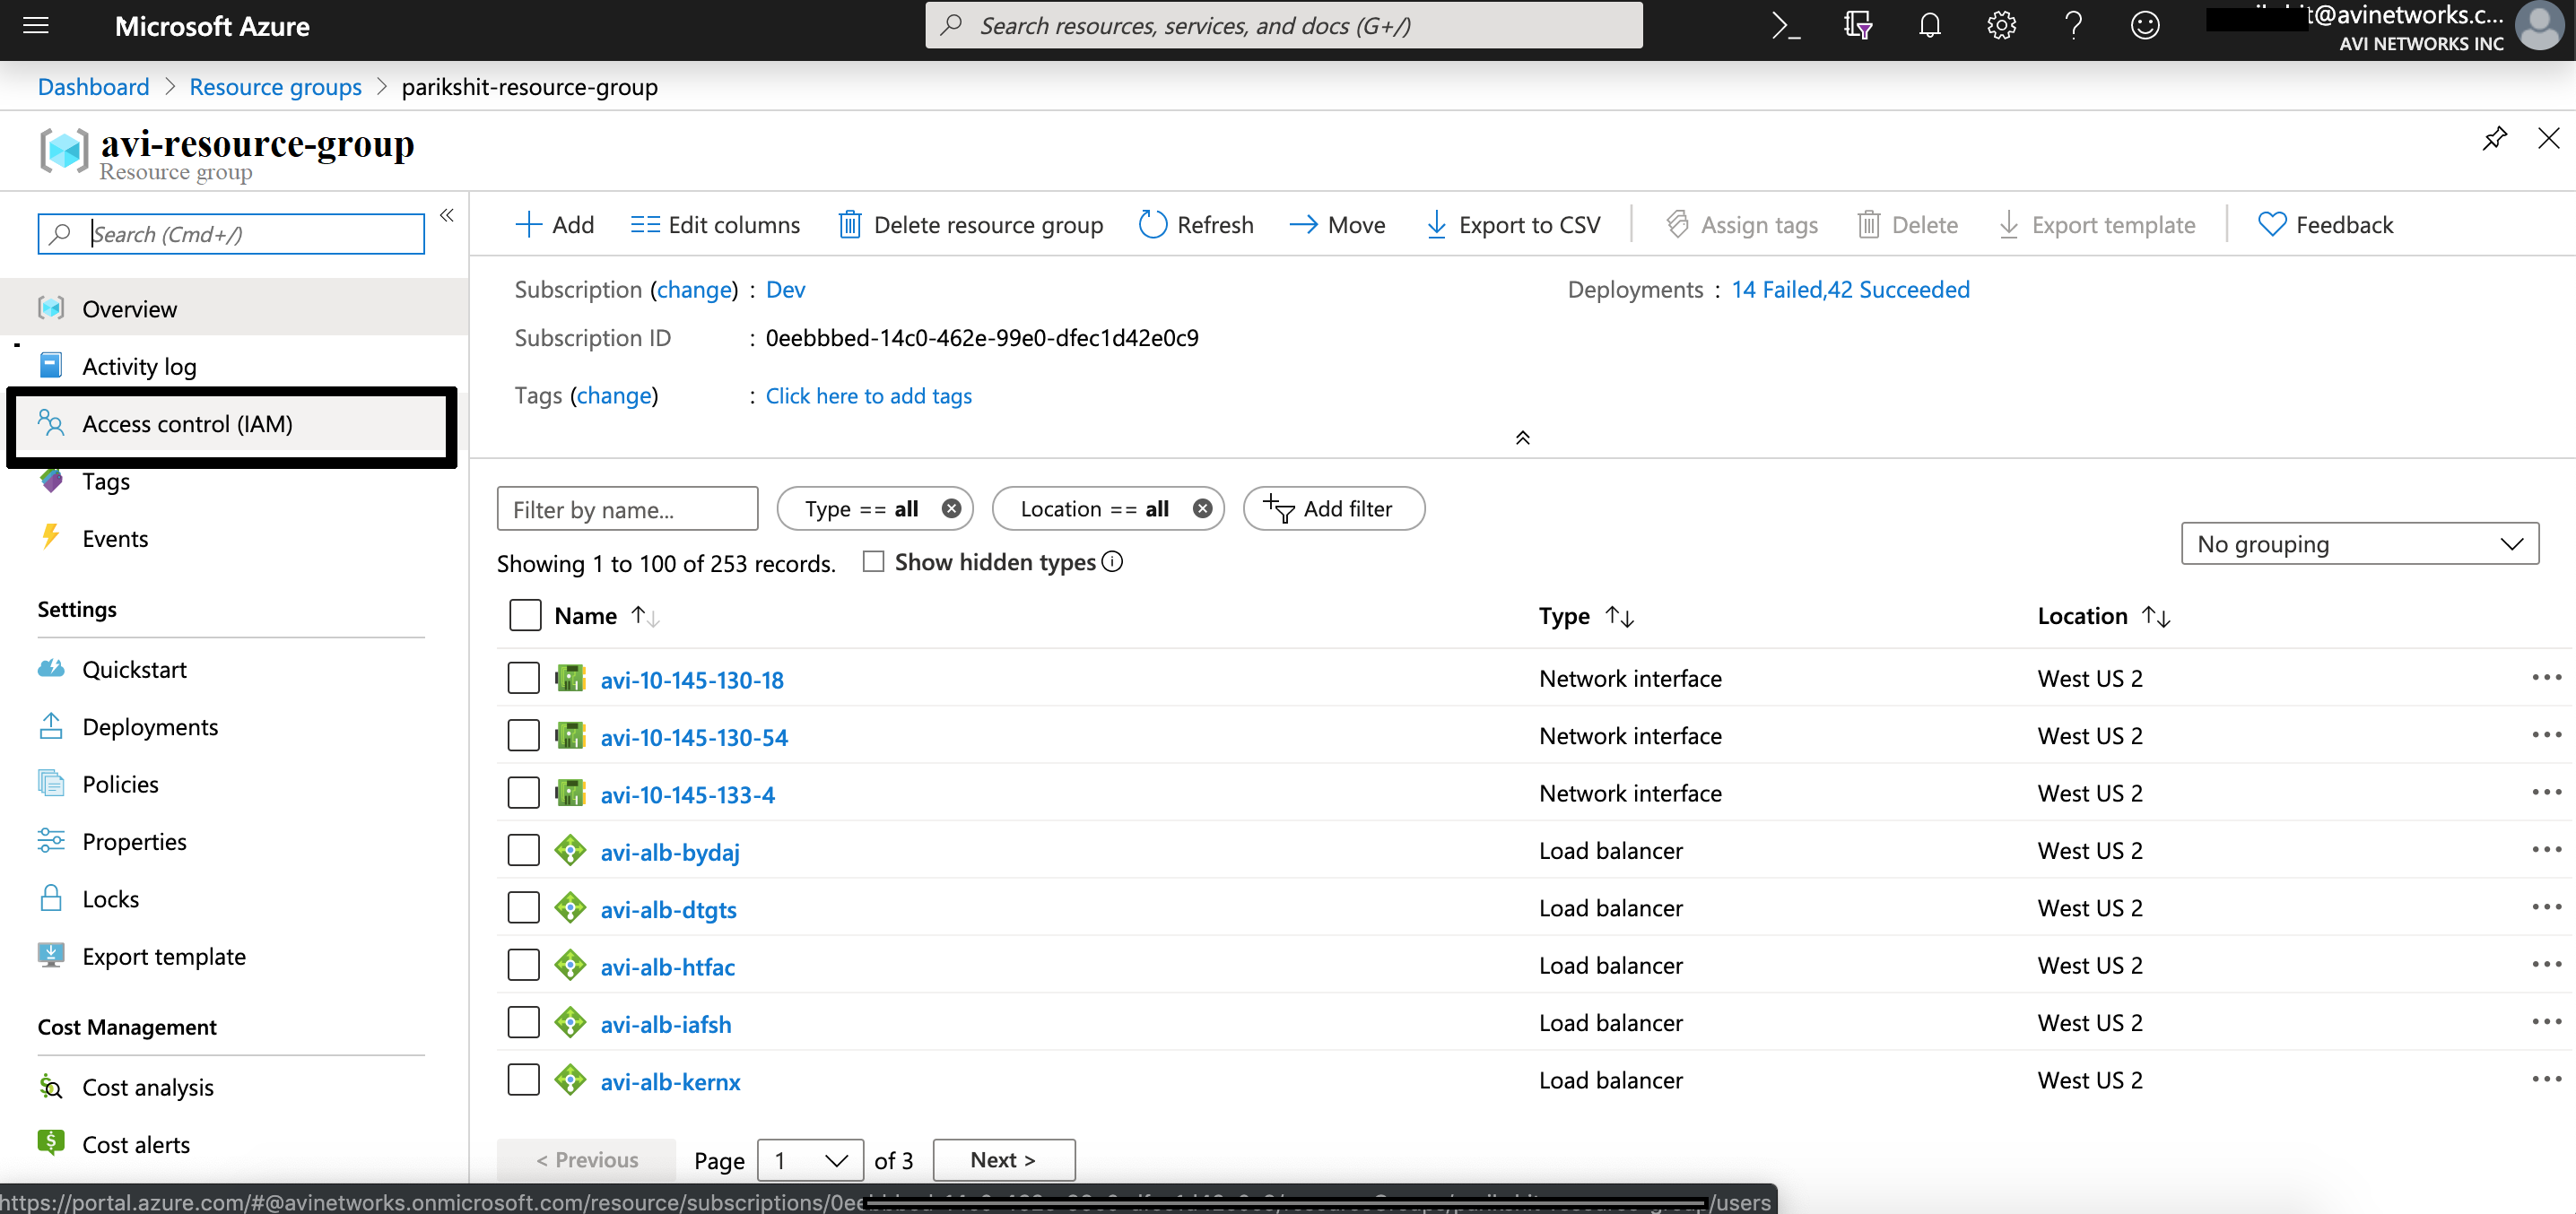
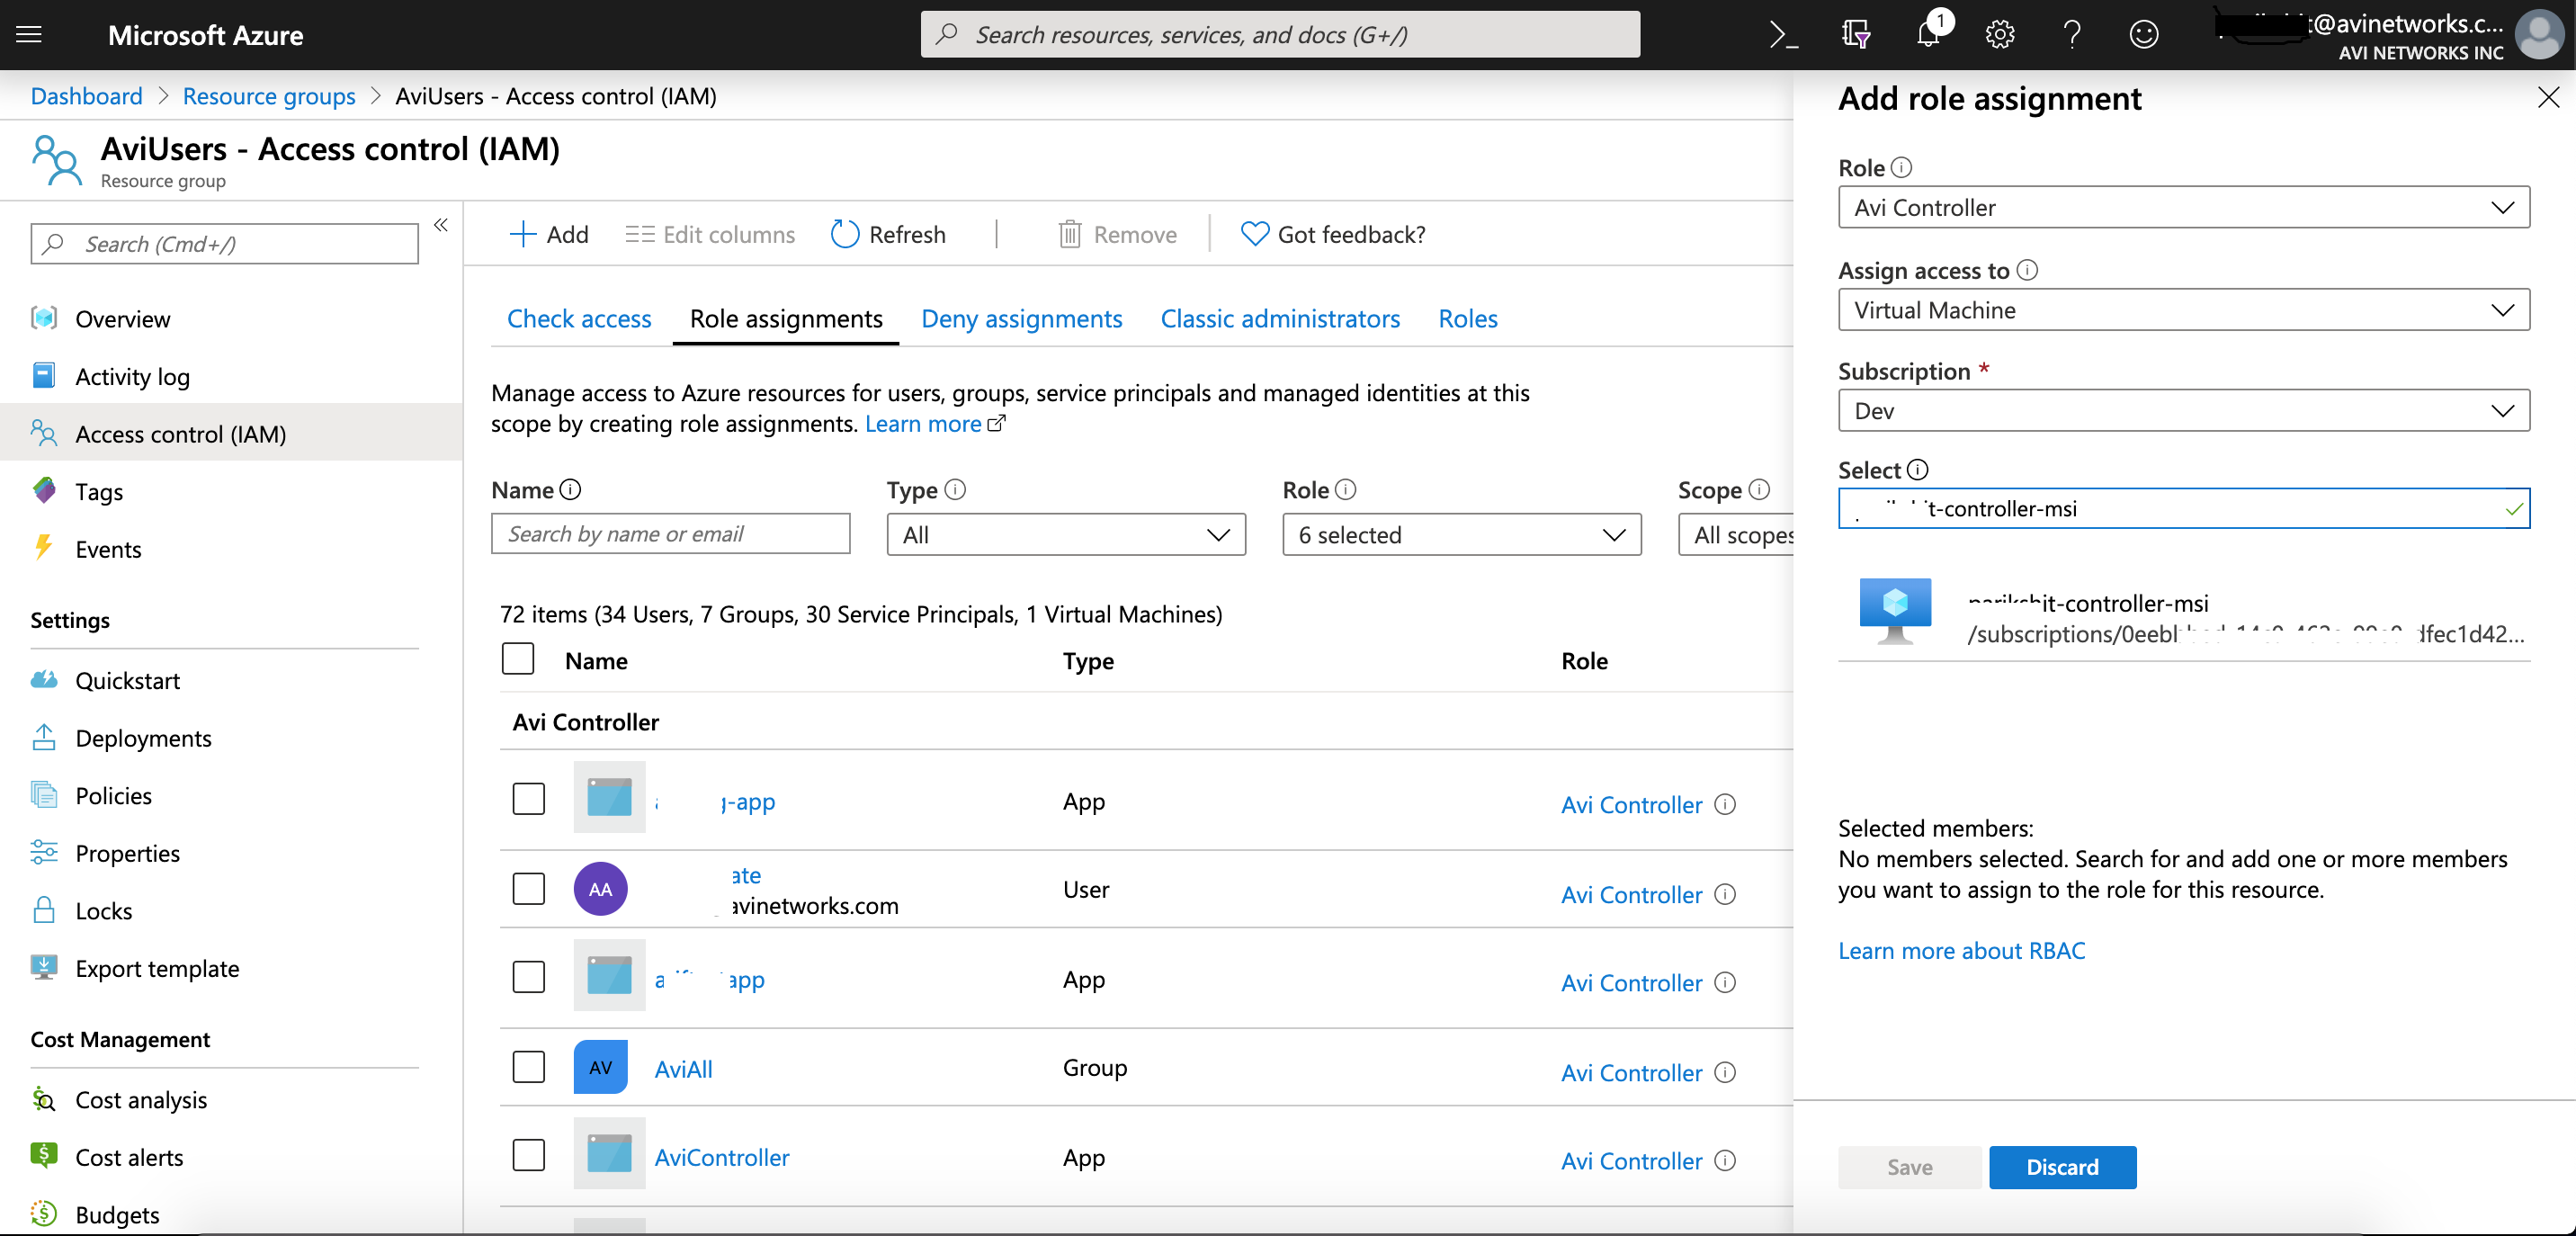
Navigate to the Avi Cloud resource group and select Access Control (IAM). Avi Controller will create all its resources in this resource group.
-
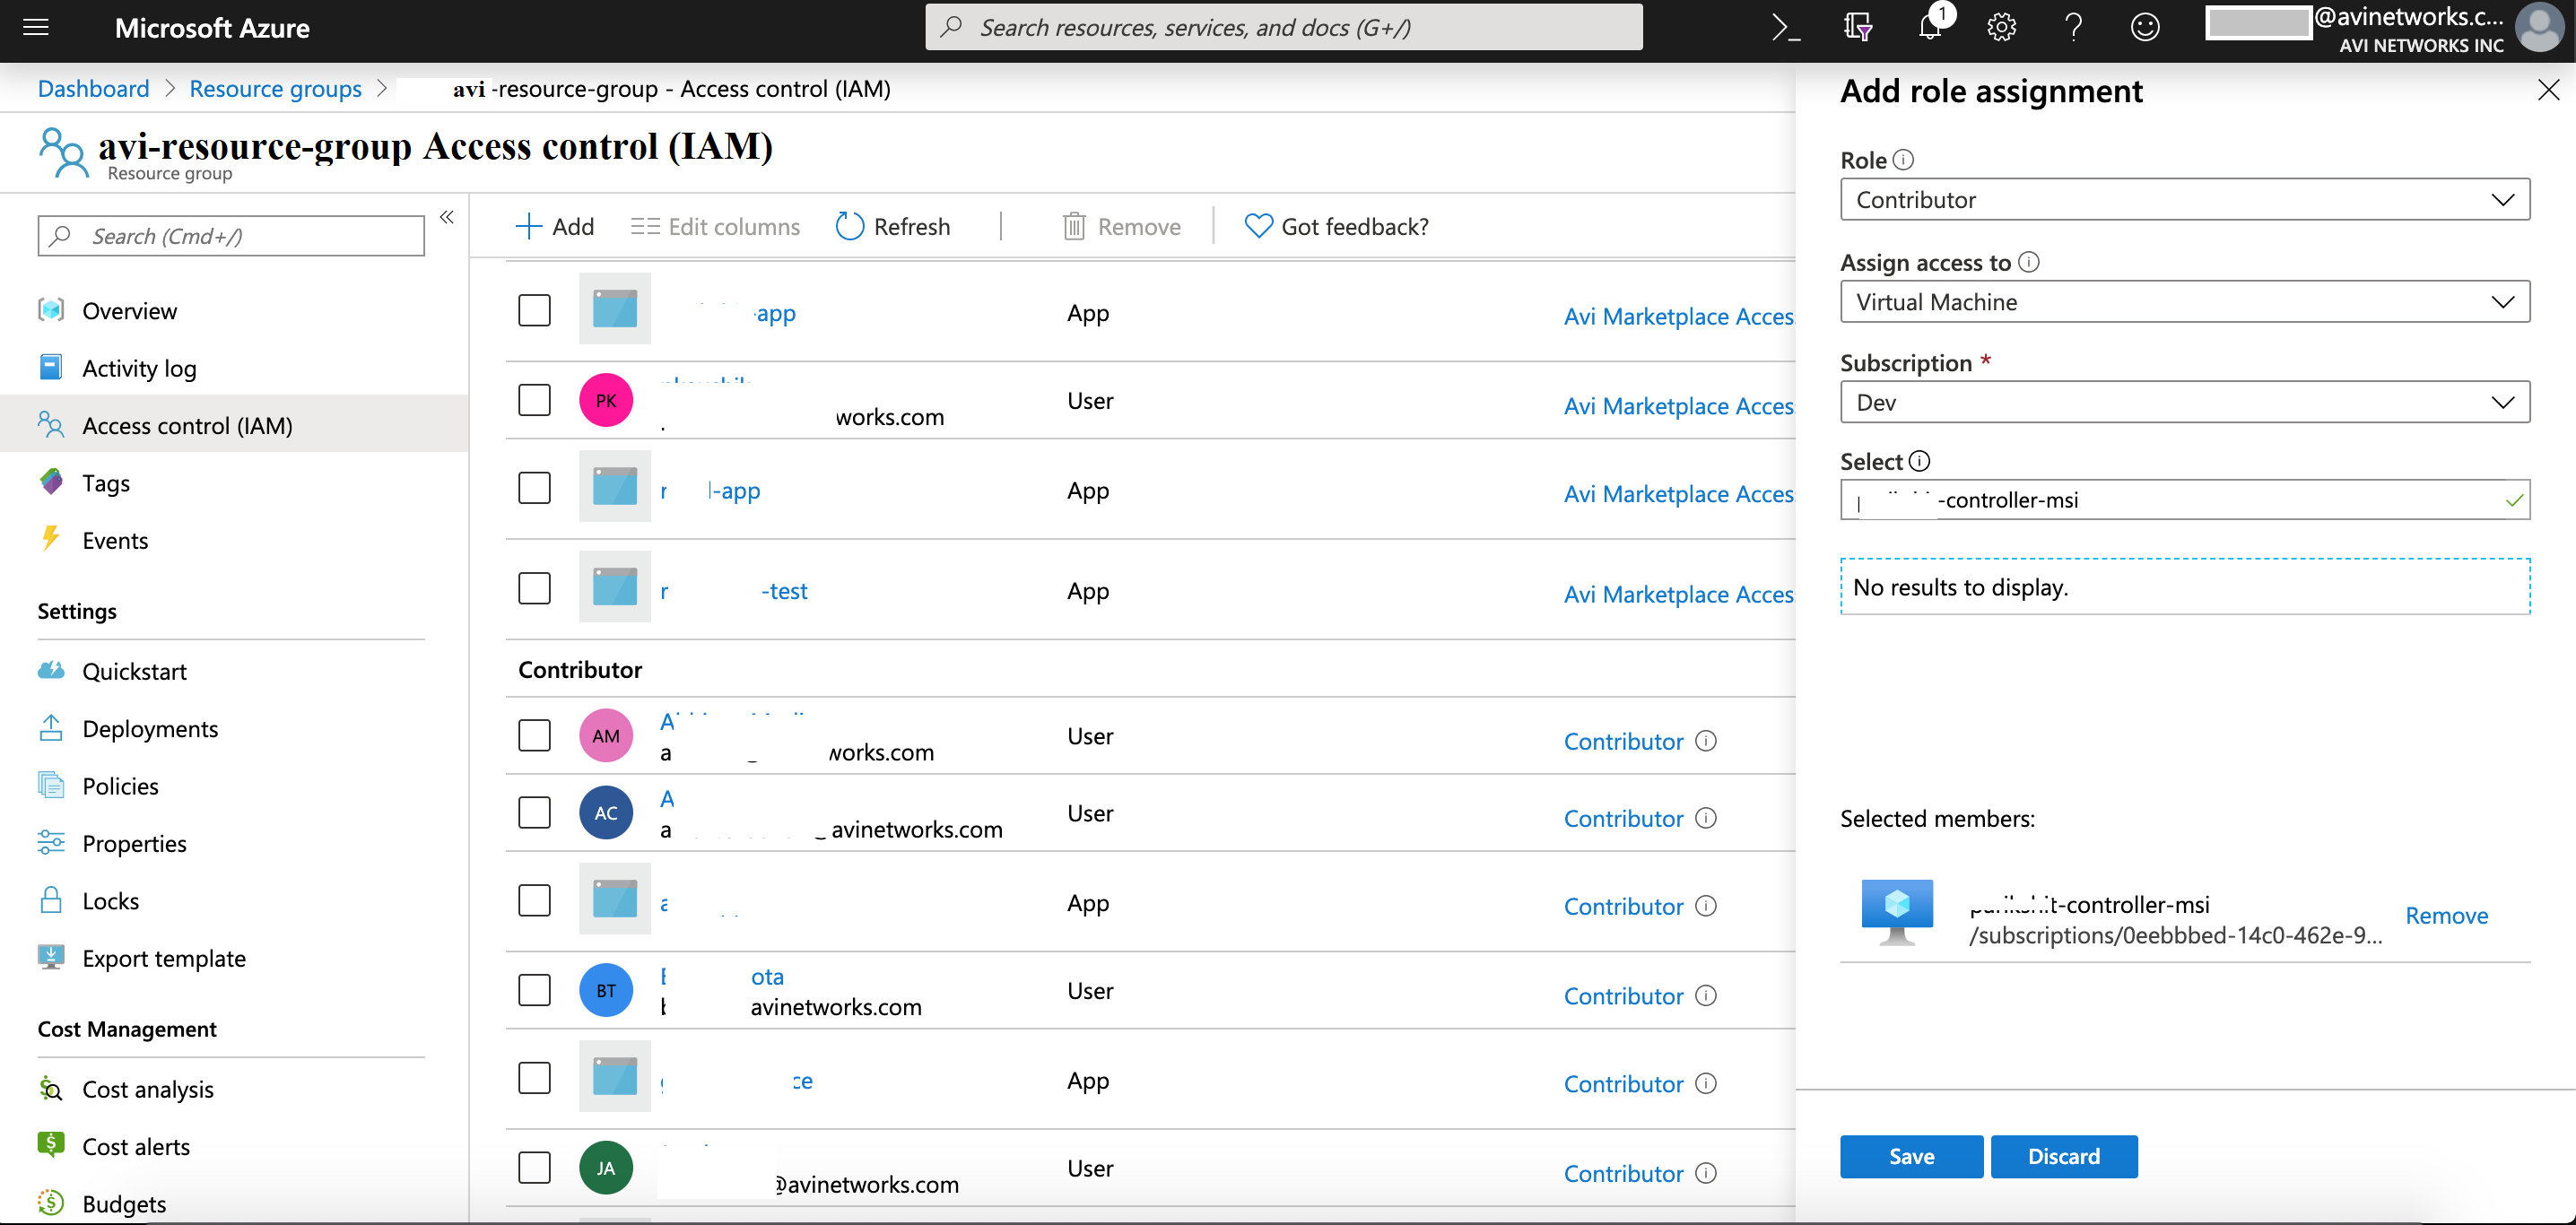
Add a new role assignment of Contributor or higher for the controller VM.
-
Save the above configuration.
Assigning Role to VNet Resource Group
-
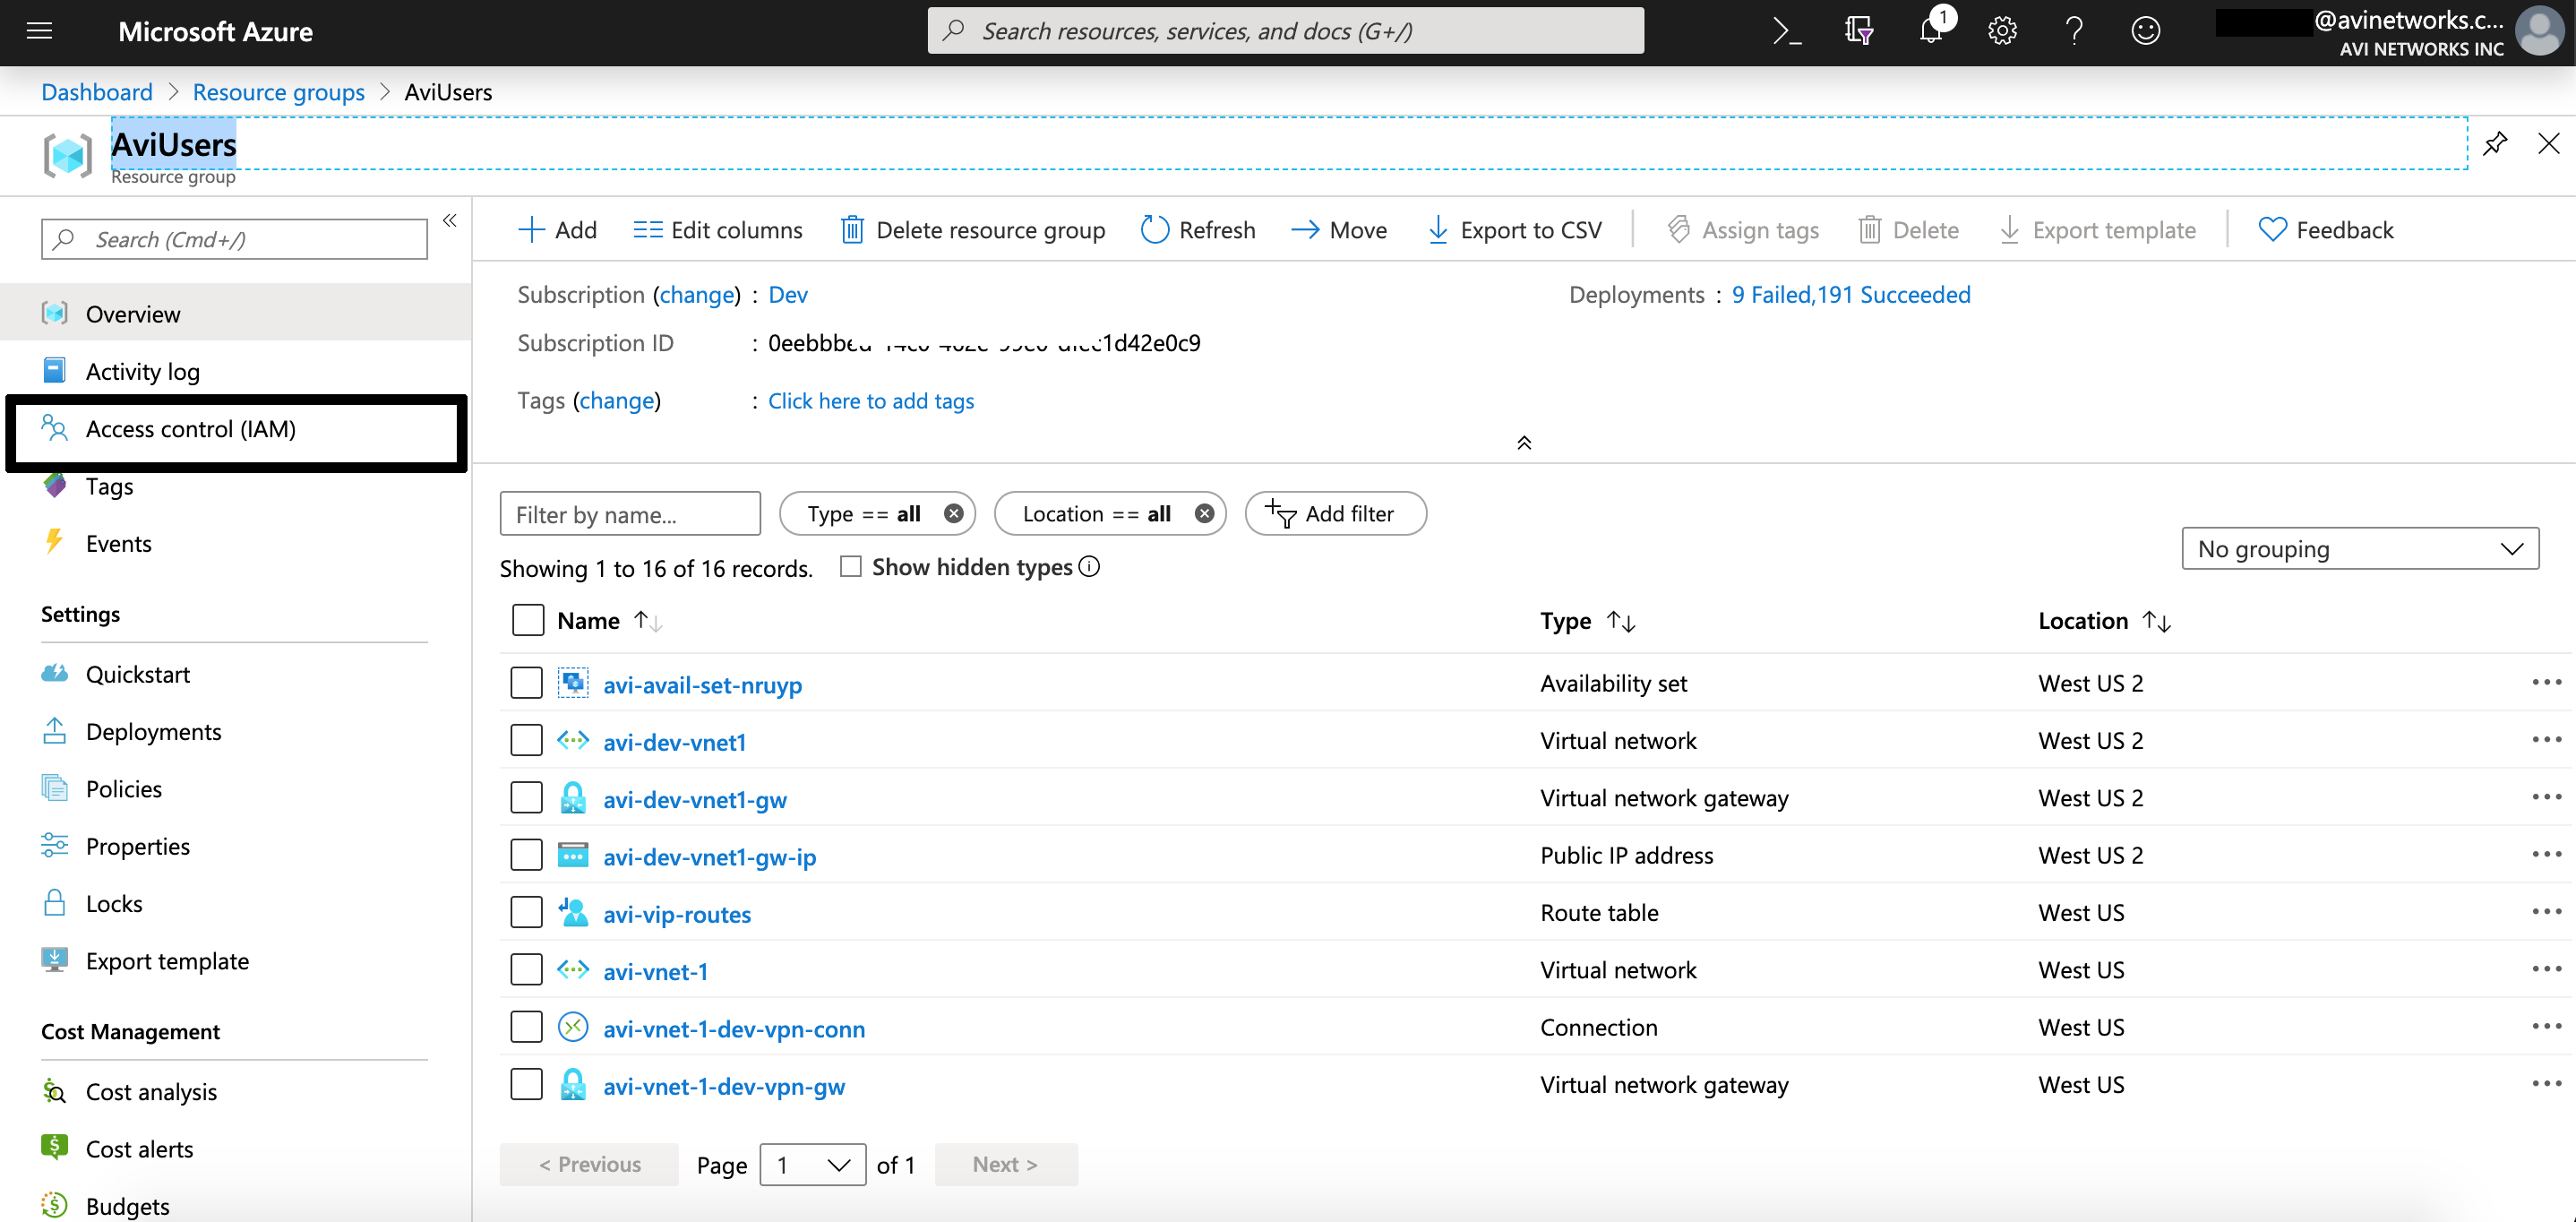
Navigate to the VNet resource group.
-
Add a new role assignment of Avi Controller for the Controller VM. The custom role can be configured using Azure CLI, PowerShell, or REST API. For more details on Azure CLI, refer to Manage Role-Based Access Control with the Azure CLI>.
-
Save the above configuration.
-
Repeat the above steps for the DNS Application Group and Application Resource Group.
Configuring Avi Vantage
Enabling MSI Authentication using Avi UI
Starting with Avi Vantage release 18.2.5, the configuration of MSI authentication for Azure is supported using Avi UI.
Follow the steps mentioned below to enable MSI authentication using Avi UI.
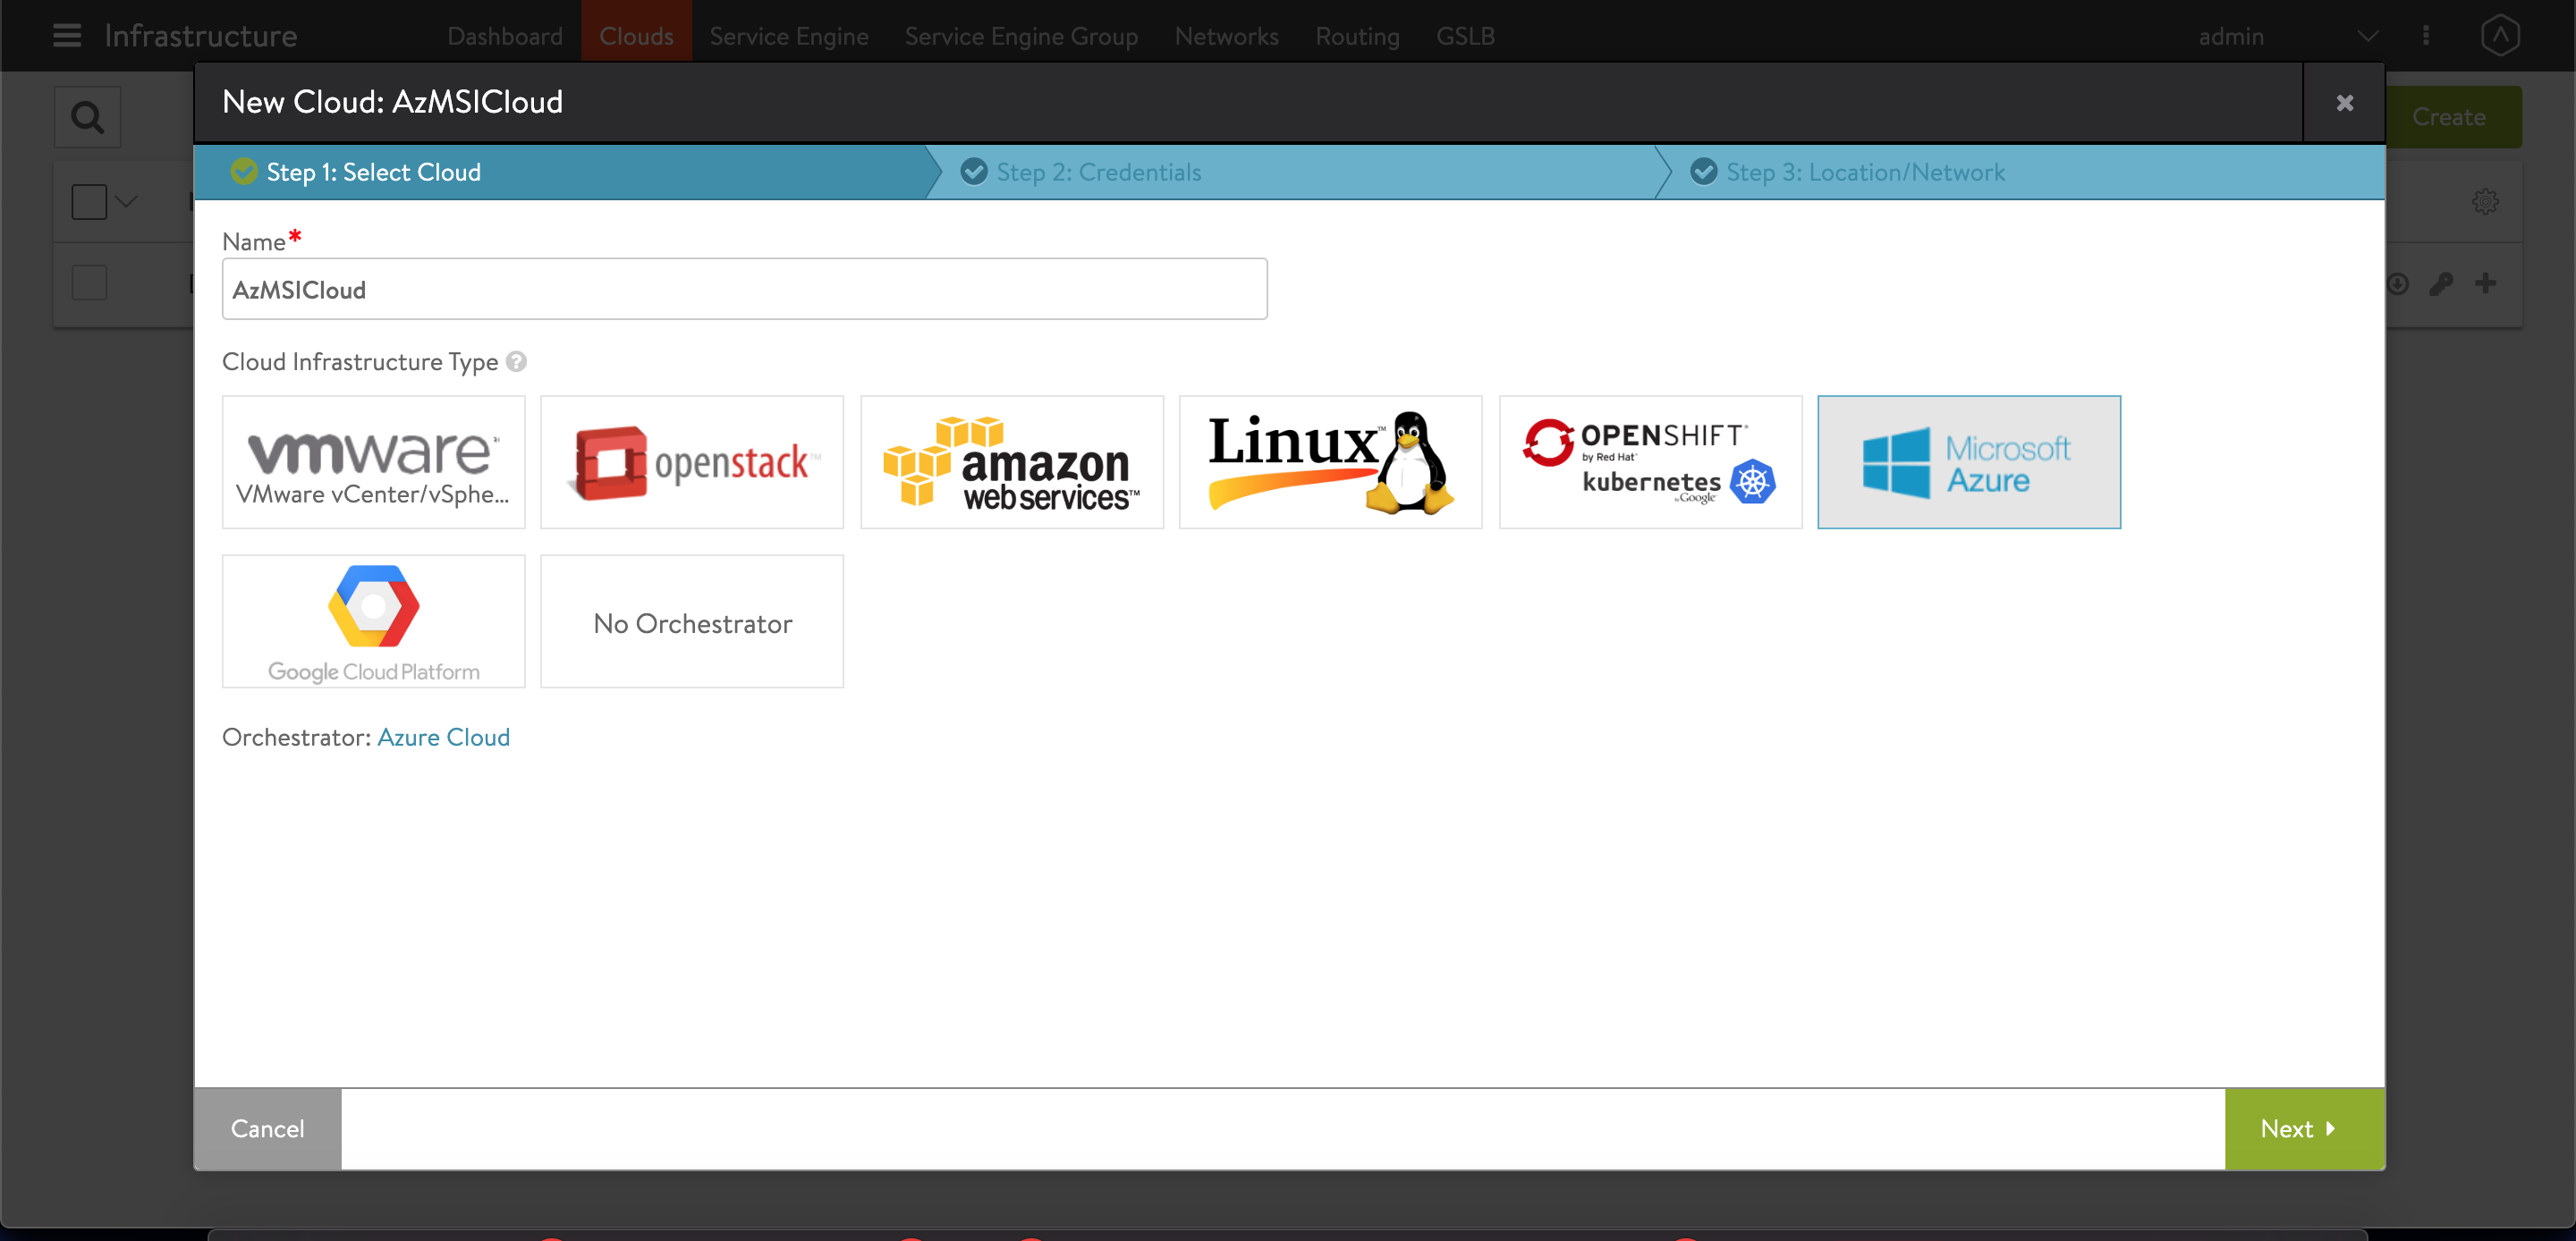
-
Navigate to Infrastructure > Cloud. Create a new cloud of type Microsoft Azure as shown below.
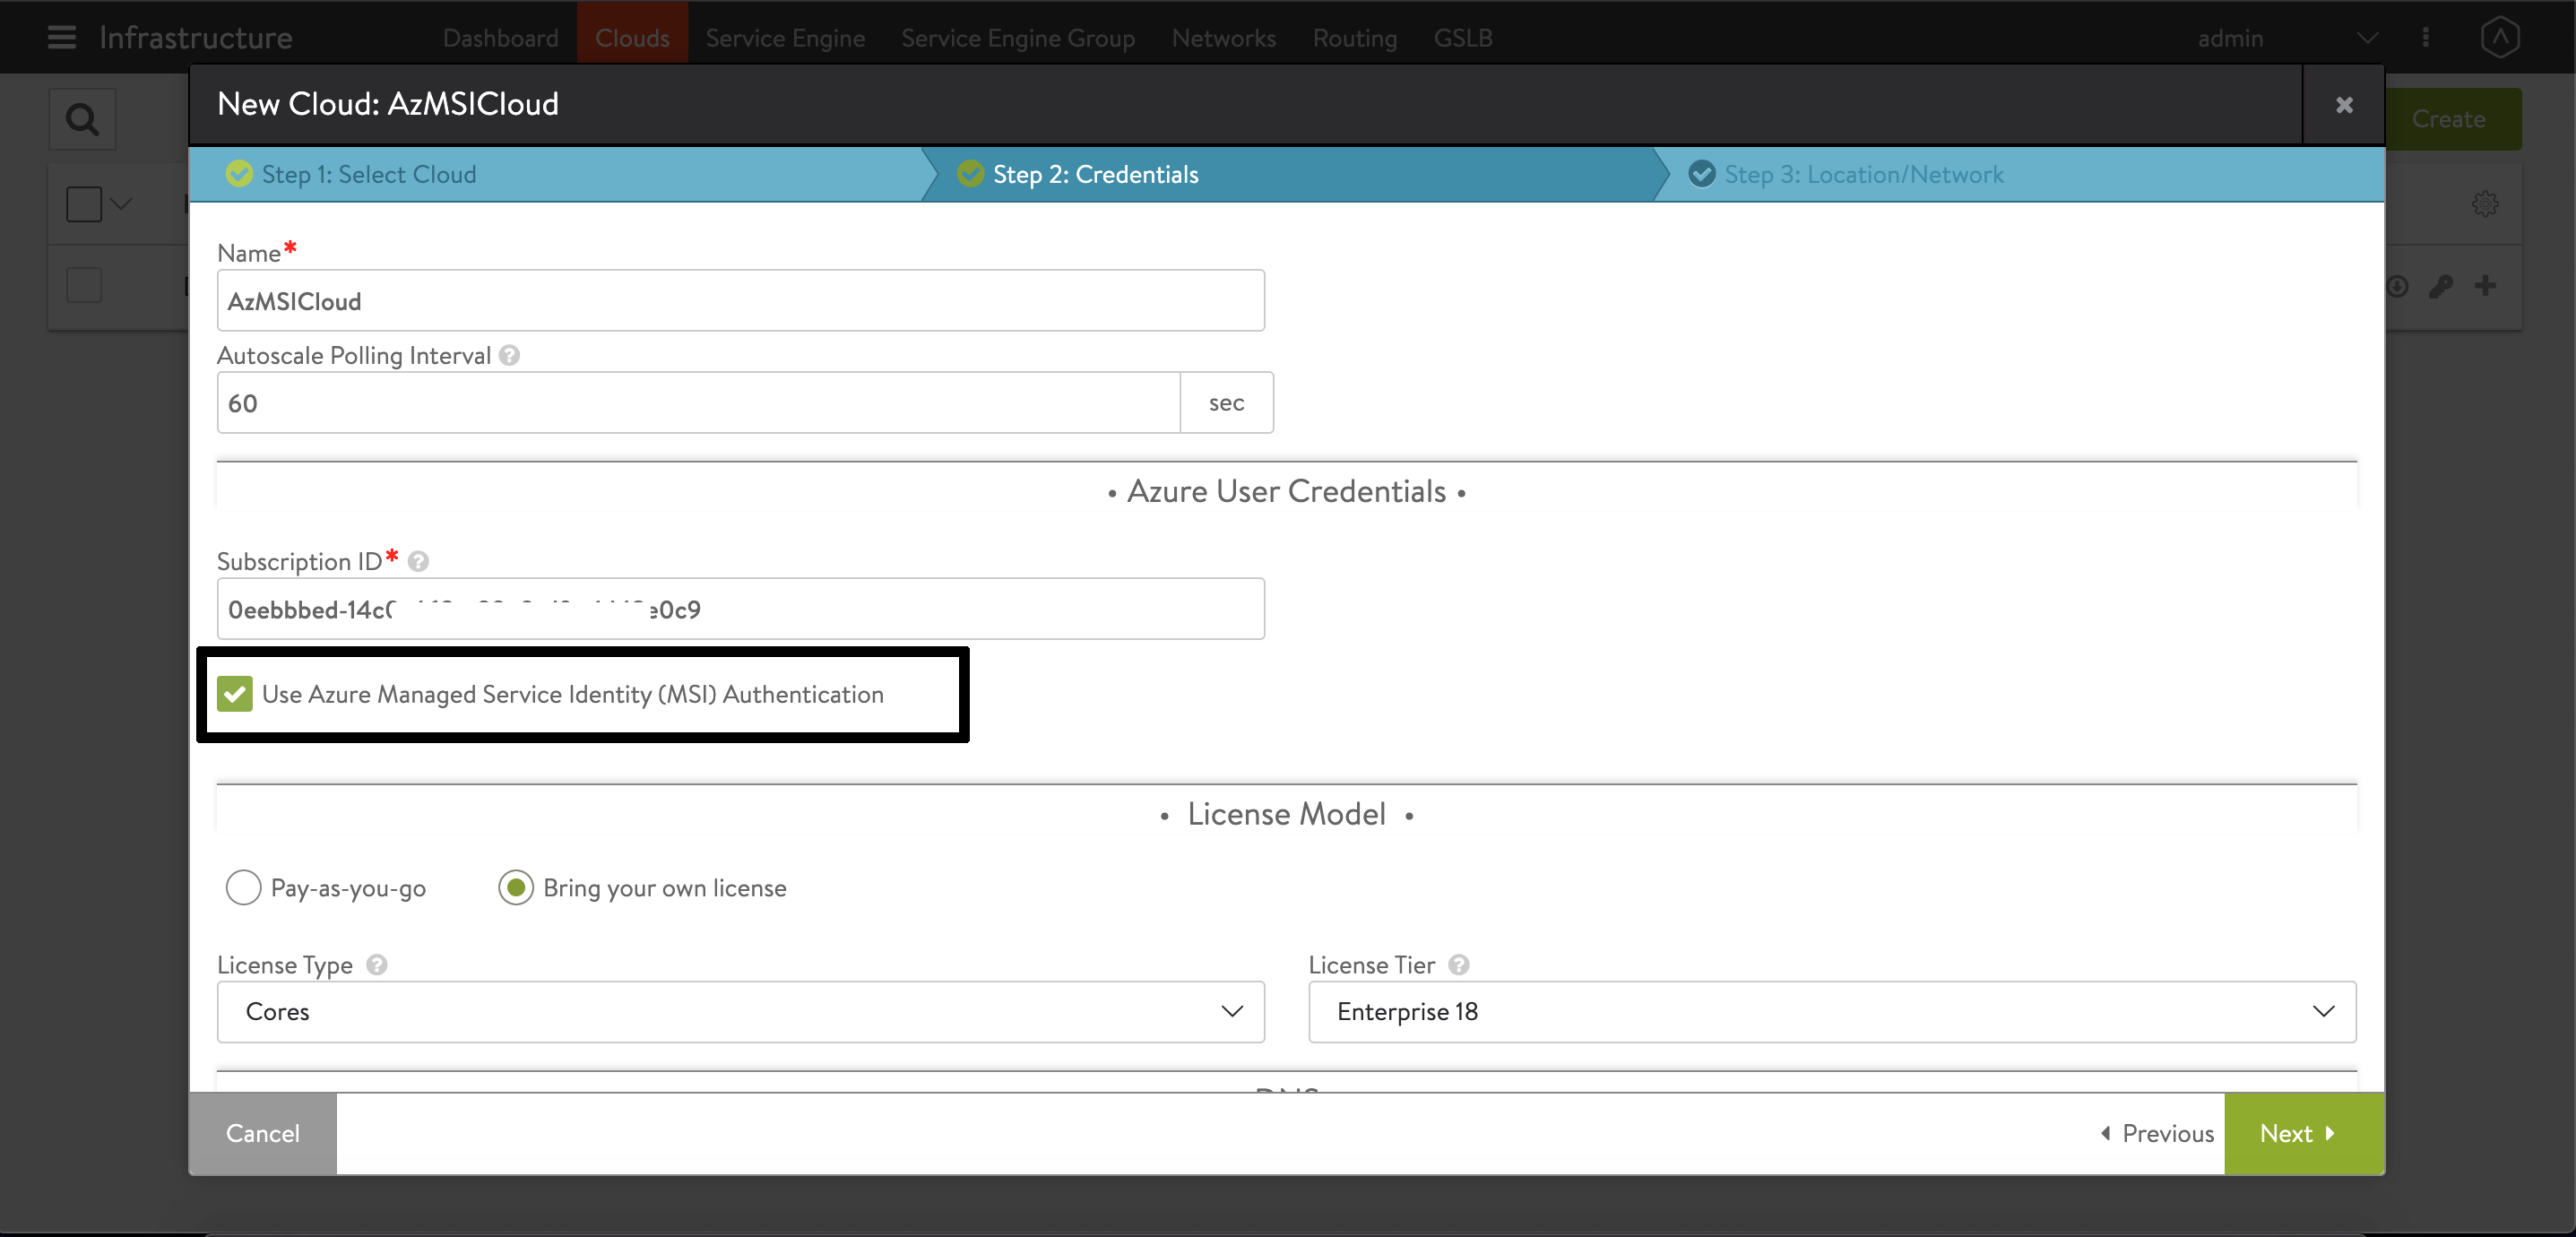
-
Enable the checkbox for Use Azure Managed Service Identity (MSI) Authentication as shown below.
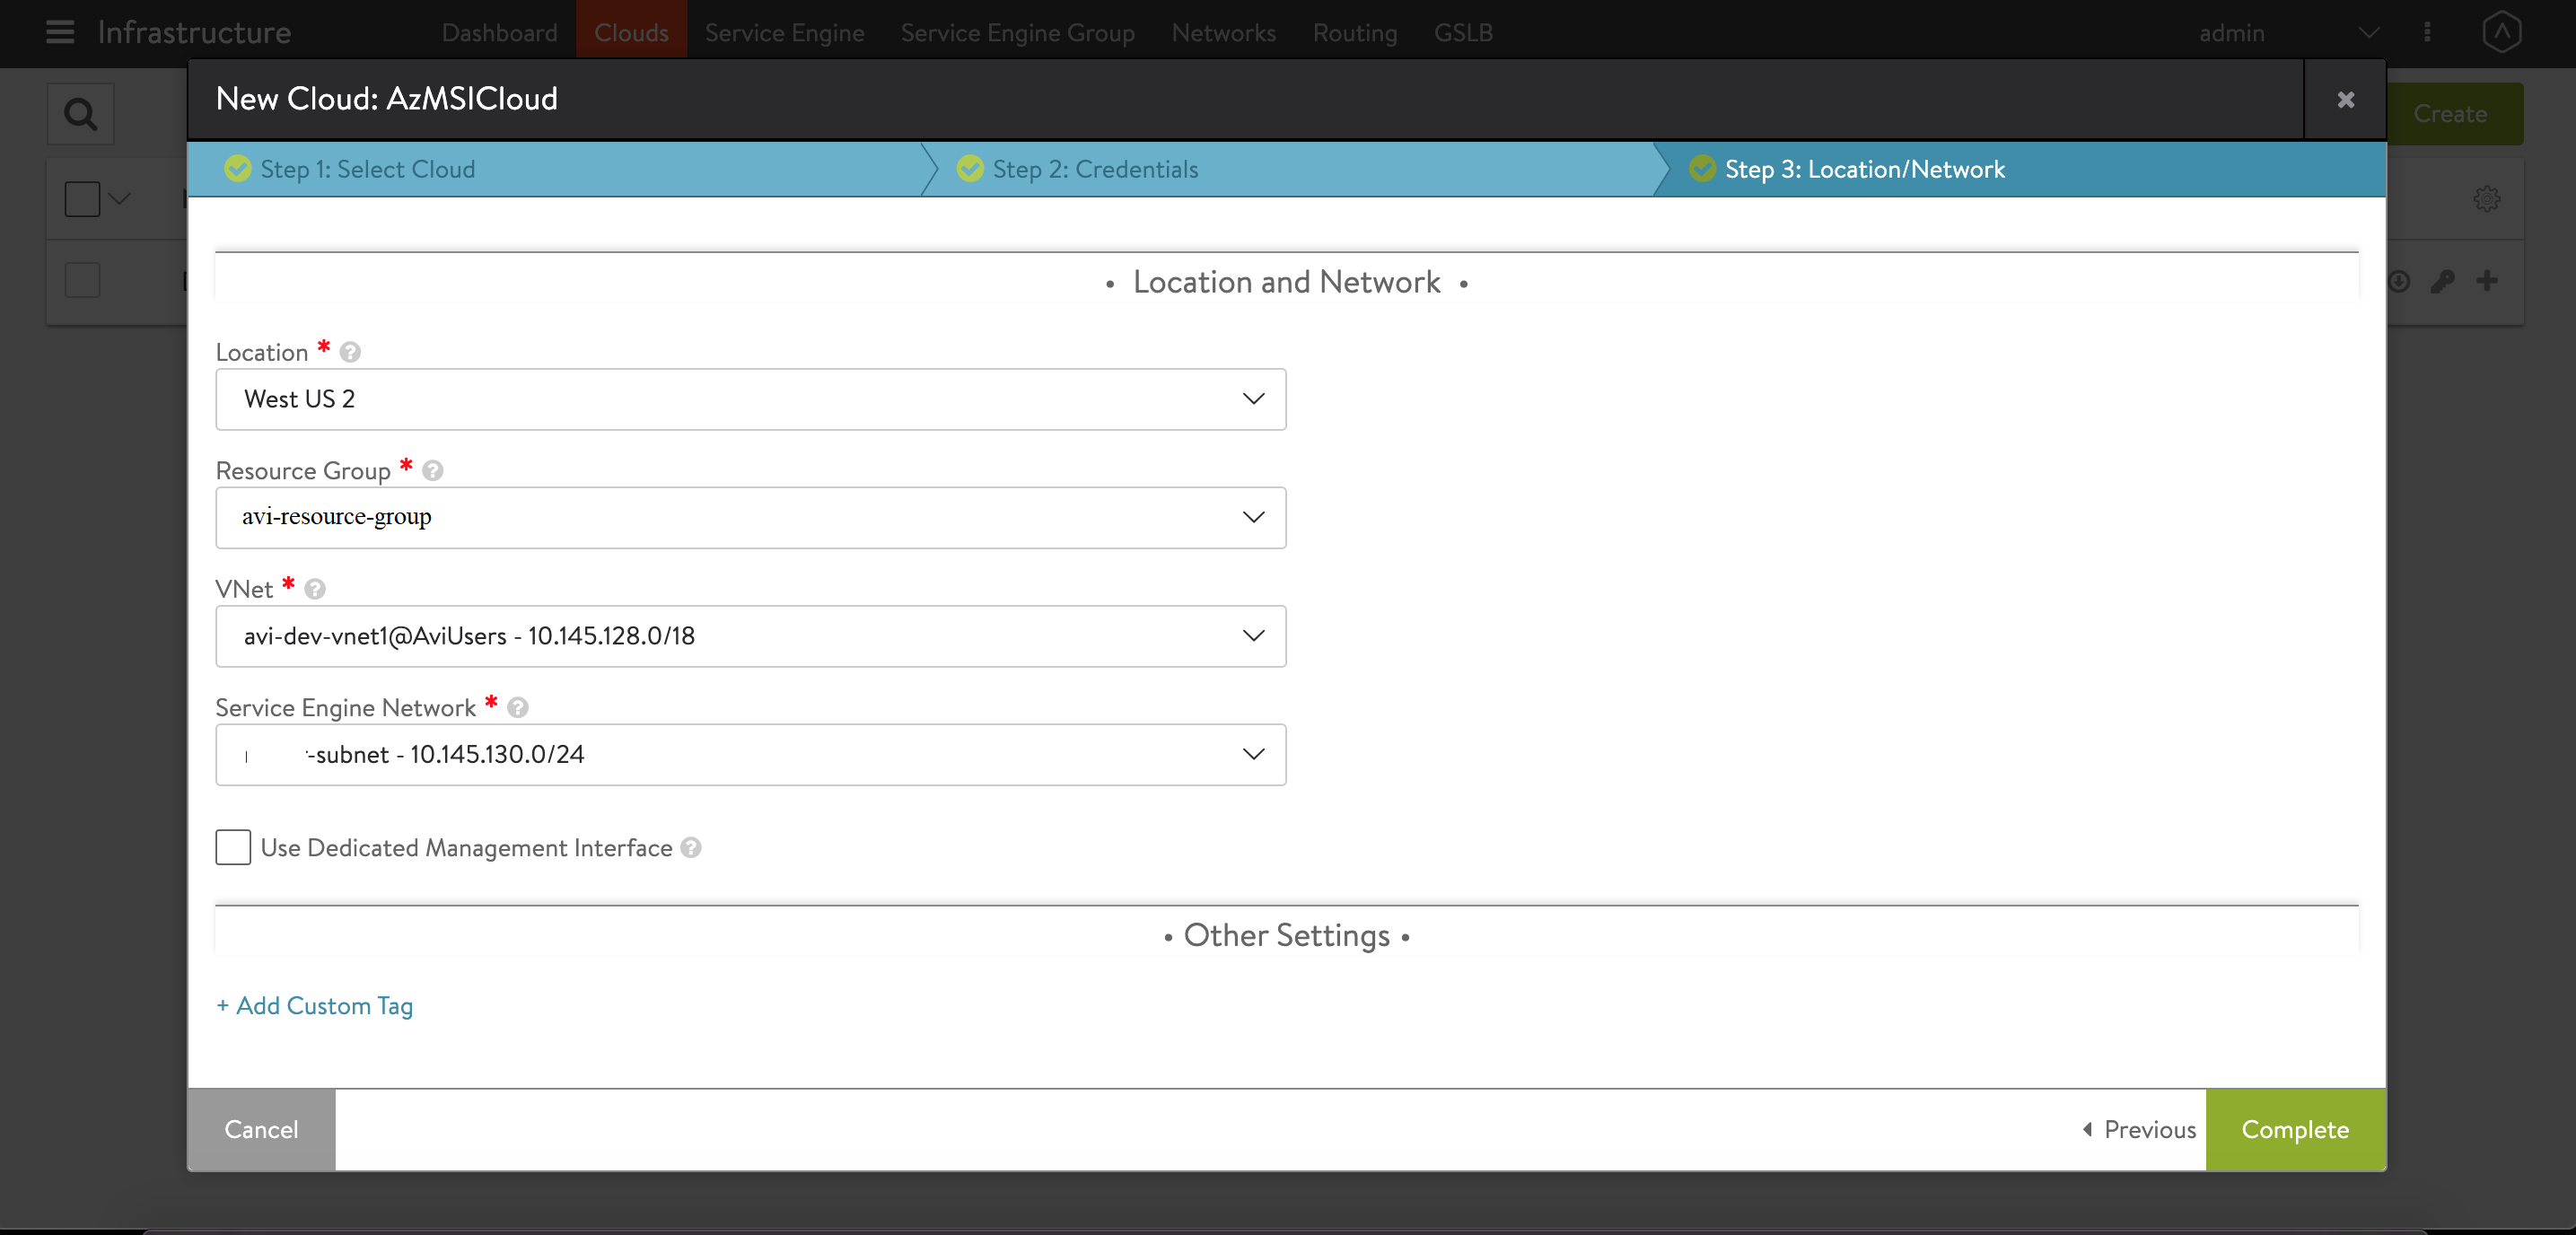
-
Continue the next steps to select the Vnet. For Vnet, select the virtual network with which Virtual IPs are associated. Select the desired Resource Group. Avi Controller creates all its resources in this resource group.
-
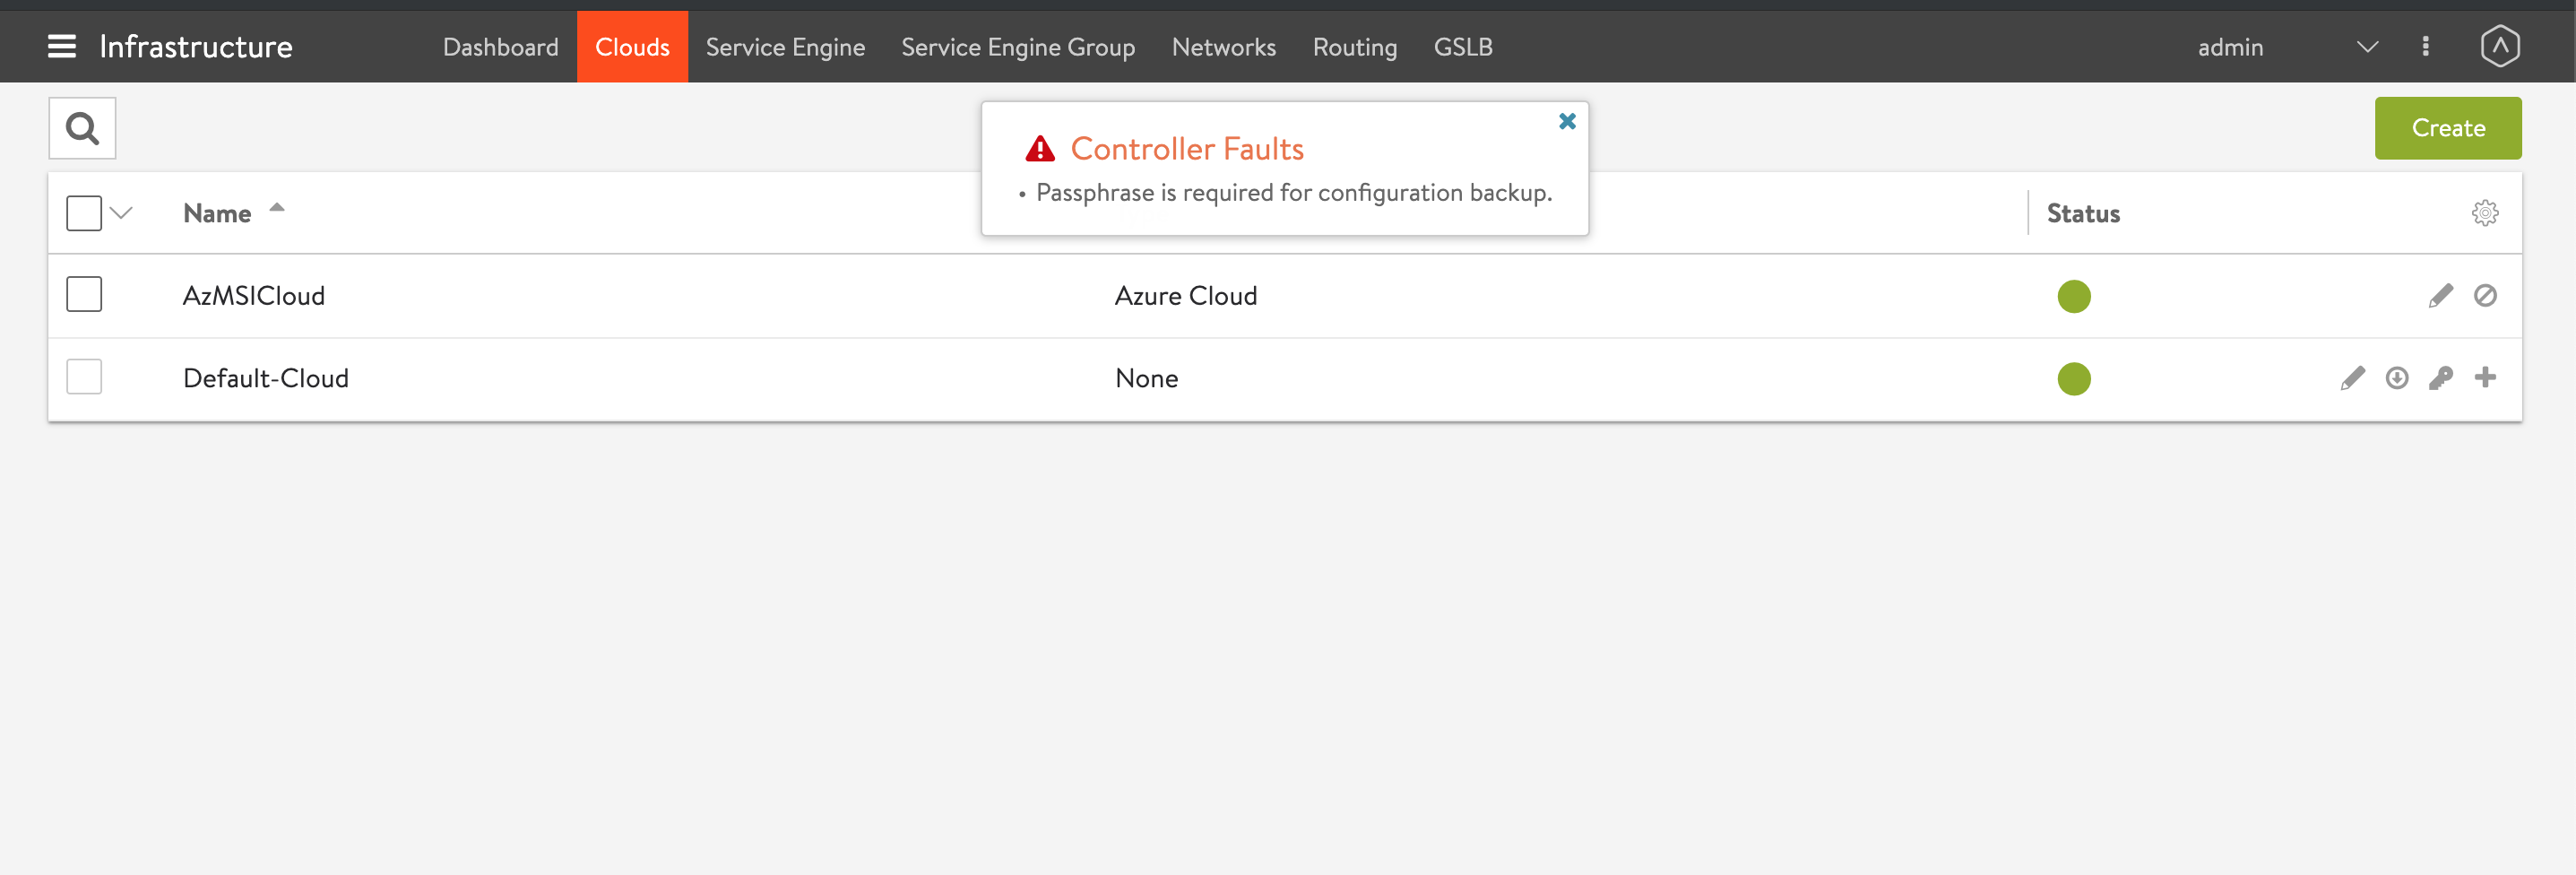
Save and navigate back to Infrastructure > Cloud to check the cloud created.
Enabling MSI Authentication using Avi CLI
Login to the Avi shell prompt and use the configure cloud <cloud name> to enable MSI authentication for the cloud.
[admin:10-145-139-60]: > configure cloud AZMSI

[admin:10-145-139-60]: cloud> vtype cloud_azure
[admin:10-145-139-60]: cloud> azure_configuration
[admin:10-145-139-60]: cloud:azure_configuration> network_info
New object being created
[admin:10-145-139-60]: cloud:azure_configuration:network_info> se_network_id parikshit-subnet
[admin:10-145-139-60]: cloud:azure_configuration:network_info> virtual_network_id /subscriptions/0eebbbed-14c0-462e-xxxx-dfxx1dx2x0c9/resourceGroups/AviUsers/providers/Microsoft.Network/virtualNetworks/avi-dev-vnet1
[admin:10-145-139-60]: cloud:azure_configuration:network_info> save
[admin:10-145-139-60]: cloud:azure_configuration> resource_group avi-resource-group
[admin:10-145-139-60]: cloud:azure_configuration> subscription_id 0eebbbed-14c0-462e-99e0-dfec1d42e0c9
[admin:10-145-139-60]: cloud:azure_configuration> location westus2
[admin:10-145-139-60]: cloud:azure_configuration> save
[admin:10-145-139-60]: cloud> save
Note:
Use no cloud_credentials_ref to convert the existing Azure cloud to use the MSI authentication if all the appropriate roles are assigned to the Controller VM.
[admin:10-145-139-60]: > configure cloud AzMSICloud
[admin:10-145-139-60]: cloud> azure_configuration
[admin:10-145-139-60]: cloud:azure_configuration> no cloud_credentials_ref