Avi Integration with NSX-T
Overview
VMware NSX-T provides an agile software-defined infrastructure to build cloud-native application environments.
NSX-T is focused on providing networking, security, automation, and operational simplicity for emerging application frameworks and architectures that have heterogeneous endpoint environments and technology stacks. NSX-T supports cloud-native applications, bare metal workloads, multi-hypervisor environments, public clouds, and multiple clouds.
To know more about VMware NSX-T, refer to the VMware NSX-T documentation.
This guide describes how to deploy Avi Vantage in a vSphere environment with NSX-T managed networking and security.
Prerequisites
The integration requires the Avi Controller to be able to authenticate with the NSX-T manager and the vCenter server(s).
The user accounts configured on the Avi Controller require the following roles and permissions for the integration to work successfully:
Configuring NSX-T Role Requirements
The NSX-T cloud should be configured with admin credentials for NSX-T manager.
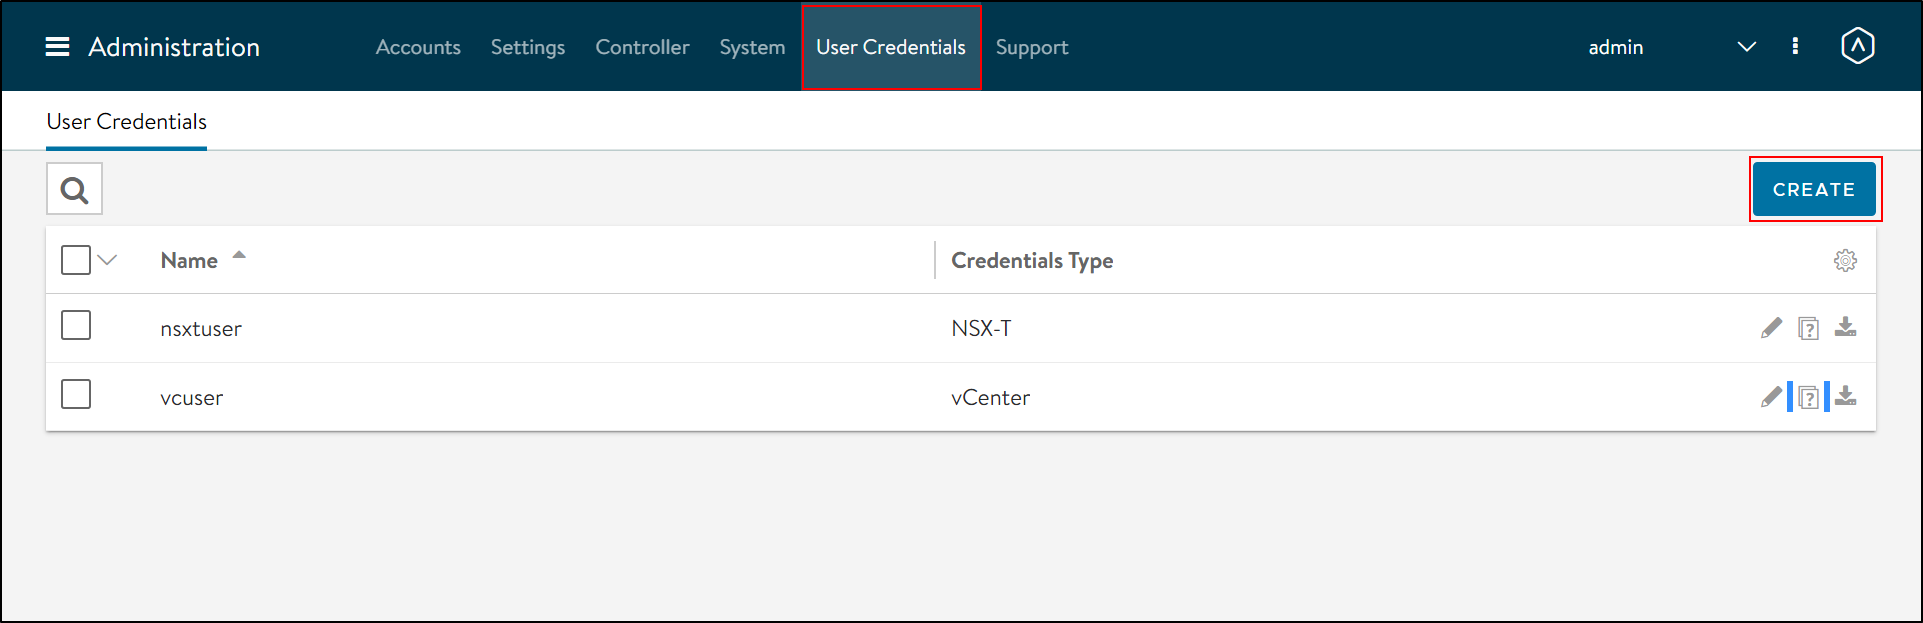
To create the username and password to talk to the NSX-T manager,
-
Navigate to Administration > User Credentials.
-
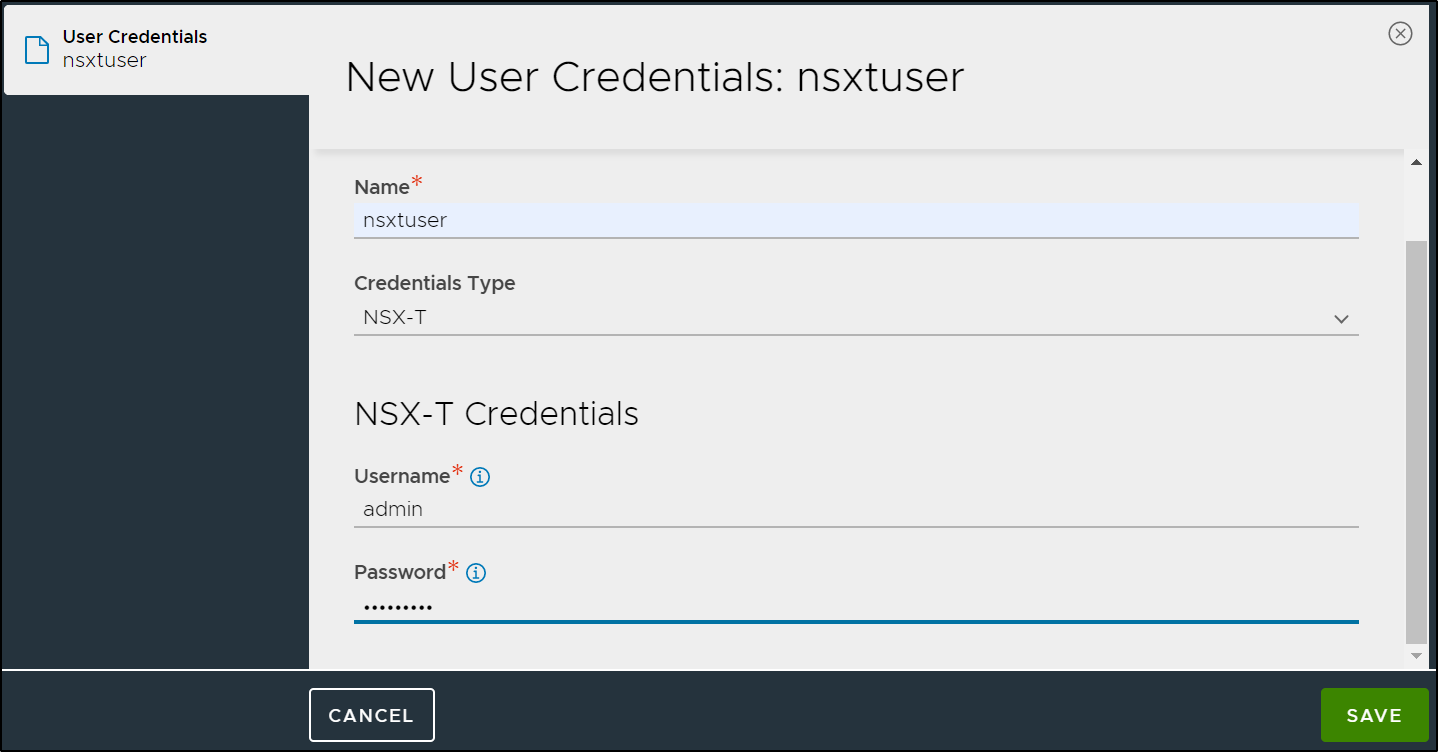
Enter the Name.
-
Select NSX-T as the Credentials Type.
-
Enter the Username and Password.
The New User Credentials screen is as shown below:
-
Click on Save.
Note: In case the password expired, and Avi tries to reconnect using the expired password. After five consecutive failed login attempts, the administrator account is locked for 15 minutes. Refer to the Account Lockout article to know more.
Configuring vCenter Role Requirements
To configure vCenter objects, you should log in to the vCenter server with administrator credentials.
To create the username and password to talk to the vCenter server, in the New User Credentials screen,
-
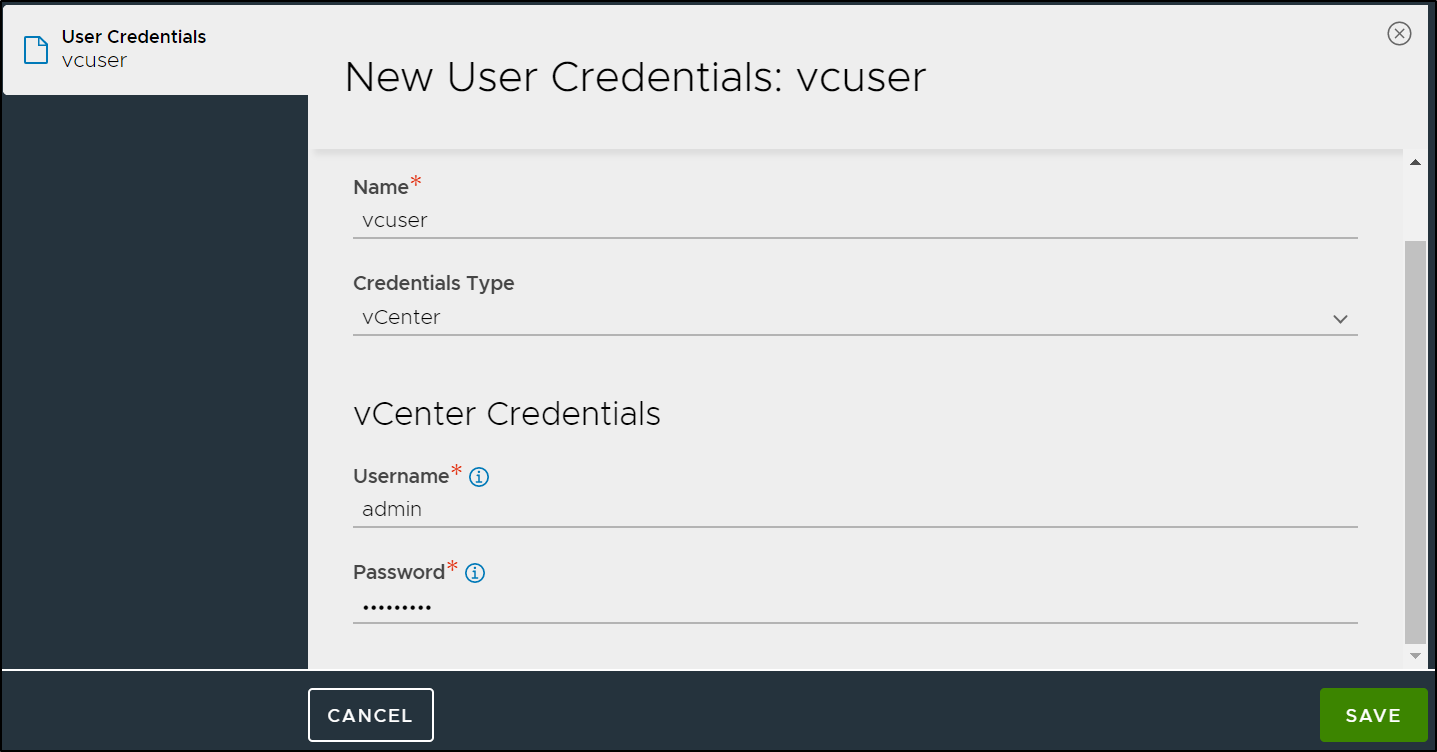
Enter the Name.
-
Select vCenter as the Credentials Type.
-
Enter the Username and Password.
The New User Credentials screen is as shown below:
-
Click on Save.
Content Library
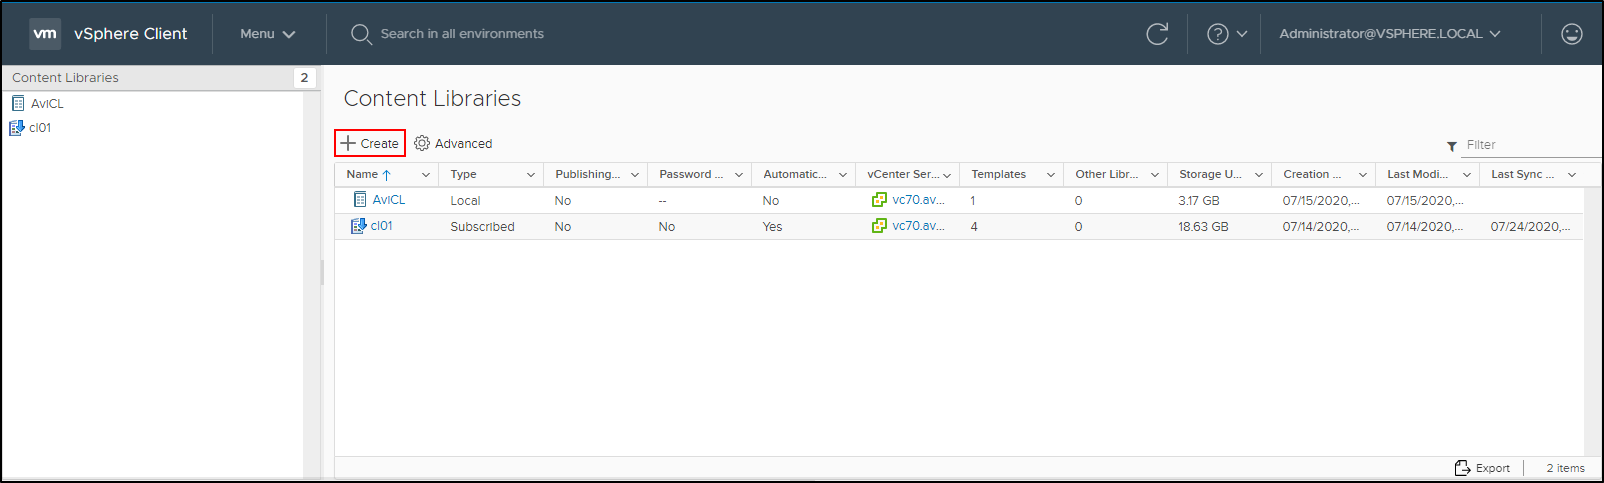
The Avi Controller uploads the Service Engine image to the content library on the vCenter server and uses this to create new virtual machine (VM) every time a new Service Engine is required. The content library must be created on vCenter before configuring the NSX-T cloud.
-
In the vCenter vSphere client, navigate to Content Libraries.
-
Click on Create. The New Content Library wizard opens.
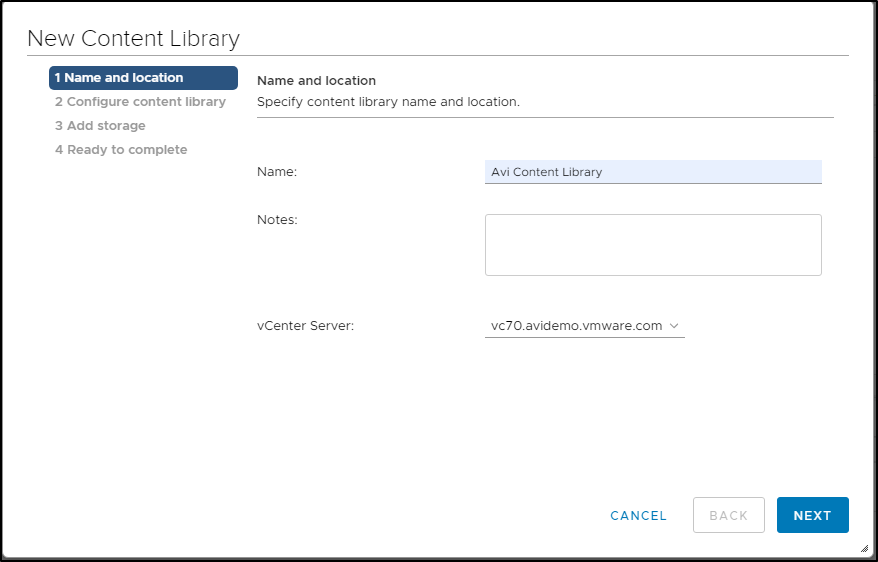
-
In the Name and location page, enter the Name and select a vCenter Server instance for the content library as shown below:
-
Click on Next.
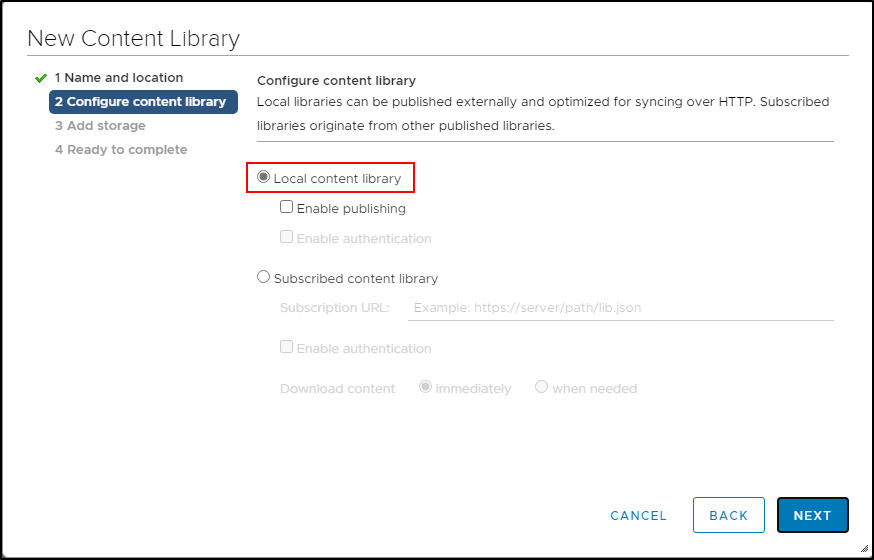
-
In the Configure content library page, select Local content library.
-
Click on Next.
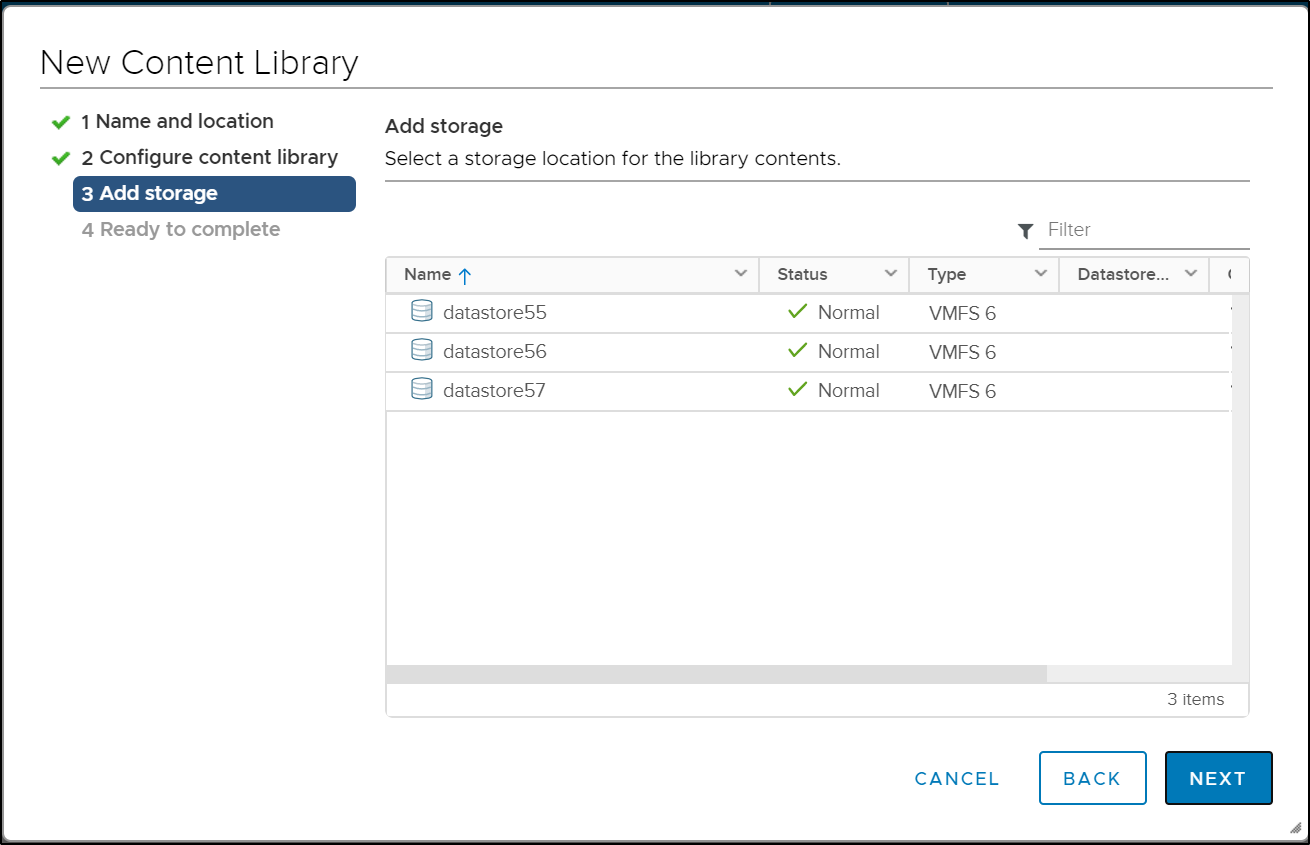
-
In the Add storage page, select datastore as a storage location for the content library contents
-
Click on Next
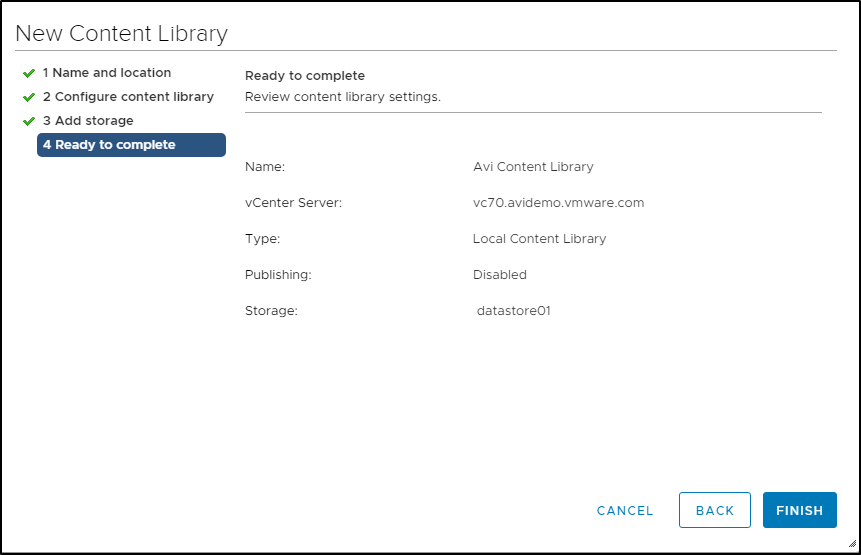
-
In the Ready to complete page, review the details.
-
Click on Finish.
Deploying the Avi Controller OVA
The Avi Controller cluster VMs are deployed using OVA, connected to the same management port group as the NSX-T Manager.
To deploy the Avi Controller OVA,
-
Log in to the vCenter server through a vCenter client.
-
From the File menu, select Deploy OVF Template.
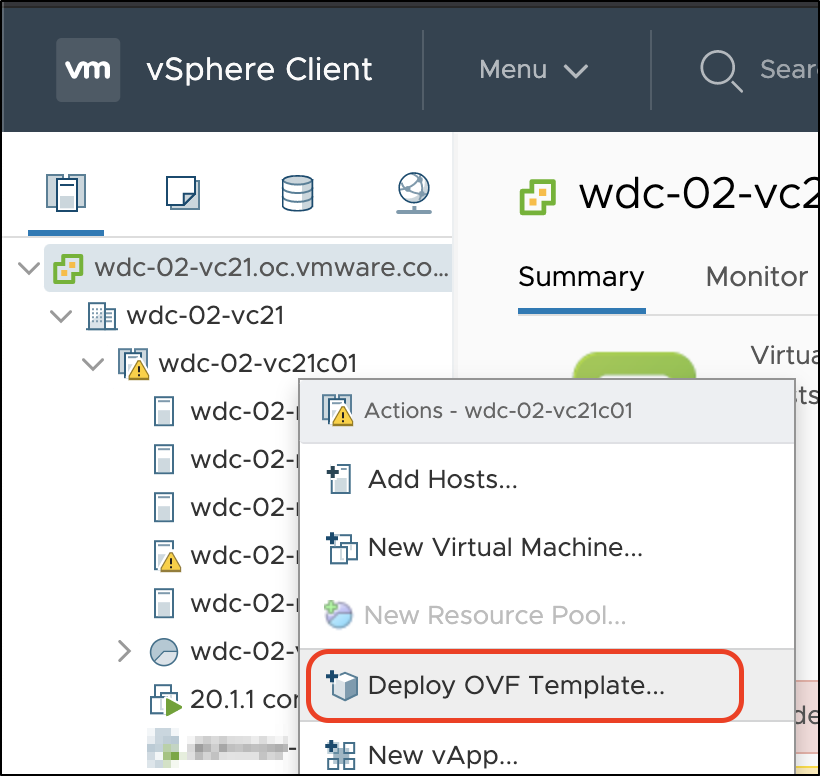
-
Select the
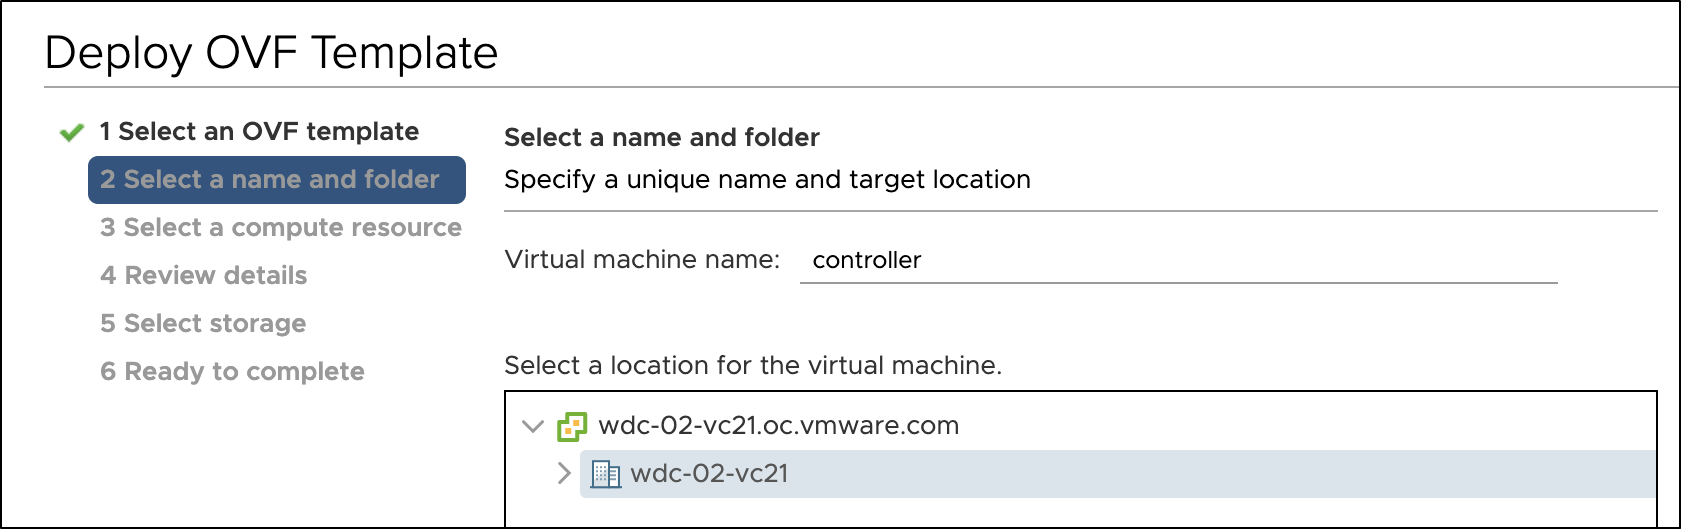
controller.ovafile from your local machine. - In the Deploy OVF Template wizard,
-
Select the VM name and the location to deploy.
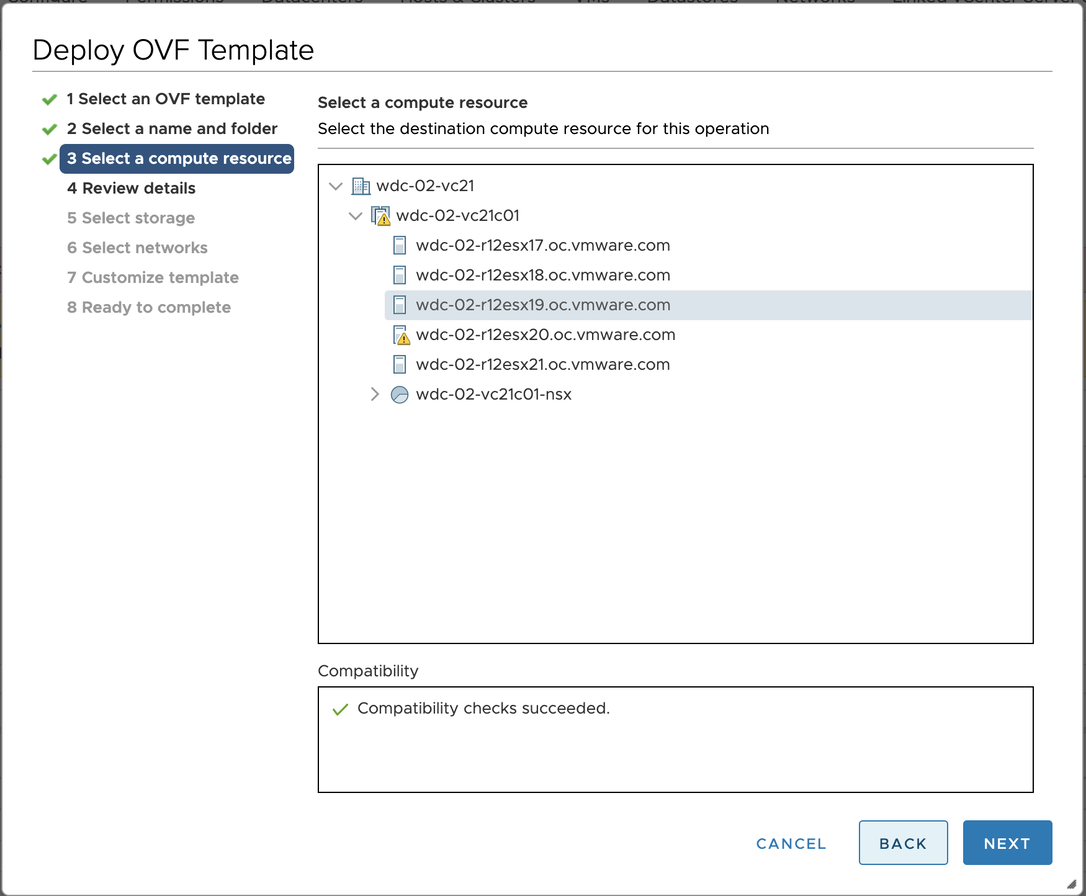
-
Select the compute resource.
-
Review the details.
-
Select the storage and set the disk format to Thick Provision Lazy Zeroed.

-
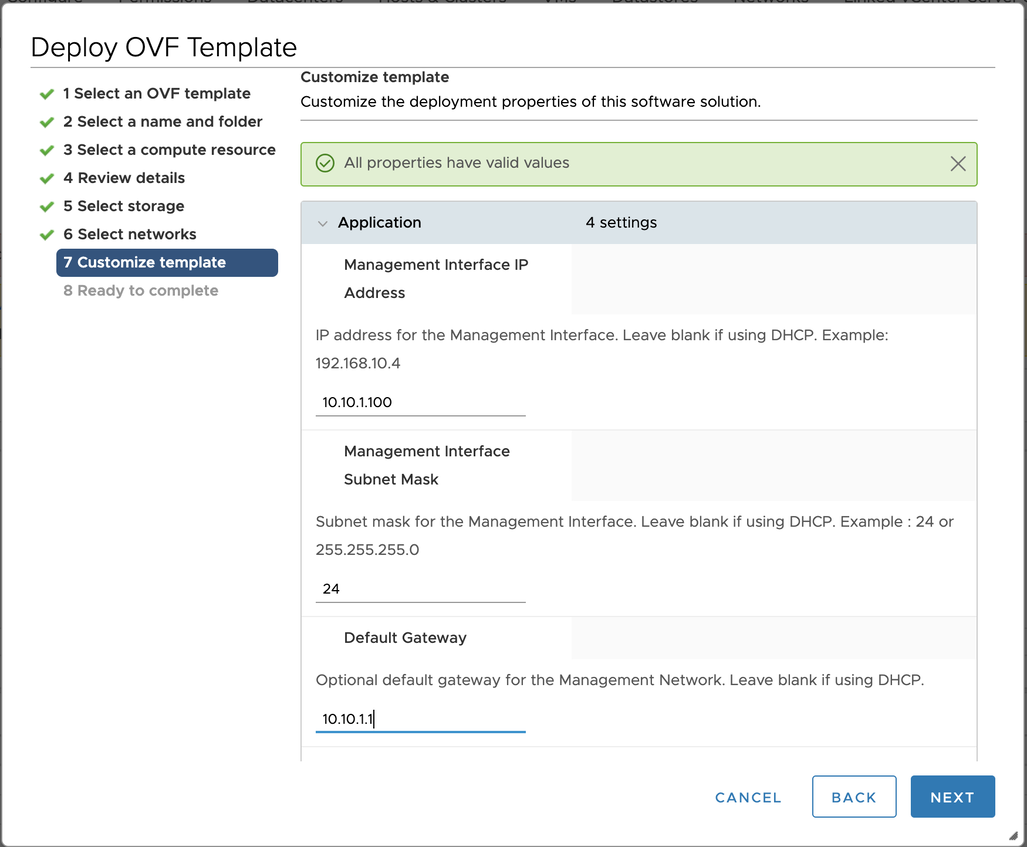
Choose a management network for the Avi Controller.
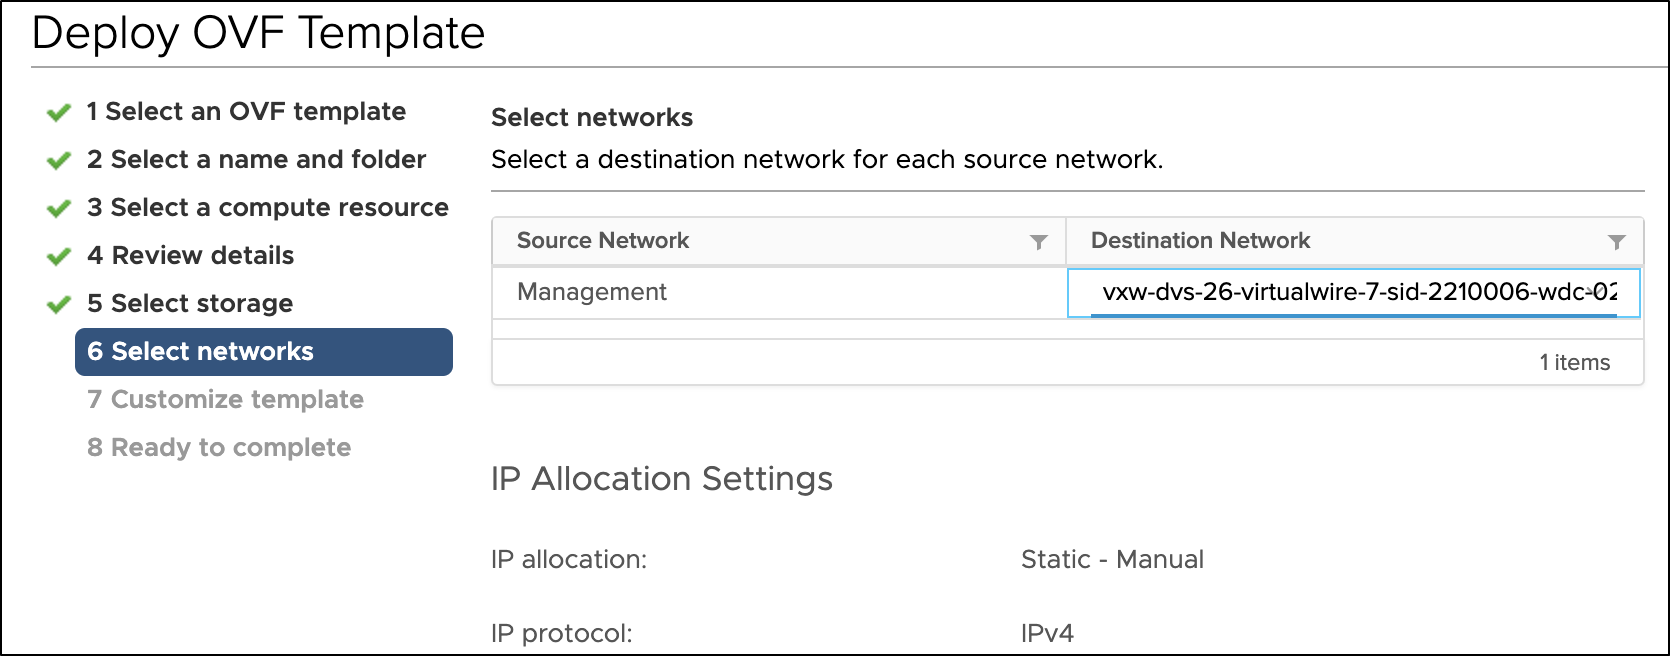
-
Enter the management IP address, subnet mask and default gateway. In the case of DHCP, leave this field empty.
Note: Using static IP address is recommended for production setups.
Note: The Avi Controller OVA supports additional OVF properties. The following properties have been added to facilitate automated deployment of the Avi Controller by the NSX Manager in a future release:
- NSX-T Node ID
- NSX-T IP Address
- Authentication token of NSX-T
- NSX-T thumbprint
- Hostname of Avi Controller
These fields should be left blank in case of a direct deployment of the Avi Controller.
- Review the settings and click on Finish.
-
- Power on the virtual machine.
Setting up the Avi Controller
This section shows the steps to perform initial configuration of the Avi Controller using its deployment wizard. You can change or customize settings following initial deployment using the Avi Controller’s web interface.
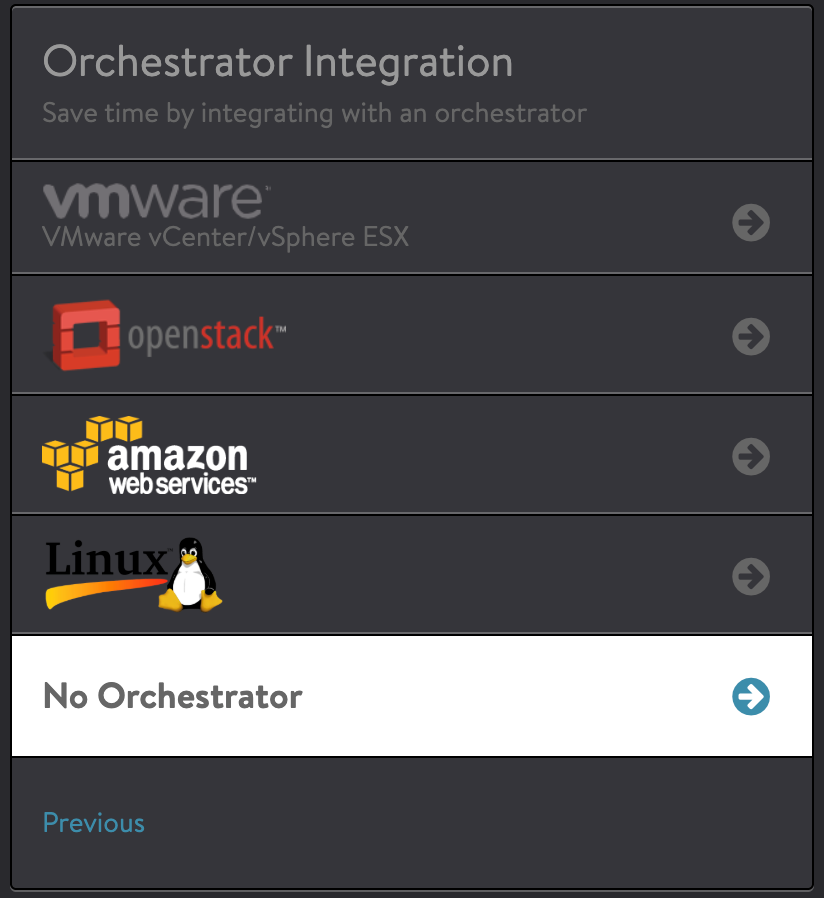
Note: The NSX-T cloud is not a part of the deployment wizard. Therefore, select No Orchestrator as the integration option.
To complete the setup,
-
Navigate to the Avi Controller IP on your browser.
Note: While the system is booting up, a 503 status code or a page with following message will appear, “Controller is not yet ready. Please try again after a couple of minutes”. Wait for about 5 to 10 minutes and refresh the page. Then follow the instructions below for the setup wizard.
-
Enter the admin details as shown below:
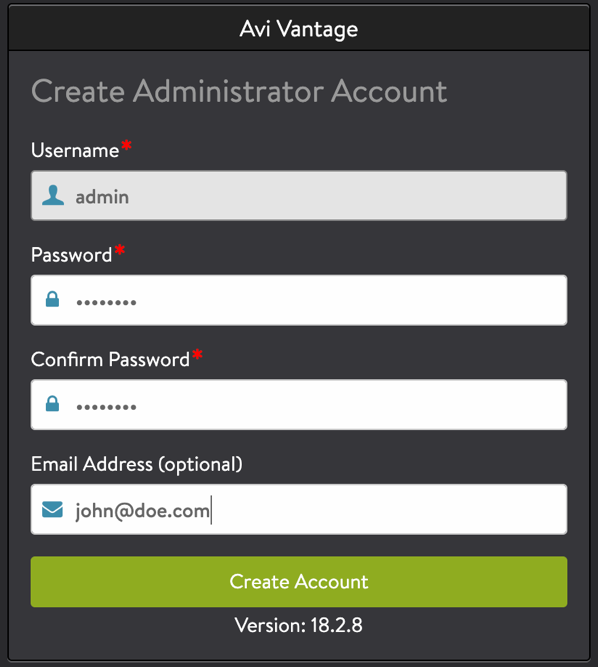
Note: The Email Address is required for admin password reset in case of lockout.
-
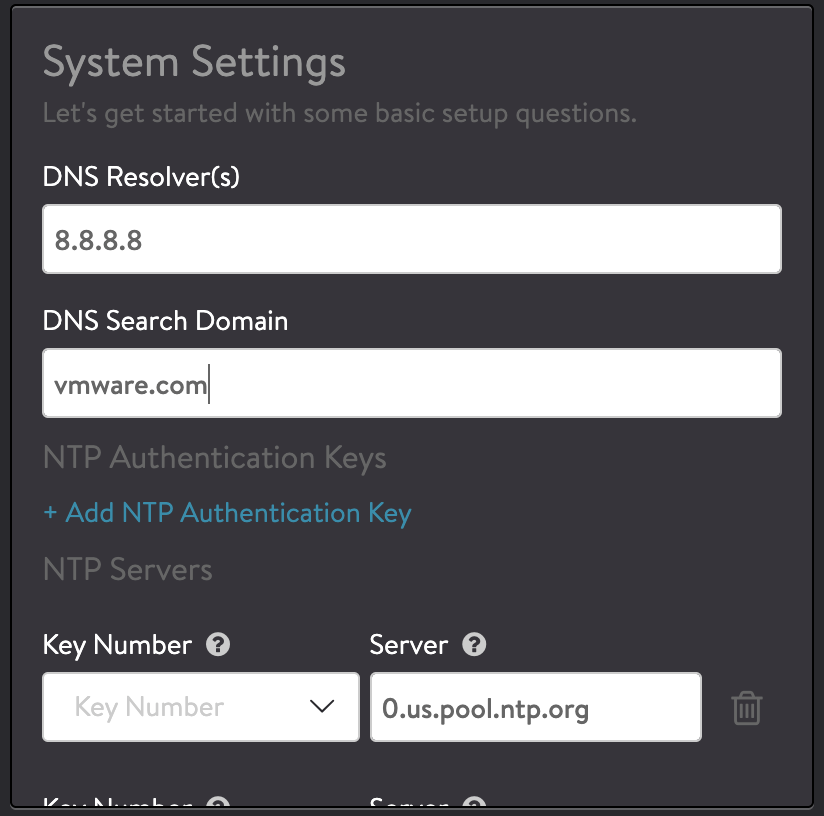
Enter the DNS and NTP server information.
-
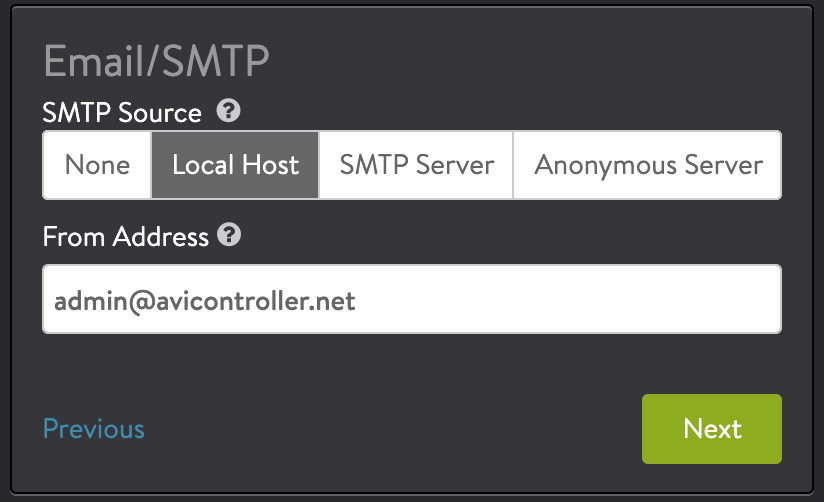
Configure the Email/SMTP information.
-
Under Orchestrator Integration, select No Orchestrator.
-
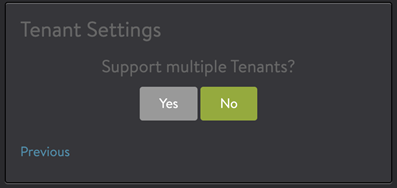
Select No under Support Multiple Tenants.
Configuring Management Networking for SE
The Avi SE management interface has to be connected to an overlay logical segment. It also needs a tier-1 gateway to provide external connectivity to be able to reach the Avi controller management IP. It is recommended to have a dedicated tier-1 gateway and segment for Avi SE management.
Before creating the NSX-T cloud create the following:
Creating a Tier-1 Gateway
A tier-1 gateway is created in an NSX-T manager a tier-1 gateway has northbound connections to tier-0 gateways and southbound connections to segments.
To add a Tier-1 Gateway,
-
In the NSX-T manager, navigate to Networking > Tier-1 Gateways.
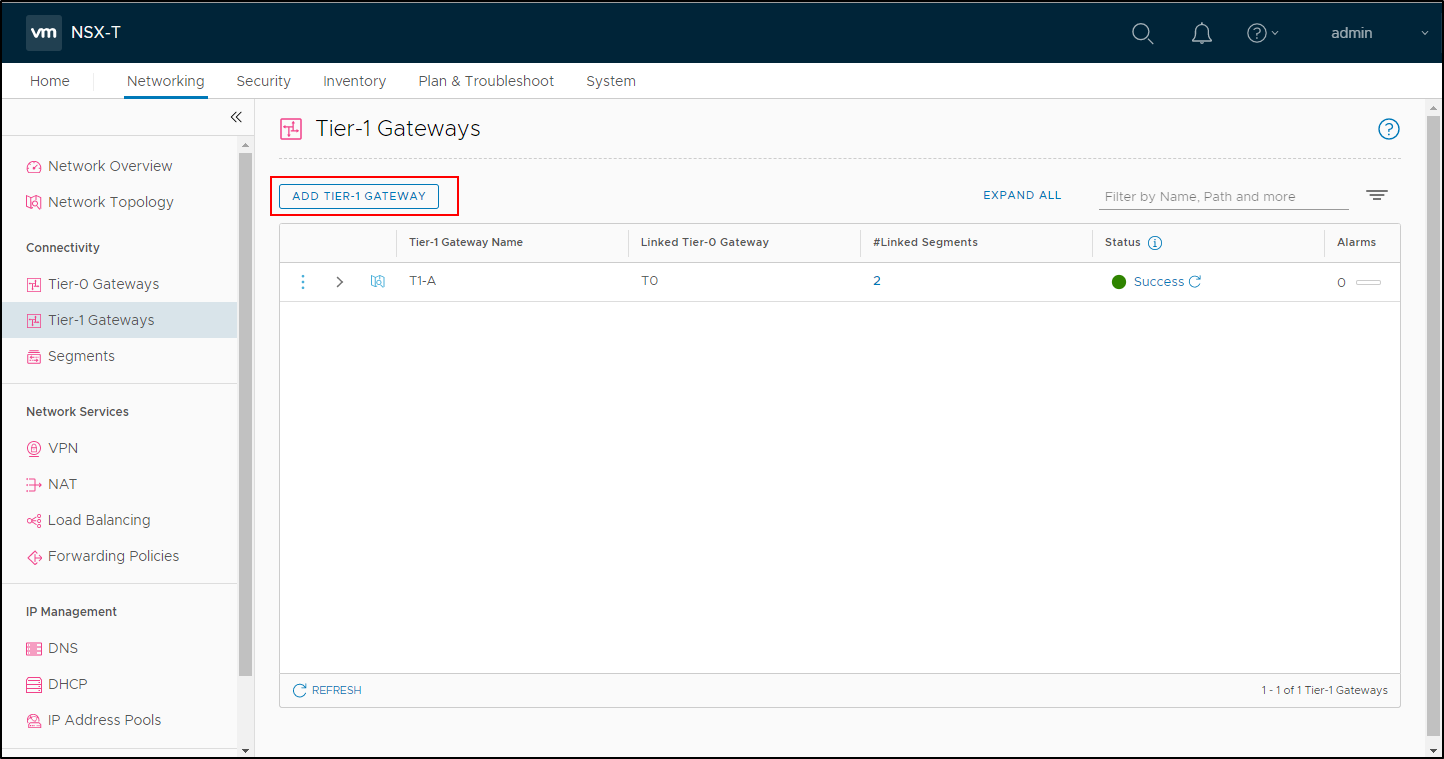
-
Click on Add Tier-1 Gateway.
-
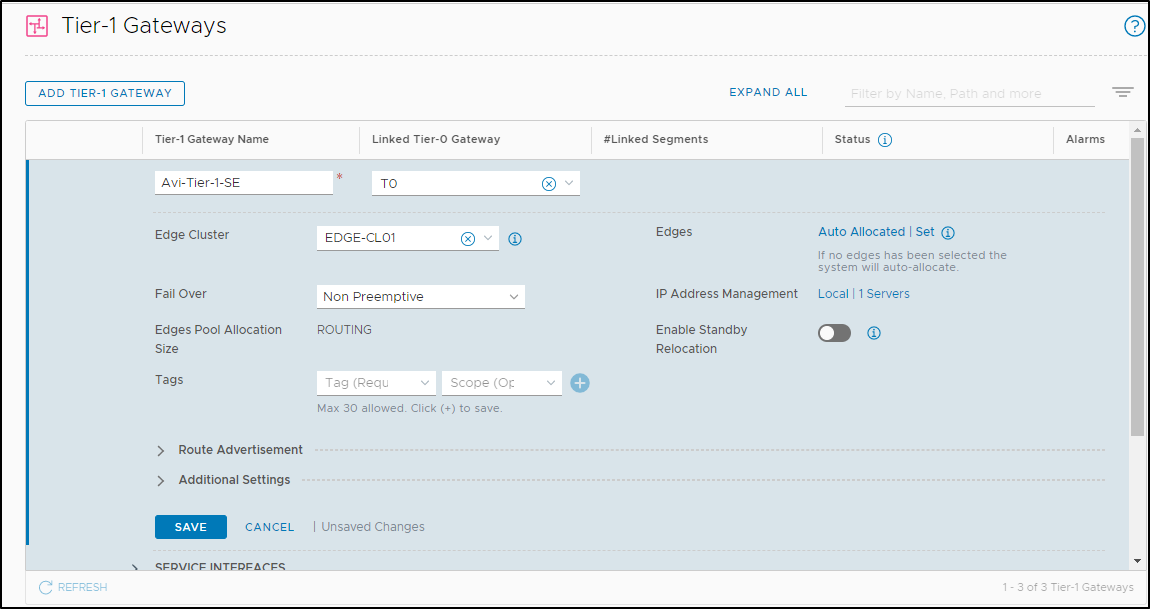
Enter the Name and select a tier-0 gateway to connect to this tier-1 gateway.
-
(Optional)Select an NSX Edge Cluster if you want this tier-1 gateway to host stateful services such as NAT, load balancer, or firewall.
-
(Optional) Next to IP Address Management, click on No Dynamic IP Allocation.
-
(Optional) In the Type drop-down menu, select DHCP Server and select a DHCP profile to attach to this gateway.
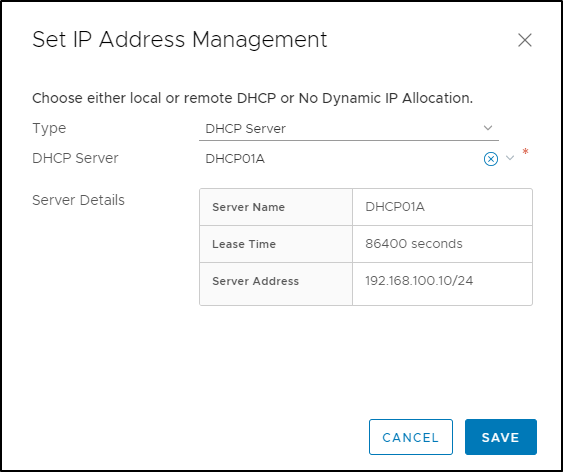
Note: Enabling DHCP on the tier-1 gateway is optional. SEs can also be configured to have static IPs configured for its interfaces by configuring IP address pool on the corresponding network object on the Avi Controller.
-
Click on Save.
-
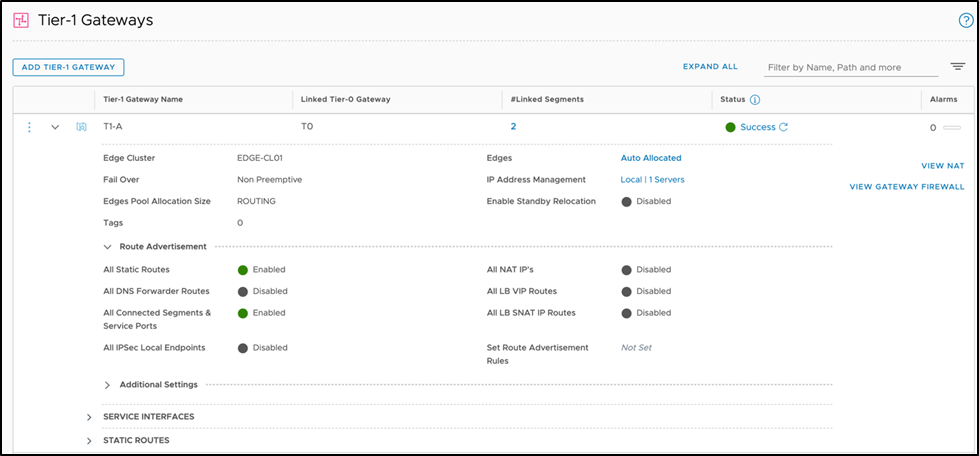
Under Route Advertisement, select the options as shown below:

-
Click on Save.
The tier-1 gateway is as shown below:
Creating a Segment
To create a segment,
-
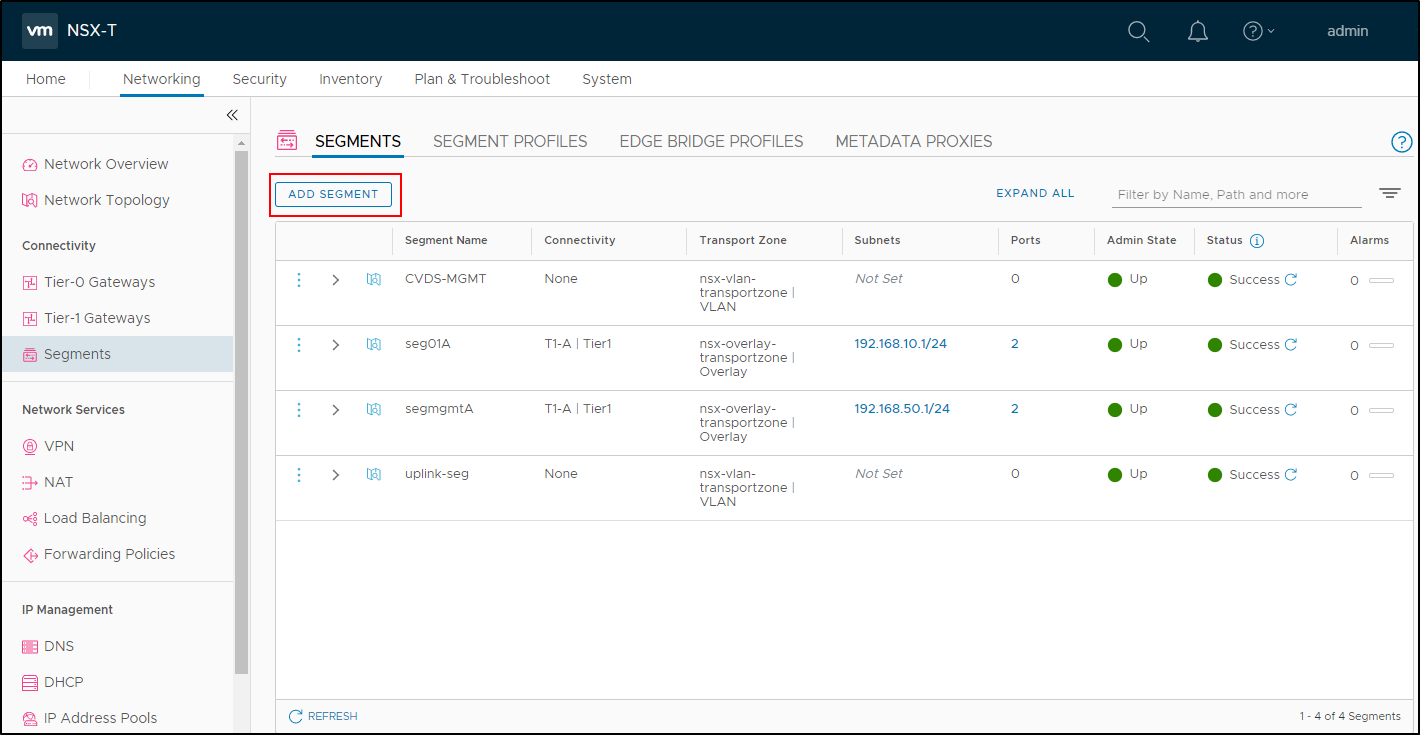
In the NSX-T manager, navigate to Networking > Segments.
-
Click on Add Segment.
-
Enter a Name for the segment.
-
Under Connectivity, select the tier-1 gateway that has to be connected.
-
Select the Overlay Transport Zone.
-
Enter the Subnets.
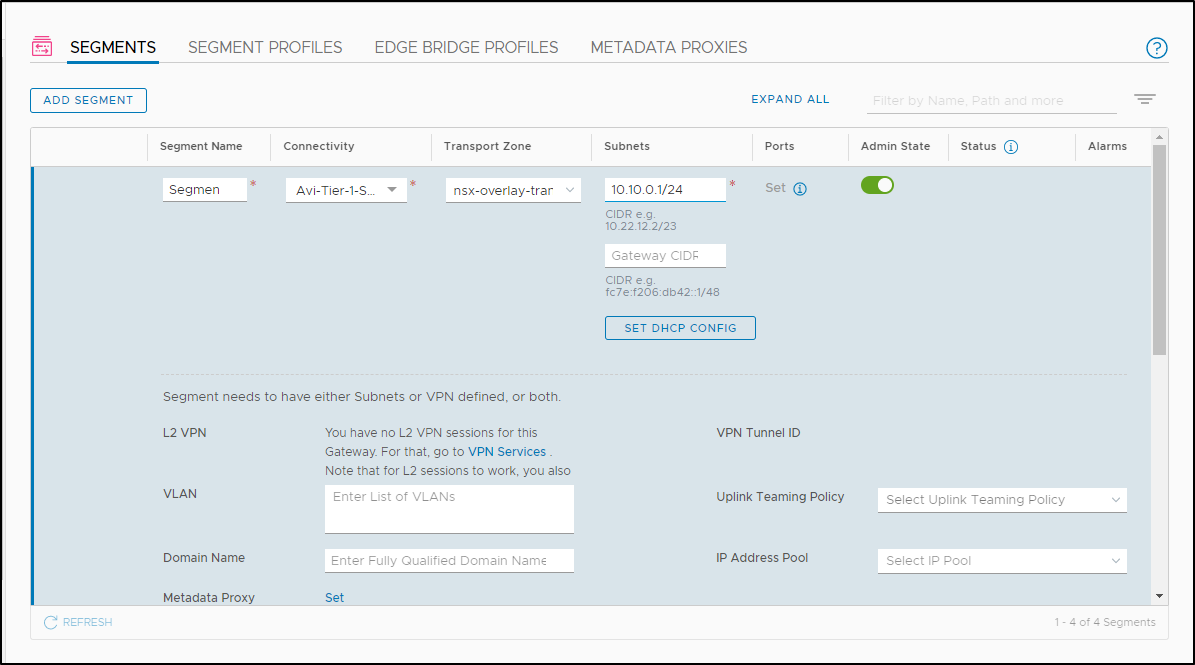
-
(Optional)To configure DHCP on the segment, click on Set DHCP Config.
-
(Optional)Enable DHCP Config and enter the DHCP Ranges.
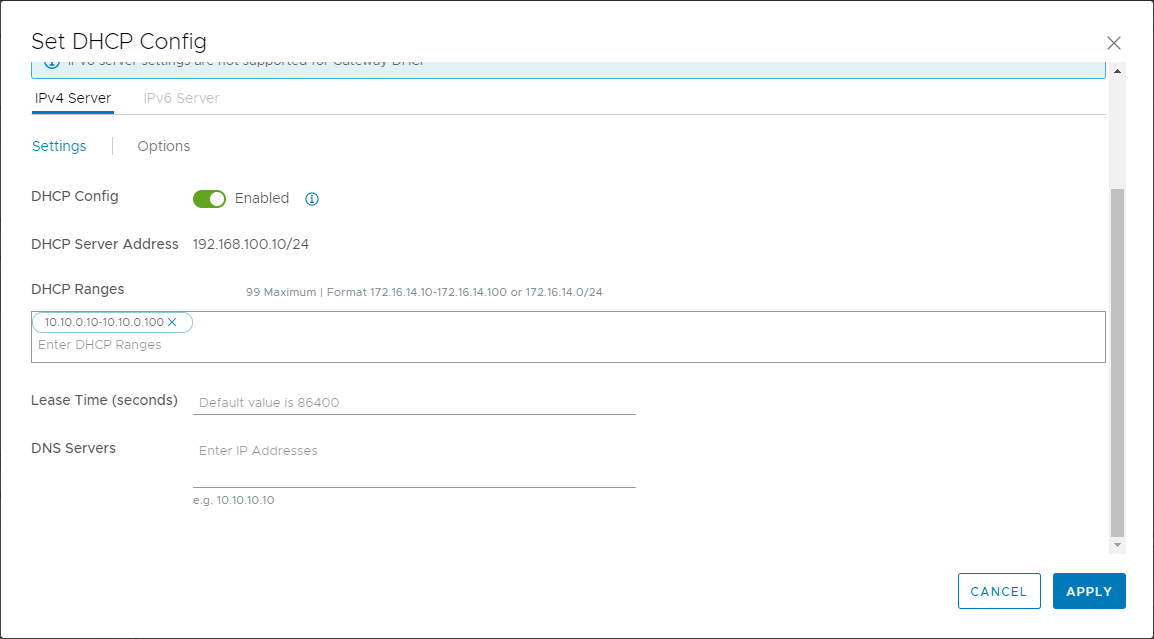
-
Click on Apply
-
Click on Save.
Creating an NSX-T Cloud
To create an NSX-T cloud, log in in to the Avi Controller and follow the steps given below:
-
Navigate to Infrastructure > Clouds.
-
Click on Create and select NSX-T Cloud.

-
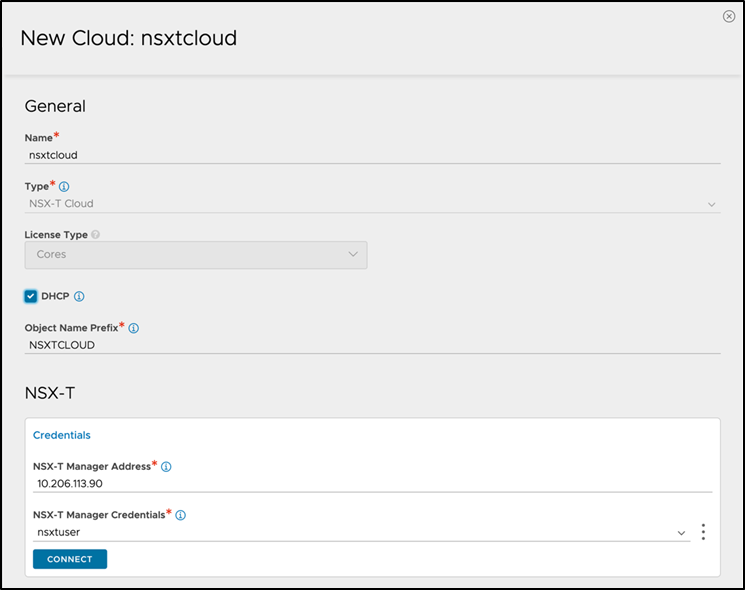
Enter the Name of the NSX-T cloud.
Note: NSX-T Cloud is selected as the Cloud Type by default.
-
Check the DHCP option if SE management segment has DHCP enabled.
Note: The prefix string must only have letters, numbers and underscore. This field cannot be changed once the cloud is configured.
-
Enter the NSX-T manager hostname or IP address as the NSX-T Manager Address and select the NSX-T Manager Credentials.
-
Click on Connect to to authenticate with the NSX-T manager.
-
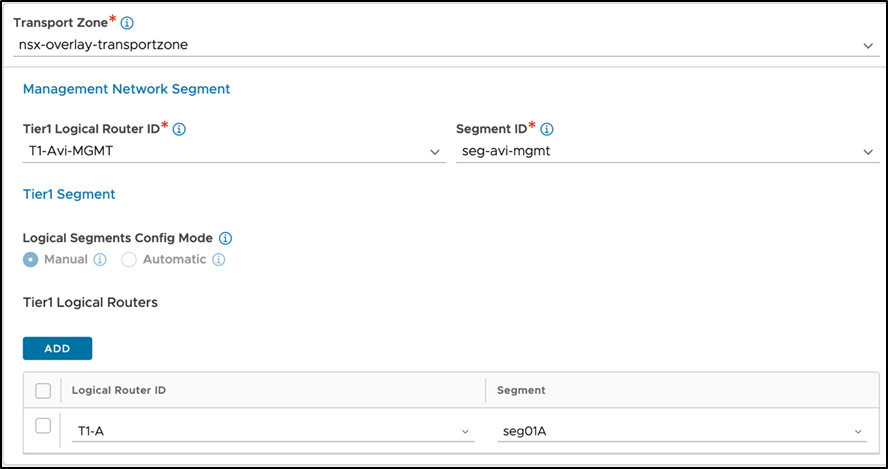
Select the Transport Zone required from the drop-down.
Note: If Virtual LAN (VLAN)-backed logical segments are used instead of Overlay transport zone, refer NSX-T VLAN Logical Segment.
-
In the Management Network Segment, select the Tier1 Logical Router ID and Segment ID.
Note: Currently, only the Manual is supported as the Logical Segments Config Mode. Hence the option is greyed out. This requires the segment to be pre-created on NSX manager. -
Select the tier-1 gateway and logical switch for VIP placement.
-
Click on Add to select one more tier-1 router and a connected logical segment for VIP placement
-
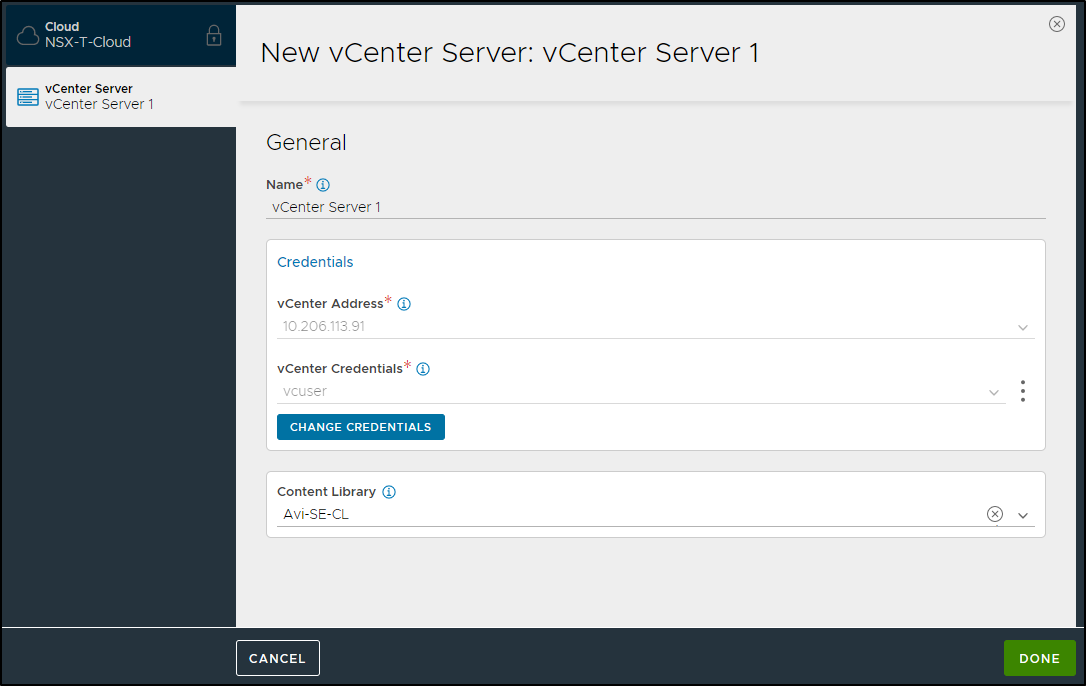
Under vCenter Servers, click on Add.
-
Enter the vCenter Server Name, and configure the credentials.
-
Click on Connect.
-
Select the Content Library and click on Done.
-
Select the IPAM/DNS Profile, as required.
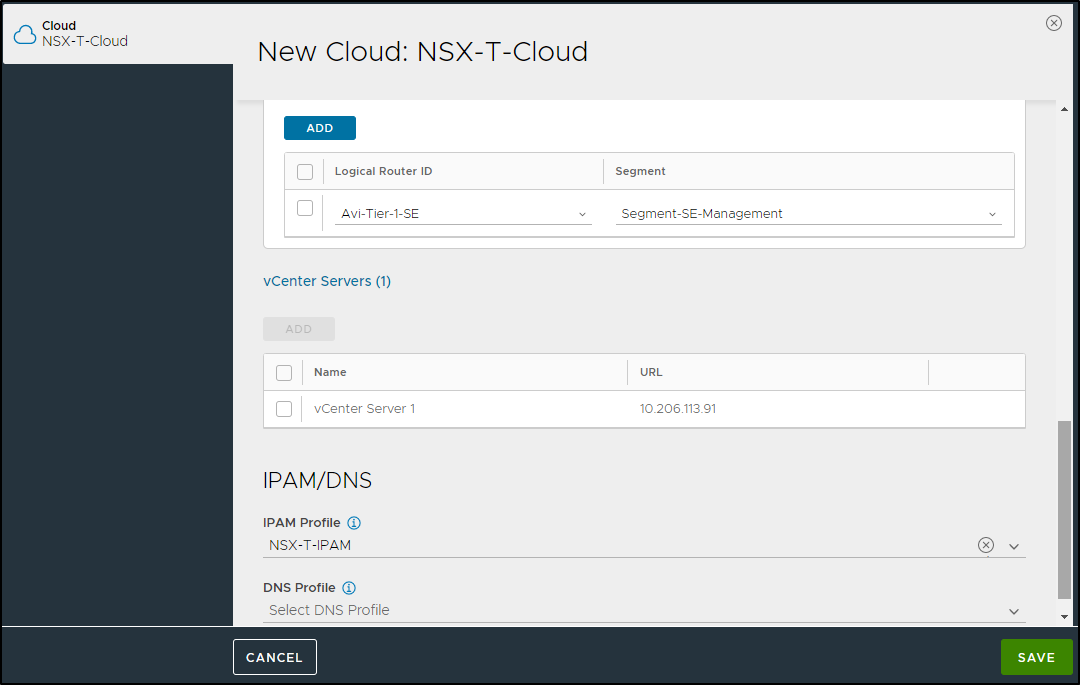
-
Click on Save to create the NSX-T cloud.
Multiple NSX-T Clouds
Starting with Avi Vantage version 20.1.3, multiple NSX-T clouds (maximum of 5) can be created.
Each NSX-T Cloud can be either created for the same NSX-T manager or different NSX-T manager. If different NSX-T managers are pointing to the same vCenter, then only one SE image per vCenter will be created.
If there are multiple NSX-T managers pointing to respective different vCenters then the SE image will be created in the respective content libraries.
Note: The cleanup of the SE image happens only after the last NSX-T cloud pointing to the SE image is removed.

SE Group Scoping in NSX-T Cloud
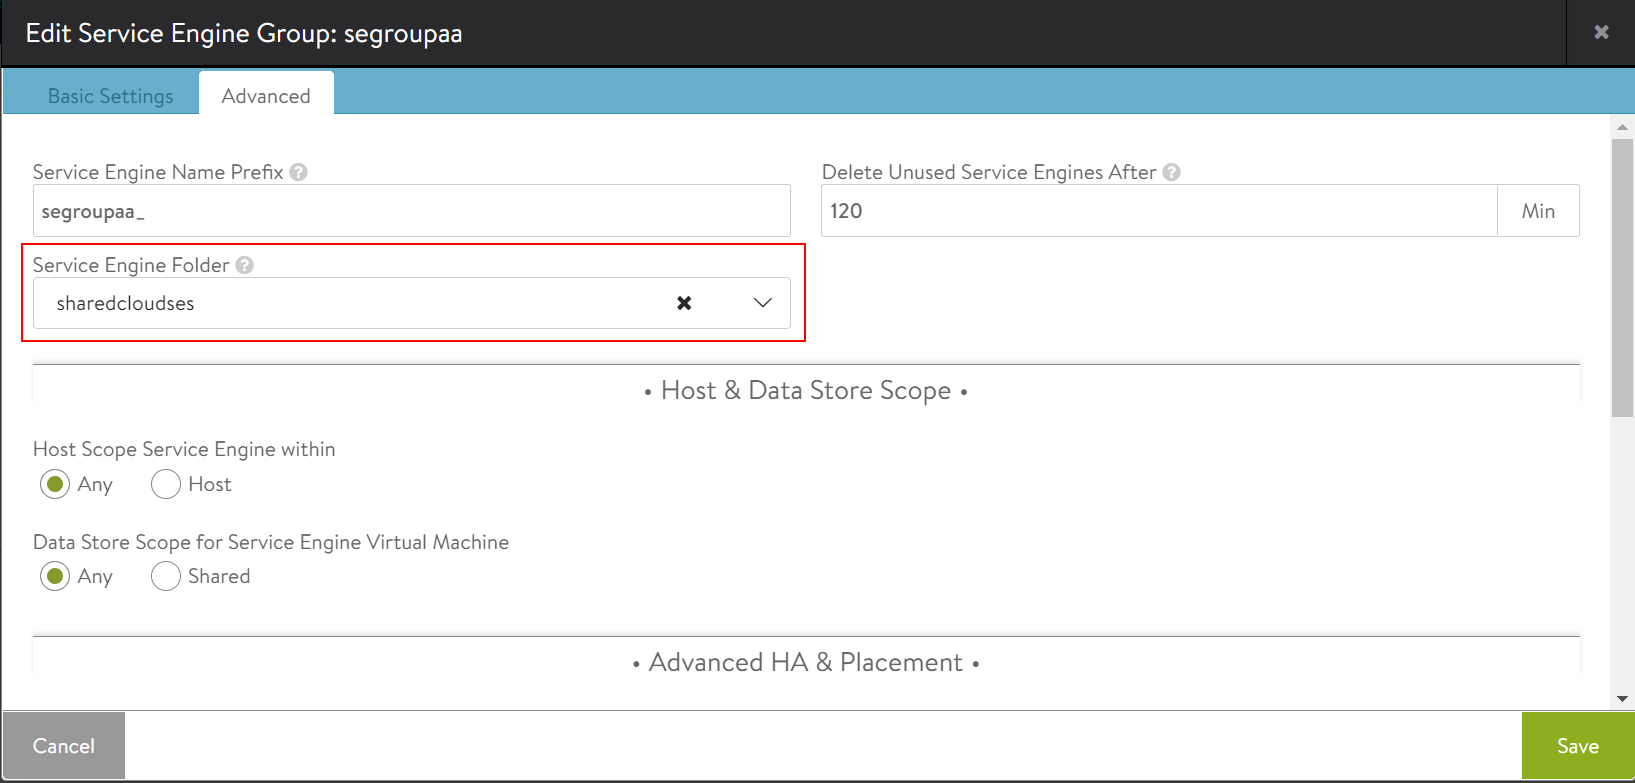
Folder Scoping for SE Placement
Service Engine Folder
To select the folder to place all the SE virtual machines in vCenter,
-
From the Avi UI, navigate to Infrastructure > Service Engine Group.
-
Select the NSX-T cloud.
-
Edit the service engine group required.
-
Click on the Advanced Tab.
-
Select the Service Engine Folder as shown below:
Note: The folder to be configured has to be pre-created in the respective vCenter. Avi Vantage does not auto-create the folders.
Host and Data Store Scope
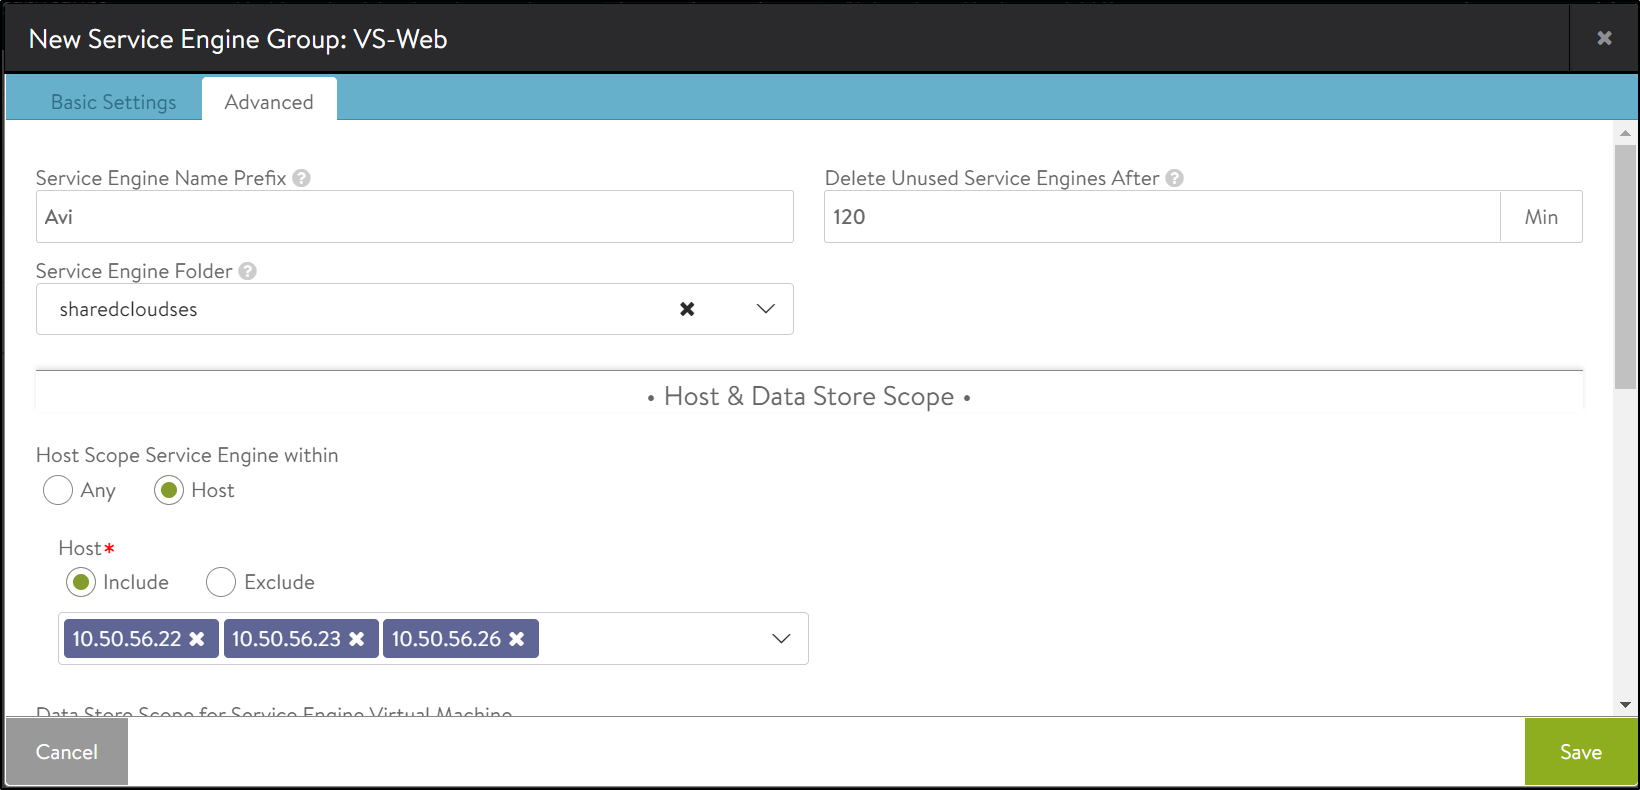
Host Scope
SEs may be deployed on any host that most closely matches the resources and reachability criteria for placement. This setting directs the placement of SEs.
By default, Avi Vantage allows SEs to be deployed to any host that best fits the deployment criteria. However, you can specify the preferred hosts as shown below:
To specify the hosts,
-
Under Host Scope Service Engine Within, click on Host.
-
Select Include to deploy SEs only on the specified hosts or click on Exclude for not deploying SEs on the specified host.
Note: All the hosts from vCenter are listed here.
-
Select the required hosts to be included/ excluded.
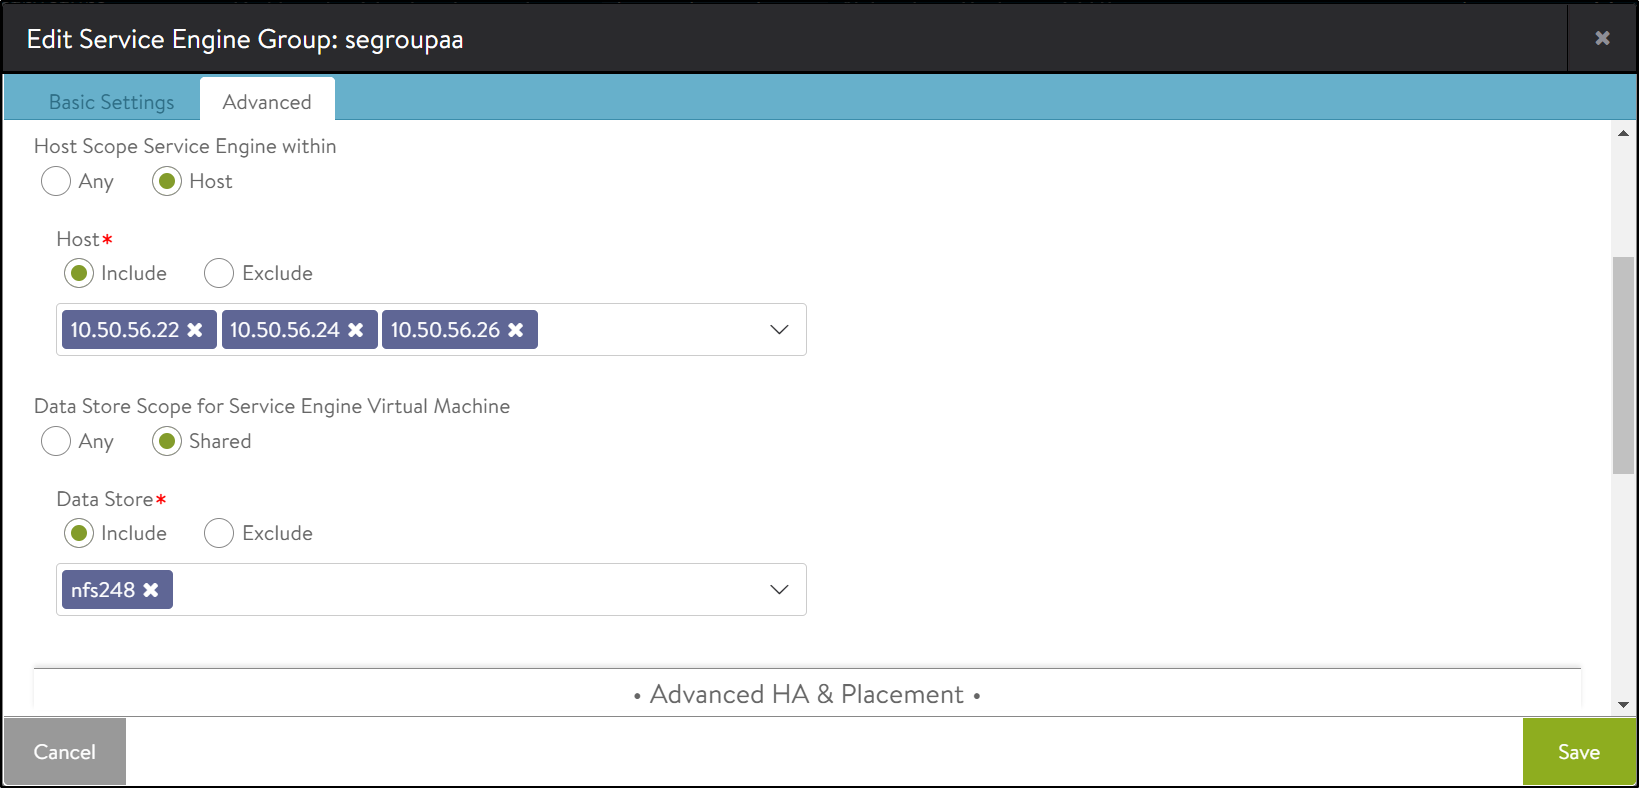
Data Store Scope
Under Data Store Scope, set the storage location for SEs.
By default, Avi Vantage will determine the best option for data storage. However, you can select specific shared data stores to be included or excluded.
To specify the shared data store,
-
Under Data Store Scope for Service Engine Virtual Machine, select Shared.
-
Select Include to select the data stores to be included or Exclude to select the data stores to be excluded.
-
Select the shared data stores to be included or excluded.
-
Click on Save.
Creating the Virtual Service
To create a new virtual service,
-
Navigate to Application > Virtual Services.
-
Click on Create Virtual Service > Basic Setup.
-
Select the NSX-T cloud cloud and click on Next.
-
Configure the virtual service. Under Add Servers, click on Security Groups and select the NSX Security Group.
Note: Starting with Avi Vantage version 20.1.2, the front-end (VIP) IP supports an IPv6 address.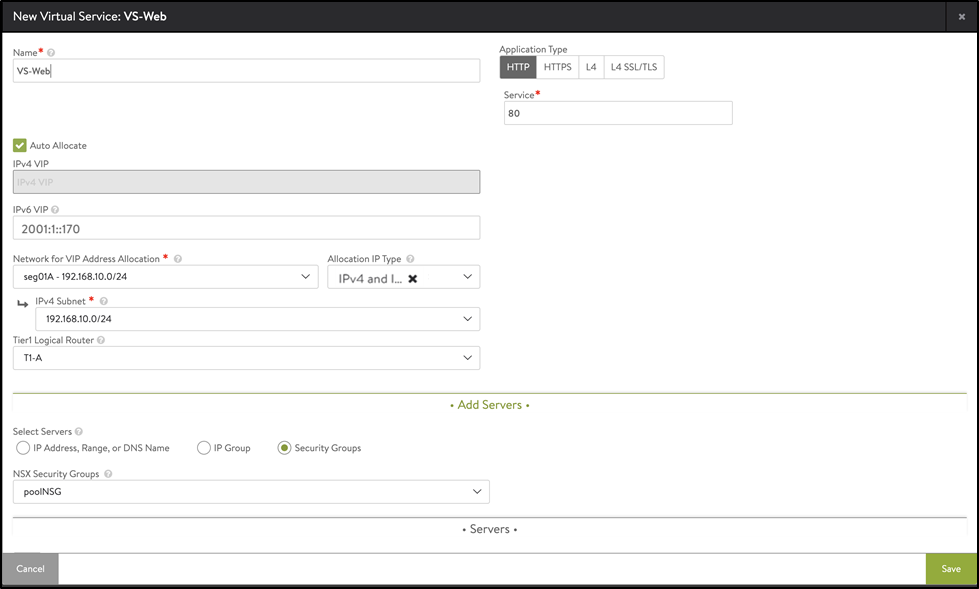
-
Click on Save.
Note In the aforementioned steps, IPAM is used. Therefore, the segment, subnet and T1 logical route had to be selected. If IPAM is not configured, you must specify the VIP and select the T1 logical route.
Document Revision History
| Date | Change Summary |
|---|---|
| June 17, 2021 | Updated the content for additional OVF properties(Version 20.1.6) |
| December 22, 2020 | Multiple NSX-T Clouds (Version 20.1.3) |
| July 30, 2020 | Published the Installation Guide for NSX-T Integration with Avi Vantage (Version 20.1.1) |
| May 18, 2020 | Published the Installation Guide for NSX-T Integration with Avi Vantage (Tech Preview) |